接入腾讯云短信服务(史上最详细+该短信服务如何申请成功+发送短信验证码API讲解+相关错误分析) |
您所在的位置:网站首页 › 腾讯云在线建站要钱吗 › 接入腾讯云短信服务(史上最详细+该短信服务如何申请成功+发送短信验证码API讲解+相关错误分析) |
接入腾讯云短信服务(史上最详细+该短信服务如何申请成功+发送短信验证码API讲解+相关错误分析)
|
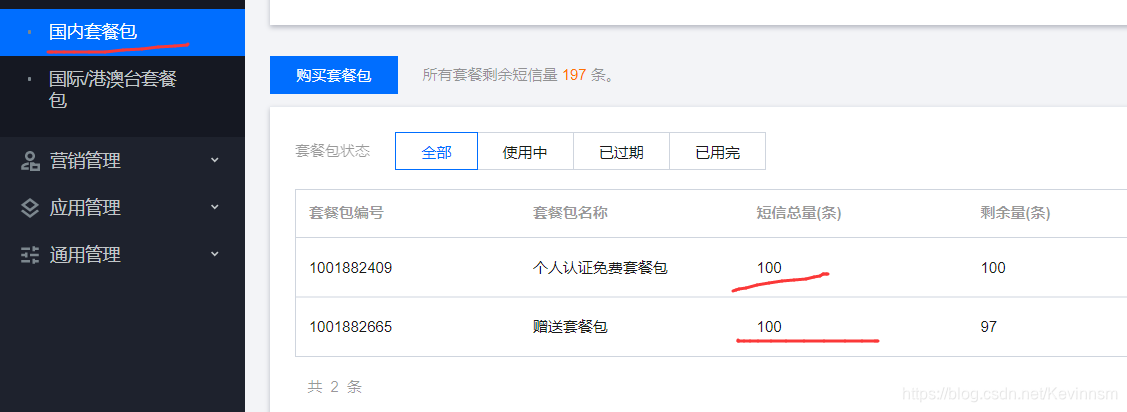
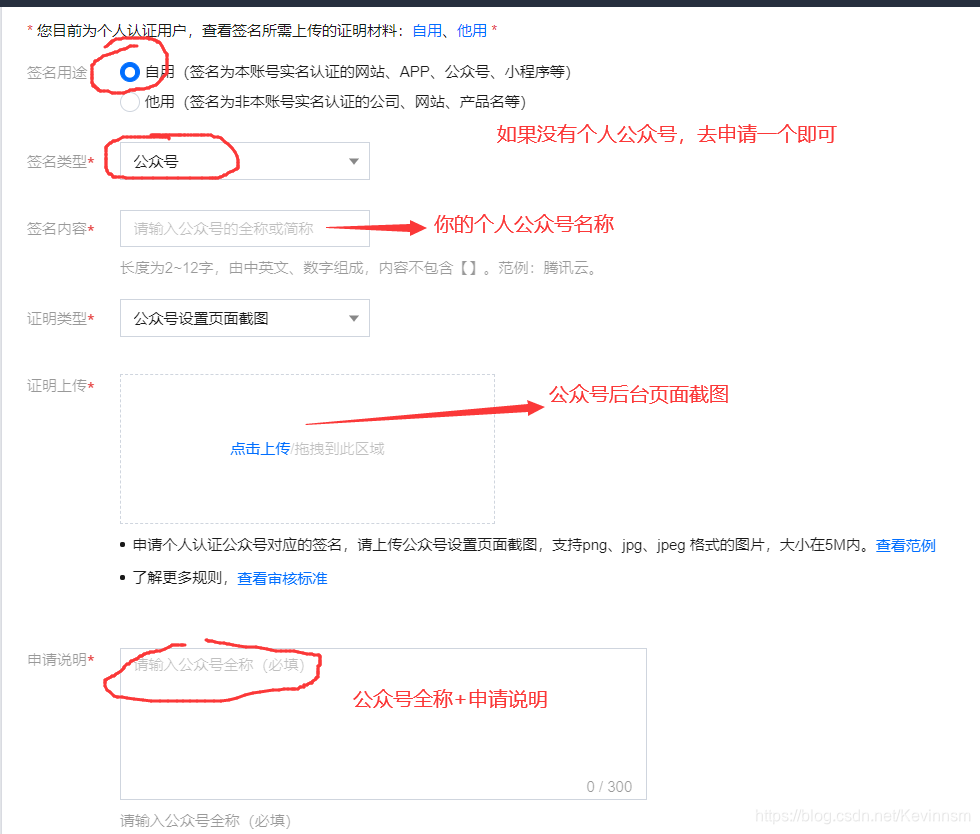
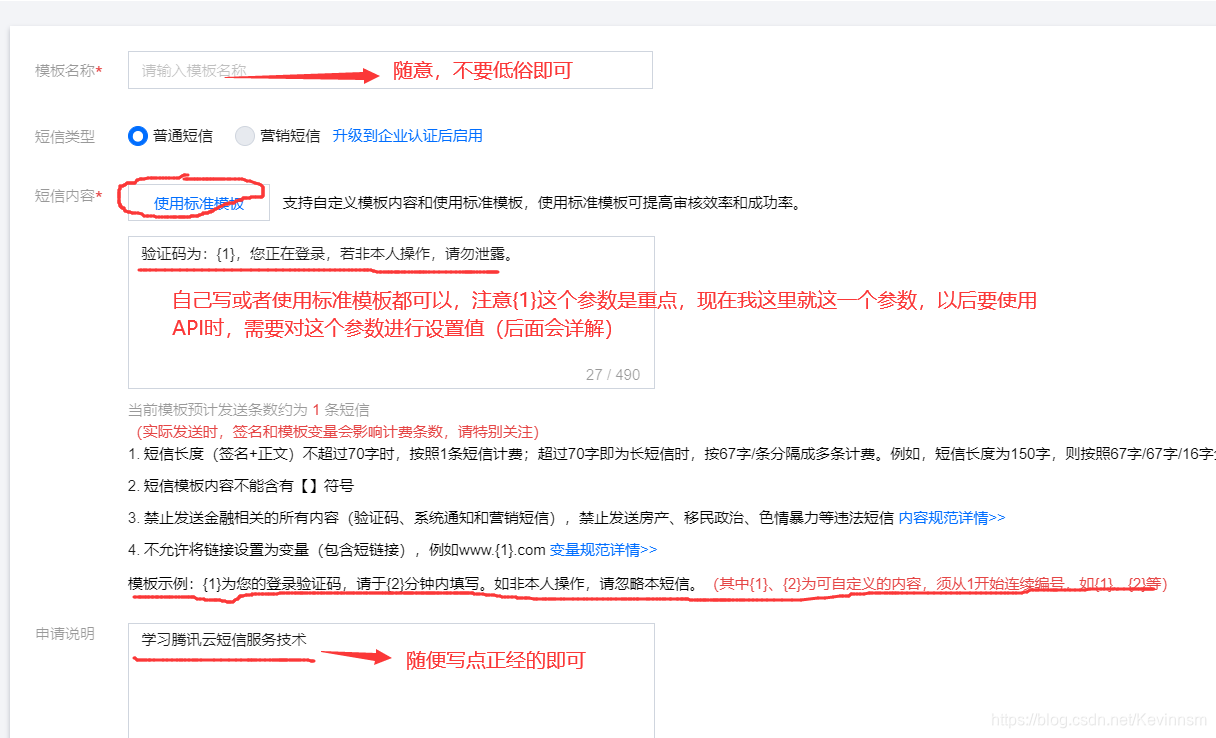
2021 / 8 / 17 / 23 : 01 {2021/8/17/23:01} 2021/8/17/23:01 文章目录 前言一、如何成功申请到腾讯云短信服务1、签名申请2、正文模板申请 二、发送短信API开发1、腾讯云在线测试2、使用springboot进行测试 三、常见的错误分析 前言或许有的人会问我为什么不使用阿里云短信服务,那是因为如今的阿里云短信服务对于大部分人来说很难申请成功,它需要备案或者项目已经上线。而腾讯云短信相对来说比较宽松一些,可以利用个人公众号进行申请成功 提示:以下是本篇文章正文内容 一、如何成功申请到腾讯云短信服务首先开通短信服务,应该会免费赠送100条短信
我
已
经
测
试
申
请
过
一
次
{我已经测试申请过一次}
我已经测试申请过一次 微信公众号平台链接:https://www.baidu.com/link?url=3OqiiGcBpe8Gp5YpnN4wF7CiaFkigOjrPtN3xjuIWLF1EDlRASXa3EDgeaQNn8k6&wd=&eqid=d95710f900018b6500000003611bd16a
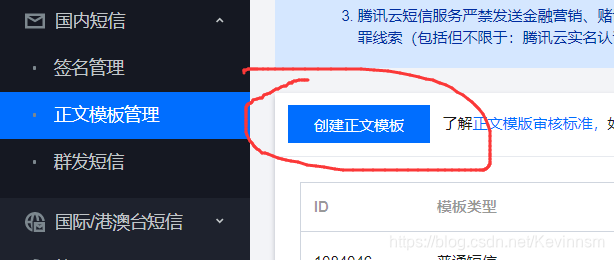
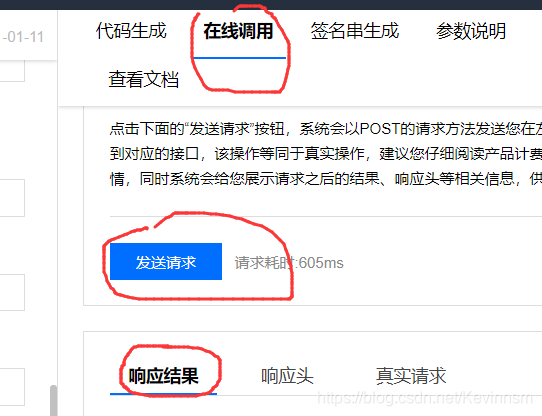
点击创建正文模板 先进行在线测试,后面再使用代码测试 测试地址:https://console.cloud.tencent.com/api/explorer?Product=sms&Version=2021-01-11&Action=SendSms&SignVersion=
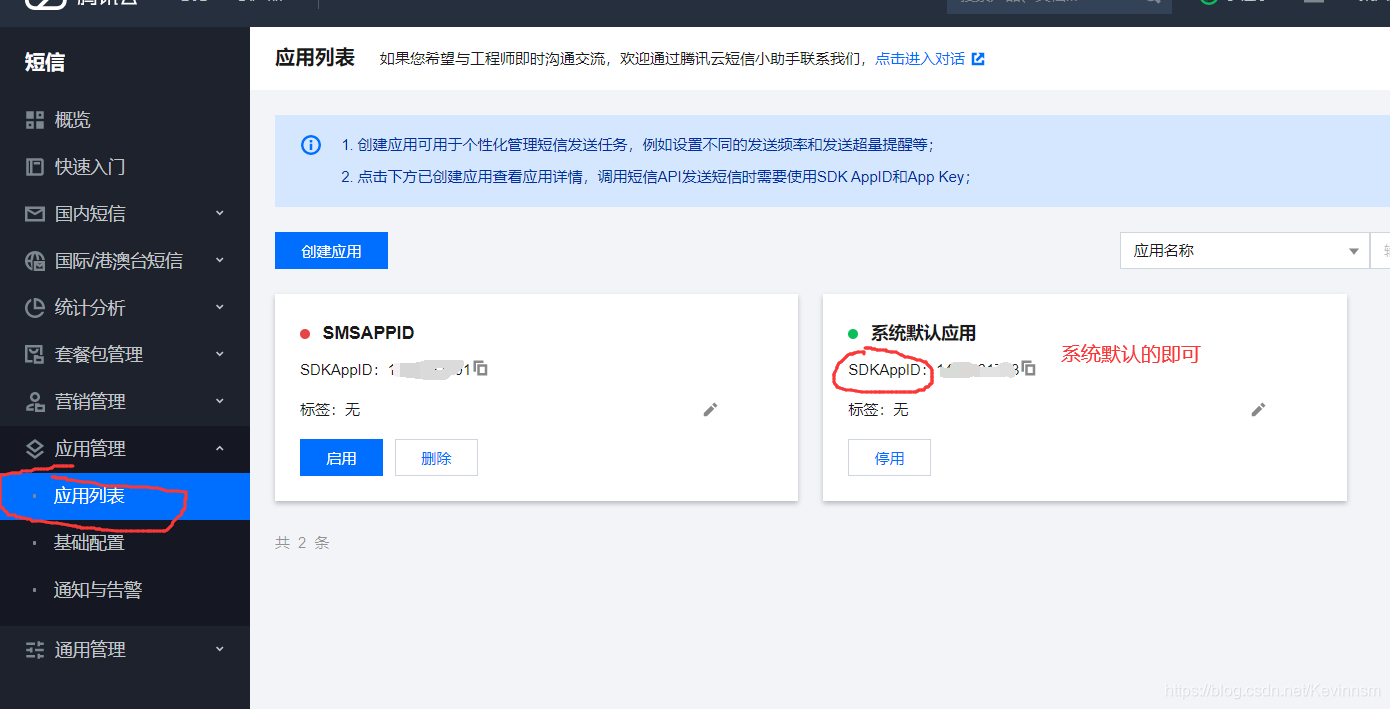
1、SmsSdkAppId:短信 SdkAppId,在 短信控制台 添加应用后生成的实际 SdkAppId 点击发送请求
1.文档参考准备工作 可以在云端直接进行生成代码 API文档链接地址:https://cloud.tencent.com/document/product/382/43194
3.
a
p
p
l
i
c
a
t
i
o
n
.
y
m
l
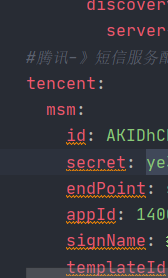
{application.yml}
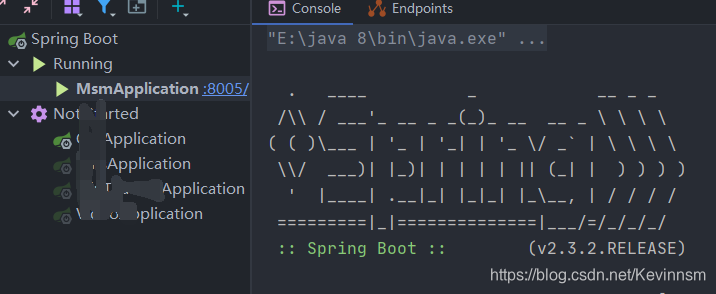
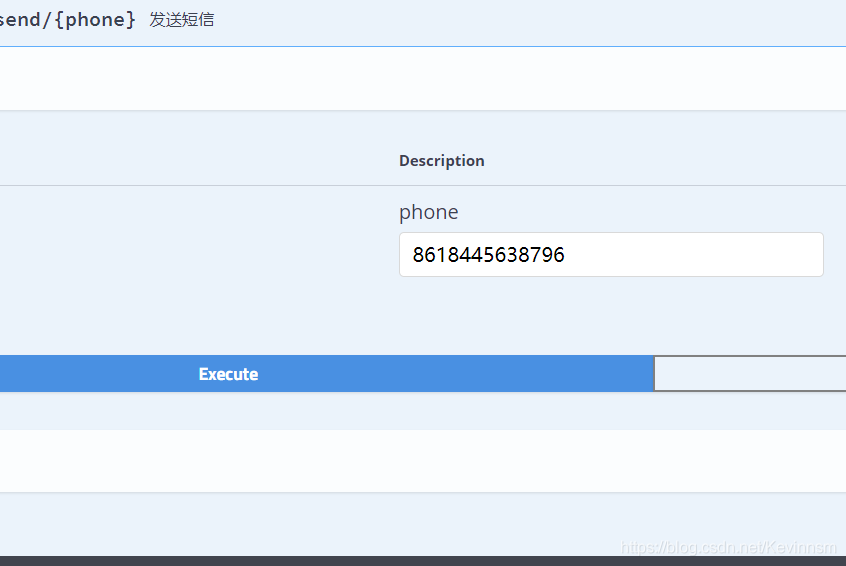
application.yml文件编写 4.创建工具类 //实现了InitializingBean接口,当spring进行初始化bean时,会执行afterPropertiesSet方法 @Component public class MsmConstantUtils implements InitializingBean { //我已经再 @Value("${tencent.msm.id}") private String secretID ; @Value("${tencent.msm.secret}") private String secretKey ; @Value("${tencent.msm.endPoint}") private String endPoint; @Value("${tencent.msm.appId}") private String appId; @Value("${tencent.msm.signName}") private String signName; @Value("${tencent.msm.templateId}") private String templateId; //六个相关的参数 public static String SECRET_ID; public static String SECRET_KEY; public static String END_POINT; public static String APP_ID; public static String SIGN_NAME; public static String TEMPLATE_ID; @Override public void afterPropertiesSet() throws Exception { SECRET_ID = secretID; SECRET_KEY = secretKey; END_POINT = endPoint; APP_ID = appId; SIGN_NAME = signName; TEMPLATE_ID = templateId; } }5.RandomUtil编写 public class RandomUtil { private static final Random random = new Random(); //我定义的验证码位数是6位 private static final DecimalFormat sixdf = new DecimalFormat("000000"); public static String getSixBitRandom() { return sixdf.format(random.nextInt(1000000)); } }6、接口编写 注意我找的这个项目已经集成了Swagger配置,后面我需要进行测试 @RestController @RequestMapping("/msm") @CrossOrigin @Api("发送短信服务") public class MsmController { @Autowired private MsmService msmService; @ApiOperation("发送短信") @GetMapping("/send/{phone}") public ResponseEntity send(@PathVariable String phone) { boolean send = msmService.send(phone); if (send) { return ResponseEntity.ok(); } return ResponseEntity.error(); } } import com.tencentcloudapi.common.Credential; import com.tencentcloudapi.common.profile.ClientProfile; import com.tencentcloudapi.common.profile.HttpProfile; import com.tencentcloudapi.sms.v20190711.SmsClient; import com.tencentcloudapi.sms.v20190711.models.SendSmsRequest; import com.tencentcloudapi.sms.v20190711.models.SendSmsResponse; import com.zhang.service.MsmService; import com.zhang.utils.MsmConstantUtils; import com.zhang.utils.RandomUtil; import lombok.extern.slf4j.Slf4j; import org.springframework.stereotype.Service; /** * @author:zsh * @date:2021/8/18 * @email:[email protected] */ @Service @Slf4j public class MsmServiceImpl implements MsmService { @Override public boolean send(String phone) { try { //这里是实例化一个Credential,也就是认证对象,参数是密钥对;你要使用肯定要进行认证 Credential credential = new Credential(MsmConstantUtils.SECRET_ID, MsmConstantUtils.SECRET_KEY); //HttpProfile这是http的配置文件操作,比如设置请求类型(post,get)或者设置超时时间了、还有指定域名了 //最简单的就是实例化该对象即可,它的构造方法已经帮我们设置了一些默认的值 HttpProfile httpProfile = new HttpProfile(); //这个setEndpoint可以省略的 httpProfile.setEndpoint(MsmConstantUtils.END_POINT); //实例化一个客户端配置对象,这个配置可以进行签名(使用私钥进行加密的过程),对方可以利用公钥进行解密 ClientProfile clientProfile = new ClientProfile(); clientProfile.setHttpProfile(httpProfile); //实例化要请求产品(以sms为例)的client对象 SmsClient smsClient = new SmsClient(credential, "ap-beijing", clientProfile); //实例化request封装请求信息 SendSmsRequest request = new SendSmsRequest(); String[] phoneNumber = {phone}; request.setPhoneNumberSet(phoneNumber); //设置手机号 request.setSmsSdkAppid(MsmConstantUtils.APP_ID); request.setSign(MsmConstantUtils.SIGN_NAME); request.setTemplateID(MsmConstantUtils.TEMPLATE_ID); //生成随机验证码,我的模板内容的参数只有一个 String verificationCode = RandomUtil.getSixBitRandom(); String[] templateParamSet = {verificationCode}; request.setTemplateParamSet(templateParamSet); //发送短信 SendSmsResponse response = smsClient.SendSms(request); log.info(SendSmsResponse.toJsonString(response)); return true; } catch (Exception e) { return false; } } }7.测试 访问http://localhost:8005/swagger-ui.html 使用swagger进行测试即可 结束了! ❤️ 2021/8/18/0:54 |
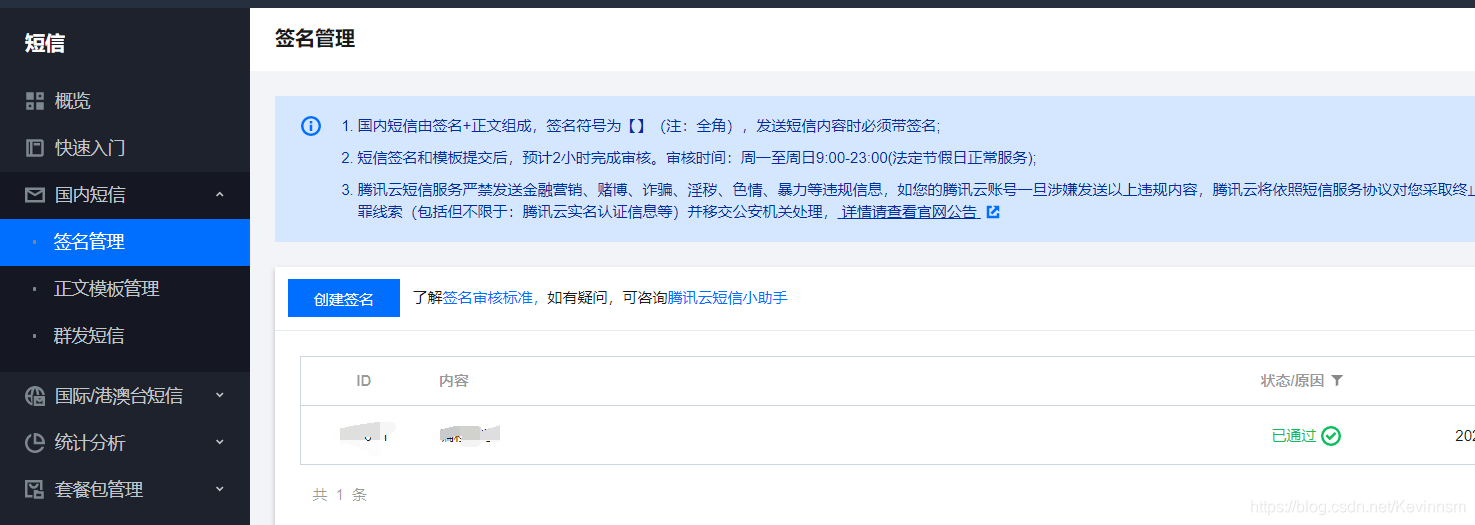 点击创建签名
 等待审核即可
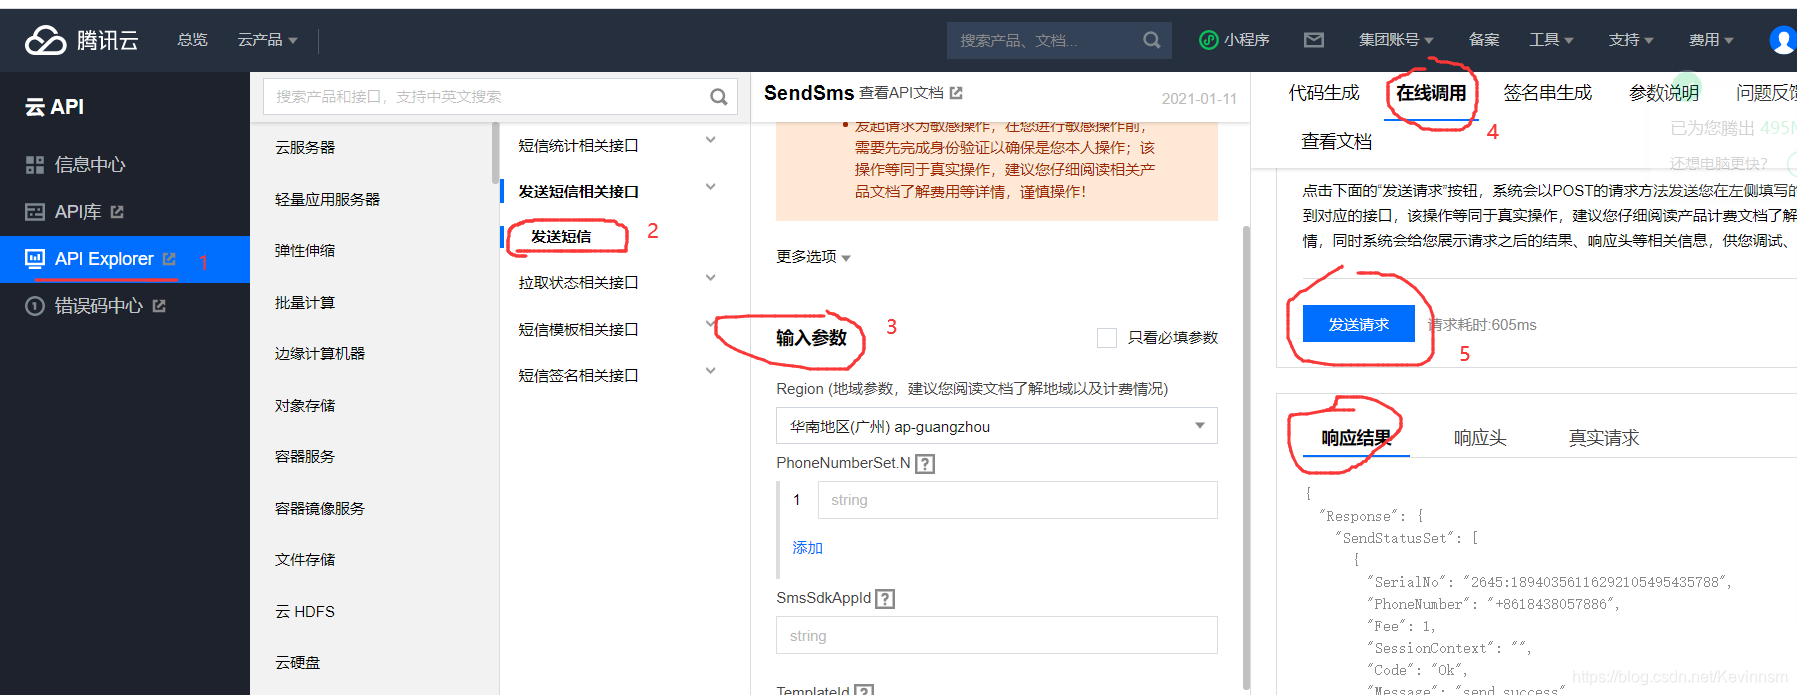

 2、TemplateId:模板 ID,必须填写已审核通过的模板 ID。模板 ID 可登录 短信控制台 查看,若向境外手机号发送短信,仅支持使用国际/港澳台短信模板。
 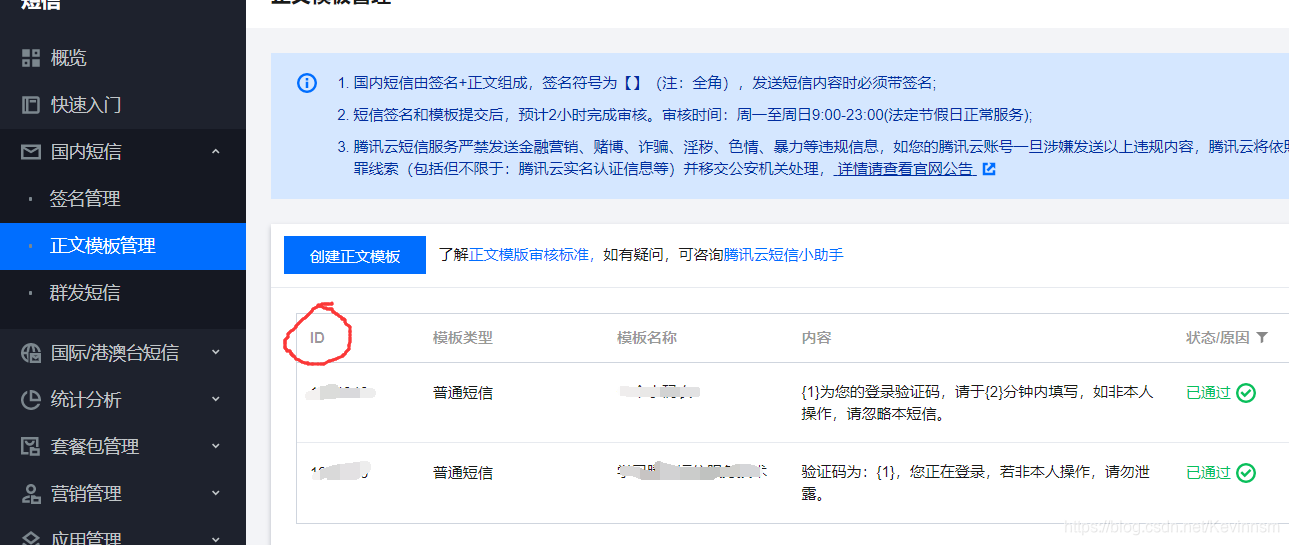 3、SignName:短信签名内容,使用 UTF-8 编码,必须填写已审核通过的签名,例如:腾讯云,签名信息可登录 短信控制台 查看。 国内短信为必填参数。
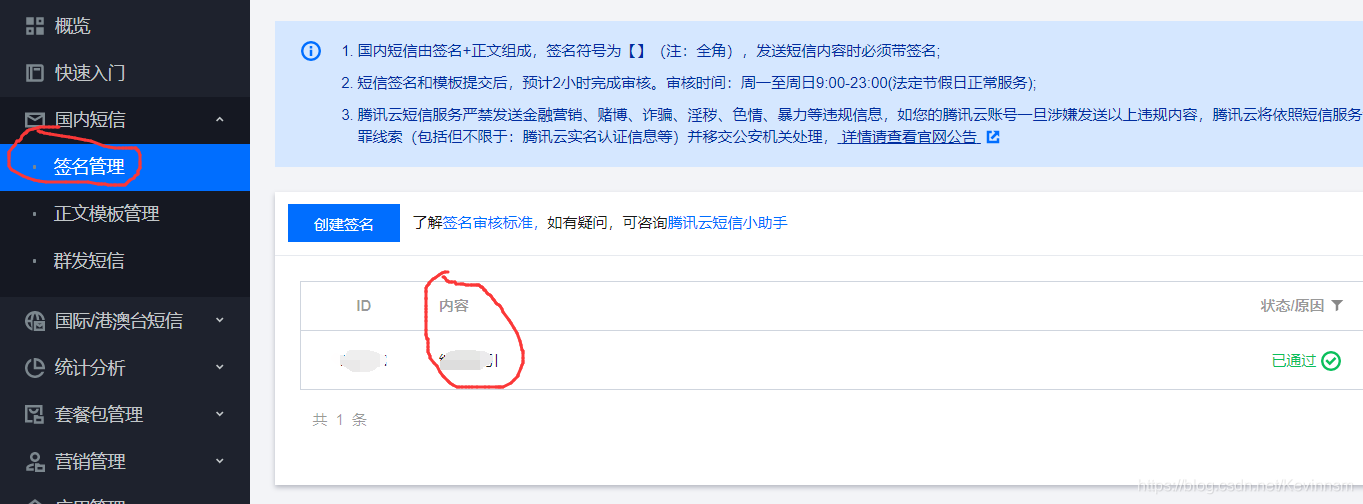
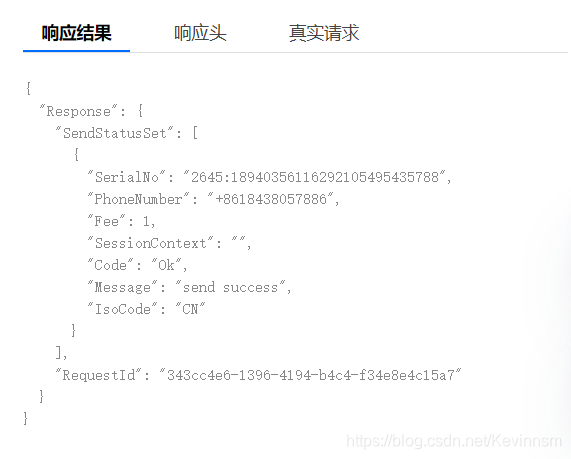
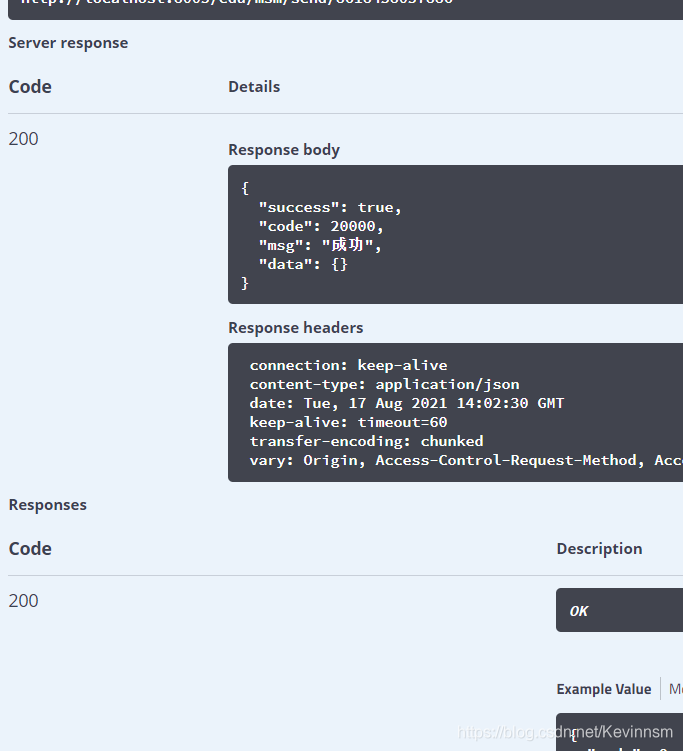
 成功!
成功! 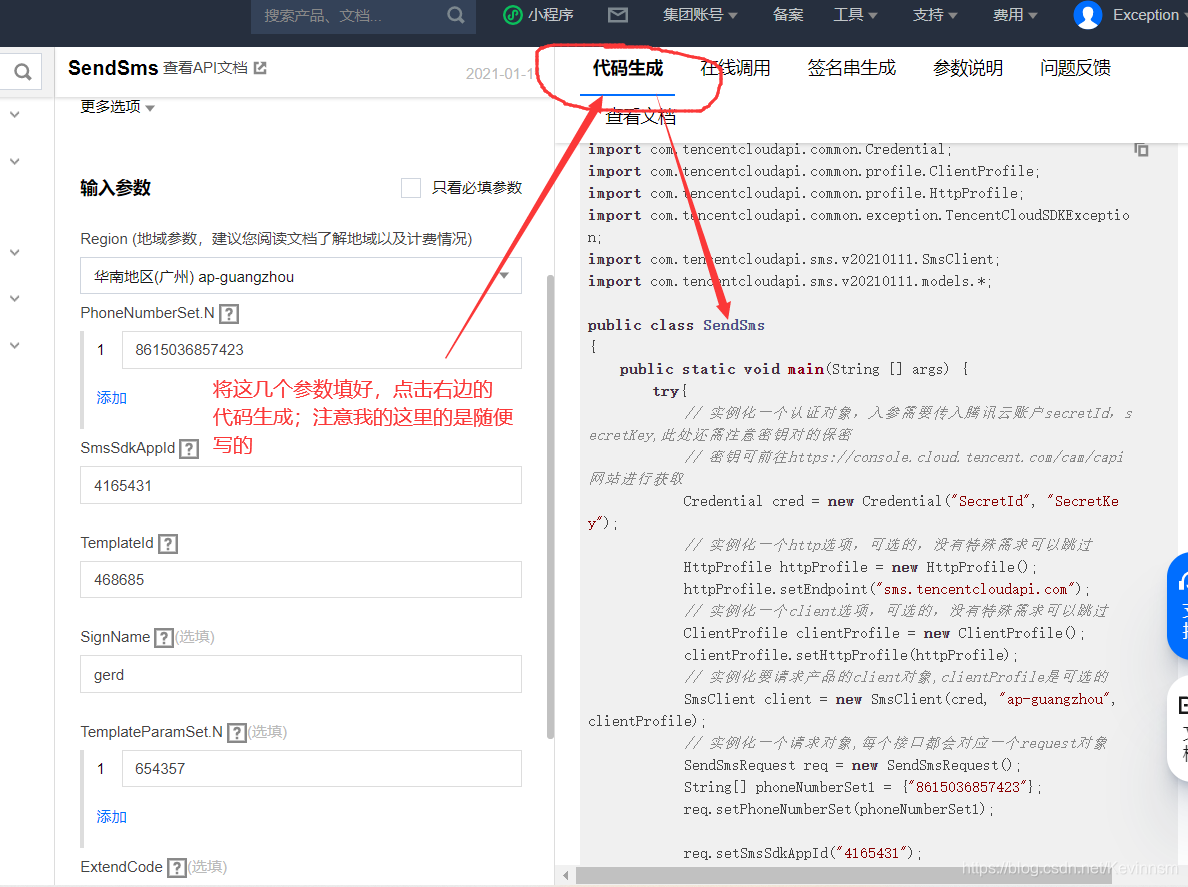 也可以参考API文档
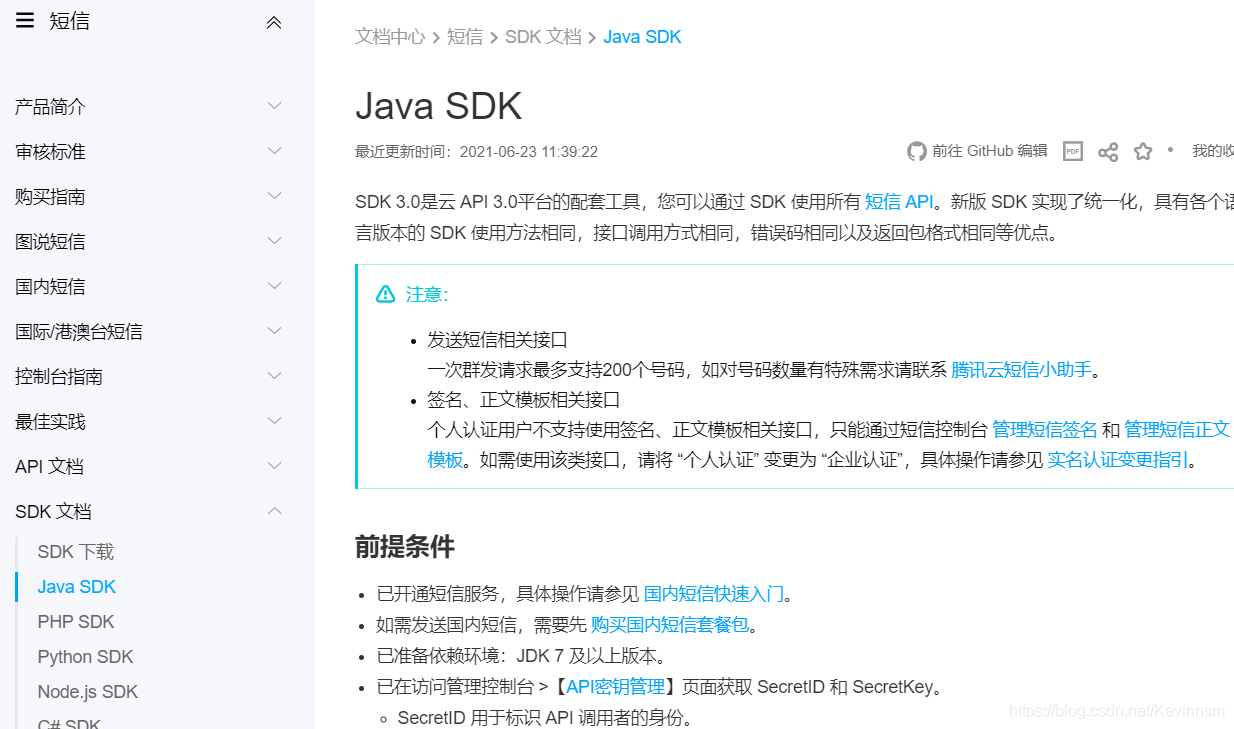 2.导入依赖
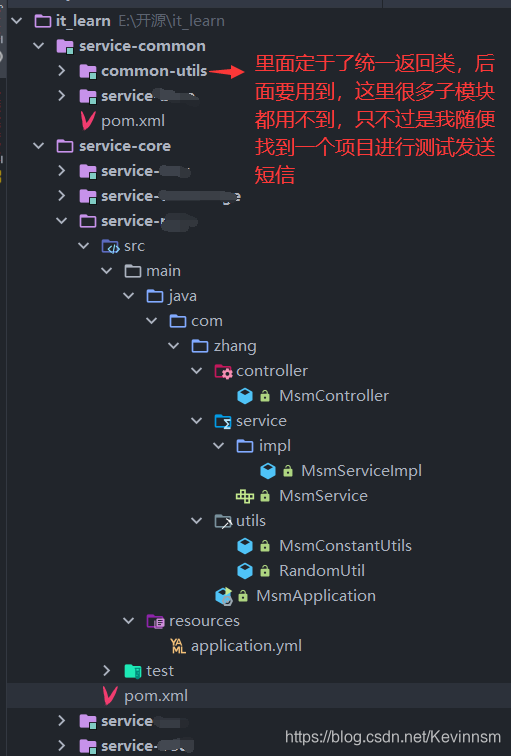
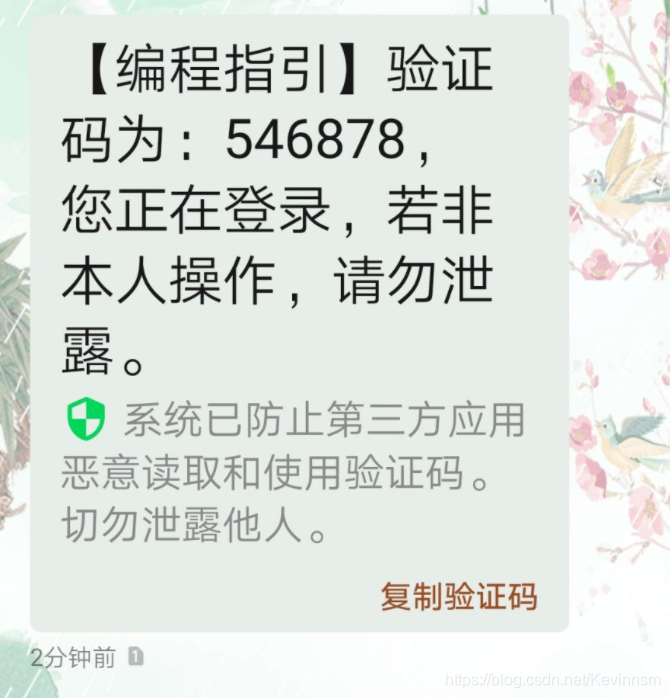
 成功!
成功!【本文地址】
今日新闻 |
推荐新闻 |