4 Quick Ways to Check Hardware ID (HWID) of a Device in Windows 11 |
您所在的位置:网站首页 › 封hwid › 4 Quick Ways to Check Hardware ID (HWID) of a Device in Windows 11 |
4 Quick Ways to Check Hardware ID (HWID) of a Device in Windows 11
|
Hardware ID (HWID) is an identification number that is associated with a hardware component present in your PC. It can be your monitor, GPU, or another device. The usefulness of Hardware ID is that you can use it to find the driver packages available for the device. 
One device can have multiple HWIDs. If you are wondering how to check Hardware ID (HWID) in Windows 11 PC, look no further. We will list four different methods to look up Hardware IDs on a Windows 11 PC. Let’s begin. 1. Using Device ManagerThe easiest way to find the Hardware ID (HWID) is by using the Device Manager. It contains the complete information on all the devices. Here’s how to do it: Step 1: Right-click on the Start button to open the Power User menu. Locate the Device Manager option and click on it to launch the utility. 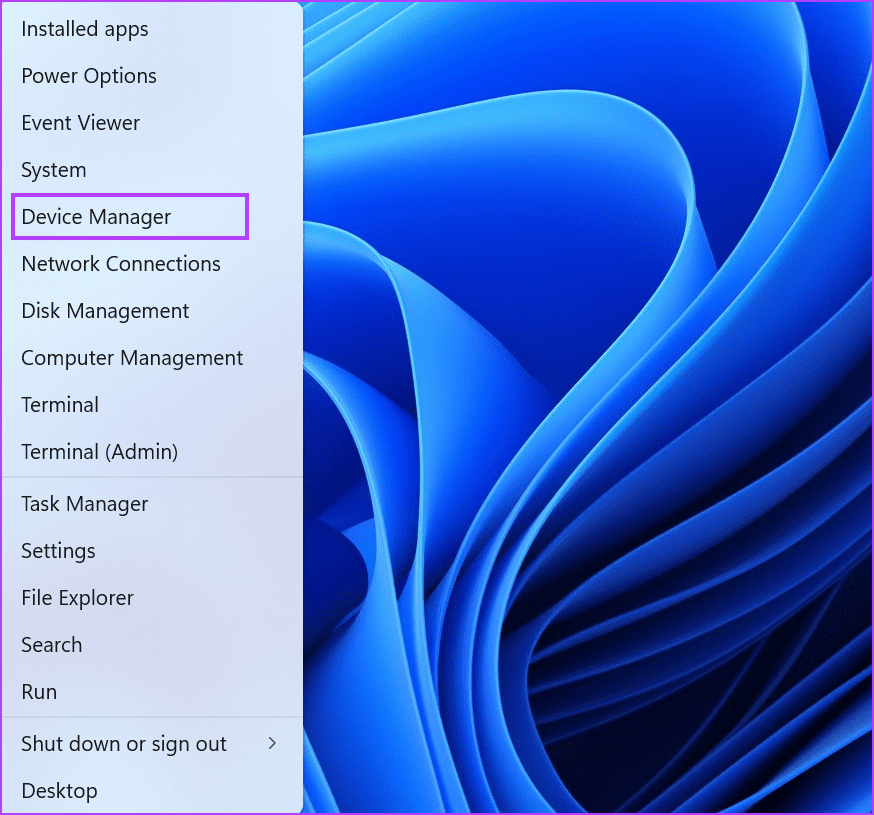
Step 2: Scroll down to locate the device in the list and right-click on it. Select the Properties option from the context menu. 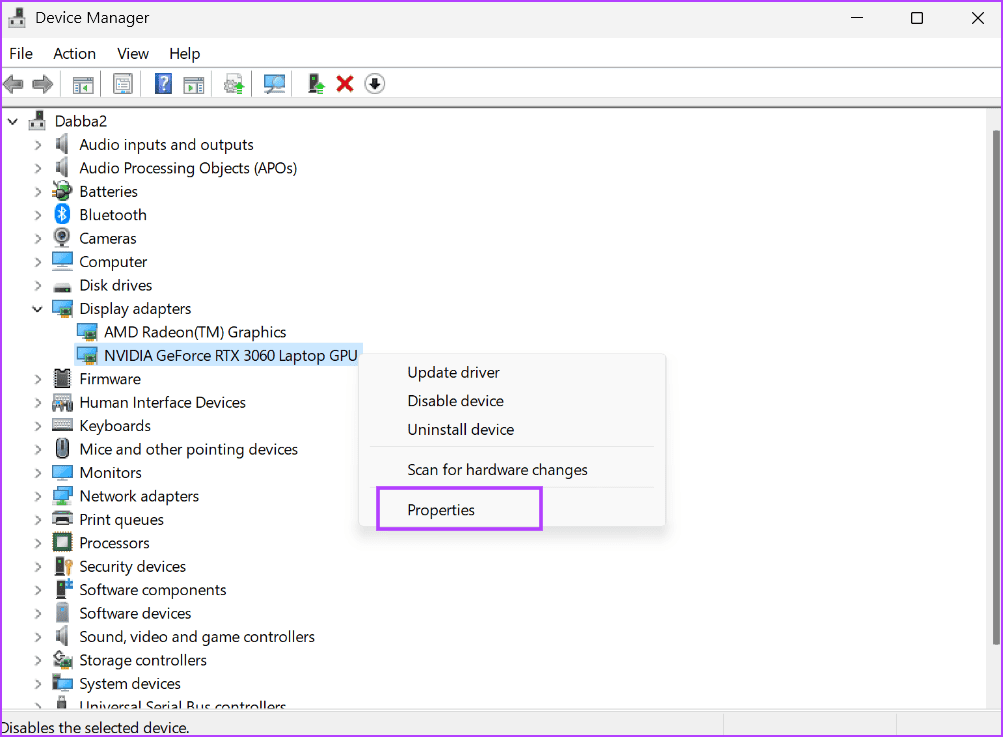
Step 3: Switch to the Details tab. 
Step 4: Click on the drop-down list below the Property option. Select the Hardware Ids from the list. 
Step 5: Under the Value section, you will see all the Hardware IDs associated with the device. 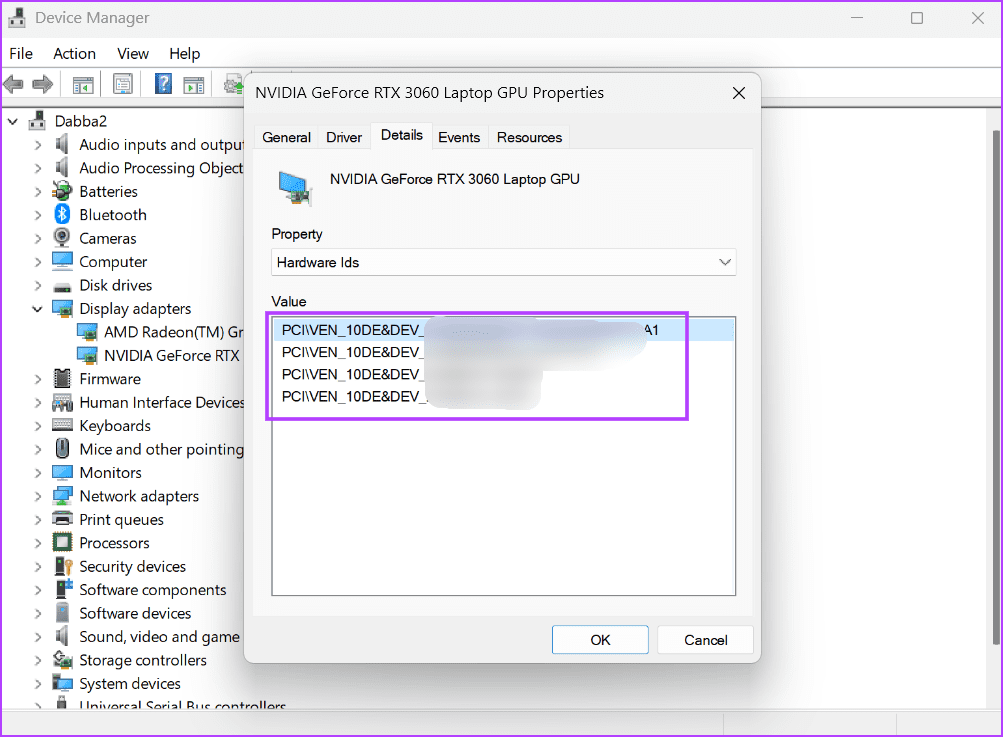
Step 6: If you want to copy the HWID, right-click on a value and select the Copy option. 
Step 7: After that, close the Device Manager window. 2. Using Command PromptIf the Device Manager is not working on your PC, you can use the Command Prompt to find the Hardware ID of any device. Repeat the following steps: Step 1: Press the Windows key to open the Start Menu. Type cmd in the search box and press the Control + Shift + Enter keyboard shortcut. 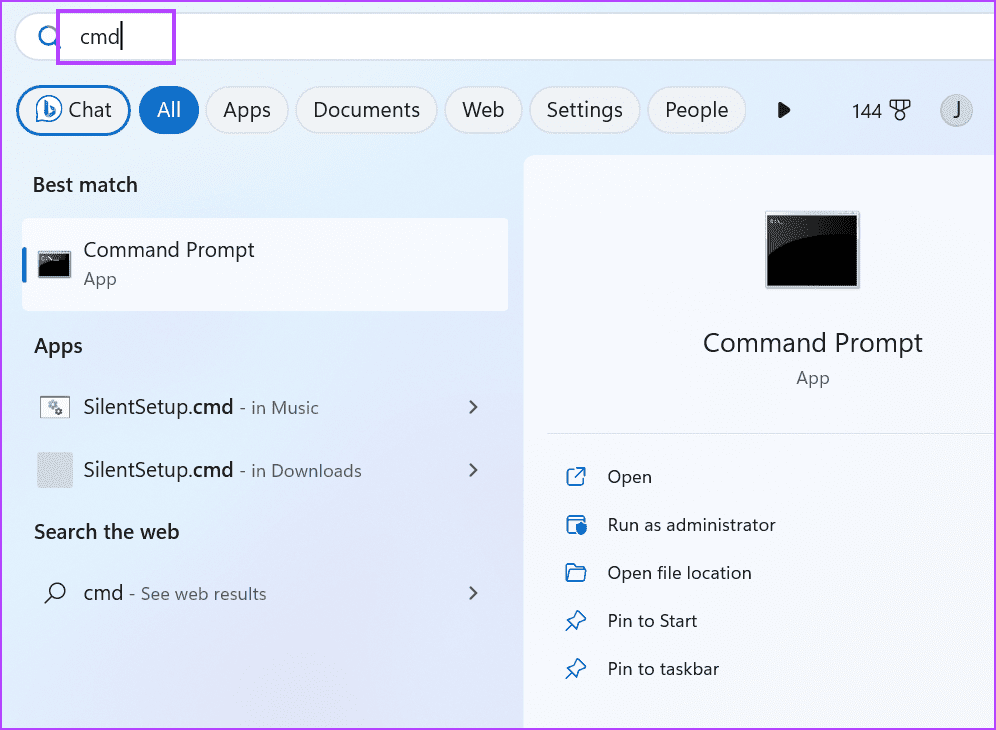
Step 2: The User Account Control window will launch. Click on the Yes button to open the Command Prompt with administrator privileges. 
Step 3: Type the following command and press Enter: DISM /Online /Get-Drivers /all /Format:Table > C:\a.txt
Step 4: The above command will create a text file containing the driver details. We purposely did it because the list is long and difficult to navigate in the Command Prompt window. Step 5: Press the Windows + E keyboard shortcut to open the File Explorer. Navigate to the C drive and then open the newly created text file. 
Step 6: Copy the Published Name of a device. The command to find the Hardware ID using the Published Name is: DISM /Online /Get-DriverInfo /Driver:Published NameStep 7: Replace the Published Name part of the command with the text you copied from the file. Our final command looks like this: DISM /Online /Get-DriverInfo /Driver:oem77.infStep 8: Execute the command by pressing Enter and it will generate the HWID of the the device. 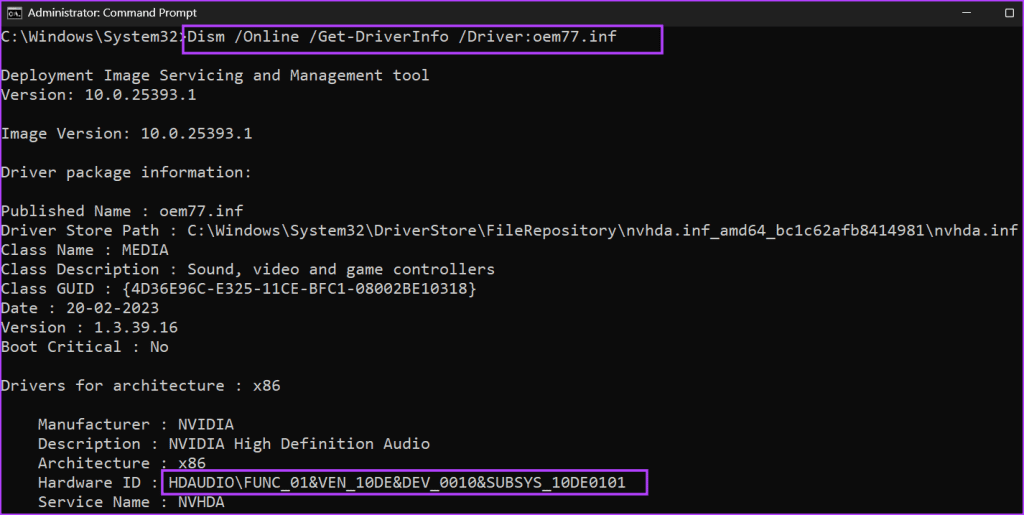
Step 9: Close the Command Prompt window. 3. Using PowerShellYou can even use the Get-PnPDevice cmdlet in PowerShell to search for the Hardware ID of a device. Here’s how to do it: Step 1: Press the Windows key to open the Start Menu. Type powershell in the search box and press the Control + Shift + Enter keyboard shortcut simultaneously. 
Step 2: The User Account Control window will launch. Click on the Yes button to open the PowerShell with administrator privileges. 
Step 3: Type the following command and press Enter: Get-PnpDevice -PresentOnly | Sort-Object -Property "Class" | Format-Table -AutoSize > D:\ID.txt
Step 4: Like the previous method, the above command will save the results to a text file in the D drive. We purposely did it because the results won’t be completely visible in the PowerShell window. 
Step 5: Copy the Instance ID of the device from the text file. The command to check the Hardware ID using the Instance ID is: Get-PnpDeviceProperty -InstanceId "Instance Id" | Format-Table -AutoSizeStep 6: Replace the text inside the “Instance Id” part with the ID you copied from the text file. The final command will look something like this: Get-PnpDeviceProperty -InstanceId "USB\VID_13D3&PID_3563&MI_00\7&1D754FA2&0&0000" | Format-Table -AutoSize > D:\HWID.txt
Step 7: The above command will export the results to a file called HWID on the D drive. Open the file and find the ‘DEVPKEY_Device_HardwareIds’ entry in the KeyName column. The corresponding value in the data column in the Hardware ID of the device.  4. Using Microsoft’s Windows Drivers Kit
Microsoft offers a tool with the Windows Driver Kit (WDK) that you can use to check the Hardware IDs of devices on your PC. Since the Windows Device Console tool isn’t included with Windows 11, you must download and install the Windows Drivers Kit (WDK) to access the tool on your PC. Here’s how to do it: Step 1: Download Windows 11 WDK. Download Step 2: Run the installer file and install the WDK on your PC. Step 3: Press the Windows + E keyboard shortcut to open the File Explorer. Step 4: Go to the address bar at the top, paste the following path, and press Enter: C:\Program Files (x86)\Windows Kits\10\Tools\10.0.22621.0\x64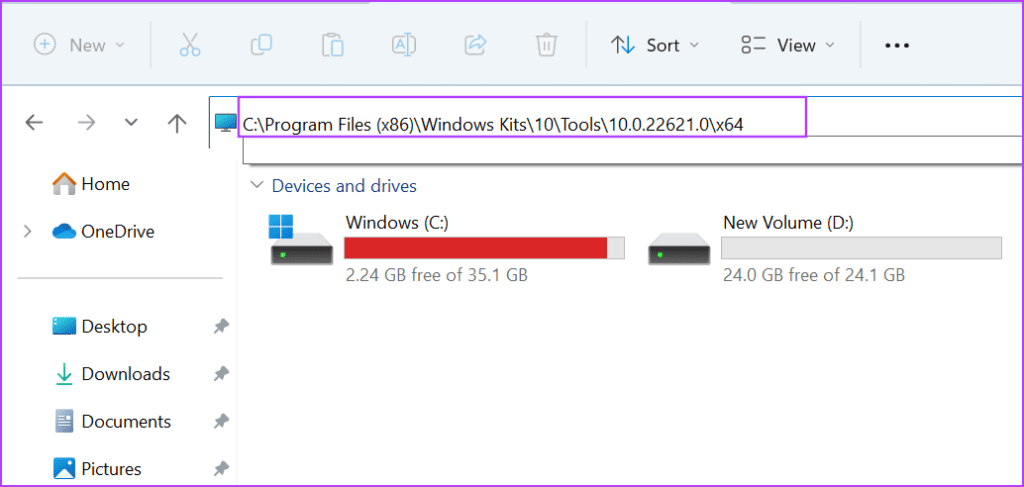
Step 5: Right-click in the File Explorer window and click on the Open in Terminal option. 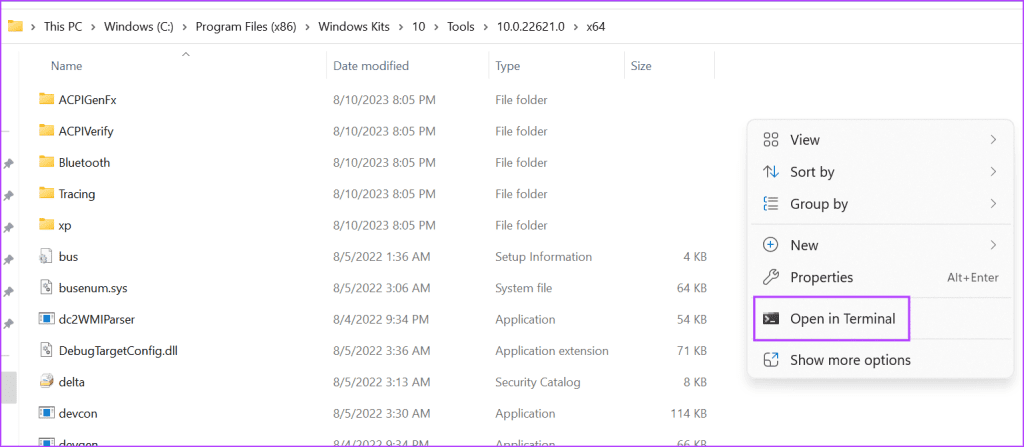
Step 6: Type the following command in the Terminal and press Enter: devcon hwids * > D:\HWID.txt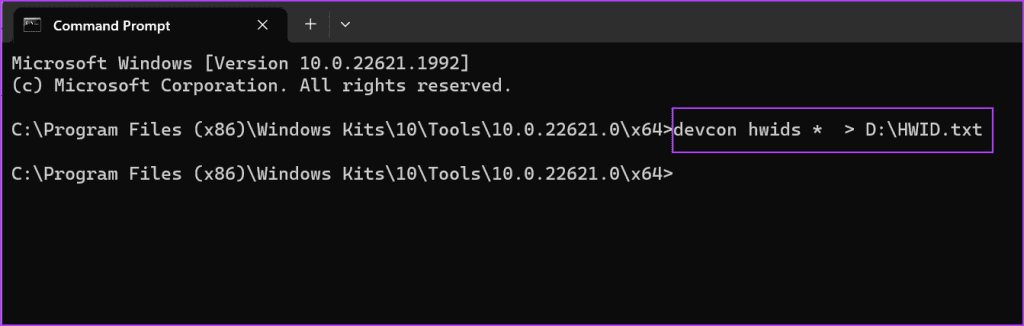
Step 7: Like the previous methods, we have saved the command output to a text file for ease of usage. Open the file and see the Device Name and their Hardware IDs.  Quickly Find Hardware ID on Windows
These were the four methods to check Hardware ID (HWID) in Windows 11 PC. Only the Device Manager offers the GUI way to view the Hardware ID. All the other methods use the Terminal to fetch the HWID of a device. Was this helpful? Thanks for your feedback!Last updated on 19 February, 2024 Leave a Reply Cancel reply Read Next 4 Ways to Check the .NET Framework Version on Windows 11
Method 1: Visit the Installation Folder Browsing the .NET Framework installation folder on Windows 11 is a nifty trick to check its version details. 4 Ways to Check the .NET Framework Version on Windows 11
Method 1: Visit the Installation Folder Browsing the .NET Framework installation folder on Windows 11 is a nifty trick to check its version details.
 4 Ways to Open Device Manager in Windows 11
Basic Ways: Via Run command: Use the Windows + R key to open Run. 4 Ways to Open Device Manager in Windows 11
Basic Ways: Via Run command: Use the Windows + R key to open Run.
 5 Ways to Fix Intel Wi-Fi 6 AX201 Adapter Driver or Hardware Issues
Fix 1: Update or Reinstall Driver The software drivers for the Intel Wi-Fi 6 AX201 on your Windows PC may be outdated and are due for an update. 5 Ways to Fix Intel Wi-Fi 6 AX201 Adapter Driver or Hardware Issues
Fix 1: Update or Reinstall Driver The software drivers for the Intel Wi-Fi 6 AX201 on your Windows PC may be outdated and are due for an update.
 How to Use Hardware Accelerated GPU Scheduling on Windows 11
What Is Hardware Accelerated GPU Scheduling Hardware Accelerated GPU Scheduling (HAGS) is a feature that allows the GPU to manage its own memory and schedule tasks, reducing the workload on How to Use Hardware Accelerated GPU Scheduling on Windows 11
What Is Hardware Accelerated GPU Scheduling Hardware Accelerated GPU Scheduling (HAGS) is a feature that allows the GPU to manage its own memory and schedule tasks, reducing the workload on
 3 Quick Ways to Find Product Key on Windows 10 or Windows 11
A Windows product key is a 25-character code crucial for activating the Windows operating system. 3 Quick Ways to Find Product Key on Windows 10 or Windows 11
A Windows product key is a 25-character code crucial for activating the Windows operating system.
 7 Ways to Force Uninstall Programs on Windows 11
Method 1: Uninstall Programs Using the File Explorer Step 1: Firstly, open the Start Menu, type the name of the program you want to uninstall in the search bar, and choose 7 Ways to Force Uninstall Programs on Windows 11
Method 1: Uninstall Programs Using the File Explorer Step 1: Firstly, open the Start Menu, type the name of the program you want to uninstall in the search bar, and choose
 4 Ways to Reset the Microsoft Store on Windows 11
Method 1: Use Windows Settings to Reset the Microsoft Store Windows 11 offers an in-built settings menu to troubleshoot system app issues. 4 Ways to Reset the Microsoft Store on Windows 11
Method 1: Use Windows Settings to Reset the Microsoft Store Windows 11 offers an in-built settings menu to troubleshoot system app issues.
The article above may contain affiliate links which help support Guiding Tech. The content remains unbiased and authentic and will never affect our editorial integrity. |
【本文地址】