配置Linux服务器华为云耀云服务器之docker中nacos服务注册中心若依微服务版本安装 (虚拟机一样适用)若依(1) |
您所在的位置:网站首页 › 华为服务器linux系统安装教程 › 配置Linux服务器华为云耀云服务器之docker中nacos服务注册中心若依微服务版本安装 (虚拟机一样适用)若依(1) |
配置Linux服务器华为云耀云服务器之docker中nacos服务注册中心若依微服务版本安装 (虚拟机一样适用)若依(1)
|
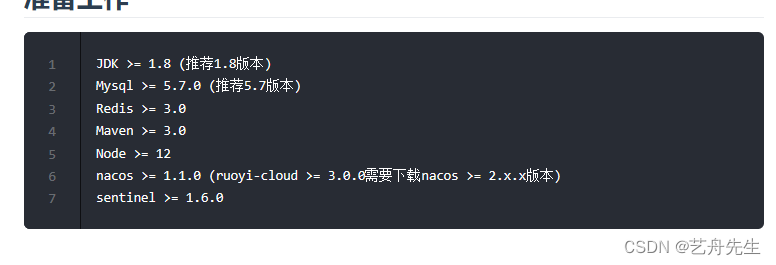
nacos简介: nacos是阿里巴巴开源的一个服务发现、配置管理和动态配置服务的平台。它可以帮助开发人员和运维人员更方便地管理应用程序和微服务的配置和发现。在互联网架构中,服务发现和配置管理是非常重要的。nacos提供了强大的功能来管理这些方面的需求。目前,nacos已经成为了国内外的很多企业中的首选服务发现和配置管理平台之一。 阿丹有话说: 本篇文章主要目标是将若依微服务系统跑起来!如果不是跑若依系统我会在最后提供相关的的配置文件以及相关的内容。 请注意辨识! 开干!我玩的就是真实! 准备工作:若依下载链接: RuoYi-Cloud: 🎉 基于Spring Boot、Spring Cloud & Alibaba的分布式微服务架构权限管理系统,同时提供了 Vue3 的版本 阿丹理解: 提前准备配置文件通过配置文件来指定nacos注册中心的数据配置。阿丹建议如果你拥有多个服务器(比如我),请为你的若依系统专门整一个配置数据库,或者整一个专门的小服务器!不然可能出现你修改了本来的nacos的配置文件。导致以前好好的项目都起不来了。大吉大利! 首先访问若依官网 ruoyi.vip
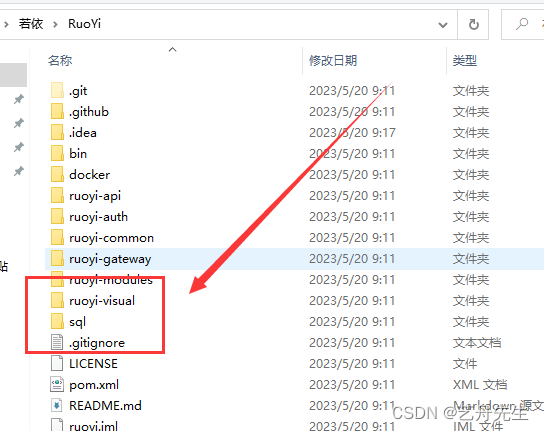
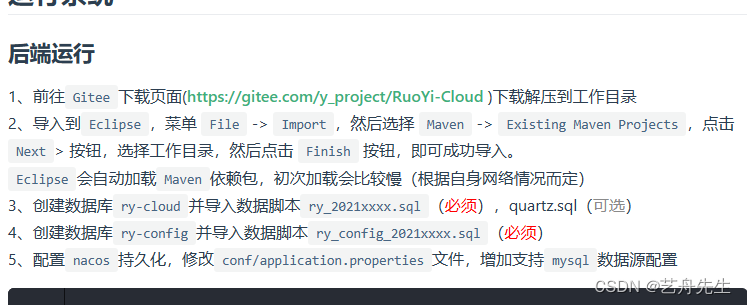
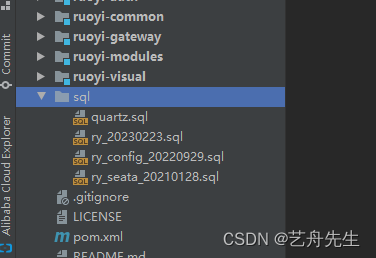
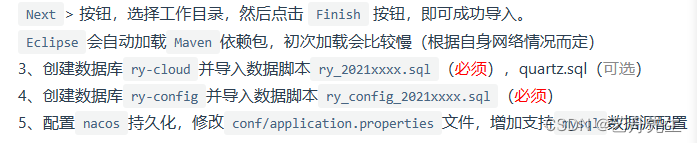
这里有版本号。我们要这里的版本号需要大于等于若依提供的版本号。 思路: 1、创建docker中的nacos的配置文件夹,并创建一个nacos的配置文件。一下代码实现: 进入/usr/local/docker/下的文件夹,创建nacos文件夹,进入nacos文件夹,创建config文件夹,进入config文件夹 cd /usr/local/docker/ mkdir nacos cd nacos/ mkdir config cd config/ 2、在config文件夹下书写配置文件 两个方法创建一个application.properties文件: 1、在config文件夹下使用指令 vim application.properties,然后复制下面的配置文件注意要添加若依官网上写数据源配置。 注意!要更改成自己的ip地址! 2、在主机创建一个txt文件,将名字改成application.properties,写入内容保证内容正确,内容同上。写完后使用你的远程连接工具将写好的配置文件传入config文件夹下面! # # Copyright 1999-2021 Alibaba Group Holding Ltd. # # Licensed under the Apache License, Version 2.0 (the "License"); # you may not use this file except in compliance with the License. # You may obtain a copy of the License at # # http://www.apache.org/licenses/LICENSE-2.0 # # Unless required by applicable law or agreed to in writing, software # distributed under the License is distributed on an "AS IS" BASIS, # WITHOUT WARRANTIES OR CONDITIONS OF ANY KIND, either express or implied. # See the License for the specific language governing permissions and # limitations under the License. # #*************** Spring Boot Related Configurations ***************# ### Default web context path: server.servlet.contextPath=/nacos ### Default web server port: server.port=8848 #*************** Network Related Configurations ***************# ### If prefer hostname over ip for Nacos server addresses in cluster.conf: # nacos.inetutils.prefer-hostname-over-ip=false ### Specify local server's IP: # nacos.inetutils.ip-address= #*************** Config Module Related Configurations ***************# ### If use MySQL as datasource: # spring.datasource.platform=mysql ### Count of DB: # db.num=1 ### Connect URL of DB: # db.url.0=jdbc:mysql://127.0.0.1:3306/nacos?characterEncoding=utf8&connectTimeout=1000&socketTimeout=3000&autoReconnect=true&useUnicode=true&useSSL=false&serverTimezone=UTC # db.user.0=nacos # db.password.0=nacos ### Connection pool configuration: hikariCP db.pool.config.connectionTimeout=30000 db.pool.config.validationTimeout=10000 db.pool.config.maximumPoolSize=20 db.pool.config.minimumIdle=2 #*************** Naming Module Related Configurations ***************# ### Data dispatch task execution period in milliseconds: Will removed on v2.1.X, replace with nacos.core.protocol.distro.data.sync.delayMs # nacos.naming.distro.taskDispatchPeriod=200 ### Data count of batch sync task: Will removed on v2.1.X. Deprecated # nacos.naming.distro.batchSyncKeyCount=1000 ### Retry delay in milliseconds if sync task failed: Will removed on v2.1.X, replace with nacos.core.protocol.distro.data.sync.retryDelayMs # nacos.naming.distro.syncRetryDelay=5000 ### If enable data warmup. If set to false, the server would accept request without local data preparation: # nacos.naming.data.warmup=true ### If enable the instance auto expiration, kind like of health check of instance: # nacos.naming.expireInstance=true ### will be removed and replaced by `nacos.naming.clean` properties nacos.naming.empty-service.auto-clean=true nacos.naming.empty-service.clean.initial-delay-ms=50000 nacos.naming.empty-service.clean.period-time-ms=30000 ### Add in 2.0.0 ### The interval to clean empty service, unit: milliseconds. # nacos.naming.clean.empty-service.interval=60000 ### The expired time to clean empty service, unit: milliseconds. # nacos.naming.clean.empty-service.expired-time=60000 ### The interval to clean expired metadata, unit: milliseconds. # nacos.naming.clean.expired-metadata.interval=5000 ### The expired time to clean metadata, unit: milliseconds. # nacos.naming.clean.expired-metadata.expired-time=60000 ### The delay time before push task to execute from service changed, unit: milliseconds. # nacos.naming.push.pushTaskDelay=500 ### The timeout for push task execute, unit: milliseconds. # nacos.naming.push.pushTaskTimeout=5000 ### The delay time for retrying failed push task, unit: milliseconds. # nacos.naming.push.pushTaskRetryDelay=1000 ### Since 2.0.3 ### The expired time for inactive client, unit: milliseconds. # nacos.naming.client.expired.time=180000 #*************** CMDB Module Related Configurations ***************# ### The interval to dump external CMDB in seconds: # nacos.cmdb.dumpTaskInterval=3600 ### The interval of polling data change event in seconds: # nacos.cmdb.eventTaskInterval=10 ### The interval of loading labels in seconds: # nacos.cmdb.labelTaskInterval=300 ### If turn on data loading task: # nacos.cmdb.loadDataAtStart=false #*************** Metrics Related Configurations ***************# ### Metrics for prometheus #management.endpoints.web.exposure.include=* ### Metrics for elastic search managementrics.export.elastic.enabled=false #managementrics.export.elastic.host=http://localhost:9200 ### Metrics for influx managementrics.export.influx.enabled=false #managementrics.export.influx.db=springboot #managementrics.export.influx.uri=http://localhost:8086 #managementrics.export.influx.auto-create-db=true #managementrics.export.influx.consistency=one #managementrics.export.influx.compressed=true #*************** Access Log Related Configurations ***************# ### If turn on the access log: server.tomcat.accesslog.enabled=true ### The access log pattern: server.tomcat.accesslog.pattern=%h %l %u %t "%r" %s %b %D %{User-Agent}i %{Request-Source}i ### The directory of access log: server.tomcat.basedir= #*************** Access Control Related Configurations ***************# ### If enable spring security, this option is deprecated in 1.2.0: #spring.security.enabled=false ### The ignore urls of auth, is deprecated in 1.2.0: nacos.security.ignore.urls=/,/error,/**/*.css,/**/*.js,/**/*.html,/**/*.map,/**/*.svg,/**/*.png,/**/*.ico,/console-ui/public/**,/v1/auth/**,/v1/console/health/**,/actuator/**,/v1/console/server/** ### The auth system to use, currently only 'nacos' and 'ldap' is supported: nacos.core.auth.system.type=nacos ### If turn on auth system: nacos.core.auth.enabled=false ### worked when nacos.core.auth.system.type=ldap,{0} is Placeholder,replace login username # nacos.core.auth.ldap.url=ldap://localhost:389 # nacos.core.auth.ldap.userdn=cn={0},ou=user,dc=company,dc=com ### The token expiration in seconds: nacos.core.auth.default.token.expire.seconds=18000 ### The default token: nacos.core.auth.default.token.secret.key=SecretKey012345678901234567890123456789012345678901234567890123456789 ### Turn on/off caching of auth information. By turning on this switch, the update of auth information would have a 15 seconds delay. nacos.core.auth.caching.enabled=true ### Since 1.4.1, Turn on/off white auth for user-agent: nacos-server, only for upgrade from old version. nacos.core.auth.enable.userAgentAuthWhite=false ### Since 1.4.1, worked when nacos.core.auth.enabled=true and nacos.core.auth.enable.userAgentAuthWhite=false. ### The two properties is the white list for auth and used by identity the request from other server. nacos.core.auth.server.identity.key=serverIdentity nacos.core.auth.server.identity.value=security #*************** Istio Related Configurations ***************# ### If turn on the MCP server: nacos.istio.mcp.server.enabled=false #*************** Core Related Configurations ***************# ### set the WorkerID manually # nacos.core.snowflake.worker-id= ### Member-MetaData # nacos.core.member.meta.site= # nacos.core.member.meta.adweight= # nacos.core.member.meta.weight= ### MemberLookup ### Addressing pattern category, If set, the priority is highest # nacos.core.member.lookup.type=[file,address-server] ## Set the cluster list with a configuration file or command-line argument # nacos.member.list=192.168.16.101:8847?raft_port=8807,192.168.16.101?raft_port=8808,192.168.16.101:8849?raft_port=8809 ## for AddressServerMemberLookup # Maximum number of retries to query the address server upon initialization # nacos.core.address-server.retry=5 ## Server domain name address of [address-server] mode # address.server.domain=jmenv.tbsite.net ## Server port of [address-server] mode # address.server.port=8080 ## Request address of [address-server] mode # address.server.url=/nacos/serverlist #*************** JRaft Related Configurations ***************# ### Sets the Raft cluster election timeout, default value is 5 second # nacos.core.protocol.raft.data.election_timeout_ms=5000 ### Sets the amount of time the Raft snapshot will execute periodically, default is 30 minute # nacos.core.protocol.raft.data.snapshot_interval_secs=30 ### raft internal worker threads # nacos.core.protocol.raft.data.core_thread_num=8 ### Number of threads required for raft business request processing # nacos.core.protocol.raft.data.cli_service_thread_num=4 ### raft linear read strategy. Safe linear reads are used by default, that is, the Leader tenure is confirmed by heartbeat # nacos.core.protocol.raft.data.read_index_type=ReadOnlySafe ### rpc request timeout, default 5 seconds # nacos.core.protocol.raft.data.rpc_request_timeout_ms=5000 #*************** Distro Related Configurations ***************# ### Distro data sync delay time, when sync task delayed, task will be merged for same data key. Default 1 second. # nacos.core.protocol.distro.data.sync.delayMs=1000 ### Distro data sync timeout for one sync data, default 3 seconds. # nacos.core.protocol.distro.data.sync.timeoutMs=3000 ### Distro data sync retry delay time when sync data failed or timeout, same behavior with delayMs, default 3 seconds. # nacos.core.protocol.distro.data.sync.retryDelayMs=3000 ### Distro data verify interval time, verify synced data whether expired for a interval. Default 5 seconds. # nacos.core.protocol.distro.data.verify.intervalMs=5000 ### Distro data verify timeout for one verify, default 3 seconds. # nacos.core.protocol.distro.data.verify.timeoutMs=3000 ### Distro data load retry delay when load snapshot data failed, default 30 seconds. # nacos.core.protocol.distro.data.load.retryDelayMs=30000这是官网提供的数据源配置,注意要更改为自己的ip地址,password要改成自己的数据库密码。其实上面提供的配置文件就有相应的配置将注解打开也行。 # db mysql spring.datasource.platform=mysql db.num=1 db.url.0=jdbc:mysql://localhost:3306/ry-config?characterEncoding=utf8&connectTimeout=1000&socketTimeout=3000&autoReconnect=true&useUnicode=true&useSSL=false&serverTimezone=UTC db.user=root db.password=password注意将写好的配置文件放到config文件夹下!哈! 在下载好的若依微服务版本中提供了sql的文件在这里我给大家看一下 然后按照官方给的文档来进行数据库初始化,就行。
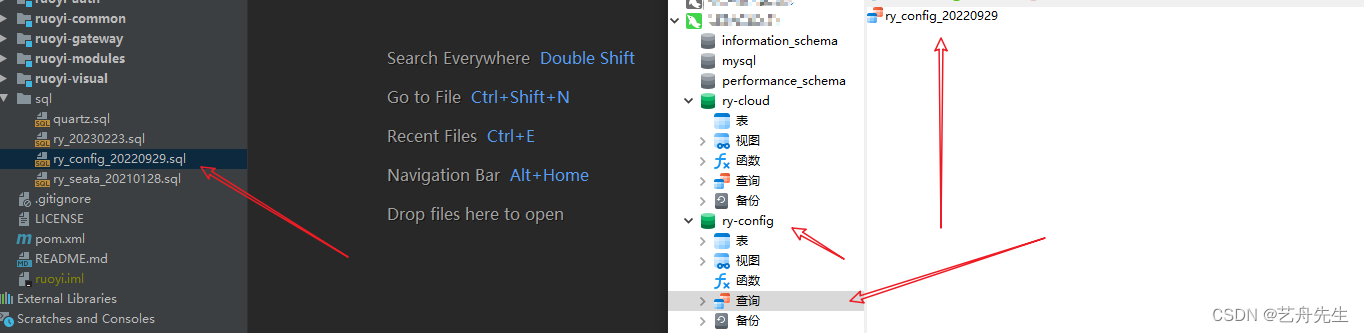
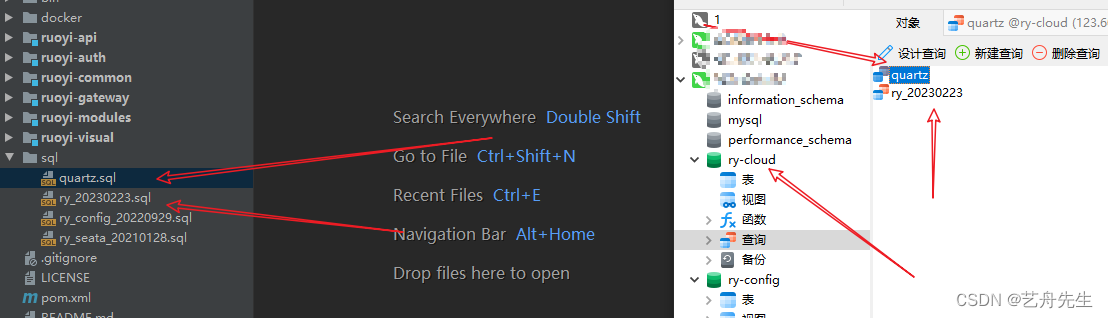
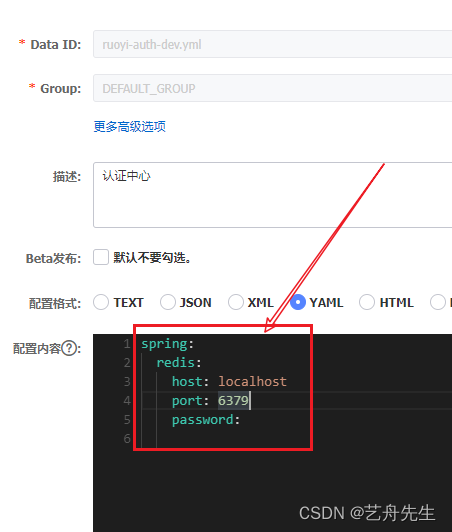
阿丹小贴士: 注意在数据源下的配置中指定的配置是ry-config注意不是下划线哈! 打开我们的数据库,进行操作 新建数据库ry-config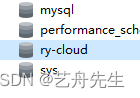
数据库的文件在这里,在数据库可视化工具中新建一个查询将对应的文件复制进入运行即可。 四个地方对应起来即可。
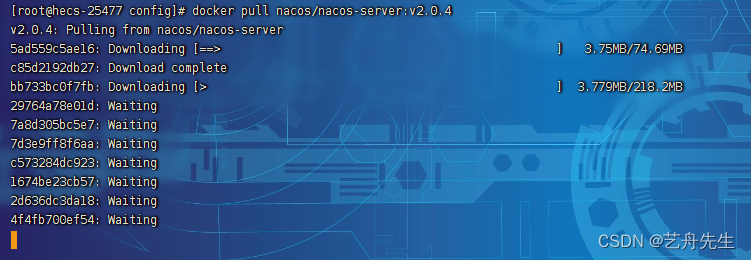
远程连接输入一下代码即可 docker pull nacos/nacos-server:v2.0.4 等待下载完成。 编写脚本进入nacos的文件夹编写启动脚本 要注意的是当前位置是config文件夹 cd ../ vim startNacos.sh 脚本内容先按下字母i开始插入模式,复制脚本后,按下esc,再按住shift+:键,输入wq! 即可保存退出! docker run -d \ --privileged=true \ --restart=always \ --name nacos-8848 \ --network host \ -e MODE=standalone \ -e JVM_XMS=256m \ -e JVM_XMX=256m \ -e JVM_XMN=256m \ -p 8848:8848 \ -p 9848:9848 \ -v /usr/local/docker/nacos/config/application.properties:/home/nacos/conf/application.properties \ nacos/nacos-server:v2.0.4 nacos/nacos-server:v2.0.4启动脚本 chmod -R 777 startNacos.sh ./startNacos.sh 验证:ip地址+8848进入网页,账号和密码都为:nacos
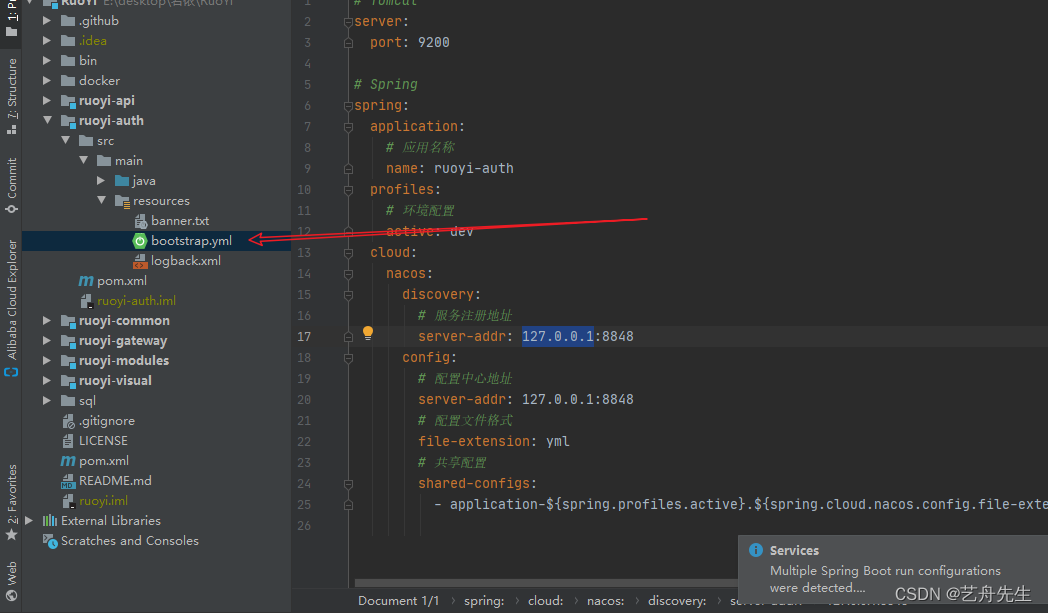
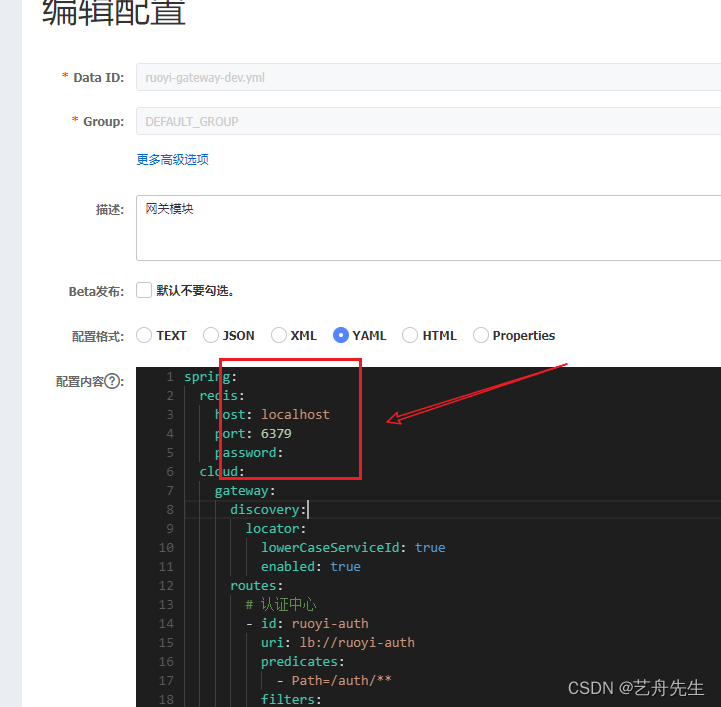
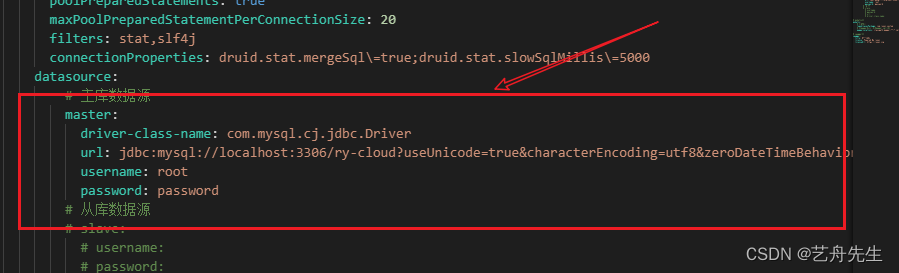
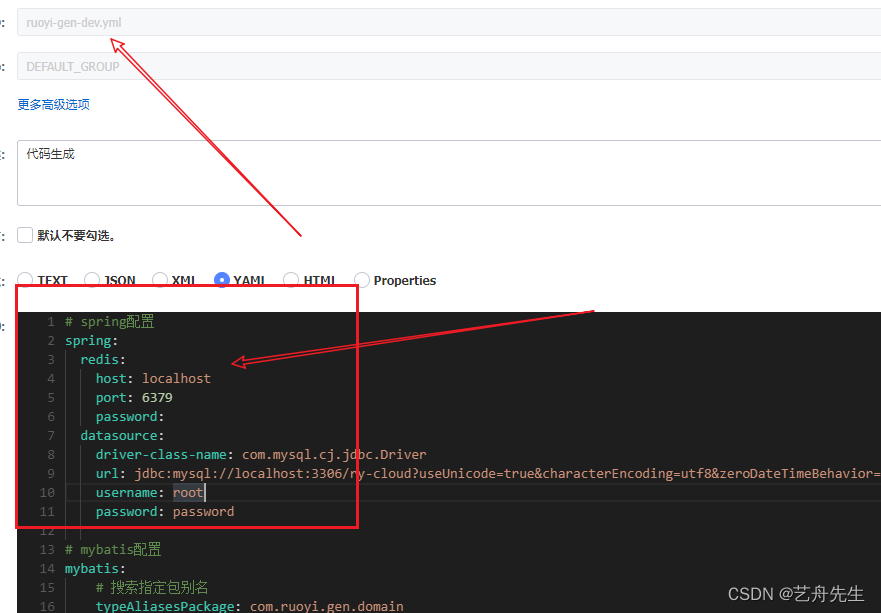
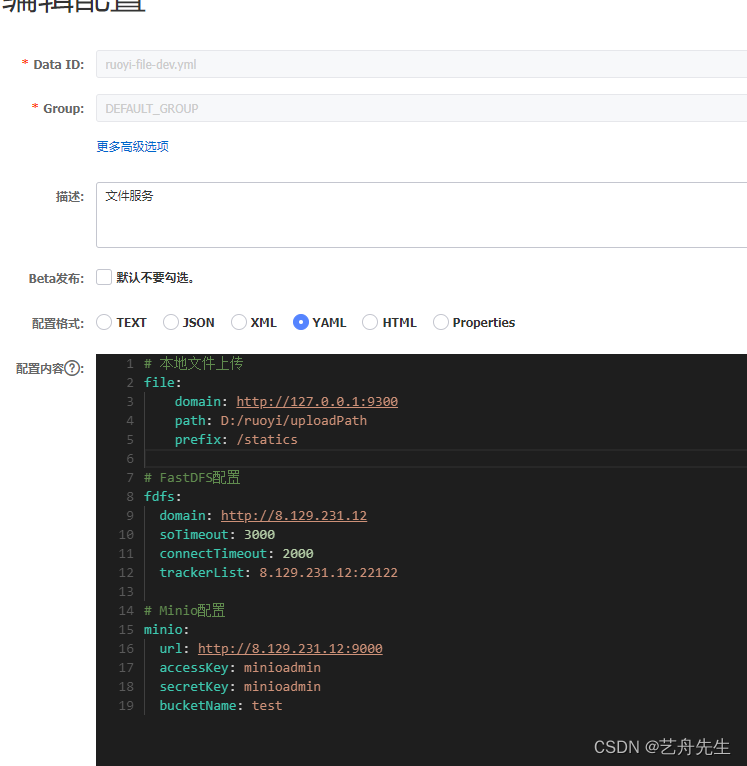
我们已经完成了nacos的安装部署现在我们开始去开启若依! 开启若依! 修改配置文件中的注册地址: 将每个bootstrap配置文件中的服务注册地址127.0.0.1改成自己的nacos配置服务器的ip 给能改的全部改了!!!能找到的全部改掉! 修改nacos中的配置数据库密码等在ry-config数据库中使用这个sql语句可以快速的更改 update config_info set content = REPLACE(content,'localhost','要修改的ip地址') , content = REPLACE(content,'password:password','password:自己数据库的密码');如果不放心就使用最安全的方法! 查看nacos中的配置文件中是否是自己的数据库密码,一个一个点开看。
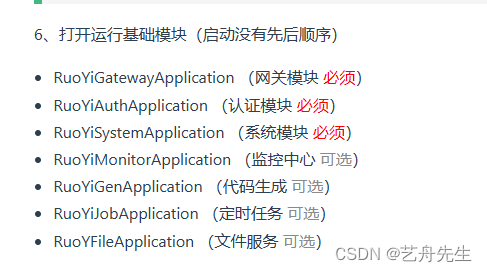
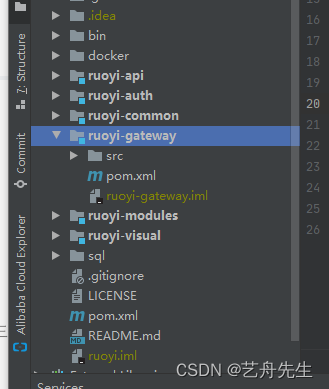
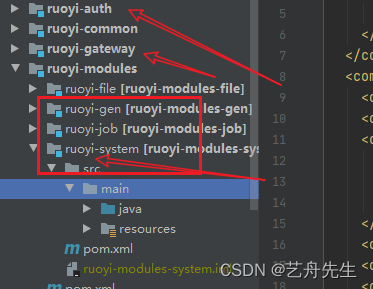
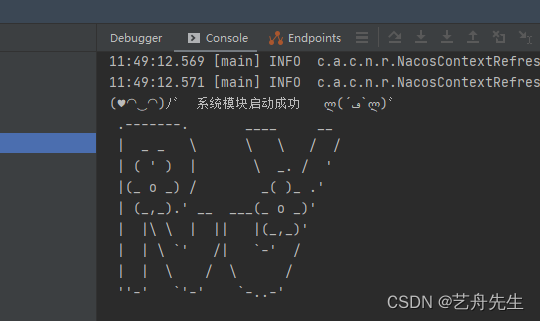
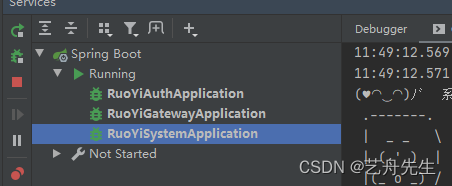
按照官方文档的启动顺序来启动项目
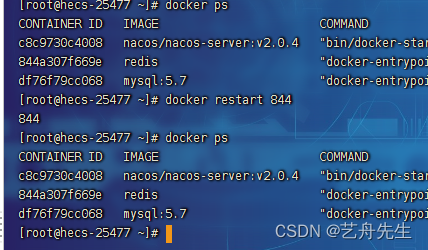
如果在启动system模块中出现redis报错 这个是redis只读副本的问题,通常重启redis即可 重启docker容器中redis问题解决成功启动 阿丹这个时候已经乐屁了!!!!!! 简单启动后台完毕!
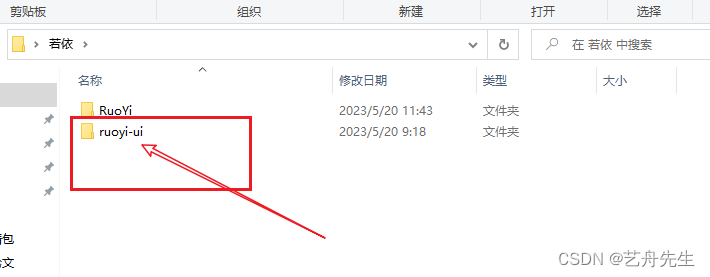
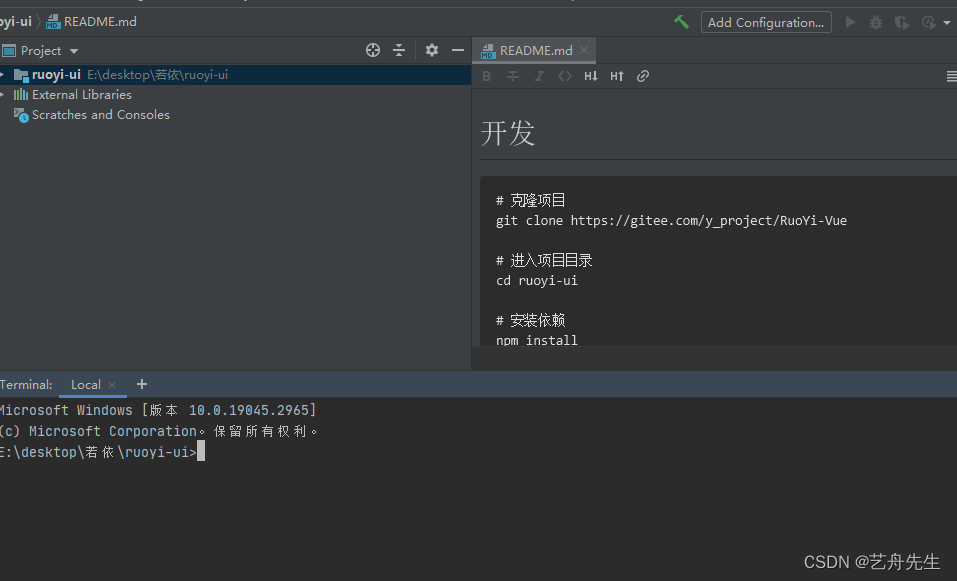
在文件中ruo-ui是前台工程!!! 将文件使用idea打开
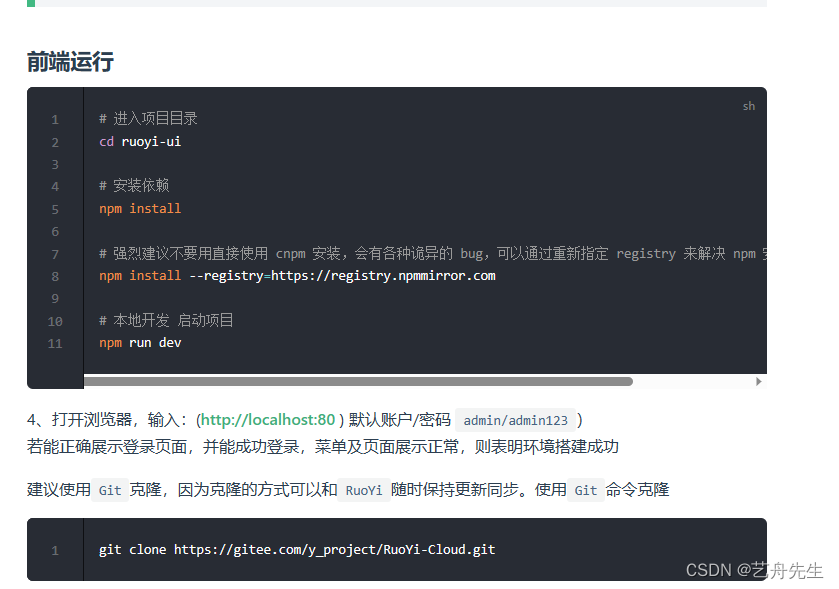
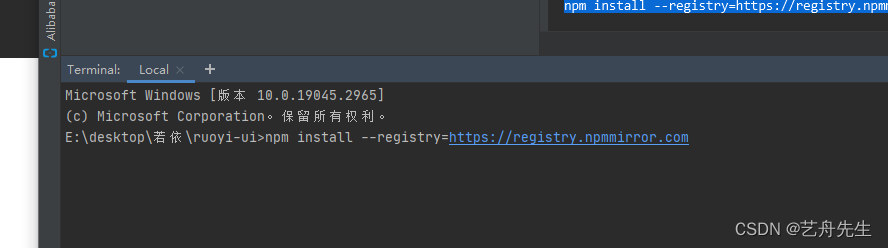
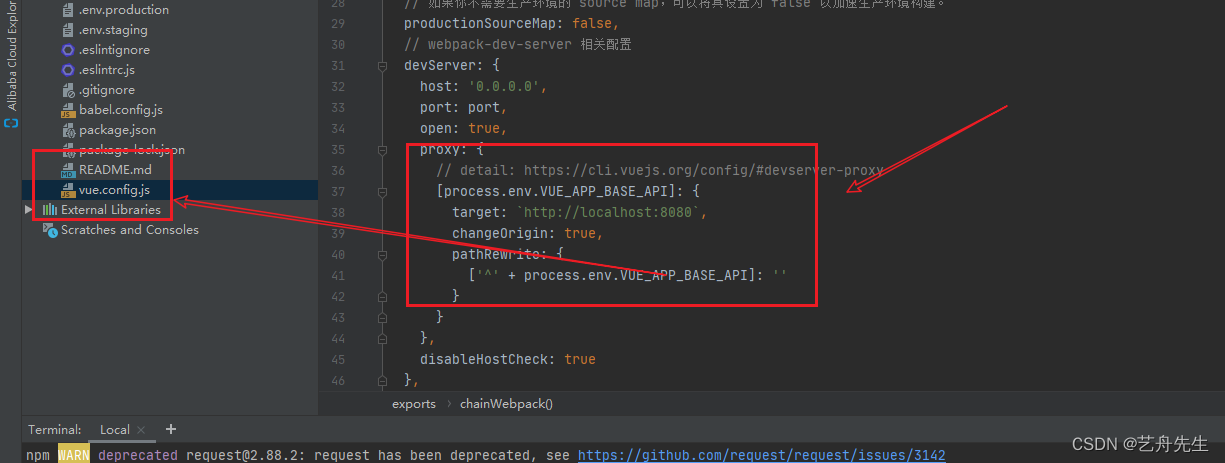
使用文档提示初始化 npm install --registry=https://registry.npmmirror.com 注意:如果后期将若依部署在服务器上就要修改这里的ip为自己的服务器ip
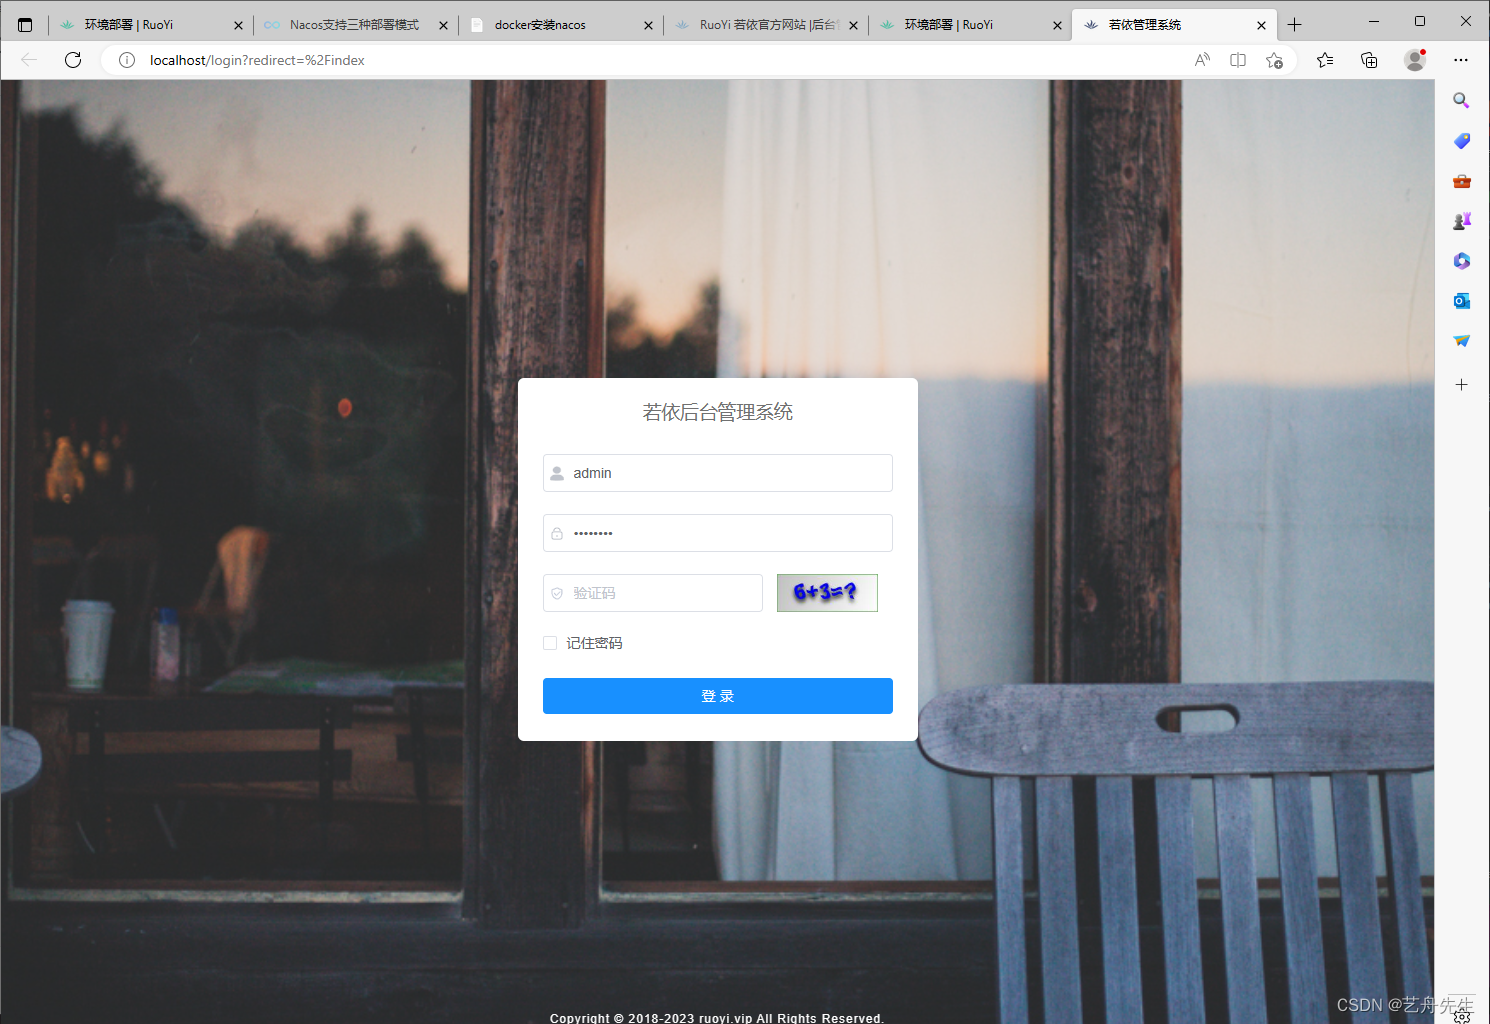
开始尝试登录!!!!!!!!
登录成功!!!! 阿丹发现: 后台网管一直在报错,可能是因为定时器模块没开的原因。但是简单若依配置以及登录已经完成 可能是由于连接被拒绝而引起的。更具体地说,可能是在尝试连接到本地 IP 地址为 127.0.0.1 和端口为 9848 的 TCP 服务时发生连接拒绝。这可能是由于服务没有启动或因为防火墙阻止了连接。关于无法连接的其它猜测还包括网络问题、权限不足、服务宕机等。如果您能提供更多上下文信息,我或许可以提供更精确的解释和指导。
|


【本文地址】