Springboot使用webupload大文件分片上传(包含前后端源码) |
您所在的位置:网站首页 › 分块上传失败 › Springboot使用webupload大文件分片上传(包含前后端源码) |
Springboot使用webupload大文件分片上传(包含前后端源码)
|
Springboot使用webupload大文件分片上传(包含源码)
1. 实现效果1.1 分片上传效果图1.2 分片上传技术介绍
2. 分片上传前端实现2.1 什么是WebUploader?功能特点接口说明事件APIHook 机制
2.2 前端代码实现2.2.1(不推荐)使用官方压缩文件方式引入2.2.2 (推荐)模块引入2.2.3 核心代码2.2.4 项目结构和运行效果
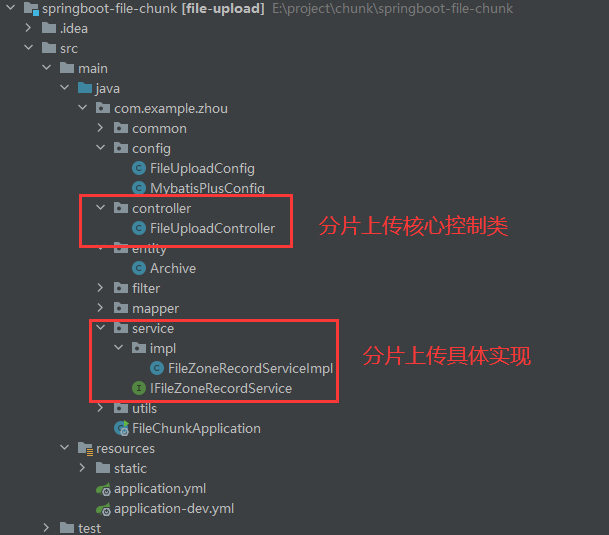
3 .分片上传后端实现3.1 项目结构和技术介绍3.2 核心代码
4. 项目运行测试5. 技术选型考量6. 项目源码参考链接
1. 实现效果
1.1 分片上传效果图
如下上传过程的效果图,可以看到文件上传进度和浏览器控制台中打印的请求信息 效果图描述如下: **选择文件:**这里我选择需要上传了1.09GB的pdf大文件分片上传: 文件被切分为多个小片段(分片),每个分片独立上传,以提高上传效率和稳定性进度条显示: 上传过程中显示文件上传进度条,实时反映上传进度请求日志: 浏览器控制台打印每个分片上传的 HTTP 请求详情,包括请求头、请求体和服务器响应信息
本文使用技术栈:springboot、vue、webupload、mysql等 在项目开发中需要上传一个非常大的文件时,单次上传整个文件往往会遇到网络不稳定、带宽限制、上传失败等问题。为了解决这些问题,文件分片上传(也称为断点续传)应运而生。分片上传的核心思想是将一个大文件分成若干份大小相等的多个小块数据块(我们称之为 Part),等所有小块文件上传成功后,再将文件进行合并成完整的原始文件。 文件分片上传的优点主要有以下几点: 断点续传:在网络中断或其他错误导致上传失败时,只需重新上传失败的部分,而不必从头开始上传整个文件,从而提高上传的可靠性和效率。降低网络压力:分片上传可以控制每个片段的大小,避免一次性传输大量数据导致的网络拥堵,提高网络资源的利用率。并行上传:多个分片可以同时上传,加快整体上传速度。灵活处理:服务器可以更灵活地处理和存储文件分片,减少内存和带宽的占用。本文使用 WebUploader 实现文件的分片上传。WebUploader 是一个由百度开发的强大而灵活的文件上传工具,支持文件分片上传、断点续传等功能。本文详细讲解并实现 WebUploader 的安装与配置,如何实现文件分片上传,以及如何在服务器端合并文件分片。通过这篇博客,你将学会:安装和配置 WebUploader实现文件分片上传 2. 分片上传前端实现技术栈或技术点:vue、webuploader、elmentui 2.1 什么是WebUploader?WebUploader 是由百度公司开发的一个现代文件上传组件,主要基于 HTML5,同时辅以 Flash 技术。它支持大文件的分片上传,提高了上传效率,并且兼容主流浏览器。 官网地址: [Web Uploader - Web Uploader (fex-team.github.io)](http://fex.baidu.com/webuploader/)
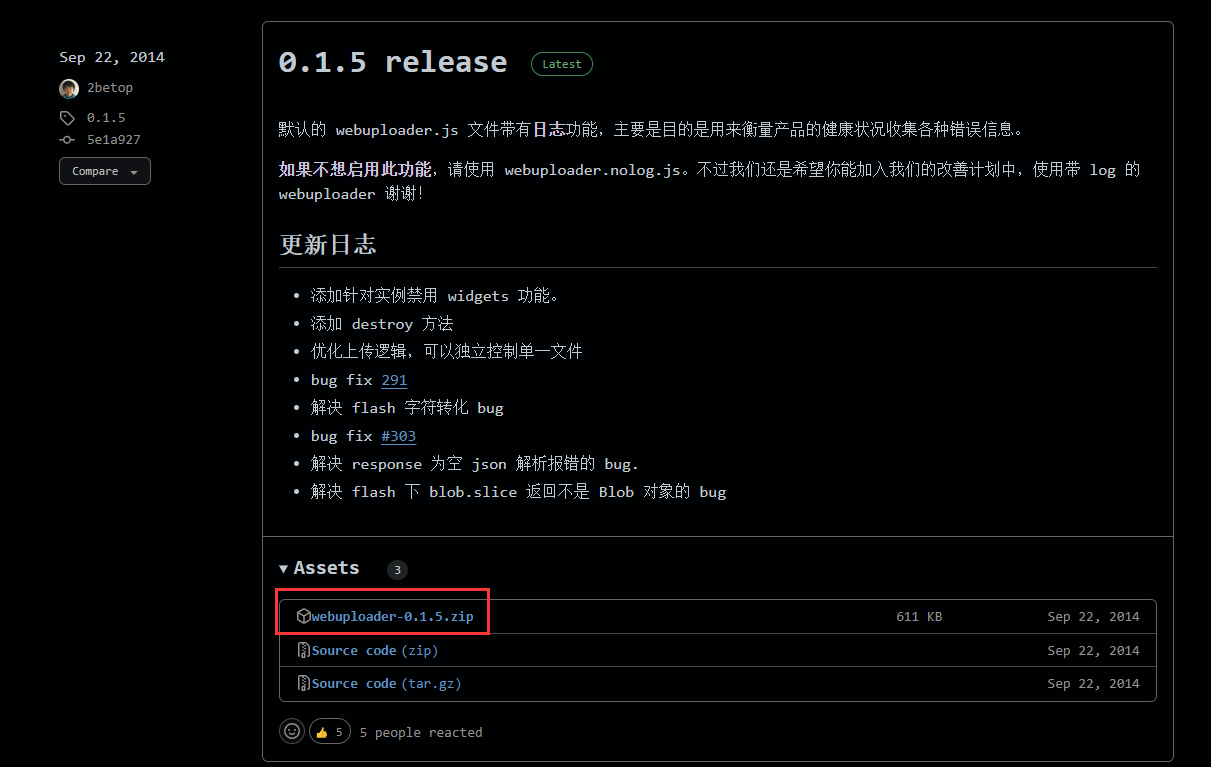
WebUploader 提供了丰富的接口和钩子函数,以下是几个关键的接口: before-send-file: 在文件发送之前执行。before-file: 在文件分片后、上传之前执行。after-send-file: 在所有文件分片上传完毕且无错误时执行。WebUploader 的所有代码都在一个闭包中,对外只暴露了一个变量 WebUploader,避免与其他框架冲突。所有内部类和功能都通过 WebUploader 命名空间进行访问。 事件APIUploader 实例拥有类似 Backbone 的事件 API,可以通过 on、off、once 和 trigger 进行事件绑定和触发。 uploader.on('fileQueued', function(file) { // 处理文件加入队列的事件 }); this.uploader.on('uploadSuccess', (file, response) => { // 上传成功事件 });除了通过 on 绑定事件外,还可以直接在 Uploader 实例上添加事件处理函数: uploader.onFileQueued = function(file) { // 处理文件加入队列的事件 }; Hook 机制关于hook机制的个人理解:Hook机制就像是在程序中的特定事件或时刻(比如做地锅鸡的时候)设定一些“钩子”。当这些事件发生时,程序会去“钩子”上找有没有要执行的额外功能,然后把这些功能执行一下。这就好比在做地锅鸡的过程中,你可以在某个步骤(比如炖鸡的时候)加上自己的调料或额外的配菜,来调整和丰富最终的味道,而不需要改动整体的食谱。 Uploader 内部功能被拆分成多个小组件,通过命令机制进行通信。例如,当用户选择文件后,filepicker 组件会发送一个添加文件的请求,负责队列的组件会根据配置项处理文件并决定是否加入队列。 webUploader.Uploader.register( { 'before-send-file': 'beforeSendFile', 'before-send': 'beforeSend', 'after-send-file': 'afterSendFile' }, { // 时间点1:所有分块进行上传之前调用此函数 beforeSendFile: function(file) { // 利用 md5File() 方法计算文件的唯一标记符 // 创建一个 deferred 对象 var deferred = webUploader.Deferred(); // 计算文件的唯一标记,用于断点续传和秒传 // 请求后台检查文件是否已存在,实现秒传功能 return deferred.promise(); }, // 时间点2:如果有分块上传,则每个分块上传之前调用此函数 beforeSend: function(block) { // 向后台发送当前文件的唯一标记 // 请求后台检查当前分块是否已存在,实现断点续传功能 var deferred = webUploader.Deferred(); return deferred.promise(); }, // 时间点3:所有分块上传成功之后调用此函数 afterSendFile: function(file) { // 前台通知后台合并文件 // 请求后台合并所有分块文件 } } ); 2.2 前端代码实现 2.2.1(不推荐)使用官方压缩文件方式引入首先我们需要下载官方文件,下载地址:Releases · fex-team/webuploader (github.com) 实现方式:快速开始 - Web Uploader (fex-team.github.io)
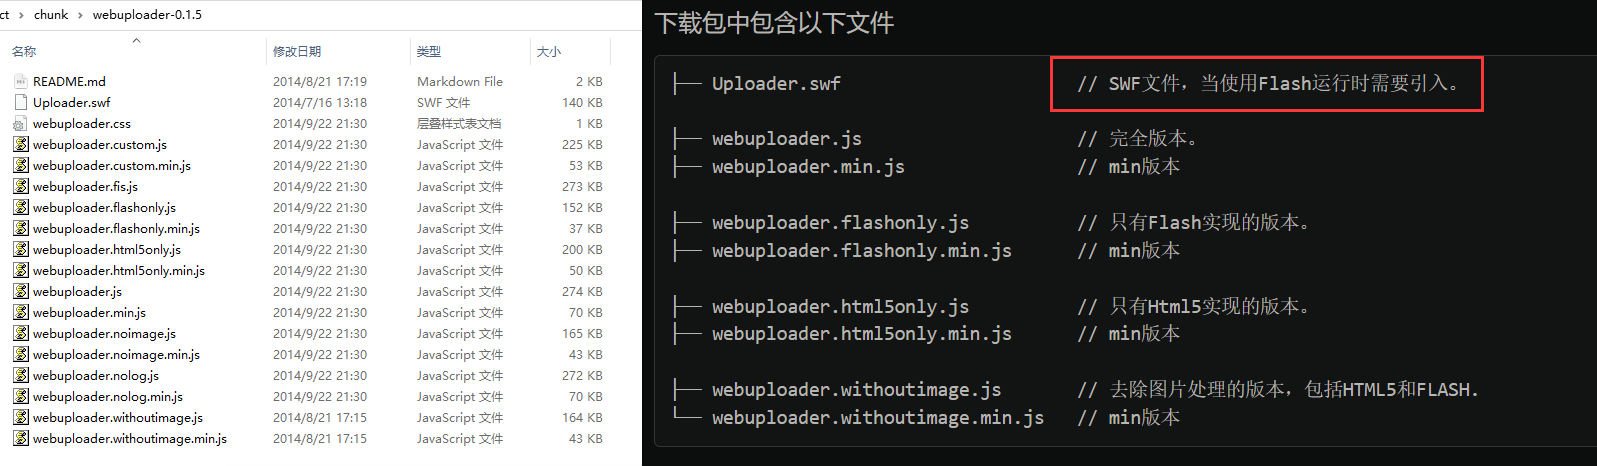
下载文件webuploader-0.1.5.zip并解压后的文件内容如下:
在已有项目或者新的空vue项目中先执行下列命令 # 引入分片需要 npm install webuploader npm install [email protected]
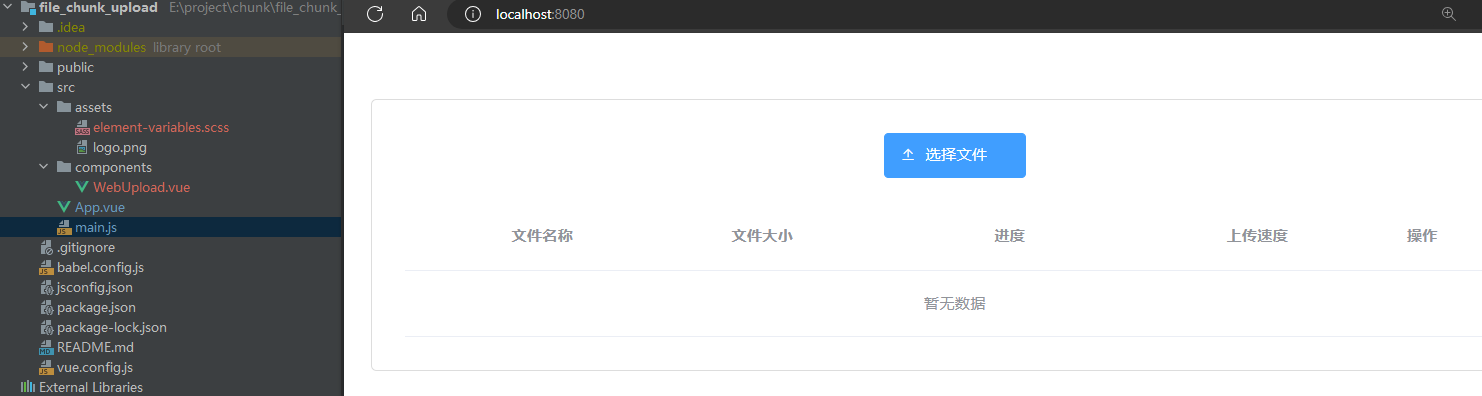
WebUpload.vue 选择文件 {{ scope.row.speed }} 移除 import webUploader from 'webuploader' // 引入WebUploader库 export default { name: 'WebFileUpload', props: { headers: { type: String, default: '' }, fileNumLimit: { type: Number, default: 100 }, fileSize: { type: Number, default: 1 * 1024 * 1024 * 1024 * 1024 // 1gb }, chunkSize: { type: Number, default: 5 * 1024 * 1024 // 5mb }, uploadSuffixUrl: { type: String, default: 'http://localhost:5590' }, multiple: { type: Boolean, default: false // 是否支持多文件上传 }, options: { type: Object, default: () => ({ fileType: 'doc,docx,pdf,xls,xlsx,jpg,jpeg,png,mp4,avi', // 允许上传的文件类型 fileUploadUrl: '/v1/upload/zone/zoneUploadSE', // 分片上传接口 headers: {} }) }, fileListData: { type: Array, default: () => [] } }, data() { return { uploader: null, percentage: 0, // 上传进度 internalFileListData: [], // 使用内部数据属性来保存文件列表数据 uploadStatus: '', // 上传状态 fList: [], fileTimestamps: {} // 用于存储每个文件的时间戳 } }, watch: { fileListData(newValue) { // 当parentData变化时,执行相应逻辑 this.internalFileListData = newValue console.log(this.internalFileListData) } }, mounted() { this.internalFileListData = [...this.fileListData] this.initUploader() this.initEvents() }, methods: { /** * 初始化上传组件 */ initUploader() { this.uploader = webUploader.create({ auto: true, // 选完文件后,是否自动上传。 resize: false, // 不压缩image swf: '../../../assets/Uploader.swf', // swf文件路径 server: this.uploadSuffixUrl + this.options.fileUploadUrl, // 默认文件接收服务端。 pick: { id: '#picker', // 上传按钮 multiple: this.multiple // 是否开启文件多选, }, accept: [ { title: 'file', extensions: this.options.fileType, mimeTypes: this.buildFileType(this.options.fileType) } ], // 单位字节,如果图片大小小于此值,不会采用压缩。512k 512*1024,如果设置为0,原图尺寸大于设置的尺寸就会压缩;如果大于0,只有在原图尺寸大于设置的尺寸,并且图片大小大于此值,才会压缩 compressSize: 0, fileNumLimit: this.fileNumLimit, //验证文件总数量, 超出则不允许加入队列,默认值:undefined,如果不配置,则不限制数量 fileSizeLimit: 2 * 1024 * 1024 * 1024 * 1024, // 1kb=1024*1024,验证文件总大小是否超出限制, 超出则不允许加入队列。 fileSingleSizeLimit: this.fileSize, //单个文件大小是否超出限制, 超出则不允许加入队列。 chunkSize: this.chunkSize, // 单个分片大小为5MB,1024 * 1024 * 5表示5MB chunked: true, //是否开启分片上传 threads: 8, // 并发上传数 chunkRetry: 8, // 网络错误重试次数 prepareNextFile: false, //在上传当前文件时是否准备好下一个文件 // 上传时添加的请求头,例如需要传送token等 // headers: { // Authorization: 'Bearer ' + getToken() // } }) }, initEvents() { // 文件添加到队列 this.uploader.on('fileQueued', file => { if (!this.multiple) { // 清空现有文件列表,实现只上传单个文件 this.internalFileListData = [] } // 生成唯一的时间戳并存储在 fileTimestamps 对象中 const timestamp = Date.now().toString() this.fileTimestamps[file.id] = timestamp const fileSize = this.formatFileSize(file.size) this.internalFileListData.push({ fileId: file.id, fileName: file.name, fileSize: fileSize, percentage: 0, // 初始化进度为0 speed: '0KB/s', // 初始化速度 state: '就绪' }) this.uploadToServer() // 选择文件后直接开始上传 }) /** * 监听上传成功事件 * @param file: 文件对象 * @param : 服务器返回的数据 */ this.uploader.on('uploadSuccess', (file, response) => { this.fList = [] // 如果code等于30000,表示上传成功 if (response.code === 30000) { response.data.fileName = response.data.originalName response.data.percentage = this.internalFileListData[0].percentage response.data.fileSize = this.internalFileListData[0].fileSize response.data.speed = this.internalFileListData[0].speed this.fList.push(response.data) this.$emit('getFileList', this.fList) this.$message.success('上传完成') } else { this.$message.error('上传失败') } }) /** * 监听上传错误事件 * @param file: 文件对象 * @param : 服务器返回的数据 */ this.uploader.on('uploadError', () => { this.$message.error('上传出错') }) // 监听上传进度 this.uploader.on('uploadProgress', (file, percentage) => { // 找到对应文件并更新进度 let targetFile = this.internalFileListData.find(item => item.fileId === file.id) if (targetFile) { const currentTime = new Date().getTime() const elapsedTime = (currentTime - (targetFile.startTime || currentTime)) / 1000 // 秒 const uploadedSize = percentage * file.size const speed = this.formatFileSize(uploadedSize / elapsedTime) + '/s' targetFile.percentage = parseFloat((percentage * 100).toFixed(2)) targetFile.speed = speed targetFile.startTime = targetFile.startTime || currentTime } }) // 上传之前发送的数据 this.uploader.on('uploadBeforeSend', (block, data, headers) => { const fileTimestamp = this.fileTimestamps[block.file.id] data.fileMd5 = block.file.fileMd5 data.contentType = block.file.type data.chunks = block.file.chunks data.zoneTotalMd5 = block.file.fileMd5 data.zoneMd5 = block.zoneMd5 data.zoneTotalCount = block.chunks data.zoneNowIndex = block.chunk data.zoneTotalSize = block.total data.zoneStartSize = block.start data.zoneEndSize = block.end data.fileUUID = fileTimestamp headers.Authorization = this.options.headers.Authorization }) // 所有文件上传完成 this.uploader.on('uploadFinished', () => { this.uploadBtnDisabled = false this.uploadStatus = 'el-icon-upload' // this.$message.success('文件上传完毕') }) // 错误信息监听 this.uploader.on('error', handler => { let errorMessage = '' if (handler === 'F_EXCEED_SIZE') { errorMessage = '上传的单个文件太大! 最大支持' + this.formatFileSize(this.fileSize) + '! 操作无法进行, 如有需求请联系管理员' } else if (handler === 'Q_TYPE_DENIED') { errorMessage = '不允许上传此类文件! 操作无法进行, 如有需求请联系管理员' } if (errorMessage) { this.$message.error({ showClose: true, message: errorMessage }) } }) }, uploadToServer() { if (this.internalFileListData.length = 1024 && unitIndex `.${type}`).join(',') }, /** * 操作中的移除 * @param {Number} index - 文件列表索引 * @param {Object} row - 文件对象 */ removeRow(index, row) { this.internalFileListData.splice(index, 1) const files = this.uploader.getFiles() for (let i = 0; i import WebUpload from './components/WebUpload.vue' export default { name: 'App', components: { WebUpload } } #app { font-family: Avenir, Helvetica, Arial, sans-serif; -webkit-font-smoothing: antialiased; -moz-osx-font-smoothing: grayscale; text-align: center; color: #2c3e50; margin-top: 60px; }同时使用了样式,因此需要引入element-ui npm install element-ui -S # main.js中内容 import Vue from 'vue'; import ElementUI from 'element-ui'; import 'element-ui/lib/theme-chalk/index.css'; import App from './App.vue'; Vue.use(ElementUI); new Vue({ el: '#app', render: h => h(App) }); 2.2.4 项目结构和运行效果执行npm run sever运行后页面效果和最终项目代码结构
后端使用技术栈主要是springboot,引入了mybatis-plus,数据库使用mysql
控制类:FileUploadController.java package com.example.zhou.controller; import com.example.zhou.common.Result; import com.example.zhou.service.IFileZoneRecordService; import lombok.extern.slf4j.Slf4j; import org.springframework.web.bind.annotation.PostMapping; import org.springframework.web.bind.annotation.RequestMapping; import org.springframework.web.bind.annotation.RestController; import org.springframework.web.multipart.MultipartFile; import javax.annotation.Resource; /** * @author ZhouQuan * @desciption 文件上传操作录控制类 * @date 2024/5/4 17:09 */ @Slf4j @RestController @RequestMapping("/v1/upload/zone") public class FileUploadController { @Resource private IFileZoneRecordService iFileZoneRecordService; /** * 单个大文件分片上传-不使用md5 * * @param file 分片的文件 * @param zoneTotalCount 分片总数 * @param zoneTotalSize 文件总大小 * @param zoneNowIndex 当前分片编号 * @param fileUUID 每个文件上传时文件唯一标识 * @return code: 30000 文件上传成功 * @return code: 30002 分片上传成功 */ @PostMapping("/zoneUploadSE") public Result zoneUploadSE(MultipartFile file, Integer zoneNowIndex, Integer zoneTotalCount, Integer zoneTotalSize, String fileUUID) { return iFileZoneRecordService.zoneUploadSE(file, zoneNowIndex, zoneTotalCount, zoneTotalSize, fileUUID); } }核心实现方法:FileZoneRecordServiceImpl.java package com.example.zhou.service.impl; import com.example.zhou.common.Result; import com.example.zhou.common.ResultCode; import com.example.zhou.config.FileUploadConfig; import com.example.zhou.entity.Archive; import com.example.zhou.mapper.ArchiveMapper; import com.example.zhou.service.IFileZoneRecordService; import com.example.zhou.utils.IdUtils; import lombok.extern.slf4j.Slf4j; import org.apache.commons.io.FileUtils; import org.apache.commons.io.FilenameUtils; import org.apache.commons.lang3.time.DateFormatUtils; import org.springframework.stereotype.Service; import org.springframework.web.multipart.MultipartFile; import javax.annotation.Resource; import java.io.*; import java.nio.file.Path; import java.nio.file.Paths; import java.util.Date; @Slf4j @Service public class FileZoneRecordServiceImpl implements IFileZoneRecordService { @Resource private ArchiveMapper archiveMapper; @Resource private FileUploadConfig fileUploadConfig; public Result zoneUploadSE(MultipartFile multipartFile, Integer currentChunk, Integer zoneTotalCount, Integer zoneTotalSize, String fileUUID) { try { // 获取上传文件的原始文件名和扩展名 String originalName = multipartFile.getOriginalFilename(); String extension = FilenameUtils.getExtension(originalName); // 构建上传路径 String uploadPath = Paths.get(fileUploadConfig.getUploadFolder(), extension).toString(); FileUtils.forceMkdir(new File(uploadPath)); // 创建目录(如果不存在) // 写入临时文件 String tempFileName = (currentChunk != null) ? currentChunk + "_" + fileUUID + "_" + originalName : fileUUID + "_" + originalName; File tempFile = new File(uploadPath, tempFileName); multipartFile.transferTo(tempFile); // 如果是最后一个分片或者只有一个分片,进行合并操作 if (currentChunk == null || (currentChunk == zoneTotalCount - 1)) { // 获取最终文件路径 String finalFileName = fileUUID + "_" + originalName; File finalFile = new File(uploadPath, finalFileName); // 合并分片文件 mergeChunkFiles(uploadPath, fileUUID, originalName, zoneTotalCount, finalFile); // 移动文件到指定目录 示例:pdf/2024/24/uuid.pdf Path filePath = Paths.get(extension, DateFormatUtils.format(new Date(), "yyyy/MM/dd"), IdUtils.fastUUID() + "." + extension); // 移动文件位置到指定文件夹下 FileUtils.moveFile(finalFile, new File(Paths.get(fileUploadConfig.getUploadFolder(), filePath.toString()).toString())); // 保存附件信息到数据库 Archive archive = new Archive(); archive.setSid(IdUtils.fastUUID()); archive.setFileName(filePath.getFileName().toString()); archive.setOriginalName(originalName); archive.setPath(filePath.toString()); archive.setSize(zoneTotalSize != null ? zoneTotalSize : (int) tempFile.length()); archive.setFileType(extension); // 插入数据库 int result = archiveMapper.insert(archive); return new Result(ResultCode.FILEUPLOADED, archive); } } catch (Exception e) { e.printStackTrace(); throw new RuntimeException(e.getMessage()); } return new Result(ResultCode.ZONEUPLOADED, "分片上传成功"); } private void mergeChunkFiles(String uploadPath, String fileUUID, String fileName, Integer zoneTotalCount, File finalFile) throws IOException { long start = System.currentTimeMillis(); try (BufferedOutputStream os = new BufferedOutputStream(new FileOutputStream(finalFile))) { for (int i = 0; i |


【本文地址】
今日新闻 |
推荐新闻 |