Stone Ocean |
您所在的位置:网站首页 › steelocean › Stone Ocean |
Stone Ocean
MangaChapter ListAnime (2021)
For other usages of the term "Stone Ocean", see the disambiguation page.
Stone Ocean
 Japanese Name
ジョジョの奇妙な冒険 Part6ストーンオーシャン
Romanized
Sutōn Ōshan
Genre
Action, Adventure, Supernatural, Drama, Mystery, Tragedy
Years Released
Japanese Name
ジョジョの奇妙な冒険 Part6ストーンオーシャン
Romanized
Sutōn Ōshan
Genre
Action, Adventure, Supernatural, Drama, Mystery, Tragedy
Years Released
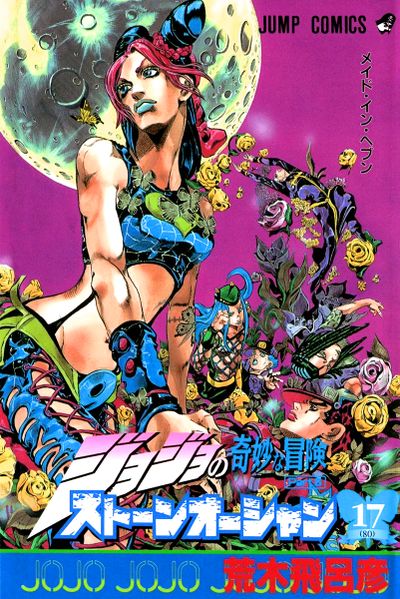
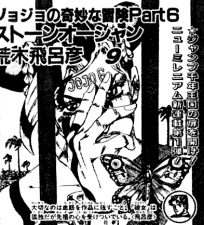
Stone Ocean (ストーンオーシャン, Sutōn Ōshan) is the sixth part of JoJo's Bizarre Adventure. It was originally serialized in Weekly Shonen Jump from December 7, 1999 to April 8, 2003, and was collected into seventeen volumes by Jump Comics. The part received a 2021 anime adaptation by David Production, which began airing worldwide on Netflix on December 1, 2021 and concluded on December 1, 2022. Set in Florida in the year 2011, Jolyne Cujoh, daughter of Jotaro, is wrongfully accused of a crime she didn't commit and sent to a maximum-security prison. While imprisoned, she struggles within a longstanding plot agreed between deceased villain DIO and ideologue Enrico Pucci. Stone Ocean is the last part set in the original timeline of JoJo's Bizarre Adventure: from Steel Ball Run onward, the story takes place in an entirely separate continuity.  Stone Ocean featured on the cover of Weekly Shonen Jump.
Contents
1 Plot Summary
1.1 Framed for Murder
1.2 The Legacy of DIO
1.3 Star Platinum's DISC
1.3.1 Tracking the DISC
1.3.2 Delivery of the Star Platinum DISC
1.4 Ermes's Revenge
1.5 The Ultra Security House Unit
1.6 Prison Escape & The Green Baby
1.7 Tracking Pucci
1.7.1 Prison Escape
1.7.2 DIO's Sons
1.7.3 Orlando
1.8 Cape Canaveral
1.9 The Final Battle
2 Characters & Stands
3 Locations
3.1 Other Maps
4 Gallery
5 Trivia
6 See also
7 References
8 Site Navigation
Plot Summary
Framed for Murder
Main article: Stone Ocean (story arc)
Main article: Prisoner FE40536: Jolyne Cujoh (story arc)
Main article: Stone Free (story arc) Stone Ocean featured on the cover of Weekly Shonen Jump.
Contents
1 Plot Summary
1.1 Framed for Murder
1.2 The Legacy of DIO
1.3 Star Platinum's DISC
1.3.1 Tracking the DISC
1.3.2 Delivery of the Star Platinum DISC
1.4 Ermes's Revenge
1.5 The Ultra Security House Unit
1.6 Prison Escape & The Green Baby
1.7 Tracking Pucci
1.7.1 Prison Escape
1.7.2 DIO's Sons
1.7.3 Orlando
1.8 Cape Canaveral
1.9 The Final Battle
2 Characters & Stands
3 Locations
3.1 Other Maps
4 Gallery
5 Trivia
6 See also
7 References
8 Site Navigation
Plot Summary
Framed for Murder
Main article: Stone Ocean (story arc)
Main article: Prisoner FE40536: Jolyne Cujoh (story arc)
Main article: Stone Free (story arc)
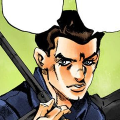
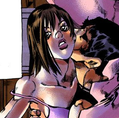
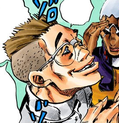
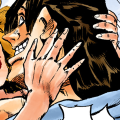
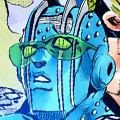
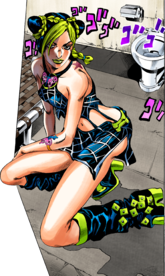 Jolyne Cujoh's first appearance Jolyne Cujoh's first appearance
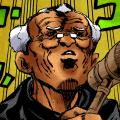
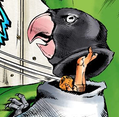
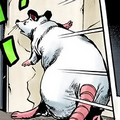
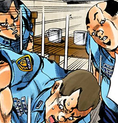
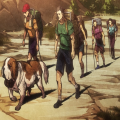
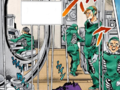
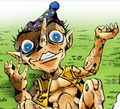
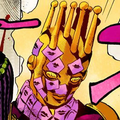
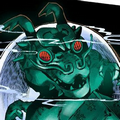
The year is 2011. Jolyne Cujoh is introduced in a Florida detainment facility, claiming to have been framed for murder. She befriends Ermes Costello while being transferred to prison. The circumstances of her accusations are clarified: Jolyne and her boyfriend Romeo Jisso seemingly ran over someone. Romeo, fearful for his future, persuaded Jolyne to not call for help and instead dispose of "the corpse". However, a few days later, Jolyne was arrested. Meeting her attorney, Jolyne also receives items from her parents, among them an amulet on which she pricks herself before tossing it in anger as it came from her father Jotaro Kujo. She soon develops a strange power that allows her to partly unravel herself into string, using it to help Ermes keep her money. Arriving at the famous Green Dolphin Street Prison situated on an island near the coast, Jolyne has nonetheless trouble accustoming herself to the new environment. Jolyne meets her new cellmate Gwess, who initially victimizes her. Jolyne then discovers that Gwess's pet parrot is a shrunken man put inside of a parrot skin. For this discovery, Gwess shrinks Jolyne and puts her in a mouse's corpse to scout for a way to escape the prison. The scout goes badly: Jolyne slowly grows back and is subsequently spotted and attacked by Gwess' Goo Goo Dolls. Fully awakening her Stand, Stone Free, Jolyne forces Gwess to shrink her again and escape the guards, returning to her cell. Having grown, Jolyne begins to affirm her toughness among the other prisoners, at the same time she helps another victimized prisoner gain her money back. The Legacy of DIO Main article: The Visitor (story arc)Jotaro soon comes to visit Jolyne, however, a mysterious child named Emporio Alnino warns her that this is a trap. Jolyne is still forced to meet Jotaro and the conversation is tense, Jolyne hating her father for being absent during her whole youth. Jotaro tells Jolyne that a prisoner named Johngalli A., a disciple of DIO, has framed her so that he could lure Jotaro in and take revenge, Jotaro willfully taking the bait for his daughter. Finally, Jotaro tells Jolyne that he will make her escape the prison. Their discussion is interrupted by an attack by Johngalli A. and his Stand Manhattan Transfer. Being a sniper, Johngalli A. uses Manhattan Transfer to read the wind and detect his targets, but the fight takes a more complex aspect as the JoJos discover that a second enemy Stand is responsible for creating the complex illusion. At a critical point of their escape, Jotaro sees Johngalli A. and the unknown Stand attacking at once and chooses to protect Jolyne. Whitesnake, the second Stand, thus uses its power to remove Jotaro's Stand Star Platinum and Jotaro's memories as two DISCs. Jotaro sinks into a deathlike state but confesses to Jolyne that he's always cherished her. Jolyne, moved, resolves to find a way to recover the DISCs from Whitesnake's mysterious user. She then effortlessly defeats Johngalli A., but loses track of the second Stand. Escaping on the beach with her father and putting him inside a submarine, Jolyne decides to stay behind in prison in order to recover the DISCs Whitesnake stole. Seeing Johngalli A. gravely wounded, Whitesnake executes him to erase any lead toward himself. Star Platinum's DISC Tracking the DISC Main article: Ermes's Sticker (story arc) Main article: There's Six of Us! (story arc) Main article: Foo Fighters (story arc) Main article: Debt Collector Marilyn Manson (story arc)Meanwhile, Ermes Costello has been ill and recovers from a fever in the infirmary. She awakens her Stand Kiss, which can reproduce objects by putting stickers on them, and damage said items when the sticker is removed. Ermes accidentally knocks a memory DISC from fellow prisoner Thunder McQueen, who keeps a hidden $5,000 stash. The suicidal prisoner links himself with Ermes with his Highway to Hell, reflecting any damage done to him on Ermes, so that his death will take her life as well. Ermes successfully escapes. Ermes is then approached by Emporio and is brought to Emporio's secret ghost room where she also meets Narciso Anasui and Weather Report. Emporio explains that Whitesnake's user is the enemy. New wounds warn Ermes that McQueen is trying to kill himself again. Ermes finds him and knocks him out for good, taking his memory DISC to retrieve the money and deciding to fight Whitesnake alongside Jolyne. Jolyne and Ermes volunteer in a search group of five prisoners to look for two missing prisoners and are given explosive bracelets that get set off if they go too far from a supervisor. In the fields, Ermes looks into the memory DISC again, in which another memory indicates a stash of Stand DISCs Whitesnake keeps hidden in a barn nearby. Jolyne and Ermes notice that there are six of them, meaning an enemy infiltrated their group. Their supervisor is killed and dragged away. Jolyne and Ermes have to find the hidden enemy. Sentient plankton colony Foo Fighters (shortened to F.F.) has in fact taken over everyone and begins to fight the two women. Ermes tries to get the supervisor back into a safe range while Foo Fighters is dragged into dry land by Jolyne, almost dying because it's dependency on keeping itself wet. Jolyne spares F.F, since it was coerced into obeying Whitesnake, and F.F. takes over prisoner Atroe's body. Jolyne successfully retrieves Jotaro's Star Platinum DISC and takes it back to prison. It is revealed that the real enemy is the prison priest, Enrico Pucci. Enrico Pucci, a friend of DIO and wielder of Whitesnake, bribes Miraschon into helping him eliminate Jolyne and gives her the Stand Marilyn Manson. Jolyne, Ermes and F.F. play a game of ball catching, and are approached by Miraschon, who bets that they can't pass the ball between themselves 100 times, Ermes eventually cheats, but Marilyn Manson automatically detects it and takes Ermes's liver as payment. Jolyne wagers another ball, but the free time has ended. She and F.F. have to play in the prison and defend themselves from Miraschon. Jolyne eventually forces Miraschon to give back Ermes's liver and pummels her, taking her out indefinitely. Delivery of the Star Platinum DISC Main article: Operation Savage Garden (story arc) Main article: Torrential Downpour Warning (story arc)Jolyne then makes a call to the Speedwagon Foundation to set up a plan to give them the Stand DISC. They agree to meet in the prison courtyard. Jolyne then meets with Emporio and Stand user Weather Report, who can manipulate the atmosphere and various weather phenomenons. They are tailed by Lang Rangler who spits on Jolyne. Jolyne then heads to the courtyard alone but is soon under Lang's influence, which annuls the gravity of anything Jolyne touches. Floating and the atmosphere going away from her, Jolyne calls Weather for help. The two Stand users bring the fight to the factory Jolyne has to cross to reach the courtyard, and they have to fight in zero gravity and airless conditions. Jolyne and Weather defeat Lang Rangler but Weather is too wounded to carry on. Pucci, who traced Jolyne's phone call, incidentally, meets her near the courtyard. Pucci has no choice but to hide his true identity and let Jolyne pass. However, in the courtyard, Jolyne is shot by a guard Whitesnake brainwashed. In a flashback, Pucci talks with DIO. It is explained that Jotaro burned DIO's Diary, which contained a plan to "get to Heaven". Jolyne is incapacitated and loses the Stand DISC, but Weather causes a rain of poisonous frog so Jolyne can escape. Jolyne tries to guard herself from the frogs but is apparently overwhelmed. Pucci is pinned down by the rain and uses Whitesnake to attempt to retrieve Jotaro's Stand DISC, only to be taken by surprise by Jolyne who gives it to Savage Garden, a carrier pigeon which flies away. Ermes's Revenge Main article: Kiss of Love and Revenge (story arc)Jolyne notices that Ermes has been very solitary lately. F.F. explains that Ermes voluntarily came to the prison to kill Sports Maxx, a gangster who murdered Ermes's sister Gloria Costello. Ermes has found him and tailed him to look for the best moment to take her revenge. Incidentally, Maxx has been meeting with Pucci who gave him the Stand Limp Bizkit. Ermes successfully kills Sports Maxx in his animal stuffing room but is attacked by the invisible specters of various stuffed animals. Jolyne and F.F. join her and help her, only for the three to see that Maxx escaped. Maxx notices he's been killed but resurrected into an invisible zombie thanks to Limp Bizkit. Jolyne and Ermes follow Sports Maxx up to a graveyard and are surrounded by numerous zombies. Ermes successfully baits Sports Maxx into giving the finishing blow in a predictable place and time and kills him for good but is gravely wounded in the process. Jolyne retrieves Sports Maxx's memory DISC. The Ultra Security House Unit Main article: The Secret of Guard Westwood (story arc) Main article: Enter the Dragon's Dream (story arc) Main article: Father: Jotaro Kujo, Daughter: Jolyne CujohJolyne is brought to the punishment ward due to having caused much trouble, and stoically endures the harsh conditions inside. Meanwhile, Emporio discovers that Whitesnake used Sports Maxx's Limp Bizkit to revive a mysterious Bone and discovers that it is hidden in the punishment ward. Jolyne has accepted to go there and retrieve the Bone. Knowing that Whitesnake will exploit Jolyne's isolation to try to kill her, F.F. tries to find an ally to get her in the punishment ward. F.F. tries to force Narciso Anasui, the user of Diver Down into helping, and Anasui is extremely cooperative, having fallen for Jolyne. Using Diver Down's power to store energy in a certain place, they successfully begin to infiltrate the punishment ward. In the punishment ward, prison guard Viviano Westwood goes crazy and liberates every prisoner in the punishment ward in a mad eagerness to fight. Meanwhile, Pucci reveals that he sent four Stand users to try to dispose of Jolyne. In a flashback, DIO explains to Pucci how the Stand Survivor manipulates people into fighting others, and how he believes physically it is the weakest stand. As Anasui and F.F. breach the security checkpoints, Jolyne begins to fight Westwood. Westwood is a tough fighter and wields Planet Waves which manipulates small meteors. The fight turns very brutal, and Jolyne manages to bypass Westwood's invulnerability to his meteors by using the meteors to propel his boot toward his face, defeating the guard. She notices that among the remaining prisoners, only two remain. Kenzou, an elderly Stand user and wielder of Dragon's Dream which reveals lucky feng-shui places for maximum killing probability, challenges Jolyne but F.F. intervenes and fights him instead. Kenzou's superior skills almost prevail against F.F. but Anasui intervenes and reveals his ability to restructure anything from the inside, defeating Kenzou when he restructures his legs into springs. Jotaro is seen dormant (in a lotus position) under the care of the Speedwagon Foundation. The doctor reveals that without memory, Jotaro has no will to live and his body is slowly decaying. Jolyne's first arrest is shown in a flashback. Prison Escape & The Green Baby Main article: Birth of the "Green" (story arc) Main article: Yo-Yo Ma Is Coming! (story arc) Main article: F.F. - The Witness (story arc) Main article: AWAKEN (story arc) Main article: Whitesnake - The Pursuer (story arc)Jolyne grabs a prisoner she saw having the Bone in his possession, but he soon transforms into a plant. In the same way every corpse in the punishment ward blooms. The Bone fuses with the plants and develops into an embryo bearing the Joestar birthmark. For his part, Anasui is approached by Guccio who wields Survivor and uses him as a trap against the sole remaining Stand user D an G. Having opted to escape the punishment ward from the eastern exit and reach the nearby swamp, Jolyne, Anasui and F.F. take a motorboat to cross it. However, the embryo which was in their possession is swallowed by the automatic Stand Yo-Yo Ma. Unable to hurt him, F.F. stays behind to kill D an G while Jolyne and Anasui take Yo-Yo Ma on board. Jolyne and Anasui are pursued by the prison guards and have to hide in the swamp. Jolyne realizes that she is slowly being melted by Yo-Yo Ma, but she cannot communicate properly and is incapacitated. At the same time, F.F. discovers that Enrico Pucci is the mastermind behind the attacks. While Anasui has successfully neutralized Yo-Yo Ma by fusing his brain with that of a frog, Pucci celebrates the soon to be born Embryo, but sees that F.F. is planning to kill D an G. The narration explains that F.F. fears having its intellect taken away and how it has come to appreciate its sentience and memories, because it has good memories of Jolyne, F.F. is ready to fight for her. 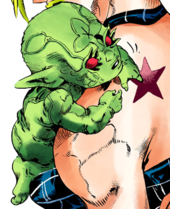 The Green Baby The Green Baby
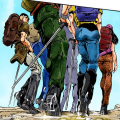
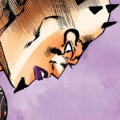
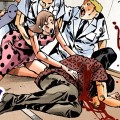
F.F. is confronted by Pucci. While F.F. kills D an G, it is severely wounded in the process and runs out of water. As the priest corners the plankton colony, the Green Baby is born from Yo-Yo Ma's remains. Meanwhile, Jolyne and Anasui try to approach the Green Baby, whose automatic Stand Green, Green Grass of Home attacks them, shrinking them as the distance between the Green Baby and them decreases. The Green Baby becomes interested in Jolyne, specifically her birthmark, and its power disappears. Jolyne and Anasui grow back to a normal height. Almost dead, F.F. contacts Weather Report with a radio, and he uses his weather control power to make it rain and make the area foggy. Whitesnake loses F.F.'s track, and she meets with Weather Report. The four of them meet, but Weather Report was in fact Whitesnake in disguise. Whitesnake heavily wounds F.F. and Anasui but only manages to hurt Jolyne. Pucci reveals himself and approaches the Baby. However, Jolyne cuffs him to herself. A brutal close-quarter fight ensues. In a flashback, DIO gives Pucci one of his finger bones. Jolyne gains the upper hand in the fight, but Pucci throws Jotaro's memory DISC into the dying Anasui, threatening the DISC to disappear forever. Jolyne opts to try helping Anasui to get the DISC, and Pucci approaches the Green Baby, telling him the 14-word long secret password which causes the Baby to touch Pucci and fuse with him. Jolyne cannot help Anasui, but he is saved when F.F. sacrifices the rest of its plankton to heal him, and F.F. exchanges a last goodbye with the helpless Jolyne. Tracking Pucci Prison Escape Main article: Jail House Lock! (story arc)A transformed Pucci leaves the prison, having no use for it anymore. DIO's entire plan is revealed, most importantly that Pucci needs to head for the location with the coordinates North latitude 28 degrees 24 minutes, West longitude 80 degrees, 36 minutes. Having read Jotaro's memory DISC, Jolyne asks Emporio to help her escape Green Dolphin Street. However, Emporio says that escape is impossible because of the true guardian of Green Dolphin Street who can make escape impossible even for Stand Users. Miuccia Miuller, aka Miu Miu, approaches Jolyne with her Stand Jail House Lock fully revealed, warning Jolyne not to do anything stupid. Jolyne attacks Miu Miu but suddenly finds herself in her cell. Jolyne is affected by Jail House Lock and cannot memorize more than three new pieces of information at a time, and although she tries to reach Emporio, she is heavily handicapped by this power. Meanwhile, Emporio was also caught and is also trapped in his room, unable to remember how to escape. Jolyne manages to reach the ghost room, but they are caught up by Miu Miu. When Jolyne is given a picture in binary of Miu Miu, Jolyne manages to defeat her and use her to neutralize the guards. Several strange phenomena happen around Pucci, who is startled and unsure of what's happening. Jolyne, Ermes, and Emporio escape from prison and carry on their hunt for Pucci. DIO's Sons Main article: Bohemian Rhapsody (story arc) Main article: Sky High (story arc)Pucci is brought by a series of coincidences near a hospital. He is taken hostage by Ungalo but Pucci tells him to awaken his power. Ungalo falls on the ground, disturbed, but is picked up by the stick figure in traffic regulation panels. In prison, Anasui notices that a star-shaped birthmark has appeared near Weather's shoulder and Weather announces his intention to escape too. After a time skip of three days, Anasui and Weather are hiding in the toilets, their evasion having been noticed and they are now fugitive. An old man Weather has helped before accepts to take them in his truck. Weather and Anasui realize that fictional characters are coming into life, and Anasui's soul is cloned. The truck crashes. Destroying Pinocchio, Anasui is one body again. Attacked by the old man who transformed into the Big Bad Wolf, Anasui is separated from Weather who took a bus without paying attention to his surroundings. Chasing his double through the town, Anasui is dragged into the story of the Seven Lambs and the wolf, and cast as the Wolf, Mother Goat threatens to cut his stomach open and fill it with rocks. Anasui tries to flee but has a hard time escaping Mother Goat and her children. Meanwhile, Weather Report is dragged into Vincent van Gogh's last autoportrait, and cast as Van Gogh, is fated to shoot himself in the head. Weather tries to stop the aggressor, whom he senses via the birthmark but Ungalo is actually on a plane enjoying the world scale chaos bringing every fictional character to life causes. When Weather invents a hero whose power is to eliminate all fantasy heroes, Ungalo's Bohemian Rhapsody is canceled and he falls into a coma, having lost his drive with his Stand. The story then goes back to 8 hours after Jolyne escapes prison. Romeo finds Jolyne in his house and begs for forgiveness. Jolyne lets him be and asks him for a vehicle. Romeo gives them the key to a helicopter and gives the police a false lead. Still, Jolyne cuts his tongue as revenge. We are introduced to Rikiel a nervous wreck of a young man, who is constantly ill. Pucci enables him to master his Stand Sky High, manipulating the cryptids Flying Rods. Jolyne, Ermes and Emporio crash when the Flying Rods attack them and cause their eyelids to close. The Rods suck body heat causing various illnesses and Jolyne sets herself on fire to counter them, defeating Rikiel. When Rikiel reveals that Pucci and Weather are brothers, Ermes puts him out of commission. Jolyne tracks Pucci up to the hospital where he's hiding and discussing with DIO's last son, Donatello Versus. Donatello awakens his Stand and strangely a child appears in their dish and a bullet comes through its head. Orlando Main article: Under World (story arc) Main article: Heavy Weather (story arc)Jolyne finds Donatello's room and sees a huge hole leading to an underground cavern. Deciding to investigate, Jolyne finds herself in a plane that is scheduled to crash. Donatello's Under World can revive memories of the ground and materialize them, having materialized said crash and imprisoning Jolyne in it. Ermes is dragged into the memory as well. A flashback narrates Donatello's misfortunes and the resentment he has toward the world. Jolyne contacts Emporio who stayed out of the hospital, and he finds that some passengers survived the crash. Jolyne and Ermes take their place and also save hapless children in the process. Defeated, Donatello commands his Stand to flee and give Weather Report his memory DISC back, to Pucci's horror, as he has unleashed a terrible power. Weather Report receives his memory DISC, re-releasing his rage at his brother Pucci, which manifests as the phenomenon Heavy Weather, which hypnotizes people into transforming into snails with refracted sunlight. A flashback narrates both Weather and Pucci's tragic past, how Pucci came to meet DIO, and how Weather and he got their Stands. Having lost his sister, Pucci fell into despair, just as Weather who lost his girlfriend. Jolyne and Ermes manage to escape the hospital, but as they are transforming into snails, they force Donatello to drive. Meanwhile, Pucci finds Weather and Anasui to kill them. Pucci rendered himself blind to stop the suggestion and fatally wounds Weather Report, but Weather takes advantage of this to almost kill him. When Donatello crashes on Weather and Pucci, the priest escapes and Weather dies. Jolyne acquires Weather's Stand DISC and gives it to Emporio just in case. Cape Canaveral Main article: Gravity of the New Moon (story arc) Main article: C-MOON (story arc)The entire party drives toward Cape Canaveral, the location indicated in DIO's Diary, resting and having fun while they can. As Pucci nears the ideal conditions, he awakens a new power. The gravity shifts around Cape Canaveral, objects falling away from it, and Ermes is pushed away. When the rest of the party reach Cape Canaveral, they don't find Pucci but are attacked by the Stand C-MOON. C-MOON can turn any object it hits on itself. It fights Jolyne and although it almost defeats her, Jolyne gains the upper hand. Pucci intervenes and commands C-MOON more precisely, hitting her in the chest and her torso turns on itself. With Jolyne dead, Pucci proceeds to track Anasui. Emporio gets a phone call from Jotaro who reveals that Jolyne is still alive. Pucci is attacked by Jolyne who used Mobius Strips' property to cancel C-MOON's attack. Time stops and Star Platinum punches Pucci. Jotaro and Ermes managed to reach Cape Canaveral as well. Cornered, Pucci realizes that he can reproduce the gravitational conditions specified on the Diary by floating to a different location. As he reaches the final stage, Made in Heaven appears and engulfs everyone in light. The Final Battle Main article: Made in Heaven (story arc)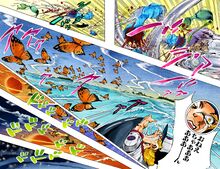 Jolyne's death Jolyne's death
Everyone wakes up, and the heroes realize that time is accelerating. The entire world is affected by the time acceleration and chaos spreads. In Cape Canaveral, Pucci isn't affected by the flow of time like everyone else and proceeds to hunt down the heroes. The party flees up to the ocean, where they expect to see Pucci coming. Pucci attacks, and Jotaro stops time, however, he sees that knives are falling toward Jolyne, he pulls her out of danger's way and attack Pucci but fails to hit him when time resumes. Jotaro's head is split in two, Anasui is killed as well as Ermes, and Jolyne receives a knife in the stomach anyway, sinking into the water. Emporio faces Pucci, but Jolyne hasn't died yet. Blinding him partially with a knife, Jolyne ties Emporio to a dolphin which swims away and sacrifices herself to delay Pucci. Time accelerates to an insane speed, and every living thing is brought into a vortex.  End of Stone Ocean End of Stone Ocean
Emporio awakens in Green Dolphin Street Prison, and soon sees alternate versions of Jolyne and Jotaro. Pucci suddenly appears and begins tracking the terrified child, explaining that he accelerated time past a singularity point and brought all living beings into the universe succeeding the original one. As a result, everyone now bears subconscious knowledge of their future, and can find peace by accepting their fate. As Emporio enters his ghost room, Pucci extends his arm to kill the child, only to be tricked into inserting Weather Report's DISC into him. Emporio uses Weather Report to create a concentration of pure oxygen in his room, poisoning both himself and Pucci, the latter being affected faster due to his ability. Unable to cancel time's acceleration and powerless to prevent the future from changing, Pucci can only yell in desperation as Weather Report finishes him off. The universe reaches another singularity point, and a new universe is created. Finding himself outside the prison, Emporio meets his companions in alternate reincarnated forms. Seeing the reincarnated Jolyne (now named Irene) bearing the Joestar birthmark, Emporio can only cry as she brings him into the car of the reincarnated Anasui (now named Anakiss) as they drive their way to meet Irene's father. Characters & Stands Show StandsShow Characters Characters and Stands from Stone Ocean
 AllySavage Garden AllySavage Garden
 AntagonistCorrupt Lawyer AntagonistCorrupt Lawyer NeutralRods NeutralRods NeutralRomeo Jisso NeutralRomeo Jisso NeutralLoccobarocco NeutralLoccobarocco NeutralCurly-Haired Prisoner NeutralCurly-Haired Prisoner NeutralAtroe NeutralAtroe NeutralSonny Likir NeutralSonny Likir NeutralVan Gogh's Self-Portrait NeutralVan Gogh's Self-Portrait NeutralJolyne's Mother NeutralJolyne's Mother PosthumousGloria Costello PosthumousGloria Costello
 PosthumousPerla Pucci PosthumousPerla Pucci NeutralIrene NeutralIrene NeutralAnakiss NeutralAnakiss NeutralEldis
Minor / Unnamed Characters NeutralEldis
Minor / Unnamed Characters
 Hitchhiker Hitchhiker
 Jolyne and Ermes's Co-Prisoners Jolyne and Ermes's Co-Prisoners
 Escort Policeman Escort Policeman
 Judge in Jolyne's Trial Judge in Jolyne's Trial
 Strip Search Staff Strip Search Staff
 Prison Doctor Prison Doctor
 Transgender Prisoner Transgender Prisoner
 Prison Hairdresser Prison Hairdresser
 Pi-chan Pi-chan
 Gwess's Rat Gwess's Rat
 Female Ward Security Staff Female Ward Security Staff
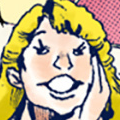
 Blonde Bully Blonde Bully
 Cornrows Bully Cornrows Bully
 Bullied Prisoner Bullied Prisoner
 Prison Visit Guard Prison Visit Guard
 Emporio's MotherUnnamed Stand Emporio's MotherUnnamed Stand
 Suicidal Woman Suicidal Woman
 Missing Prisoners Missing Prisoners
 Search Party Guard Search Party Guard
 Shaved-Head Prisoner Shaved-Head Prisoner
 Black-Haired Prisoner Black-Haired Prisoner
 Tanned Prisoner Tanned Prisoner
 F.F.'s Would-be Bully F.F.'s Would-be Bully
 Courtyard Guard Courtyard Guard
 SPW Found. Representative SPW Found. Representative
 Factory Guard Factory Guard
 Surveillance Technician Surveillance Technician
 Brainwashed Courtyard Guard Brainwashed Courtyard Guard
 Blinded Courtyard Guard Blinded Courtyard Guard
 Ermes and Gloria's Father
Ermes and Gloria's MotherAnime Ermes and Gloria's Father
Ermes and Gloria's MotherAnime
 Invisible Alligator Invisible Alligator
 Sharon Sharon
 Max. Security Inmates Max. Security Inmates
 Anasui's Former Girlfriend Anasui's Former Girlfriend
 Group of Hikers Group of Hikers
 Mountain Investigation Team Mountain Investigation Team
 Little Prisoner Little Prisoner
 Kenzou's Cultists Kenzou's Cultists
 SPW Doctors SPW Doctors
 David David
 David's Father David's Father
 Swamp Searching Party Swamp Searching Party
 Ron the Viper Ron the Viper
 Shoplifter Shoplifter
 Stick Figure Stick Figure
 Elderly Former Carpenter Elderly Former Carpenter
 Mickey Mickey
 Pinocchio Pinocchio
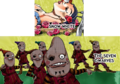 Snow White & 7 Dwarfs Snow White & 7 Dwarfs
 Misc. Robots Misc. Robots
 Big Bad Wolf Big Bad Wolf
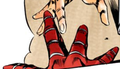 Spider-Man
BatmanAnime Spider-Man
BatmanAnime
 Chocolate Store Clerk Chocolate Store Clerk
 Kenshiro
Raoh Kenshiro
Raoh
 Mother Goat and Seven Young Goats Mother Goat and Seven Young Goats
 Prince Charming Prince Charming
 Venus Venus
 Peter Pan and Tinker Bell Peter Pan and Tinker Bell
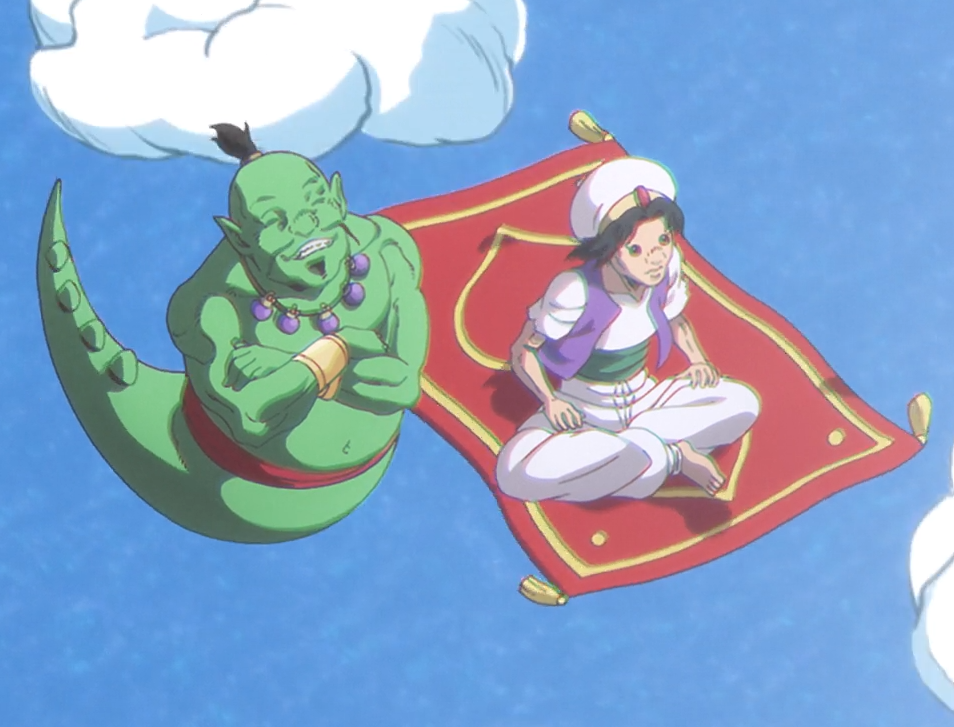 Aladdin and The GenieAnime Aladdin and The GenieAnime
 Book-Reading Girl Book-Reading Girl
 Put Back Put Back
 Mike Mike
 Mike's Parents Mike's Parents
 Memory of Sports Maxx Memory of Sports Maxx
 Sergeant McCoy Sergeant McCoy
 Versus's Family Versus's Family
 Judge In Versus's Trial
Ichiro
Professional Thief Judge In Versus's Trial
Ichiro
Professional Thief
 Juvenile Detention Inmate Juvenile Detention Inmate
 Wes Bluemarine Wes Bluemarine
 Wes's Mother
Pucci's Great-Grandmother
Pucci's Ancestor Wes's Mother
Pucci's Great-Grandmother
Pucci's Ancestor
 Pucci's Parents Pucci's Parents
 Racist Detective Racist Detective
 Snail Eaters Snail Eaters
 Nice Tourist Nice Tourist
 Tourist Killed by C-MOON Tourist Killed by C-MOON
 MIH Victims MIH Victims
 Miss Jones
Yoshimura Miss Jones
Yoshimura
 Rocky Rocky
 Kenichi Kenichi
 Jolyne's Doppelgänger Jolyne's Doppelgänger
 Jotaro's Doppelgänger Jotaro's Doppelgänger
 Alternate Weather
Eldis’s Sister
Irene's Father
Locations Alternate Weather
Eldis’s Sister
Irene's Father
Locations
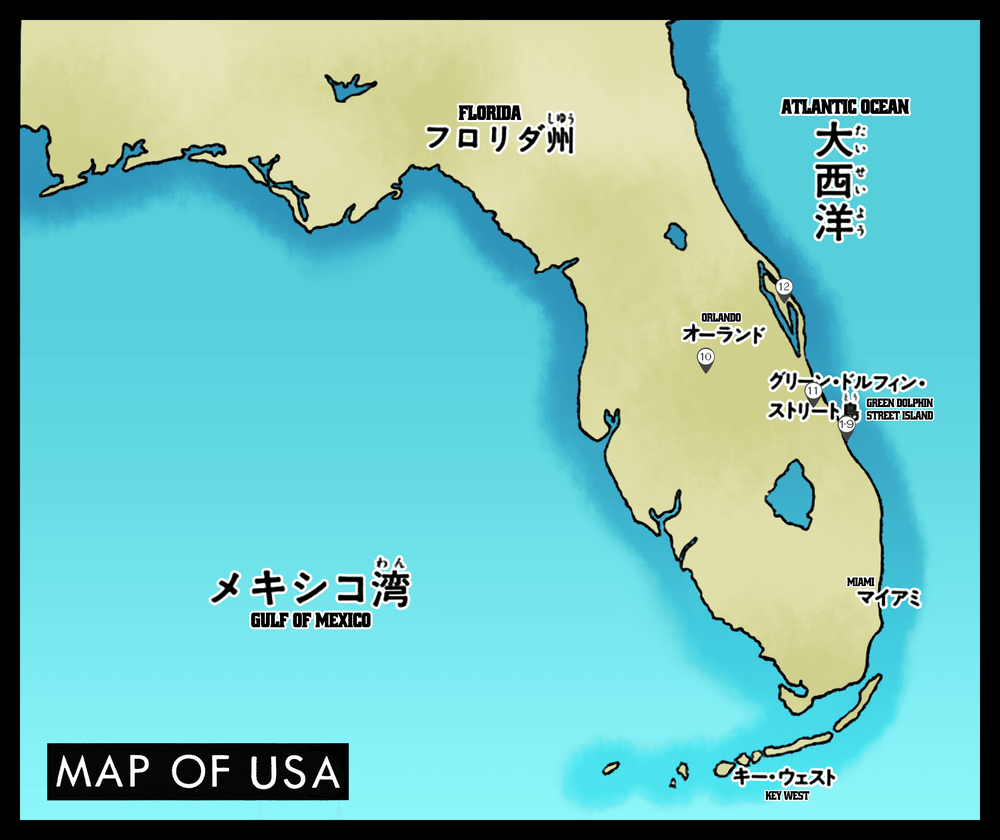
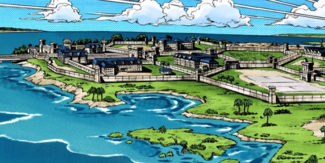
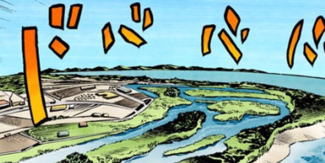
As protagonist Jolyne Cujoh is an inmate, the majority of Stone Ocean occurs in or around Green Dolphin Street Prison, a fictional prison on the Atlantic Coast of Central Florida. After escaping, Cujoh's group travels a short route across Florida to Cape Canaveral and the Kennedy Space Center. Locations from Stone Ocean G.D. Street Prison G.D. Street Prison Kennedy Space Center Kennedy Space Center Minor Locations Minor Locations
 MAP LEGEND
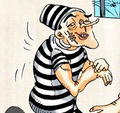
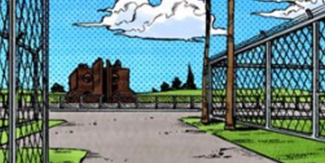
 "The main prison is operating at maximum security LEVEL 4! Your prisoner number will be FE-40536! When we call you by this number, even if you're in the bathroom or eating, we're calling for you! Stamp it in your brain!"
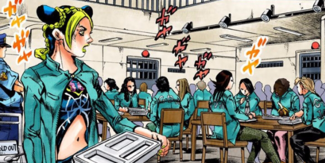 You're free to sleep in and you're free to come late, but if you come late, the food is gone. It's explained as one of the seven mysteries of the prison...
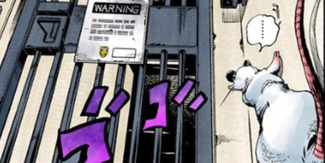 This prison possesses the right to shoot and kill without warning anyone who proceeds beyond this corridor without permission.
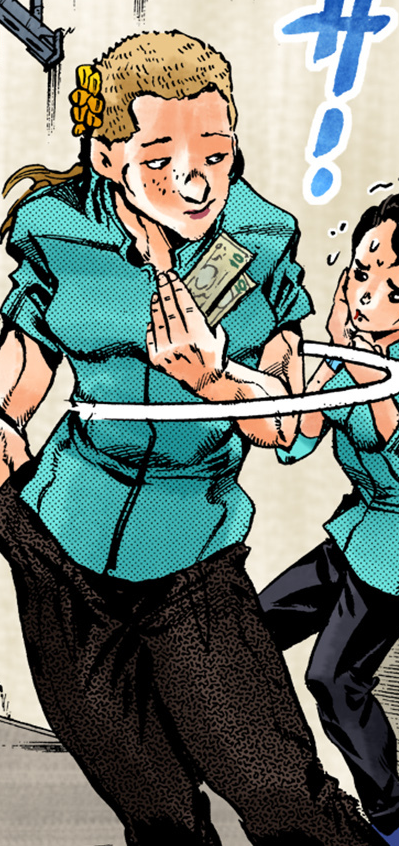
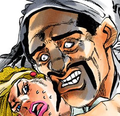
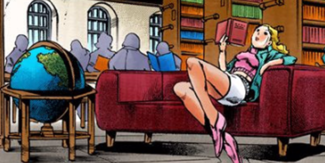 After Gwess warns Jolyne that if a rumor gets out that she failed to collect even one dollar back from who she lent it to, Jolyne heads to the library with a secret plan.
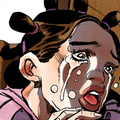
 When Jolyne wakes up with a pain in her finger, she realizes that she and Jotaro, who came to visit her, were trapped in a hallucination until now. Where did the hallucination come from, and was there really an attack by Johngalli A.?
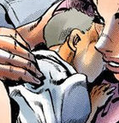
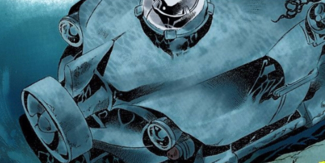 The pendant that Jotaro gave to Jolyne had a built-in transmitter, and the escape submarine was set to automatically track it.
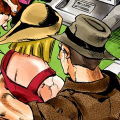
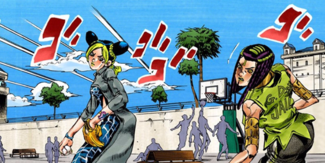 "The name's Miraschon. Did you say you were at 87 throws? If you guys can't get to 100 throws in your little game of catch... I get 100 bucks."
 In order to get the Speedwagon Foundation to retrieve the DISC, Jolyne rushes into the courtyard with deadly determination, but is shot by the guards on watch. In a desperate pinch, Weather Report takes an extremely bizarre measure...
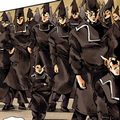
 One meal a day and one shower a day. Nothing else here! No permission to work! No reading! No phone calls! No permission to carry things! No permission to walk! You don't even have permission to talk!
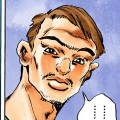
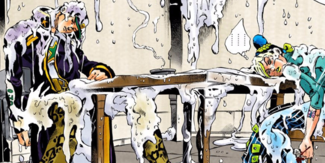
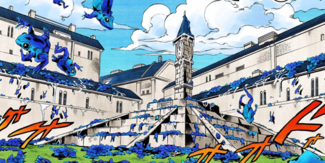
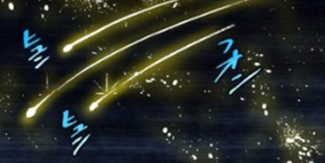 The letters on the sign, the numbers on the meter, the book he is reading, and the number of shooting stars... Everything pointed to the number "3". Father Pucci meets three men at this hospital that he stopped by.
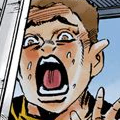
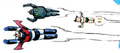
 An emergency occurs where all the occupants of the helicopter have their eyelids forced shut. Determining that they are being attacked by an unidentified enemy, Jolyne makes the unexpected choice to abandon the helicopter!
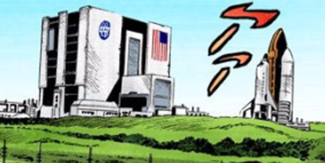 Cape Canaveral is located at 28 degrees 24 minutes north latitude and 80 degrees 36 minutes west longitude on a vast 34,000-hectare island jutting into the Atlantic Ocean on the Florida peninsula. The Kennedy Space Center has been here since the 1950s.
Other Maps
Cape Canaveral is located at 28 degrees 24 minutes north latitude and 80 degrees 36 minutes west longitude on a vast 34,000-hectare island jutting into the Atlantic Ocean on the Florida peninsula. The Kennedy Space Center has been here since the 1950s.
Other Maps
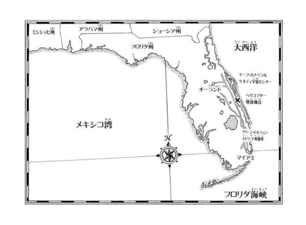
Map of Florida Gallery

Stone Ocean logo 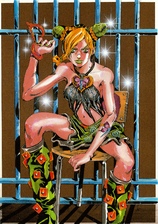
Volume 1 Cover 
Volume 2 Cover 
Volume 3 Cover 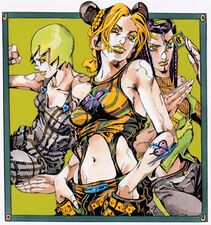
Volume 4 Cover 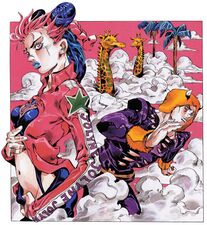
Volume 5 Cover 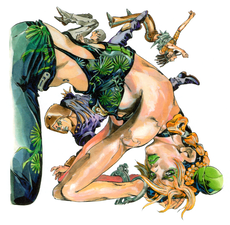
Volume 6 Cover 
Volume 7 Cover 
Volume 8 Cover 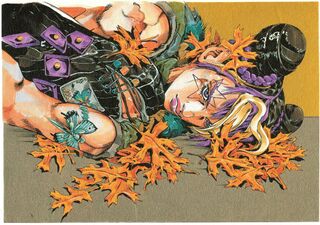
Volume 9 Cover 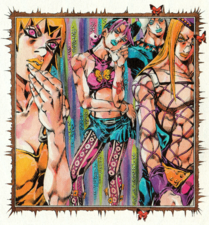
Volume 10 Cover 
Volume 11 Cover 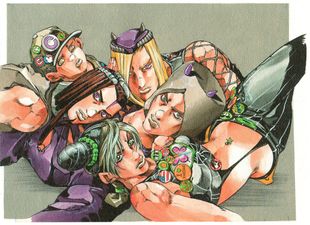
Volume 12 Cover 
Volume 13 Cover 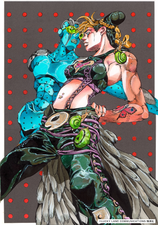
Volume 14 Cover 
Volume 15 Cover 
Volume 16 Cover 
Volume 17 Cover
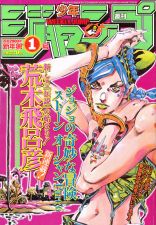
Stone Ocean announcement, Weekly Shonen Jump 2000 Issue #1 
Jump Festa Poster (2000) 
WSJ 2000 Issue #1 Cover Illustration 
WSJ 2000 Issue #1 (Inside Illustration) 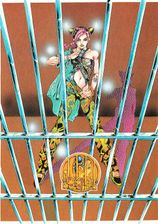
WSJ 2000 Issue #1 (Title Page) 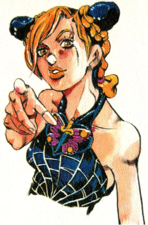
WSJ 2000 Issue #3-4 Cover Illustration 
WSJ 2000 Issue #9 Issue Illustration 
WSJ 2000 Issue #3-4 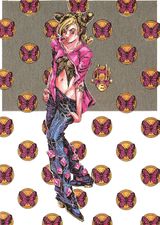
WSJ 2000 Issue #12 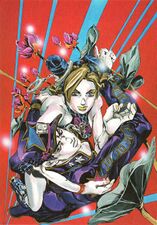
WSJ 2000 Issue #17 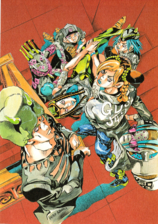
WSJ 2000 Issue #30 
WSJ 2001 Issue #5-6 Cover Illustration 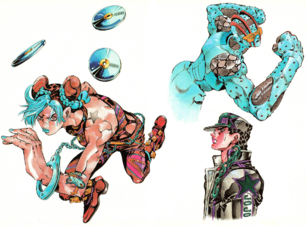
WSJ 2001 Issue #8 Cover Illustration 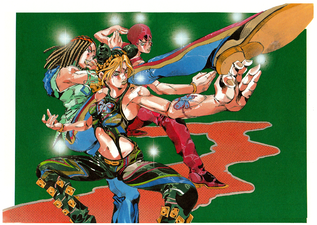
WSJ 2001 Issue #8 Cover Illustration 
WSJ 2001 Issue #21-22 Cover Illustration 
WSJ 2001 Issue #27 
WSJ 2002 Issue #4-5 Cover Illustration 
WSJ 2002 Issue #8 Cover Illustration 
WSJ 2002 Issue #8 Cover Illustration 
WSJ 2002 Issue #8 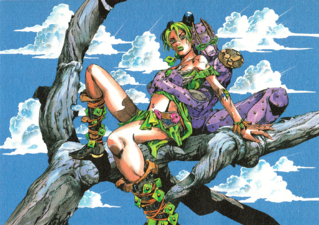
Ultra Jump January 2003 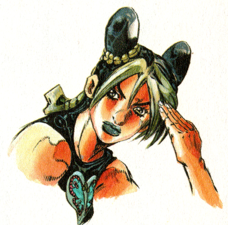
WSJ 2002 Issue #5 Cover Illustration 
WSJ 2002 Issue #6-7 Cover Illustration 
WSJ 2002 Issue #12 Cover Illustration 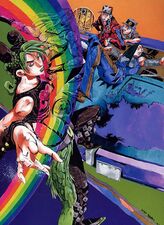
WSJ 2002 Issue #12 
JOJO IN PARIS 2003 Exhibition "Jolyne in Spring" 
WSJ 2003 Issue #20 "The Matrix Reloaded Support Project" 
JOJO x BEAMS 
JOJO x BEAMS 
JOJO x BEAMS 
SO Volume 1 through 17 spine art 
Alternate Volume 1 through 17 spine art 
Jump Festa 2001 - Jolyne & Jotaro (Autograph Session) 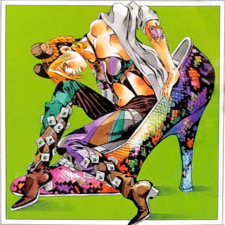
Hirohiko Araki Autograph Postcard 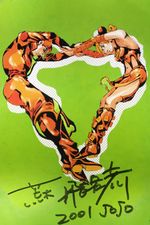
Hirohiko Araki Autograph Postcard 
Hirohiko Araki Autograph Postcard 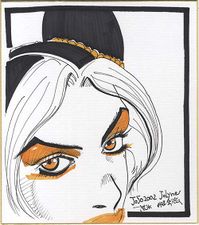
Hirohiko Araki Autograph Postcard 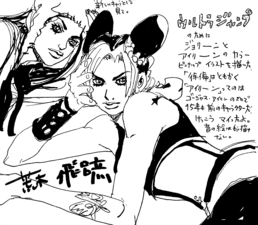
Ultra Jump January 2003 - Jolyne Cujoh & Irene Rapona 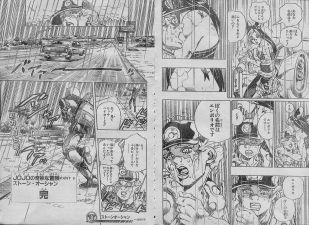
Original "The End" page of Part 6 (WSJ version) 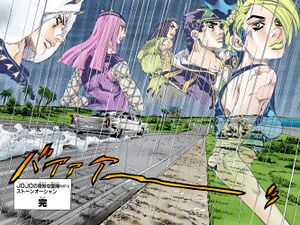
Current "The End" page of Part 6 (Tankobon version)
WSJ 2000 Issue #1, SO Chapter 1 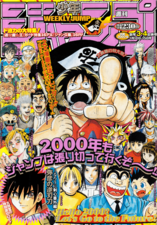
WSJ 2000 Issue #3-4, SO Chapter 3 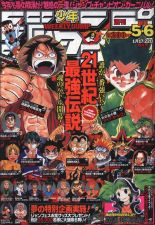
WSJ 2001 Issue #5-6, SO Chapter 52 
WSJ 2001 Issue #8, SO Chapter 54 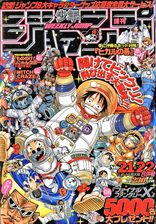
WSJ 2001 Issue #21-22, SO Chapter 67 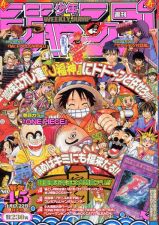
2002 Issue #4-5, SO Chapter 99 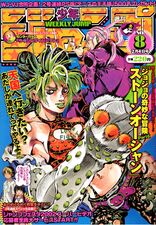
WSJ 2002 Issue #8, SO Chapter 101 
WSJ 2003 Issue #5, SO Chapter 145 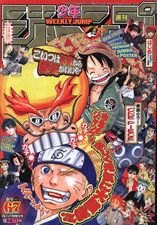
WSJ 2003 Issue #6-7, SO Chapter 146 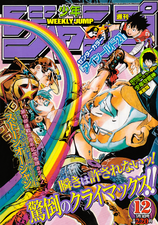
WSJ 2003 Issue #12, SO Chapter 151
SO Chapter 1 
SO Chapter 2 
SO Chapter 3 
SO Chapter 4 
SO Chapter 5 
SO Chapter 6 
SO Chapter 7 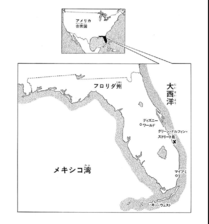
SO Chapter 10 
SO Chapter 13 
SO Chapter 14 
SO Chapter 15 
SO Chapter 18, A 
SO Chapter 18, B 
SO Chapter 28 
SO Chapter 29 
SO Chapter 30 
SO Chapter 31 
SO Chapter 38 
SO Chapter 39 
SO Chapter 40 
SO Chapter 44 
SO Chapter 46 
SO Chapter 47 
SO Chapter 48 
SO Chapter 49 
SO Chapter 50 
SO Chapter 51 
SO Chapter 52 
SO Chapter 55 
SO Chapter 56 
SO Chapter 57 
SO Chapter 58 
SO Chapter 59 
SO Chapter 64 
SO Chapter 65 
SO Chapter 68 
SO Chapter 69 
SO Chapter 70 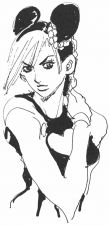
SO Chapter 74 
SO Chapter 75 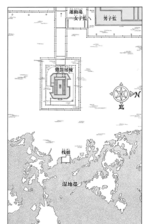
SO Chapter 76 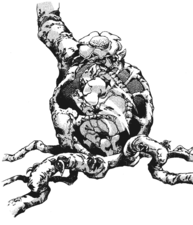
SO Chapter 77 
SO Chapter 79 
SO Chapter 80 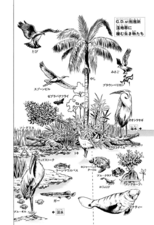
SO Chapter 84 
SO Chapter 85 
SO Chapter 89 
SO Chapter 91 
SO Chapter 92 
SO Chapter 93 
SO Chapter 94 
SO Chapter 95 
SO Chapter 96 
SO Chapter 102 
SO Chapter 103 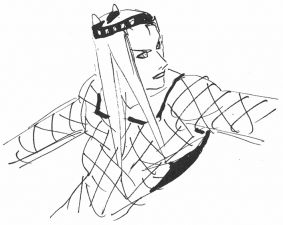
SO Chapter 104 
SO Chapter 105 
SO Chapter 106 
SO Chapter 107 
SO Chapter 109 
SO Chapter 111 
SO Chapter 112 
SO Chapter 113
SO Chapter 114 
SO Chapter 115, B 
SO Chapter 118 
SO Chapter 119 
SO Chapter 122 
SO Chapter 123 
SO Chapter 124 
SO Chapter 125 
SO Chapter 127 
SO Chapter 128 
SO Chapter 129 
SO Chapter 130 
SO Chapter 131 
SO Chapter 134 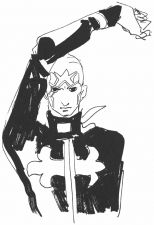
SO Chapter 136 
SO Chapter 137 
SO Chapter 138 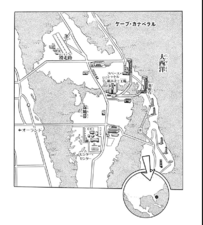
SO Chapter 139 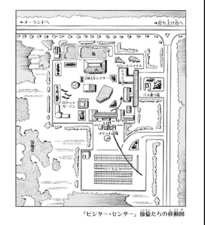
SO Chapter 140 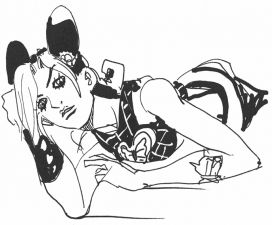
SO Chapter 141 
SO Chapter 142 
SO Chapter 144 
SO Chapter 145 
SO Chapter 147 
SO Chapter 148 
SO Chapter 150 
SO Chapter 151 
SO Chapter 152 
SO Chapter 153 
SO Chapter 155 
SO Chapter 157 Trivia Araki stated that towards the end of Stone Ocean's serialization, he felt as if he reached the peak of both his creativity and career. Upset by this, he changed the ending in the final few chapters to deliver an ending that would return the JoJo series back to its roots; a concept he would continue in Steel Ball Run.[1] In this part, many characters' names are derived from fashion brands instead of music references. According to Araki, the "Stone" of "Stone Ocean" is the will of Jolyne, while "Ocean" symbolizes women altogether.[2] In a 2015 poll on Charapedia, Japanese readers ranked Stone Ocean in the 17th place of the most shocking ending of all time in manga and anime.[3] See also Part 6 Interviews References ↑ Interview:Stone Ocean Bunko Vol. 11 (February 2009) ↑ Interview:Stone Ocean Bunko Vol. 1 (April 2008) ↑ https://www.charapedia.jp/research/0077/ Site Navigation Other languages: English • Deutsch • français • polski • português do Brasil veJoJo's Bizarre AdventurePeople Hirohiko Araki Lucky Land Communications Staff MangaList of Chapters Japanese |


【本文地址】
今日新闻 |
推荐新闻 |