Python3 Requests 模块 |
您所在的位置:网站首页 › python37怎么保存 › Python3 Requests 模块 |
Python3 Requests 模块
|
Requests模块是第三方模块,需要预先安装,requests模块在python内置模块的基础上进行了高度的封装,从而使得python进行网络请求时,变得更加简洁和人性化。 1.安装非常简单,打开cmd,直接pip安装,或pycharm 中搜索 requests 安装即可. pip install requests2.导入模块 import requests3.简单使用 Get 请求 发送无参数的get请求,尝试获取某个网页. r = requests.get('http://www.baidu.com')发送无参数的get请求 设置超时时间 timeout 单位秒 r = requests.get('http://www.baidu.com', timeout=1)发送带参数的请求. 你也许经常想为 URL 的查询字符串(query string) 传递某种数据。如果你是手工构建 URL,那么数据会以键/值对的形式置于 URL 中,跟在一个问号的后面。例如, www.baidu.com/?key=val。 Requests 允许你使用 params 关键字参数,以一个字符串字典来提供这些参数。举例来说,如果你想传递 key1=value1 和 key2=value2 到 www.baidu.com/ ,那么你可以使用如下代码: payload = {'key1': 'value1', 'key2': 'value2'} r = requests.get("https://www.baidu.com/", params=payload) print(r.url) https://www.baidu.com/?key2=value2&key1=value1你还可以将一个列表作为值传入. payload = {'key1': 'value1', 'key2': ['value2', 'value3']} r = requests.get('http://www.baidu.com/', params=payload) print(r.url) http://www.baidu.com/?key2=value2&key2=value3&key1=value1定制请求头如果你想为请求添加 HTTP 头部,只要简单地传递一个 dict 给 headers 参数就可以了 url = 'https://www.baidu.com/s?wd=python' headers = { 'Content-Type': 'text/html;', 'User-Agent' : 'Mozilla/5.0 (Windows NT 10.0; Win64; x64)' } r = requests.get(url,headers=headers)Response对象使用. r.url #打印输出该 URL r.headers #以字典对象存储服务器响应头,但是这个字典比较特殊,字典键不区分大小写,若键不存在则返回None r.status_code #返回连接状态,200正常。 r.text #默认以unicode形式返回网页内容,也就是网页源码的字符串。 r.content #以字节形式(二进制)返回。字节方式的响应体,会自动为你解码 gzip 和 deflate 压缩。 r.json() #把网页中的json数据转成字典并将其返回。 r.encoding #获取当前的编码 r.encoding = 'ISO-8859-1' #指定编码,r.text返回的数据类型,写在r.text之前。POST 请求 HTTP 协议规定 POST 提交的数据必须放在消息主体(entity-body)中,但协议并没有规定数据必须使用什么编码方式,服务端通过是根据请求头中的Content-Type字段来获知请求中的消息主体是用何种方式进行编码,再对消息主体进行解析。具体的编码方式包括: 1.最常见post提交数据的方式,以form表单形式提交数据 application/x-www-form-urlencoded2.以json串提交数据。 application/json3.一般使用来上传文件 multipart/form-data实例如下: 1. 以form形式发送post请求 Reqeusts支持以form表单形式发送post请求,只需要将请求的参数构造成一个字典,然后传给requests.post()的data参数即可 payload = {'key1': 'value1', 'key2': 'value2' } r = requests.post("http://httpbin.org/post", data=payload) print(r.text) ... "form": { "key1": "value1", "key2": "value2" }, ...2. 以json形式发送post请求可以将一 json串传给requests.post()的data参数, url = 'http://httpbin.org/post' payload = {'key1': 'value1', 'key2': 'value2'} r = requests.post(url, data=json.dumps(payload)) #print(r.text) print(r.headers.get('Content-Type')) application/json3. 以multipart形式发送post请求Requests也支持以multipart形式发送post请求,只需将一文件传给requests.post()的files参数即可,文本文件report.txt的内容只有一行:Hello world!,从请求的响应结果可以看到数据已上传到服务端中。 url = 'http://httpbin.org/post' files = {'file': open('report.txt', 'rb')} r = requests.post(url, files=files) print(r.text) { ... "files": { "file": "hello world" }, "form": {}, "headers": { "Content-Type": "multipart/form-data; boundary=6db46af64e694661985109da21c8fe9b", }, "json": null, "origin": "223.72.217.138", "url": "http://httpbin.org/post" ... }
实例: 1.下载单张图片并保存到本地磁盘目录. #!/usr/bin/env python #coding:utf-8 import requests import os # 下载图片URL url = 'https://ss0.bdstatic.com/5aV1bjqh_Q23odCf/static/superman/img/logo/bd_logo1_31bdc765.png' # 保存地址 path = "D://图片//" # 构造下载图片url down = path + url.split('/')[-1] #print(down) # D://图片//bd_logo1_31bdc765.png try: # 判断目录是否存在 if not os.path.exists(path): os.mkdir(path) # 如果url不存在,则开始下载 if not os.path.exists(down): r = requests.get(url) print(r) # 开始写文件,wb代表写二进制文件 with open(down,'wb') as f: # 图片以二进制形式保存(r.content) f.write(r.content) print("图片下载成功") else: print("图片已经存在.") except Exception as e : print("爬取失败:",str(e))2.使用requests模块和bs4模块,抓取贴吧图片并保存到指定目录,这个保存的图片名称可能会比较的长,后面会处理. #!/usr/bin/env python #coding:utf-8 import requests from bs4 import BeautifulSoup import os #图片保存路径: path = "D://爬虫专用//" URL = 'http://tieba.baidu.com/p/1753935195' html_page = requests.get(URL) #创建BeautifulSoup对象 soup = BeautifulSoup(html_page.text,'html.parser') #通过class="BDE_Image"获取所有的img 标签 class_image = soup.findAll(attrs={"class":"BDE_Image"}) print(class_image) #判断目录是否存在 if not os.path.exists(path): os.mkdir(path) try: # 循环class_image列表,找到所有img标签的链接 for i in class_image: #取出src对应的url地址 src_url = i.get('src') #请求src_url链接地址 imge_list = requests.get(src_url) #构造url名称 down = path + src_url.split('/')[-1] print(down) #以二进制保存图片 with open(down,'wb') as f: f.write(imge_list.content) except Exception as e: print("pass")执行后下载图片如下,文件名太长不美观,继续改造.
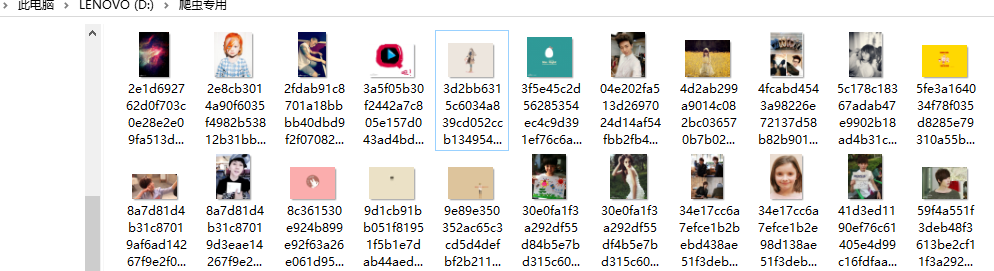
改造代码后,图片的名称会以1、2、3...的形式存起来. #!/usr/bin/env python #coding:utf-8 import requests from bs4 import BeautifulSoup import os #图片保存路径: path = "D://爬虫专用//" URL = 'http://tieba.baidu.com/p/1753935195' html_page = requests.get(URL) #创建BeautifulSoup对象 soup = BeautifulSoup(html_page.text,'html.parser') #通过class="BDE_Image"获取所有的img 标签 class_image = soup.findAll(attrs={"class":"BDE_Image"}) print(class_image) #判断目录是否存在 if not os.path.exists(path): os.mkdir(path) try: x = 0 # 循环class_image列表,找到所有img标签的链接 for i in class_image: #取出src对应的url地址 src_url = i.get('src') #请求src_url链接地址 imge_list = requests.get(src_url) #构造url名称 #down = path + src_url.split('/')[-1] down = path + '%s.jpg' %x print(down) #以二进制保存图片 with open(down,'wb') as f: f.write(imge_list.content) x += 1 except Exception as e: print("pass")ok,改造后看看结果.
oye,成功.下次在学习下分页爬取. 下面,我们来一个牛逼的脚本,爬取www.mzitu.com中所有妹子的图片,而且涉及到分页和更复杂的流程控制.这个脚本是我在网上找的然后改动了下,注释都是我执行后添加的,适合学习和了解. #!/usr/bin/env python #coding:utf-8 import requests import os from bs4 import BeautifulSoup #访问的域名地址 all_url = 'http://www.mzitu.com' #配置header 请求头 headers_w = { 'User-Agent': 'Mozilla/4.0 (compatible; MSIE 6.0; Windows NT 5.1)', 'Referer': 'http://www.mzitu.com' } headers_i = { 'User-Agent': 'Mozilla/4.0 (compatible; MSIE 6.0; Windows NT 5.1)', 'Referer': 'http://i.meizitu.net' } #发送get请求,获取某个网页,并使用.text属性打印出源码信息 start_html = requests.get(all_url,headers=headers_w) #print(start_html.text) #定义保存地址. path = 'D:\\images\\' #寻求最大页数 #我们使用bs4模块开从html文件中提取数据,使用BeautifulSoup模块解析代码 soup = BeautifulSoup(start_html.text,'html.parser') #print(soup) #找出源码中所有包含class_='page-numbers'的a标签,会以一个列表的形式保存 page = soup.find_all('a',class_='page-numbers') #print(page) #取出next的上一个页面数199 max_page = page[-2].text #print(max_page) # same_url = "http://www.mzitu.com/page/" for i in range(1,int(max_page)+1): #构造每页的url page_url = same_url + str(i) #print(page_url) #请求每页的url get_page_url = requests.get(page_url,headers=headers_w) #加载每页源码内容 page_soup = BeautifulSoup(get_page_url.text,'html.parser') #print(page_soup) # 将div标签中包含class_=''postlist取出,在取出a标签中target=_blank的标签内容. get_all_a = soup.find('div',class_='postlist').find_all('a',target='_blank') #print(get_all_a) for a in get_all_a: #print(a) #从标签中获取所有文字内容 title = a.get_text() #print(title) if title != '': print("准备爬取:%s" %(title)) #处理字符串,先去除空行,然后将?号替换为空,再将':'替换成空行 #判断目录是否存在 #print(path + title.strip().replace('?','').replace(':','')) if not os.path.exists(path + title.strip().replace('?','').replace(':','')): os.makedirs(path + title.strip().replace('?','').replace(':','')) # 改变当前工作目录;相当于shell下cd os.chdir(path + title.strip().replace('?', '').replace(':', '')) # 获取每一张图片页面的url,如http://www.mzitu.com/155568 href = a.get('href') # print(href) # 图片url中取出图片的页数和jpg结尾的图片地址 html = requests.get(href,) mess = BeautifulSoup(html.text,'html.parser') pic_max = mess.find_all('span') # pic_max[10] 取出来的是图片页数,如41、42 pic_max = pic_max[10].text #print(pic_max) if len(os.listdir(path+title.strip().replace('?','').replace(':',''))) >= int(pic_max): print('已经保存完毕,跳过') continue for num in range(1,int(pic_max)+1): #print(num) pic = href + '/' + str(num) # 打印出url如下:http://www.mzitu.com/155192/44 #print(pic) #从pic的url中取出图片地址 html = requests.get(pic,headers=headers_w) #print(html.url) mess = BeautifulSoup(html.text,'html.parser') #print(mess) pic_url = mess.find('img', alt=title) #打印出图片地址: #print(pic_url)
html_img = requests.get(pic_url.get('src'),headers=headers_i)
#请求每张图片的下载url:http://i.meizitu.net/2018/11/02f33.jpg
#print(html_img.url)
file_name = pic_url.get('src').split('/')[-1]
#print(file_name)
with open(file_name,'wb') as f :
f.write(html_img.content)
print('图片 %s 保存完成' %(file_name))
print('第',i,'页爬取完成.')
#print(pic_url)
html_img = requests.get(pic_url.get('src'),headers=headers_i)
#请求每张图片的下载url:http://i.meizitu.net/2018/11/02f33.jpg
#print(html_img.url)
file_name = pic_url.get('src').split('/')[-1]
#print(file_name)
with open(file_name,'wb') as f :
f.write(html_img.content)
print('图片 %s 保存完成' %(file_name))
print('第',i,'页爬取完成.')
执行后就这样爬下了所以美眉的图片,是不是特别有学习的动力呢.
参考文档: http://docs.python-requests.org/zh_CN/latest/user/quickstart.html https://www.jb51.net/article/133660.htm https://blog.csdn.net/qq_878799579/article/details/73956344?utm_source=blogxgwz0
|


【本文地址】
今日新闻 |
推荐新闻 |