NodeMCU Lesson 6: Send Temperature data from NodeMCU to APP « osoyoo.com |
您所在的位置:网站首页 › nodemcu-build › NodeMCU Lesson 6: Send Temperature data from NodeMCU to APP « osoyoo.com |
NodeMCU Lesson 6: Send Temperature data from NodeMCU to APP « osoyoo.com
NodeMCU Lesson 6: Send Temperature data from NodeMCU to APP
Post Time: 2023-03-29 11:03:58
Category: Uncategorized

In this lesson, we will use this IoT kit to remotely monitor the home environmental temperature and humidity, and display the data to the OSOYOO IoT APP.  HARDWARE
OSOYOO NodeMCU board
DHT11 Temperature/Humidity Sensor
Breadboard and Jumper wires
SOFTWARE
Arduino IDE (version 1.6.4+)
DHT Sensor Library : https://osoyoo.com/wp-content/uploads/samplecode/DHT.zip
HARDWARE
OSOYOO NodeMCU board
DHT11 Temperature/Humidity Sensor
Breadboard and Jumper wires
SOFTWARE
Arduino IDE (version 1.6.4+)
DHT Sensor Library : https://osoyoo.com/wp-content/uploads/samplecode/DHT.zip

Build the circuit as below: DHT11 signal pin (data) to NodeMCU D2 DHT11 VCC to NodeMCU 3.3V DHT11 GND to NodeMCU G pin 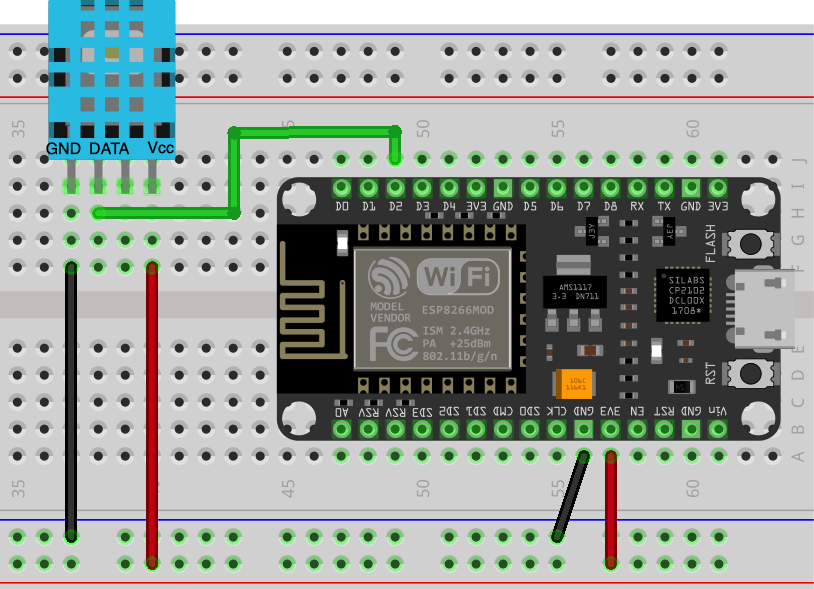 Fritzing File Download link: https://osoyoo.com/driver/nodemcu/nodemcu-dht11.fzz

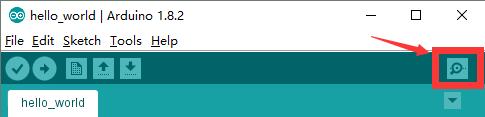
Prerequisite: You need to download and install DHT library if you don’t have them: DHT Sensor Library : https://osoyoo.com/wp-content/uploads/samplecode/DHT.zip In Arduino IDE, click Sketch->Include Library ->Add .ZIP library and upload above library zip files to the IDE. Download and Edit Lesson2-3 Arduino Code Step 1 ) After installing above library, please download the code from following link, unzip it: https://osoyoo.com/driver/nodemcu/nodemcu-dht11.zip Step 2 )Double click nodemcu-dht11.ino file to open the sketch file 3)Replace line 15, 16 with your own wifi ssid and password const char* ssid = "***"; //replace *** with your wifi ssid const char* password = "***"; //replace *** with your wifi passwordStep 3 )Upload the code to Arduino board, then open Arduino Serial monitor in the upper right corner.
Now please set your Baud Rate to 115200 you will see NodeMCU IP address as following:
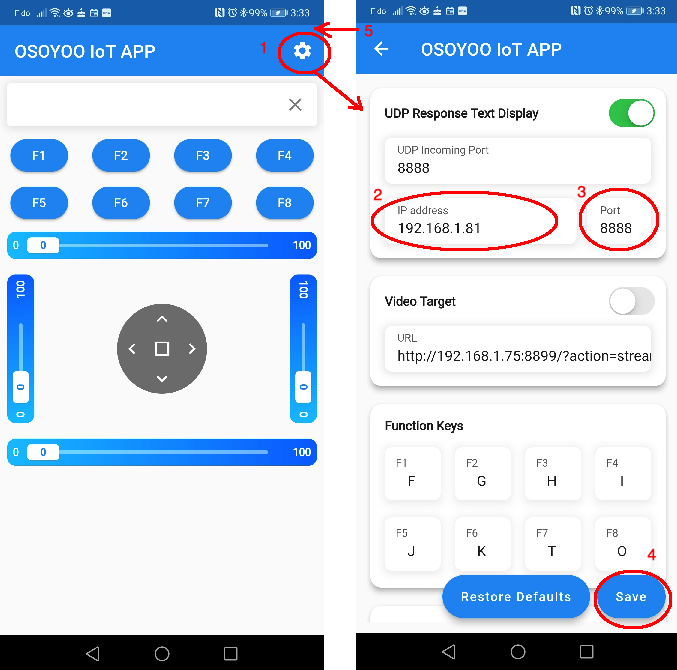
APP Installation and Setting: Step 1) If you haven’t installed OSOYOO IoT Robot APP, please search OSOYOO IoT Robot Car APP in Google Play or Apple Store to install this APP. You read following tutorial link for more information about APP install : https://osoyoo.com/2022/02/06/smart-house-iot-learning-kit-v2-0-lesson-1-wireless-lighting-control/#installapp Step 2):Make sure your Cell phone is in the same Local Network of Arduino. Open the APP, click Settings, enter your NodeMCU IP address from Step F and Port to 8888 in settings: For example, if your NodeMCU IP address is 192.168.1.81, then set the IP as per following picture.
 Now you can see the LCD will display the temperature value and Humidity value. In your APP , you will also see the temperature value and Humidity value in the text field as following picture. If you can’t see the data, press F1 key and check again.
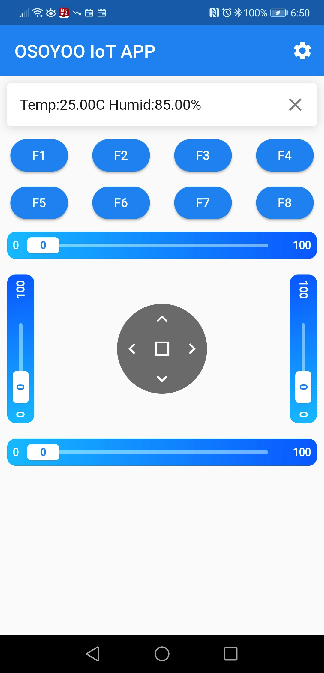
DownLoad Url osoyoo.com |

【本文地址】