golang中的图像image处理详解 |
您所在的位置:网站首页 › cmyk颜色数值在实际调色中应用 › golang中的图像image处理详解 |
golang中的图像image处理详解
|
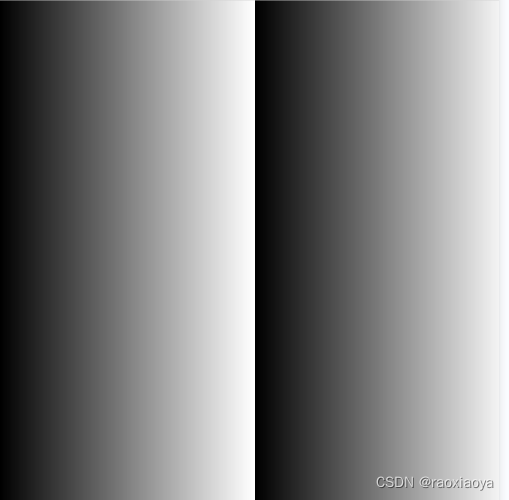
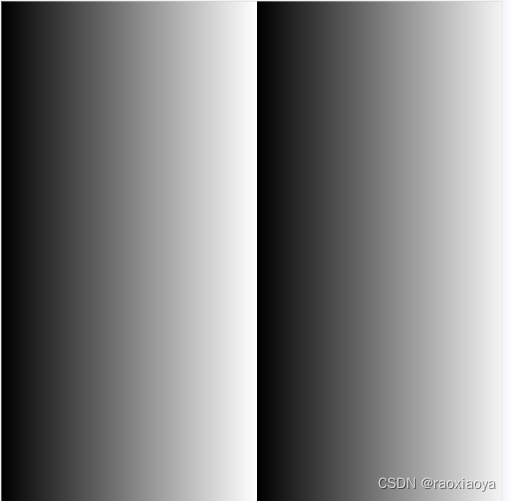
常用的图像格式有png,jpeg,gif,对应的文件后缀为png,jpg,gif,当然文件的具体内容编码才能证明存放的是哪种文件,图像文件的头部都存储了具体标志,比如jpeg前缀\xffd8,png前缀\x89PNG\r\n\x1a\n,gif前缀GIF8?a,使用文本编辑器打开图像文件就能明显看到。 读取jpg文件头部 f, err := os.Open("./image1.jpg") if err != nil { panic(err) } defer f.Close() r := bufio.NewReader(f) b, _ := r.Peek(2) fmt.Println(b) // [255 216] 就是 \xffd8因此在解析之前先要设置好前缀信息,比如 import _ "image/jpeg" import _ "image/png"查看其init方法 func init() { image.RegisterFormat("jpeg", "\xff\xd8", Decode, DecodeConfig) }通过对比这个magic前缀来决定使用哪个编码解码方式。而name参数只是名称。 var pic = "./image1.jpg" func main() { f, err := os.Open(pic) if err != nil { panic(err) } defer f.Close() img, fmtName, err := image.Decode(f) if err != nil { panic(err) } fmt.Printf("Name: %v, Bounds: %v, Color: %+v", fmtName, img.Bounds(), img.ColorModel()) }关于Image接口 type Image interface { ColorModel() color.Model // 返回图片的颜色模型 Bounds() Rectangle // 返回图片外框边界 At(x, y int) color.Color // 返回(x,y)像素点的颜色 }也就是图像的宽高,以及各个像素点的颜色值。 // 透明度 func NewAlpha(r Rectangle) *Alpha func NewAlpha16(r Rectangle) *Alpha16 func NewRGBA(r Rectangle) *RGBA func NewRGBA64(r Rectangle) *RGBA64 func NewNRGBA(r Rectangle) *NRGBA func NewNRGBA64(r Rectangle) *NRGBA64 func NewGray(r Rectangle) *Gray func NewGray16(r Rectangle) *Gray16 func NewCMYK(r Rectangle) *CMYK func NewYCbCr(r Rectangle, subsampleRatio YCbCrSubsampleRatio) *YCbCr func NewNYCbCrA(r Rectangle, subsampleRatio YCbCrSubsampleRatio) *NYCbCrA func NewPaletted(r Rectangle, p color.Palette) *Paletted func NewUniform(c color.Color) *Uniform RGBA RGBA represents a traditional 32-bit alpha-premultiplied color, having 8 bits for each of red, green, blue and alpha. // RGBA is an in-memory image whose At method returns color.RGBA values. type RGBA struct { // Pix holds the image's pixels, in R, G, B, A order. The pixel at // (x, y) starts at Pix[(y-Rect.Min.Y)*Stride + (x-Rect.Min.X)*4]. Pix []uint8 // Stride is the Pix stride (in bytes) between vertically adjacent pixels. Stride int // Rect is the image's bounds. Rect Rectangle } // NewRGBA returns a new RGBA image with the given bounds. func NewRGBA(r Rectangle) *RGBA { return &RGBA{ Pix: make([]uint8, pixelBufferLength(4, r, "RGBA")), Stride: 4 * r.Dx(), Rect: r, } } type Rectangle struct { Min, Max Point }RGBA对象实现了 Image 接口,用来操作带有RGB颜色以及透明度A的图像,因此每一个像素点有四个值,都是uint8类型,存储在切片 Pix 中,像素点是矩阵排列,因此需要规则转换。 其中r.Dx()为图像的宽度,即X轴最大值。 那么对于像素点(x,y),我们要怎么找到其在 Pix 切片中的起始位置呢,算法在注释中已经给明了,为了便于理解就假设Rect.Min在(0,0)位置,一个像素点占四个位置,然后就很容易得出结果 Pix[(y-Rect.Min.Y)*Stride + (x-Rect.Min.X)*4]。 Stride 的注释是像素点在垂直方向上的间距,在这里它是4倍的图像宽度,方便在y轴上计算用的。 提供的方法 func (p *RGBA) ColorModel() color.Model // 返回颜色模型 func (p *RGBA) Bounds() Rectangle // 返回图像边界 func (p *RGBA) At(x, y int) color.Color // 返回制定像素点的颜色 func (p *RGBA) RGBAAt(x, y int) color.RGBA // 返回制定像素点的颜色,返回color.RGBA func (p *RGBA) RGBA64At(x, y int) color.RGBA64 // 返回制定像素点的颜色,返回color.RGBA64 func (p *RGBA) Set(x, y int, c color.Color) // 设置制定像素点的颜色 func (p *RGBA) SetRGBA64(x, y int, c color.RGBA64) // 设置制定像素点的颜色 func (p *RGBA) SetRGBA(x, y int, c color.RGBA) // 设置制定像素点的颜色 func (p *RGBA) SubImage(r Rectangle) Image // 返回制定区域的Image,注意他们会共享Pix切片 func (p *RGBA) Opaque() bool // 判断是否每个像素点的A值都是255,即是否完全不透明 func NewRGBA(r Rectangle) *RGBA RGBA64 RGBA64 represents a 64-bit alpha-premultiplied color, having 16 bits for each of red, green, blue and alpha.前面的 RGBA 的一个像素点通过四个 uint8 来存储,而 RGBA64 的一个像素点则需要八个 uint8 来存储,也就是64位,R,G,B,A都是两个字节存储。这使得颜色表现更细腻一些。 NRGBA NRGBA represents a non-alpha-premultiplied 32-bit color.颜色编码没有alpha-premultiplied NRGBA64 NRGBA64 represents a non-alpha-premultiplied 64-bit color, having 16 bits for each of red, green, blue and alpha. Alpha Alpha represents an 8-bit alpha color.透明度 0-255,0完全透明,255完全不透明,也可以说白表示完全不透明,黑表示完全透明,灰则是半透明。 支持alpha通道的格式有png, tag, tif。 dx := 500 dy := 500 img := image.NewAlpha(image.Rect(0, 0, dx, dy)) for i := 0; i img.Set(i, j, color.Alpha{A: uint8(i % 256)}) } } f, _ := os.Create("./image3.png") defer f.Close() b := bufio.NewWriter(f) png.Encode(b, img) b.Flush()
如果使用jpg来存储的话 dx := 500 dy := 500 img := image.NewAlpha(image.Rect(0, 0, dx, dy)) for i := 0; i img.Set(i, j, color.Alpha{A: uint8(i % 256)}) } } f, _ := os.Create("./image3.jpg") defer f.Close() b := bufio.NewWriter(f) jpeg.Encode(b, img, nil) b.Flush()
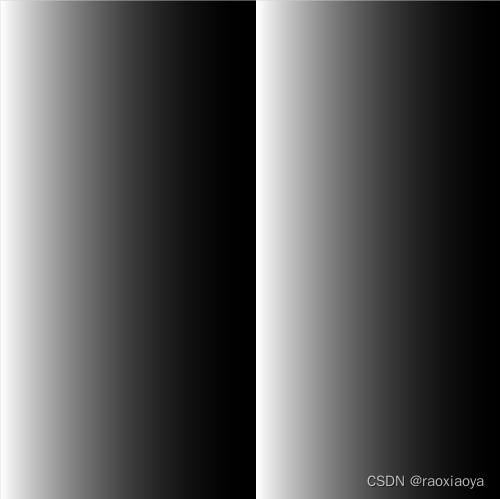
那是因为jpg, bmp, gif等图像格式不支持alpha通道,于是需要将 Alpha 颜色转换成 RGBA 颜色,同时会过滤掉A这个值。 func (c Alpha) RGBA() (r, g, b, a uint32) { a = uint32(c.A) a |= a y := uint32(c.Y) y |= y img.Set(i, j, color.Gray{Y: uint8(i % 256)}) } } f, _ := os.Create("./image4.jpg") defer f.Close() b := bufio.NewWriter(f) jpeg.Encode(b, img, nil) b.Flush()
印刷四色模式是彩色印刷时采用的一种套色模式,利用色料的三原色混色原理,加上黑色油墨,共计四种颜色混合叠加,形成所谓"全彩印刷"。四种标准颜色是:C:Cyan = 青色,又称为’天蓝色’或是’湛蓝’;M:Magenta = 品红色,又称为’洋红色’;Y:Yellow = 黄色;K:blacK=黑色,虽然有文献解释说这里的K应该是Key Color(定位套版色),但其实是和制版时所用的定位套版观念混淆而有此一说。此处缩写使用最后一个字母K而非开头的B,是为了避免与Blue混淆。CMYK模式是减色模式,相对应的RGB模式是加色模式。 它和RGB相比有一个很大的不同:RGB模式是一种屏幕显示发光的色彩模式,你在一间黑暗的房间内仍然可以看见屏幕上的内容; CMYK是一种用于印刷品依靠反光的色彩模式,我们是怎样阅读报纸的内容呢?是由阳光或灯光照射到报纸上,再反射到我们的眼中,才看到内容。它需要有外界光源,如果你在黑暗房间内是无法阅读报纸的。 只要在屏幕上显示的图像,就是RGB模式表现的。只要是在印刷品上看到的图像,就是CMYK模式表现的。比如期刊、杂志、报纸、宣传画等,都是印刷出来的,那么就是CMYK模式的了。 RGB以黑色为底色加,即RGB均为0是黑色,均为255是白色。 CMY以白色为底色减,即CMY均为0是白色,均为100%是黑色(但在实际中,由于油墨的纯度等问题这样得不到纯正的黑色,因此引入K)。 dx := 500 dy := 500 img := image.NewCMYK(image.Rect(0, 0, dx, dy)) for i := 0; i img.Set(i, j, color.CMYK{C: uint8(i % 256), M: uint8(i % 256), Y: uint8(i % 256), K: uint8(i % 256)}) } } f, _ := os.Create("./image5.jpg") defer f.Close() b := bufio.NewWriter(f) jpeg.Encode(b, img, nil) b.Flush()
可以看到与RGB颜色正好相反。 所以,如果图像是要印刷出来的话,那么应该采用CMYK颜色值,因为用RGB颜色打印出来的效果会有较大差异。 YCbCr // YCbCr represents a fully opaque 24-bit Y'CbCr color, having 8 bits each for // one luma and two chroma components. // // JPEG, VP8, the MPEG family and other codecs use this color model. Such // codecs often use the terms YUV and Y'CbCr interchangeably, but strictly // speaking, the term YUV applies only to analog video signals, and Y' (luma) // is Y (luminance) after applying gamma correction. // // Conversion between RGB and Y'CbCr is lossy and there are multiple, slightly // different formulae for converting between the two. This package follows // the JFIF specification at https://www.w3.org/Graphics/JPEG/jfif3.pdf. type YCbCr struct { Y, Cb, Cr uint8 }这是另外一种颜色模式。使用亮度(黑白灰),蓝色、红色的偏移量描述图像信号的色彩空间,应用在视频领域。jpeg图像使用的就是YCbCr颜色。 使用YCbCr是因为,人眼对于亮度对比的感知能力比色彩的感知能力要强,把亮度分量分离出来后,可以有针对性地使用不同的量化表、采样因子来达到不同的压缩率,且人眼感知不强。如果只有Y信号分量,那么表示的就是黑白灰度图像。 jpeg图像使用的就是 YCbCr 颜色。 关于RGB, YUV, YCbCr三种颜色空间 NYCbCrA // NYCbCrA represents a non-alpha-premultiplied Y'CbCr-with-alpha color, having // 8 bits each for one luma, two chroma and one alpha component. type NYCbCrA struct { YCbCr A uint8 } Paletted调色板 前面提到的类型,都是直接将像素点的各个分量存储在 Pix 中,而调色板类型,则是先有一个调色板p存储了一些color值,而 Pix 中存储的值是p中的索引,这样像素点的颜色也就对应上了,但是Pix中byteePerPixel为1,也就是索引值最大255,所以调色板里最多有256个color。调色板里的color要先预制好,Set方法只能去里面匹配,如果没有找到则索引为0。 func NewPaletted(r Rectangle, p color.Palette) *Paletted { return &Paletted{ Pix: make([]uint8, pixelBufferLength(1, r, "Paletted")), Stride: 1 * r.Dx(), Rect: r, Palette: p, } }NewPaletted 函数得到的是一个调色板,还没有设置 Pix,因此得到的图像的表现就是由调色板第一个颜色平铺而成的背景。 默认提供的两个调色板 palette.Plan9,palette.WebSafe 如果你的图像的颜色区间不大,那么使用调色板模式就可以大大减少存储空间。 Uniform // Uniform is an infinite-sized Image of uniform color. // It implements the color.Color, color.Model, and Image interfaces. type Uniform struct { C color.Color } func (c *Uniform) Bounds() Rectangle { return Rectangle{Point{-1e9, -1e9}, Point{1e9, 1e9}} } // NewUniform returns a new Uniform image of the given color. func NewUniform(c color.Color) *Uniform { return &Uniform{c} }用同一个color来填充一个无限大的幕布,我们可以从幕布上截取一块,当然,这个功能也好实现,只是官方提供了而已, dx := 500 dy := 500 r := image.Rect(0, 0, dx, dy) img := image.NewRGBA(r) for i := 0; i img.Set(i, j, color.Black) } }或者 dx := 500 dy := 500 r := image.Rect(0, 0, dx, dy) img := image.NewRGBA(r) imgBack := image.NewUniform(image.Black) draw.Draw(img, r, imgBack, image.Point{}, draw.Src) gif图像 type GIF struct { // 连续的图片 Image []*image.Paletted // 连续的延迟时间,单位是百分之一秒,delay中数值表示展示的时间,10就表示0.1秒 Delay []int // LoopCount 控制动画的重复播放规则 // 0 表示无限循环 // -1 表示只播放一次 // 其它的播放 LoopCount+1 次 LoopCount int // Disposal is the successive disposal methods, one per frame. For // backwards compatibility, a nil Disposal is valid to pass to EncodeAll, // and implies that each frame's disposal method is 0 (no disposal // specified). Disposal []byte // Config is the global color table (palette), width and height. A nil or // empty-color.Palette Config.ColorModel means that each frame has its own // color table and there is no global color table. Each frame's bounds must // be within the rectangle defined by the two points (0, 0) and // (Config.Width, Config.Height). // // For backwards compatibility, a zero-valued Config is valid to pass to // EncodeAll, and implies that the overall GIF's width and height equals // the first frame's bounds' Rectangle.Max point. Config image.Config // BackgroundIndex is the background index in the global color table, for // use with the DisposalBackground disposal method. BackgroundIndex byte }gif图像本身可以存储静态图和动态图,但如今该图像主要被用来存储动态图,且在大部分系统上都支持。但是相对于webp这些新式的动态图格式,其在颜色质量和压缩率上的表现相对不如人意。gif图像和一般的图像直接存储图像内容不同,而是通过一个颜色表(调色板)映射来表达对应的图像的内容。也就是说图像中存在一张颜色表存储图像中出现的颜色,然后每一帧的图像通过颜色索引来表示颜色。GIF支持的最大颜色表数量为8bit,即256色,所以一般的动态图能够看到图像中存在明显的颜色梯度变化的效应,也就是不够清晰。 func image14() { p1 := image.NewPaletted(image.Rect(0, 0, 100, 100), palette.Plan9) p2 := image.NewPaletted(image.Rect(0, 0, 100, 100), palette.Plan9) for y := 0; y R: 0, G: 0, B: 255, A: 255}) } for y := 0; y R: 255, G: 0, B: 0, A: 255}) } g := &gif.GIF{ Image: []*image.Paletted{p1, p2}, Delay: []int{10, 100}, // p1展示0.1秒,p2展示1秒 LoopCount: 0, } f1, _ := os.Create("./image14.gif") defer f1.Close() gif.EncodeAll(f1, g) }
参数说明 dst 要绘制的目标图像 r 在目标图像的哪个区域绘制 src 源图像 sp start point,从源图像的哪个点开始,范围是 r 的长宽 mask 是绘图时用的蒙版,控制替换图片的方式 op 两个图像采用不同的混合方式得出的结果不同,此处有 Porter-Duff 12 等式,即12种混合方式,参考 https://blog.csdn.net/ison81/article/details/5468763 和 http://www.blogjava.net/onedaylover/archive/2008/01/16/175675.html1、图像合并 func image8() { // 蓝色 500*500 img1 := image.NewRGBA(image.Rect(0, 0, 500, 500)) for i := 0; i img1.Set(i, j, color.RGBA{B: 255, A: 255}) } } // 红色 200*200 img2 := image.NewRGBA(image.Rect(0, 0, 200, 200)) for i := 0; i img2.Set(i, j, color.RGBA{R: 255, A: 255}) } } draw.Draw(img1, img2.Bounds(), img2, img2.Bounds().Min, draw.Src) f, _ := os.Create("./image8.jpg") defer f.Close() b := bufio.NewWriter(f) jpeg.Encode(b, img1, nil) b.Flush() }
2、图片置灰 使用灰度Gray作为目标即可 func image9() { f, err := os.Open("./image1.jpg") if err != nil { panic(err) } defer f.Close() src, _, _ := image.Decode(f) dst := image.NewGray(src.Bounds()) draw.Draw(dst, src.Bounds(), src, src.Bounds().Min, draw.Src) f1, _ := os.Create("./image9.jpg") defer f1.Close() b := bufio.NewWriter(f1) jpeg.Encode(b, dst, nil) b.Flush() }
3、图片裁剪 func image10() { f, err := os.Open("./image1.jpg") if err != nil { panic(err) } defer f.Close() src, _, _ := image.Decode(f) // jpeg 使用的 YCbCr 颜色 dst := src.(*image.YCbCr).SubImage(image.Rect(0, 0, 500, 500)) f1, _ := os.Create("./image10.jpg") defer f1.Close() b := bufio.NewWriter(f1) jpeg.Encode(b, dst, nil) b.Flush() }4、图片缩放 图片的缩小可以理解为只抽取部分像素点,比如等比例缩小为原来的一半,那么就是每间隔一个点抽取一个像素,然后将这些像素点排列在新的画布上,原来的1200*800变成600*400,没有原来清晰了。 func image11() { f, err := os.Open("./image1.jpg") if err != nil { panic(err) } defer f.Close() scale := 2 // 等比例缩小一半 src, _, _ := image.Decode(f) width := src.Bounds().Max.X height := src.Bounds().Max.Y dstWidth := width / scale dstHeight := height / scale dst := image.NewRGBA(image.Rect(0, 0, dstWidth, dstHeight)) for i := 0; i dst.Set(i, j, src.At(i*scale, j*scale)) } } f1, _ := os.Create("./image11.jpg") defer f1.Close() b := bufio.NewWriter(f1) jpeg.Encode(b, dst, nil) b.Flush() }
等比例缩放和非等比例缩放是一样的道理。次方法成为邻域插值法。 缩小操作效果还可以,但是放大操作由于算法的原因会导致一些像素点不太合理,有时候会得到不存在的像素点,因此效果不是太好。 传统差值原理和评价 在传统图像插值算法中,邻插值较简单,容易实现,早期的时候应用比较普遍。但是,该方法会在新图像中产生明显的锯齿边缘和马赛克现象。双线性插值法具有平滑功能,能有效地克服邻法的不足,但会退化图像的高频部分,使图像细节变模糊。在放大倍数比较高时,高阶插值,如双三次和三次样条插值等比低阶插值效果好。这些插值算法可以使插值生成的像素灰度值延续原图像灰度变化的连续性,从而使放大图像浓淡变化自然平滑。但是在图像中,有些像素与相邻像素间灰度值存在突变,即存在灰度不连续性。这些具有灰度值突变的像素就是图像中描述对象的轮廓或纹理图像的边缘像素。在图像放大中,对这些具有不连续灰度特性的像素,如果采用常规的插值算法生成新增加的像素,势必会使放大图像的轮廓和纹理模糊,降低图像质量。 基于边缘的图像插值算法 为了克服传统方法的不足, 提出了许多边缘保护的插值方法,对插值图像的边缘有一定的增强, 使得图像的视觉效果更好, 边缘保护的插值方法可以分为两类: 基于原始低分辨图像边缘的方法和基于插值后高分辨率图像边缘的方法。基于原始低分辨率图像边缘的方法:(1)首先检测低分辨率图像的边缘, 然后根据检测的边缘将像素分类处理, 对于平坦区域的像素,采用传统方法插值;对于边缘区域的像素, 设计特殊插值方法, 以达到保持边缘细节的目的。(2)基于插值后高分辨率图像边缘的方法这类插值方法:首先采用传统方法插值低分辨率图像,然后检测高分辨率图像的边缘,最后对边缘及附近像素进行特殊处理, 以去除模糊, 增强图像的边缘。 基于区域的图像插值算法 首先将原始低分辨率图像分割成不同区域,然后将插值点映射到低分辨率图像, 判断其所属区域, 最后根据插值点的邻域像素设计不同的插值公式, 计算插值点的值。 官方包golang.org/x/image/draw提供了对图像高级操作。 采用双线性插值算法(bilinear)来放大图像。 import draw2 "golang.org/x/image/draw" func image13() { f, err := os.Open("./image1.jpg") if err != nil { panic(err) } defer f.Close() src, _, _ := image.Decode(f) scale := 2 dstWidth := src.Bounds().Max.X * scale dstHeight := src.Bounds().Max.Y * scale dr := image.Rect(0, 0, dstWidth, dstHeight) dst := image.NewRGBA(dr) draw2.BiLinear.Scale(dst, dr, src, src.Bounds(), draw2.Src, nil) f1, _ := os.Create("./image13.jpg") defer f1.Close() b := bufio.NewWriter(f1) jpeg.Encode(b, dst, nil) b.Flush() }golang.org/x/image/draw 提供了四种插值算法,他们的特点在注释中已经说明了。 var ( // NearestNeighbor is the nearest neighbor interpolator. It is very fast, // but usually gives very low quality results. When scaling up, the result // will look 'blocky'. NearestNeighbor = Interpolator(nnInterpolator{}) // ApproxBiLinear is a mixture of the nearest neighbor and bi-linear // interpolators. It is fast, but usually gives medium quality results. // // It implements bi-linear interpolation when upscaling and a bi-linear // blend of the 4 nearest neighbor pixels when downscaling. This yields // nicer quality than nearest neighbor interpolation when upscaling, but // the time taken is independent of the number of source pixels, unlike the // bi-linear interpolator. When downscaling a large image, the performance // difference can be significant. ApproxBiLinear = Interpolator(ablInterpolator{}) // BiLinear is the tent kernel. It is slow, but usually gives high quality // results. BiLinear = &Kernel{1, func(t float64) float64 { return 1 - t }} // CatmullRom is the Catmull-Rom kernel. It is very slow, but usually gives // very high quality results. // // It is an instance of the more general cubic BC-spline kernel with parameters // B=0 and C=0.5. See Mitchell and Netravali, "Reconstruction Filters in // Computer Graphics", Computer Graphics, Vol. 22, No. 4, pp. 221-228. CatmullRom = &Kernel{2, func(t float64) float64 { if t |


![[外链图片转存失败,源站可能有防盗链机制,建议将图片保存下来直接上传(img-BVbqp6Qr-1675236120865)(D:\dev\php\magook\trunk\server\md\img\image-20230131164352370.png)]](https://img-blog.csdnimg.cn/3453bf1085374735b2c02d13346fd1b3.png)
![[外链图片转存失败,源站可能有防盗链机制,建议将图片保存下来直接上传(img-bpzXjqnC-1675236120866)(D:\dev\php\magook\trunk\server\md\img\image-20230131170943418.png)]](https://img-blog.csdnimg.cn/8c02bc001c5c48fa858ae7c65ad5c3bd.png)
![[外链图片转存失败,源站可能有防盗链机制,建议将图片保存下来直接上传(img-DqRJZrJR-1675236120866)(D:\dev\php\magook\trunk\server\md\img\image-20230201094227274.png)]](https://img-blog.csdnimg.cn/fe673cd99212481b99ed0aefd09af98c.png)
【本文地址】
今日新闻 |
推荐新闻 |