weblogic + SpringBoot + log4j2 + idea 开发过程及模版 |
您所在的位置:网站首页 › Idea中使用weblogic › weblogic + SpringBoot + log4j2 + idea 开发过程及模版 |
weblogic + SpringBoot + log4j2 + idea 开发过程及模版
|
一 :搭建 weblogic 环境 weblogic下载地址 : https://www.oracle.com/technetwork/cn/middleware/ias/downloads/wls-main-091116-zhs.html 解压下载好的zip文件 《 fmw_12.2.1.3.0_wls_quick_Disk1_1of1.zip 》 ps 安装需要 java环境 命令安装 : java -jar fmw_12.2.1.3.0_wls_quick.jar 创建 domain cd wls12213/oracle_common/common 执行domain安装程序 bin/config.sh 按照安装程序窗口一步步执行没什么难度 记好创建的 weblogic 用户名密码 二 :设置 idea 执行weblogic环境 (不是必须的,可以不使用idea启动weblogic 笔者只是自己觉得方便。。。)
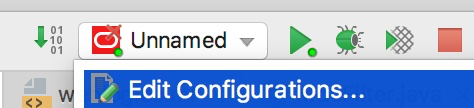
点击 Edit Configurations...
找到WebLogic server --> local 填写完毕后点击 OK 点击启动按钮 启动 weblogic
启动成功后可以使用 http://localhost:7001/console 访问weblogic 控制台
使用设置的weblogic用户名密码登录 三:创建能部署到 weblogic 上的 SpringBoot 项目 使用idea 创建个MAVEN项目 New -> projet -> Maven -> Next -> 填好Groupid 和 Artifacid 点击 next -> finish 修改pom文件 4.0.0 com.boostrdev.legacy.weblogic spring-boot-legacy-weblogic 0.0.1-SNAPSHOT war Spring Boot Legacy WebLogic Demo project for deploying a Spring Boot to a legacy (10.3.5) weblogic environment using servlet 2.5 4.2.5.RELEASE 1.1.12.RELEASE org.springframework.boot spring-boot-starter-parent 1.1.12.RELEASE org.springframework.boot spring-boot-legacy 1.0.2.RELEASE org.springframework.boot spring-boot-starter-web org.springframework.boot spring-boot-starter-tomcat provided javax.servlet servlet-api 2.5 test org.springframework.boot spring-boot-starter-test test org.springframework spring-web ${spring.version} org.apache.maven.plugins maven-war-plugin true ${project.version} true lib/ ${project.basedir}/src/main/resources/static ${project.basedir}/src/main/webapp ${project.artifactId} org.springframework.boot spring-boot-maven-plugin ${spring.boot.version} BOOT repackage创建springboot启动类 package com.yaya; import org.springframework.boot.SpringApplication; import org.springframework.boot.autoconfigure.EnableAutoConfiguration; import org.springframework.boot.builder.SpringApplicationBuilder; import org.springframework.boot.context.web.SpringBootServletInitializer; import org.springframework.context.annotation.ComponentScan; import org.springframework.context.annotation.Configuration; import org.springframework.web.WebApplicationInitializer; @EnableAutoConfiguration @Configuration @ComponentScan public class SpringBootWebLogicApplication extends SpringBootServletInitializer implements WebApplicationInitializer { public static void main(String[] args) { SpringApplication.run(SpringBootWebLogicApplication.class, args); } @Override protected SpringApplicationBuilder configure(SpringApplicationBuilder builder) { return builder.sources(SpringBootWebLogicApplication.class).showBanner(false); } }创建测试类 package com.yaya; import org.springframework.web.bind.annotation.RequestMapping; import org.springframework.web.bind.annotation.RequestParam; import org.springframework.web.bind.annotation.RestController; @RestController public class TestService { @RequestMapping("/welcome") public String welcome(@RequestParam(name = "username") String username) { return "welcome:" + username; } }创建web.xml 和 weblogic.xml 点击 File->Project-Structure->Project Settinngs->Facets 添加web.xml文件
添加 weblogic.xml 文件
web.xml内容 contextConfigLocation com.yaya.SpringBootWebLogicApplication org.springframework.boot.legacy.context.web.SpringBootContextLoaderListener metricFilter org.springframework.web.filter.DelegatingFilterProxy metricFilter /* appServlet org.springframework.web.servlet.DispatcherServlet contextAttribute org.springframework.web.context.WebApplicationContext.ROOT 1 appServlet /weblogic.xml 内容 /spring-boot-weblogic-app org.slf4j.* org.springframework.*
四:打包部署 打包 Build->BuildArtifacts->程序名:war->Build 打好的war包在target下 部署 复制打好的包到domain的文件夹下 打开weblogic控制台 http://localhost:7001/console 登录 点击部署 点击安装
点击刚刚复制的war包 下一步到完成 五:测试 http://localhost:7001/weblogic.xml中设置的路径名称/welcome?username=lanyu 返回 六:集成log4j2 改造pom文件 4.0.0 com.boostrdev.legacy.weblogic spring-boot-legacy-weblogic 0.0.1-SNAPSHOT war Spring Boot Legacy WebLogic Demo project for deploying a Spring Boot to a legacy (10.3.5) weblogic environment using servlet 2.5 4.2.5.RELEASE 1.1.12.RELEASE org.springframework.boot spring-boot-starter-parent 1.1.12.RELEASE org.springframework.boot spring-boot-legacy 1.0.2.RELEASE org.springframework.boot spring-boot-starter-web org.springframework.boot spring-boot-starter-logging org.springframework.boot spring-boot-starter-tomcat provided javax.servlet servlet-api 2.5 test org.springframework.boot spring-boot-starter-test test org.springframework spring-web ${spring.version} org.springframework.boot spring-boot-starter-log4j2 2.1.6.RELEASE org.projectlombok lombok 1.18.8 provided commons-logging commons-logging-api 1.1 org.apache.maven.plugins maven-war-plugin true ${project.version} true lib/ ${project.basedir}/src/main/resources/static ${project.basedir}/src/main/webapp ${project.artifactId} org.springframework.boot spring-boot-maven-plugin ${spring.boot.version} BOOT repackage添加log4j.xml 到resource下 s
|


【本文地址】
今日新闻 |
推荐新闻 |