睿智的目标检测28 |
您所在的位置:网站首页 › 马可增强了吗 › 睿智的目标检测28 |
睿智的目标检测28
|
睿智的目标检测28——YoloV4当中的Mosaic数据增强方法
学习前言代码下载什么是Mosaic数据增强方法实现思路全部代码1、数据增强2、调用代码
学习前言
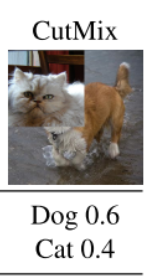
哈哈哈!我又来数据增强了! https://github.com/bubbliiiing/object-detection-augmentation 什么是Mosaic数据增强方法Yolov4的mosaic数据增强参考了CutMix数据增强方式,理论上具有一定的相似性! CutMix数据增强方式利用两张图片进行拼接。 1、每次读取四张图片。
这里的代码直接复制无法使用,请到Github下载。 1、数据增强该部分为数据增强。 import cv2 import numpy as np from PIL import Image, ImageDraw def rand(a=0, b=1): return np.random.rand()*(b-a) + a def merge_bboxes(bboxes, cutx, cuty): merge_bbox = [] for i in range(len(bboxes)): for box in bboxes[i]: tmp_box = [] x1, y1, x2, y2 = box[0], box[1], box[2], box[3] if i == 0: if y1 > cuty or x1 > cutx: continue if y2 >= cuty and y1 = cutx and x1 = cuty and y1 = cutx and x1 1)] box_data = np.zeros((len(box),5)) box_data[:len(box)] = box image_datas.append(image_data) box_datas.append(box_data) #---------------------------------# # 将图片分割,放在一起 #---------------------------------# cutx = int(w * min_offset_x) cuty = int(h * min_offset_y) new_image = np.zeros([h, w, 3]) new_image[:cuty, :cutx, :] = image_datas[0][:cuty, :cutx, :] new_image[cuty:, :cutx, :] = image_datas[1][cuty:, :cutx, :] new_image[cuty:, cutx:, :] = image_datas[2][cuty:, cutx:, :] new_image[:cuty, cutx:, :] = image_datas[3][:cuty, cutx:, :] new_image = np.array(new_image, np.uint8) #---------------------------------# # 对图像进行色域变换 # 计算色域变换的参数 #---------------------------------# r = np.random.uniform(-1, 1, 3) * [hue, sat, val] + 1 #---------------------------------# # 将图像转到HSV上 #---------------------------------# hue, sat, val = cv2.split(cv2.cvtColor(new_image, cv2.COLOR_RGB2HSV)) dtype = new_image.dtype #---------------------------------# # 应用变换 #---------------------------------# x = np.arange(0, 256, dtype=r.dtype) lut_hue = ((x * r[0]) % 180).astype(dtype) lut_sat = np.clip(x * r[1], 0, 255).astype(dtype) lut_val = np.clip(x * r[2], 0, 255).astype(dtype) new_image = cv2.merge((cv2.LUT(hue, lut_hue), cv2.LUT(sat, lut_sat), cv2.LUT(val, lut_val))) new_image = cv2.cvtColor(new_image, cv2.COLOR_HSV2RGB) #---------------------------------# # 对框进行进一步的处理 #---------------------------------# new_boxes = merge_bboxes(box_datas, cutx, cuty) return new_image, new_boxes 2、调用代码该部分为调用代码 import os from random import sample import numpy as np from PIL import Image, ImageDraw from utils.random_data import get_random_data, get_random_data_with_Mosaic from utils.utils import convert_annotation, get_classes #-----------------------------------------------------------------------------------# # Origin_VOCdevkit_path 原始数据集所在的路径 #-----------------------------------------------------------------------------------# Origin_VOCdevkit_path = "VOCdevkit_Origin" #-----------------------------------------------------------------------------------# # input_shape 生成的图片大小。 #-----------------------------------------------------------------------------------# input_shape = [640, 640] if __name__ == "__main__": Origin_JPEGImages_path = os.path.join(Origin_VOCdevkit_path, "VOC2007/JPEGImages") Origin_Annotations_path = os.path.join(Origin_VOCdevkit_path, "VOC2007/Annotations") #---------------------------# # 遍历标签并赋值 #---------------------------# xml_names = os.listdir(Origin_Annotations_path) #------------------------------# # 获取4个图像与标签 #------------------------------# sample_xmls = sample(xml_names, 4) unique_labels = get_classes(sample_xmls, Origin_Annotations_path) annotation_line = [] for xml in sample_xmls: line = convert_annotation(os.path.join(Origin_JPEGImages_path, os.path.splitext(xml)[0] + '.jpg'), os.path.join(Origin_Annotations_path, xml), unique_labels) annotation_line.append(line) #------------------------------# # 合并mosaic #------------------------------# image_data, box_data = get_random_data_with_Mosaic(annotation_line, input_shape) img = Image.fromarray(image_data.astype(np.uint8)) for j in range(len(box_data)): thickness = 3 left, top, right, bottom = box_data[j][0:4] draw = ImageDraw.Draw(img) for i in range(thickness): draw.rectangle([left + i, top + i, right - i, bottom - i],outline=(255, 255, 255)) img.show() |

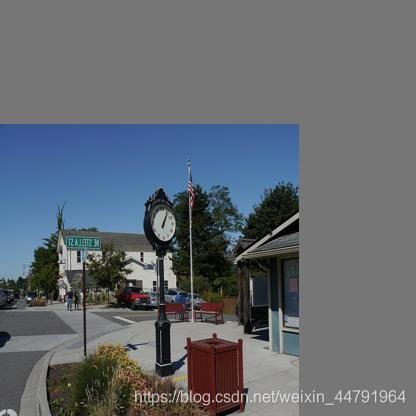
 但是mosaic利用了四张图片,根据论文所说其拥有一个巨大的优点是丰富检测物体的背景!且在BN计算的时候一下子会计算四张图片的数据! 就像下图这样:
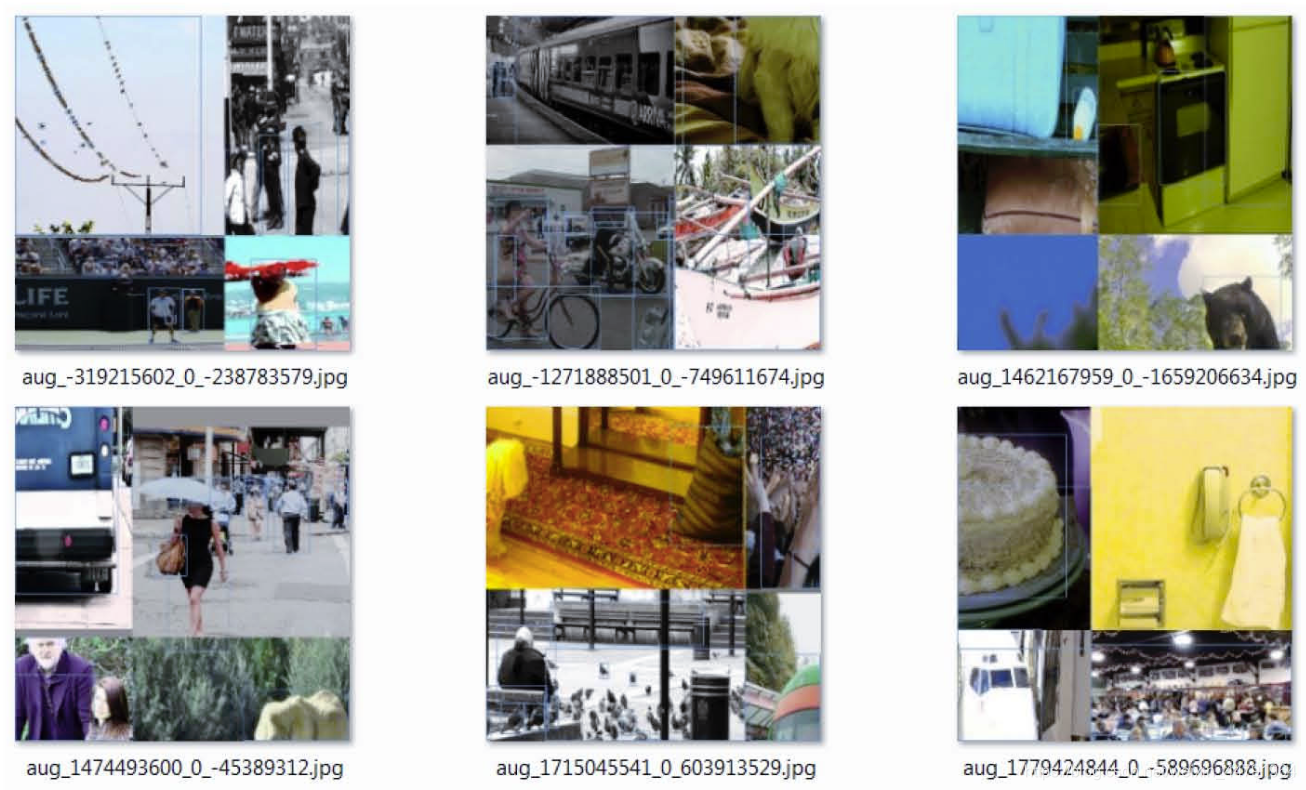
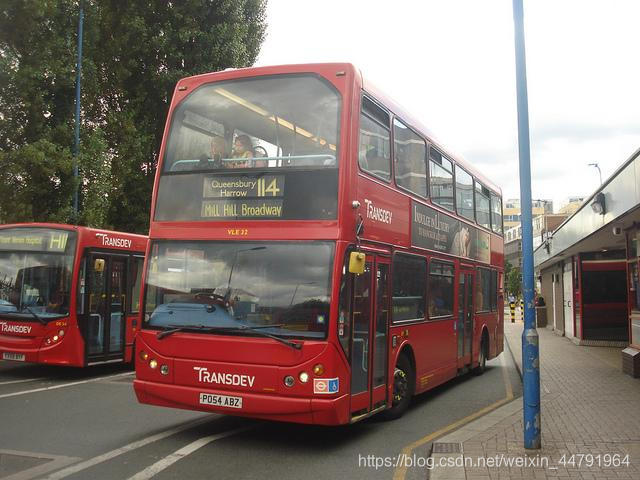
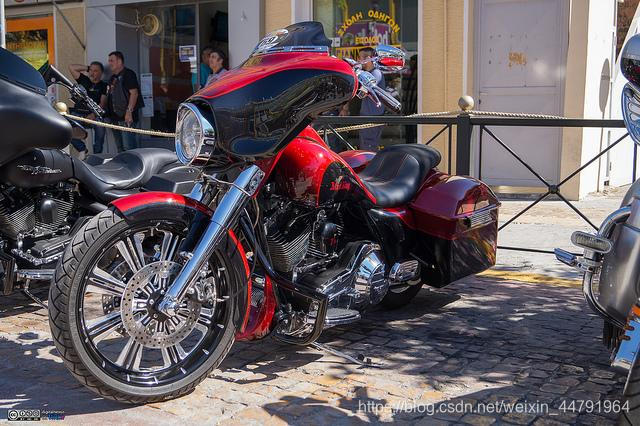 2、分别对四张图片进行翻转、缩放、色域变化等,并且按照四个方向位置摆好。

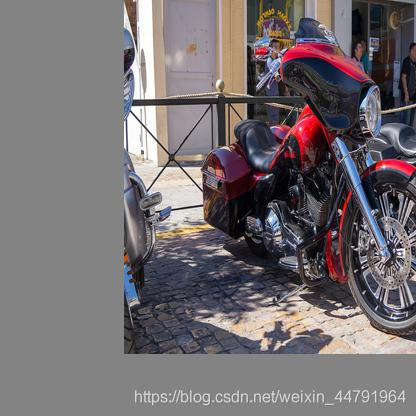 3、进行图片的组合和框的组合
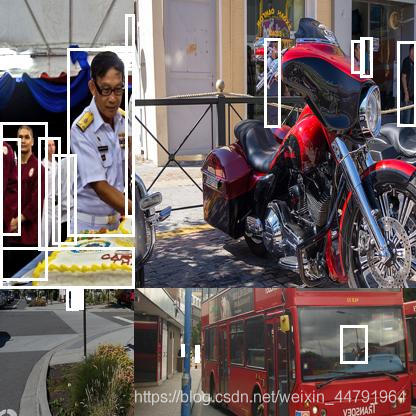
【本文地址】