Android+IDEA后台+MySQL数据库数据交互实战案例(A电脑:Android B电脑:IDEA后台) |
您所在的位置:网站首页 › 街头篮球安卓版 › Android+IDEA后台+MySQL数据库数据交互实战案例(A电脑:Android B电脑:IDEA后台) |
Android+IDEA后台+MySQL数据库数据交互实战案例(A电脑:Android B电脑:IDEA后台)
|
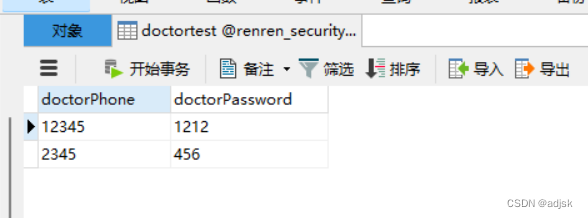
目录 一、实现功能: 二、实战部署: 2.1 Android项目详解: 2.1.1 Android定义返回实体类(如是返回基本类型如int String Boolean 等无需建类) 2.1.2 Android定义接口 2.1.3 Android定义配置文件,设置IDEA电脑主机IP(localhost)以及端口号 2.1.4 Android使用Retrofit框架进行网络请求,并使用工具类进行日志拦截 2.1.5 调用接口进行数据请求 2.2 IDEA项目详解 2.2.1 项目结构: 2.2.2 Controller层/DoctortestController.java 2.2.3 dao层/Doctortest.java 2.2.4 mapper层/DoctortestMapper.java 2.2.5 service层/impl/DoctortestServiceImpl.java 2.2.6 service层/IDoctortestService.java 2.2.7 代码生成器Code,修改参数 2.2.8 MybatisPlusConfig 2.2.9 DoctortestMapper.xml 2.2.10 application.properties 2.2.11 依赖pom.xml文件: 3.运行结果 4.数据库表结构 一、实现功能:框架思路:A电脑部署Android项目,B电脑部署IDEA后台,Android向IDEA发送参数M,在IDEA中根据接收参数M对Mysql数据库进行查询处理,将结果(参数N)返回给Android 实战逻辑:Android输入手机号Phone,和密码Password,将两个参数的值传输到IDEA项目,IDEA项目根据手机号查询,如果查询到记录,则返回true表示已注册,如果未查询到记录,则返回false(Android项目code、IDEA项目code、数据库结构以及注意问题 都放进去了) 二、实战部署: 2.1 Android项目详解: 2.1.1 Android定义返回实体类(如是返回基本类型如int String Boolean 等无需建类)注:由于下面案例返回的是Boolean值,没用上这个实体类,但是返回的是对象类型就需要建一个代码如下(示例):
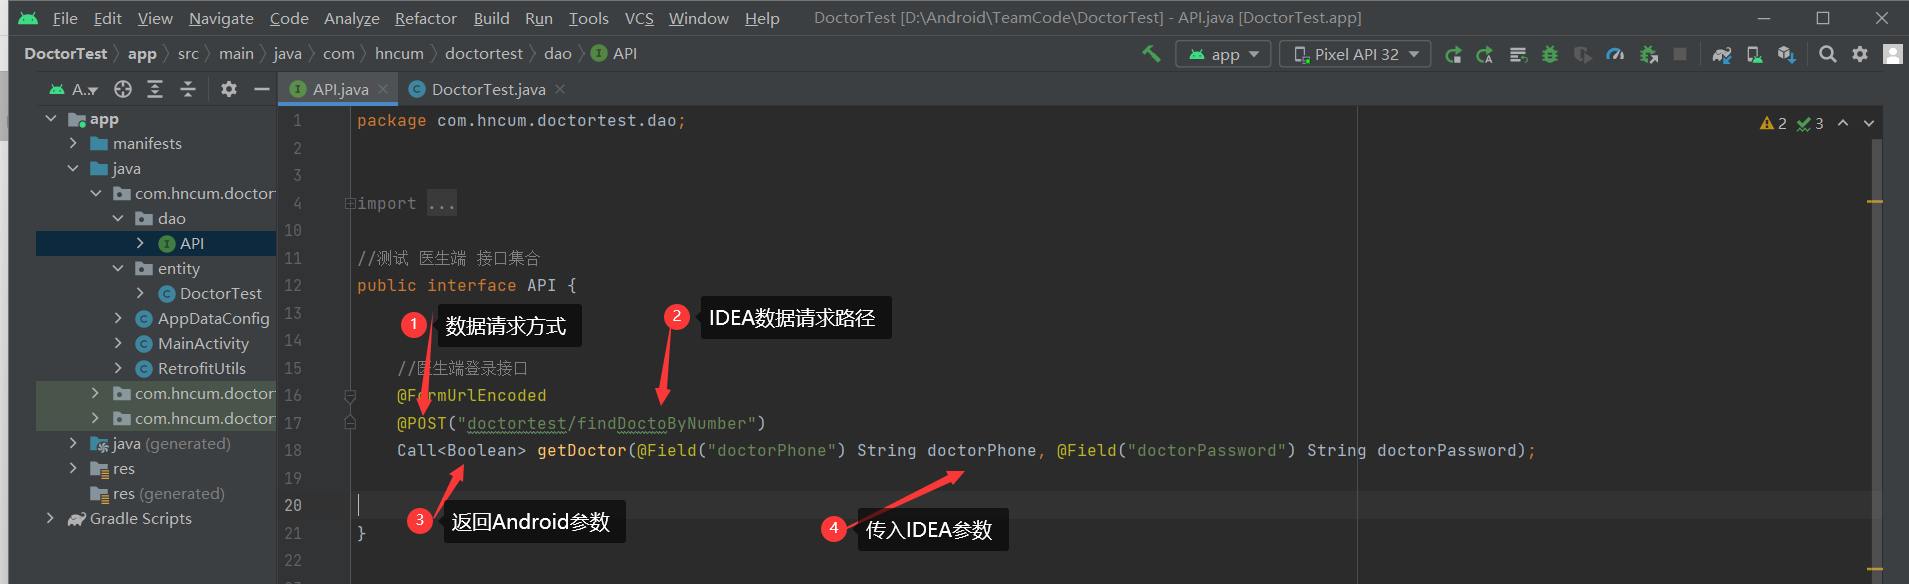
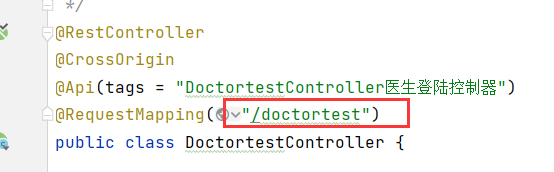
doctortest :IDEA项目中的Controller层定义的路径,对应下面红框部分
findDoctoByNumber :IDEA项目中的Controller类中的方法注解路径,如下图
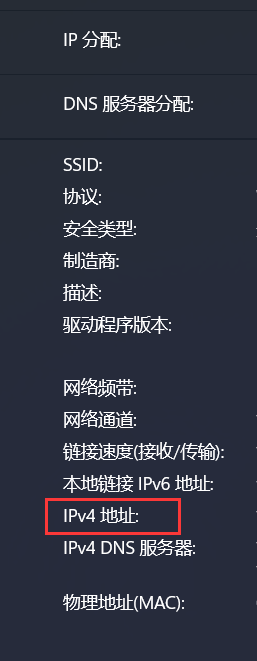
代 package com.hncum.doctortest.dao; import com.hncum.doctortest.entity.DoctorTest; import retrofit2.Call; import retrofit2.http.Field; import retrofit2.http.FormUrlEncoded; import retrofit2.http.POST; //测试 医生端 接口集合 public interface API { //医生端登录接口 @FormUrlEncoded @POST("doctortest/findDoctoByNumber") Call getDoctor(@Field("doctorPhone") String doctorPhone, @Field("doctorPassword") String doctorPassword); } 2.1.3 Android定义配置文件,设置IDEA电脑主机IP(localhost)以及端口号 package com.hncum.doctortest; public class AppDataConfig { //使用公网 IP地址 处于统一局域网中 public static String localhost = " 公共网络IP地址 "; //9000 端口号 public static String getURL(){ return "http://"+localhost+":9000/"; } }注:此处IP地址 需要两部电脑同时连接一个热点之后(最好别用校园网,可以自己开热点),然后在IDEA项目的电脑上打开 设置==》网络和Internet==》WLAN==》第二行点进去 翻到最下面 复制 IPv4地址 对应的IP 放到Android项目中 localhost,切记 需两台电脑连接同一个热点后再复制对应IP地址,而且每次重新连接网络都会更改此地址
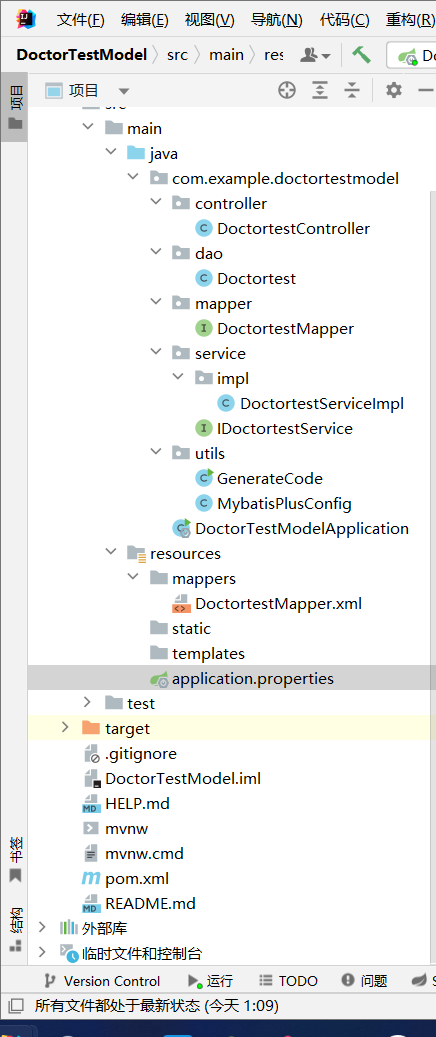
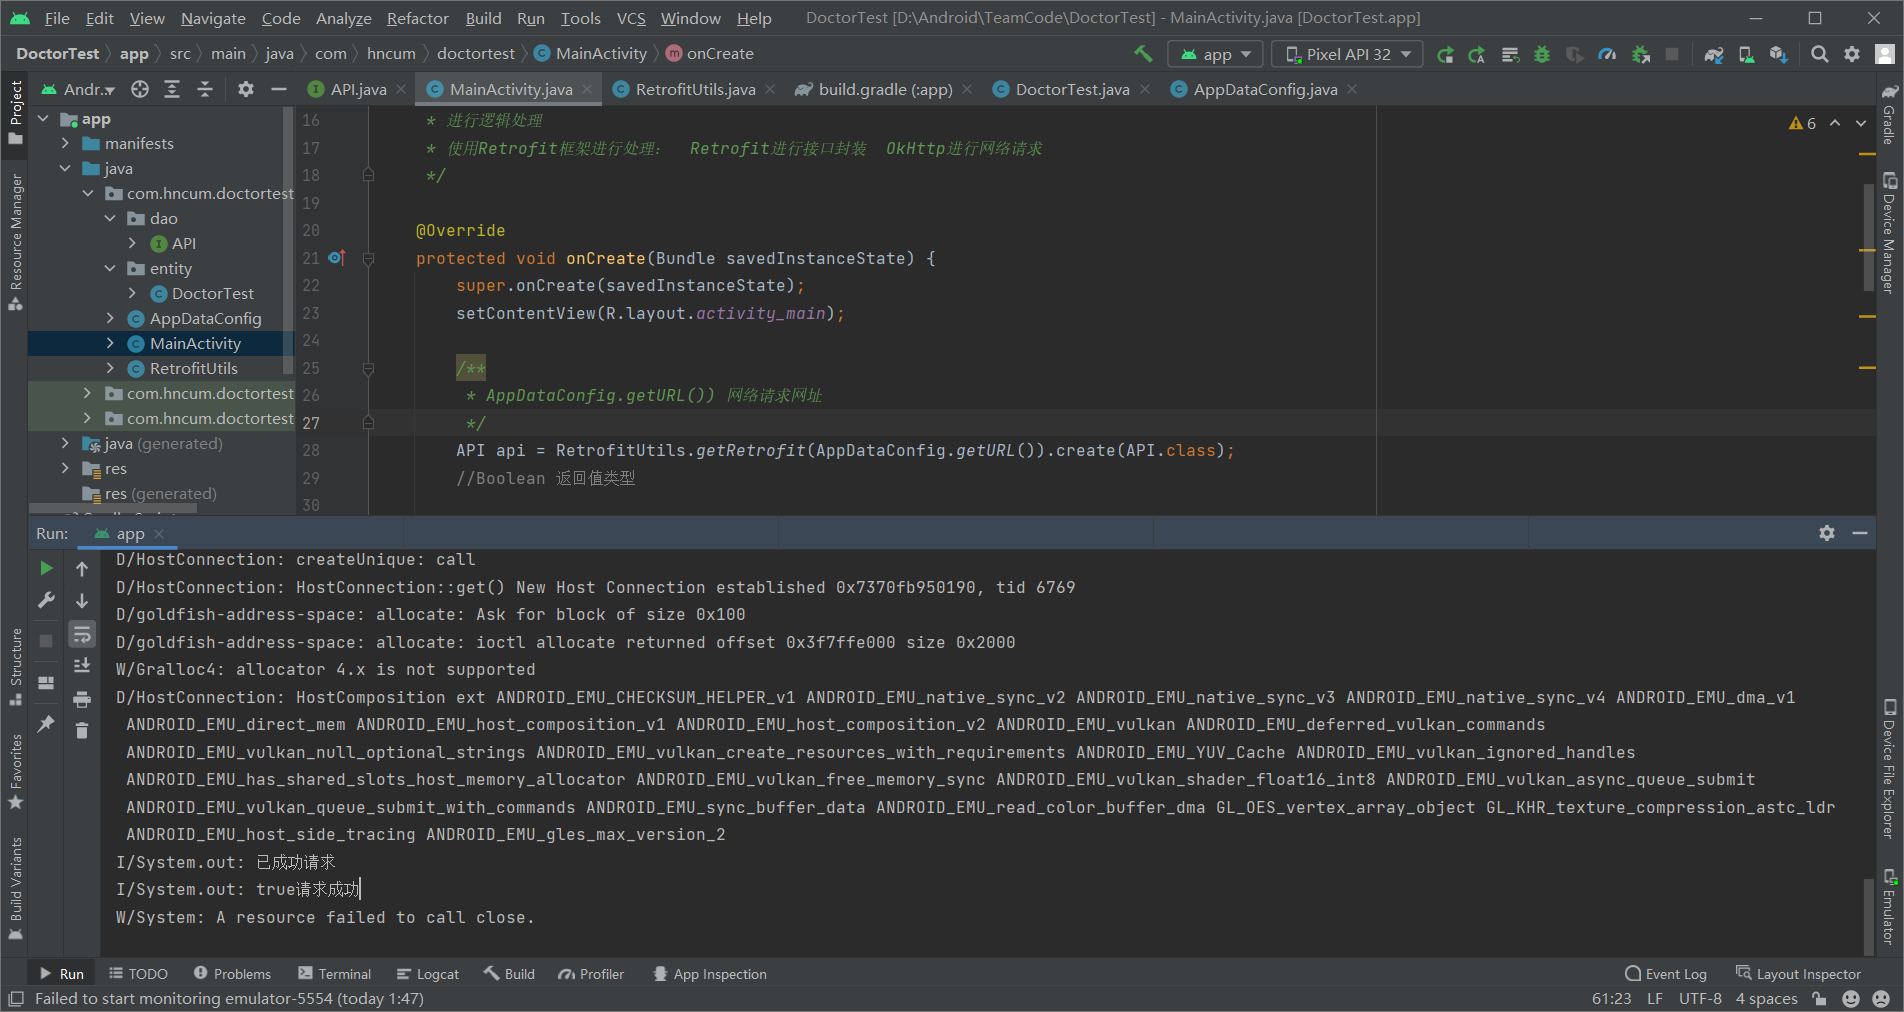
Retrofit工具类进行日志拦截: package com.hncum.doctortest; import android.util.Log; import okhttp3.OkHttpClient; import okhttp3.logging.HttpLoggingInterceptor; import retrofit2.Retrofit; import retrofit2.converter.gson.GsonConverterFactory; public class RetrofitUtils { public static Retrofit getRetrofit(String url) { //日志显示级别 HttpLoggingInterceptor.Level level= HttpLoggingInterceptor.Level.BODY; //新建log拦截器 HttpLoggingInterceptor loggingInterceptor=new HttpLoggingInterceptor(new HttpLoggingInterceptor.Logger() { @Override public void log(String message) { Log.d("RetrofitMessage","OkHttp====Message:"+message); } }); loggingInterceptor.setLevel(level); //定制OkHttp OkHttpClient.Builder httpClientBuilder = new OkHttpClient .Builder(); //OkHttp进行添加拦截器loggingInterceptor httpClientBuilder.addInterceptor(loggingInterceptor); Retrofit retrofit = new Retrofit.Builder() .baseUrl(url) .addConverterFactory(GsonConverterFactory.create()) .client( httpClientBuilder.build()) .build(); return retrofit; } }Android添加Retrofit+GSON依赖: //retrofit+gson+网络请求 implementation("com.squareup.okhttp3:okhttp:4.9.3") implementation 'com.google.code.gson:gson:2.9.0' implementation 'com.squareup.retrofit2:retrofit:2.9.0' implementation 'com.squareup.retrofit2:converter-gson:2.9.0' implementation 'com.squareup.okhttp3:logging-interceptor:4.9.3' //retrofit+gson+网络请求 2.1.5 调用接口进行数据请求 package com.hncum.doctortest; import androidx.appcompat.app.AppCompatActivity; import android.os.Bundle; import com.hncum.doctortest.dao.API; import com.hncum.doctortest.entity.DoctorTest; import retrofit2.Call; import retrofit2.Callback; import retrofit2.Response; public class MainActivity extends AppCompatActivity { /** * 进行逻辑处理 * 使用Retrofit框架进行处理: Retrofit进行接口封装 OkHttp进行网络请求 */ @Override protected void onCreate(Bundle savedInstanceState) { super.onCreate(savedInstanceState); setContentView(R.layout.activity_main); /** * AppDataConfig.getURL()) 网络请求网址 */ API api = RetrofitUtils.getRetrofit(AppDataConfig.getURL()).create(API.class); //Boolean 返回值类型 api.getDoctor("12345","1212").enqueue(new Callback() { //请求成功 @Override public void onResponse(Call call, Response response) { System.out.println("已成功请求"); System.out.println(response.body()+"请求成功"); } //请求失败后 @Override public void onFailure(Call call, Throwable t) { System.out.println("请求失败"); //返回错误信息 System.out.println(t.getMessage()); } }); } } 2.2 IDEA项目详解 2.2.1 项目结构:
* 前端控制器 * * @since 2022-11-05 */ @RestController @CrossOrigin @Api(tags = "DoctortestController医生登陆控制器") @RequestMapping("/doctortest") public class DoctortestController { @Autowired IDoctortestService iDoctortestService; /** * * @param phone_number * @param doctorPassword * @return Boolean */ @PostMapping("findDoctoByNumber") private Boolean findDoctoByNumber(@RequestParam(name = "doctorPhone") String phone_number, @RequestParam(name = "doctorPassword") String doctorPassword) { QueryWrapper queryWrapper = new QueryWrapper(); queryWrapper.eq("doctorPhone", phone_number); List list = new ArrayList(); System.out.println(111); list = iDoctortestService.getBaseMapper().selectList(queryWrapper); if(list.size()!=1) return false; if(list.get(0).getDoctorPassword().equals(doctorPassword)) return true; return false; } } 2.2.3 dao层/Doctortest.java package com.example.doctortestmodel.dao; import com.baomidou.mybatisplus.annotation.TableField; import com.baomidou.mybatisplus.annotation.TableId; import com.baomidou.mybatisplus.annotation.TableName; import io.swagger.annotations.ApiModel; import lombok.Data; import java.io.Serializable; /** ** * * @since 2022-11-05 */ @Data @ApiModel(value = "Doctortest对象", description = "") @TableName("doctortest") public class Doctortest implements Serializable { private static final long serialVersionUID = 1L; @TableId(value = "doctorPhone") private String doctorPhone; @TableField(value="doctorPassword") private String doctorPassword; public String getDoctorPhone() { return doctorPhone; } public void setDoctorPhone(String doctorPhone) { this.doctorPhone = doctorPhone; } public String getDoctorPassword() { return doctorPassword; } public void setDoctorPassword(String doctorPassword) { this.doctorPassword = doctorPassword; } @Override public String toString() { return "Doctortest{" + "doctorPhone=" + doctorPhone + ", doctorPassword=" + doctorPassword + "}"; } } 2.2.4 mapper层/DoctortestMapper.java package com.example.doctortestmodel.mapper; import com.baomidou.mybatisplus.core.mapper.BaseMapper; import com.example.doctortestmodel.dao.Doctortest; import org.apache.ibatis.annotations.Mapper; /** ** Mapper 接口 * * * @author yqifei * @since 2022-11-05 */ @Mapper public interface DoctortestMapper extends BaseMapper { } 2.2.5 service层/impl/DoctortestServiceImpl.java package com.example.doctortestmodel.service.impl; import com.baomidou.mybatisplus.extension.service.impl.ServiceImpl; import com.example.doctortestmodel.dao.Doctortest; import com.example.doctortestmodel.mapper.DoctortestMapper; import com.example.doctortestmodel.service.IDoctortestService; import org.springframework.stereotype.Service; /** ** 服务实现类 * * * @author yqifei * @since 2022-11-05 */ @Service public class DoctortestServiceImpl extends ServiceImpl implements IDoctortestService { } 2.2.6 service层/IDoctortestService.java package com.example.doctortestmodel.service; import com.baomidou.mybatisplus.extension.service.IService; import com.example.doctortestmodel.dao.Doctortest; /** ** 服务类 * * * @author yqifei * @since 2022-11-05 */ public interface IDoctortestService extends IService { } 2.2.7 代码生成器Code,修改参数 package com.example.doctortestmodel.utils; import com.baomidou.mybatisplus.generator.FastAutoGenerator; import com.baomidou.mybatisplus.generator.config.OutputFile; import java.util.Collections; public class GenerateCode { public static void main(String[] args) { FastAutoGenerator.create("jdbc:mysql://1.117.225.144:3306/renren_security?serverTimezone=UTC", "root", "83f67c3ec322f2b0") .globalConfig(builder -> { builder.author(" ") // 设置作者 .enableSwagger() // 开启 swagger 模式 .fileOverride() // 覆盖已生成文件 .outputDir("D://data//"); // 指定输出目录 }) .packageConfig(builder -> { builder.parent("com.example_login.demo") // 设置父包名 // .moduleName("idcard") // 设置父包模块名 .pathInfo(Collections.singletonMap(OutputFile.mapperXml, "D://data//")); // 设置mapperXml生成路径 }) .strategyConfig(builder -> { builder.addInclude("doctortest") // 设置需要生成的表名 .addTablePrefix("t_", "c_"); // 设置过滤表前缀 }) // .templateEngine(new FreemarkerTemplateEngine()) // 使用Freemarker引擎模板,默认的是Velocity引擎模板 .execute(); } } 2.2.8 MybatisPlusConfig package com.example.doctortestmodel.utils; import com.baomidou.mybatisplus.extension.plugins.PaginationInterceptor; import org.springframework.context.annotation.Bean; import org.springframework.context.annotation.Configuration; @Configuration public class MybatisPlusConfig { @Bean public PaginationInterceptor paginationInnerInterceptor(){ return new PaginationInterceptor(); } }DoctorTestModelApplication package com.example.doctortestmodel; import org.springframework.boot.SpringApplication; import org.springframework.boot.autoconfigure.SpringBootApplication; @SpringBootApplication public class DoctorTestModelApplication { public static void main(String[] args) { SpringApplication.run(DoctorTestModelApplication.class, args); } } 2.2.9 DoctortestMapper.xml 2.2.10 application.properties # åºç¨å称 spring.application.name=DoctorTestModel # åºç¨æå¡ WEB 访é®ç«¯å£ server.port=9000 #ä¸é¢è¿äºå容æ¯ä¸ºäºè®©MyBatisæ å° #æå®MybatisçMapperæ件 mybatis.mapper-locations=classpath:mappers/*xml #æå®Mybatisçå®ä½ç®å½ mybatis.type-aliases-package=com.example.doctortestmodel.DoctorTestModelApplication # æ°æ®åºé©±å¨ï¼ spring.datasource.driver-class-name=com.mysql.cj.jdbc.Driver # æ°æ®æºå称 spring.datasource.name=defaultDataSource # æ°æ®åºè¿æ¥å°å # localhost 对应连接热点后的IP地址 3306为端口号 renren_security 数据库名 spring.datasource.url=jdbc:mysql://localhost:3306/renren_security?serverTimezone=UTC # æ°æ®åºç¨æ·å&å¯ç ï¼ spring.datasource.username=root spring.datasource.password=83f67c3ec322f2b0 # å¤è·¯å¾éç½® spring.resources.static-locations=file:/home/dachuang # å¼å¯æ¥å¿ logging.level.com.hnucm.xiaotang = debug mybatis-plus.configuration.log-impl=org.apache.ibatis.logging.stdout.StdOutImpl spring.servlet.multipart.max-request-size=200MB spring.servlet.multipart.max-file-size=200MB 2.2.11 依赖pom.xml文件: 4.0.0 com.example DoctorTestModel 0.0.1-SNAPSHOT DoctorTestModel DoctorTestModel 1.8 UTF-8 UTF-8 2.3.7.RELEASE org.springframework.boot spring-boot-starter-web org.springframework.boot spring-boot-devtools runtime true org.projectlombok lombok true org.springframework.boot spring-boot-starter-test test org.junit.vintage junit-vintage-engine io.springfox springfox-swagger2 3.0.0 io.springfox springfox-swagger-ui 3.0.0 com.baomidou mybatis-plus-boot-starter 3.4.2 com.baomidou mybatis-plus-generator 3.5.1 org.apache.velocity velocity-engine-core 2.2 mysql mysql-connector-java 8.0.24 org.springframework.boot spring-boot-dependencies ${spring-boot.version} pom import org.apache.maven.plugins maven-compiler-plugin 3.8.1 1.8 1.8 UTF-8 org.springframework.boot spring-boot-maven-plugin 2.3.7.RELEASE com.example.doctortestmodel.DoctorTestModelApplication repackage repackage 3.运行结果3.1 两个项目部署好之后即可运行,IDEA项目运行后,Android发起请求并打印输出结果
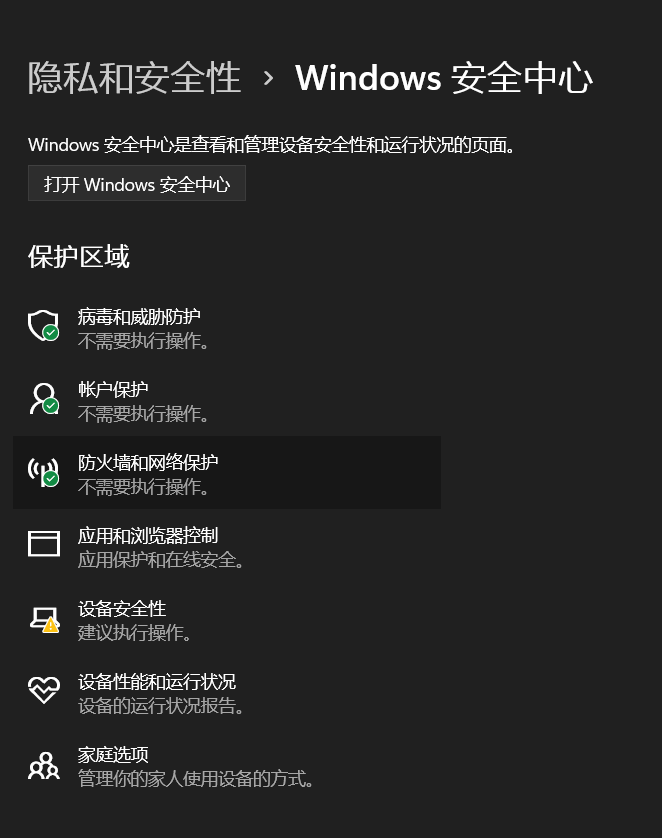
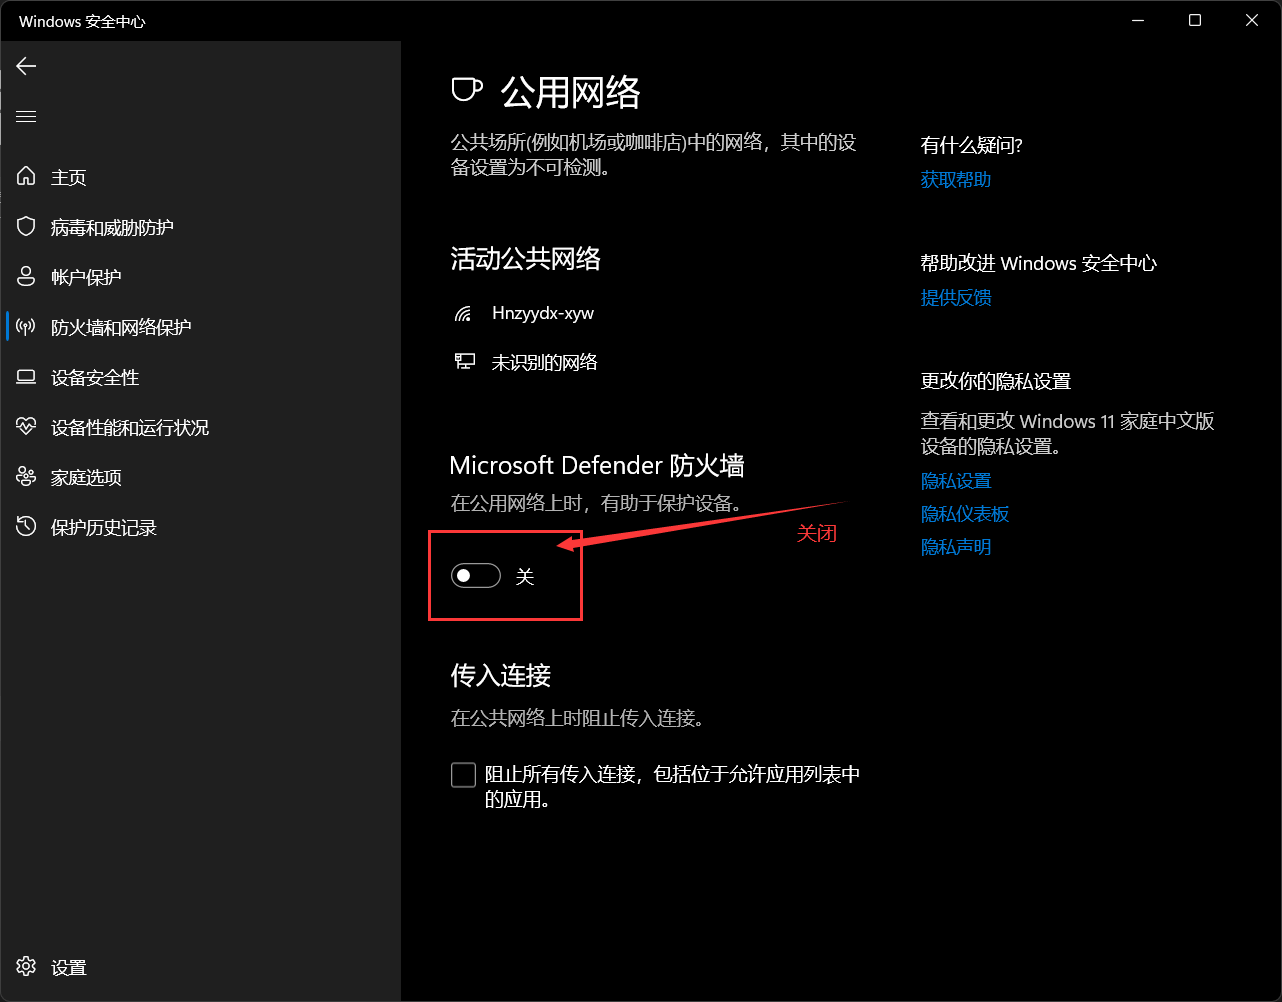
3.2 在写好IDEA项目后,可用APIFOX进行调试,测试接口是否正确返回数据(APIFOX在线调试工具,可看这一篇 APIFOX在线调试工具 有图有实例) 3.3 如若Android项目显示连接超时,请关掉两台电脑主机的公网防火墙
|


【本文地址】
今日新闻 |
推荐新闻 |