|
下一篇:【Python】手把手教你用tkinter设计图书管理登录UI界面(二)-CSDN博客
本项目将分段设计“图书管理登录UI界面”的用户登录、用户注册、用户账号找回等。主要围绕GUI标准库tkinter、以及类的继承(重点)来设计本项目。
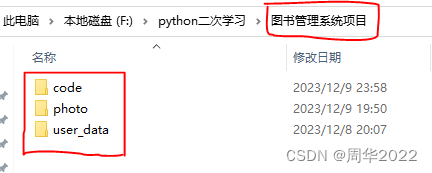
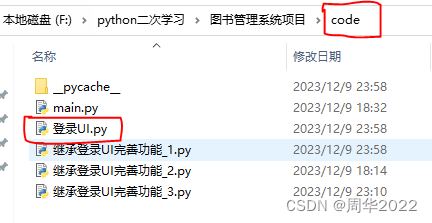
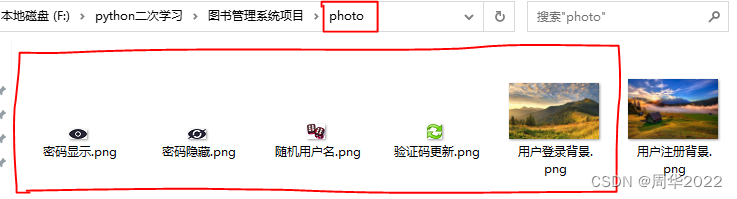
首先新建一个文件夹命名为“图书管理系统项目”,并在其目录下新建文件夹code、photo、user_data。然后在code目录下新建“登录UI.py”,再然后把图片放在photo目录下,如下图:
注意:此时的窗口组件并未绑定触发事件,所以按键无法触发。
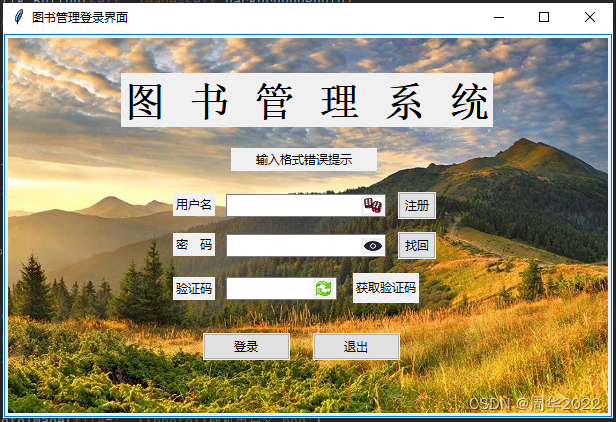
运行结果
登录UI.py 代码示例
"""
登录UI 模块
"""
# 通配符 '*'
__all__ = ['LoginUI']
import tkinter as tk
from tkinter import ttk
class LoginUI(tk.Tk):
"""继承tk.Tk,创建登录UI"""
def __init__(self):
"""构造方法"""
# 调用tk.Tk的构造方法
super().__init__()
self.width = self.winfo_screenwidth() # 窗口宽初始位置为屏幕宽度位置显示
self.height = self.winfo_screenheight() # 窗口高初始位置为屏幕高度位置显示
# 设计自己项目的UI
self.title('图书管理登录界面') # 标题
self.geometry(f'+{self.width//4}+{self.height//8}') # 窗口像素大小
self.resizable(0, 0) # 窗口大小禁止调节
# 窗口背景图
self.backgroundPhoto = tk.PhotoImage(file='..\\photo\\用户登录背景.png')
self.backgroundButton = ttk.Button(self, image=self.backgroundPhoto)
self.backgroundButton.pack()
# 系统名
self.titleLabel = tk.Label(self, text='图 书 管 理 系 统', font=('Tahoma', 30, 'bold'))
self.titleLabel.place(x=118, y=40)
# 输入格式错误提示
self.hintLabel = tk.Label(self, text='输入格式错误提示', width=20)
self.hintLabel.place(x=228, y=115)
# 用户名
tk.Label(self, text='用户名').place(x=170, y=160)
# 输入用户名
self.userName = tk.StringVar()
self.userEntry = ttk.Entry(self, textvariable=self.userName, width=22)
self.userEntry.place(x=223, y=161)
# 随机用户名
self.randomPhoto = tk.PhotoImage(file='..\\photo\\随机用户名.png')
self.randomButton = tk.Button(self, image=self.randomPhoto, relief=tk.FLAT)
self.randomButton.place(x=358, y=162)
# 密码
tk.Label(self, text='密 码').place(x=170, y=200)
# 输入密码
self.password = tk.StringVar()
self.passwordEntry = ttk.Entry(self, textvariable=self.password, width=22)
self.passwordEntry.place(x=223, y=201)
# 显示/隐藏密码
self.showOrConcealCount = 0
self.showPhoto = tk.PhotoImage(file='..\\photo\\密码显示.png')
self.concealPhoto = tk.PhotoImage(file='..\\photo\\密码隐藏.png')
self.showOrConcealButton = tk.Button(self, image=self.showPhoto, relief=tk.FLAT)
self.showOrConcealButton.place(x=358, y=205)
# 验证码
tk.Label(self, text='验证码').place(x=170, y=244)
# 输入验证码
self.inputVerifyCode = tk.StringVar()
self.verifyEntry = ttk.Entry(self, textvariable=self.inputVerifyCode, width=15)
self.verifyEntry.place(x=223, y=244)
# 随机验证码
self.showVerifyCode = tk.StringVar(value='获取验证码')
self.verifyButton = tk.Button(self, textvariable=self.showVerifyCode, relief='flat', width=8)
self.verifyButton.place(x=350, y=240)
# 刷新验证码
self.updatePhoto = tk.PhotoImage(file='..\\photo\\验证码更新.png')
self.updateButton = tk.Button(self, image=self.updatePhoto, relief='flat')
self.updateButton.place(x=310, y=245)
# 注册
self.registerButton = ttk.Button(self, text='注册', width=4)
self.registerButton.place(x=395, y=159)
# 找回
self.retrieveButton = ttk.Button(self, text='找回', width=4)
self.retrieveButton.place(x=395, y=199)
# 登录
self.loginButton = ttk.Button(self, text='登录')
self.loginButton.place(x=200, y=300)
# 退出
self.close = ttk.Button(self, text='退出', command=self.destroy)
self.close.place(x=310, y=300)
# 代码测试
if __name__ == '__main__':
ui = LoginUI() # 对象实例化
ui.mainloop() # 窗口主循环
else:
print(f'导入【{__name__}】模块')
作者:周华
传作日期:2023/12/10
|