|
全局的设置
在matplotlib目前的绘图文字显示时,是不支持中文的,我们想输出中文,需要设置一下。
matplotlib.rcParams['属性'] = '属性值',可以修改全局字体 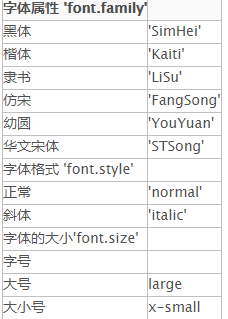
import matplotlib.pyplot as plt
import matplotlib
# 将全局的字体设置为黑体
matplotlib.rcParams['font.family'] = 'SimHei'
y = [3, 1, 4, 5, 2]
plt.plot(y)
plt.ylabel("纵轴的值")
plt.xlabel("横轴的值")
# 自动保存图片
plt.savefig("test", dpi=600)
plt.show()
2.局部的设置
为了不影响全局的字体,我们可以选择在局部改变字体。
在需要输入中文的地方,输入一下参数 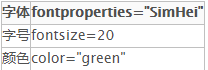
import matplotlib.pyplot as plt
y = [3, 1, 4, 5, 2]
plt.plot(y)
# 改变局部变量
plt.ylabel("纵轴的值", fontproperties="SimHei", fontsize=20)
plt.xlabel("横轴的值", fontproperties="SimHei", fontsize=20, color="green")
plt.savefig("test", dpi=600)
plt.show()
文本显示
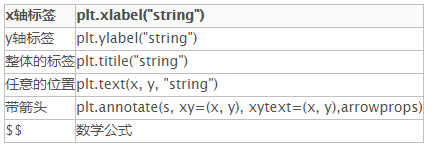 带箭头的参数: 带箭头的参数:
s : "string"
xy: 箭头的坐标
xytext: 文字的坐标
arrowprops: 箭头的属性,字典类型
arrowprops=dict(facecolor="red", shrink=0.1, width=2)
facecolor:箭头颜色
shrink:箭头的长度(两坐标距离的比例,0~1)
width:箭头的宽度
import matplotlib.pyplot as plt
y = [3, 1, 4, 5, 2]
plt.plot(y)
# x , y 轴标签
plt.ylabel("纵轴的值", fontproperties="SimHei", fontsize=20)
plt.xlabel("横轴的值", fontproperties="SimHei", fontsize=20, color="green")
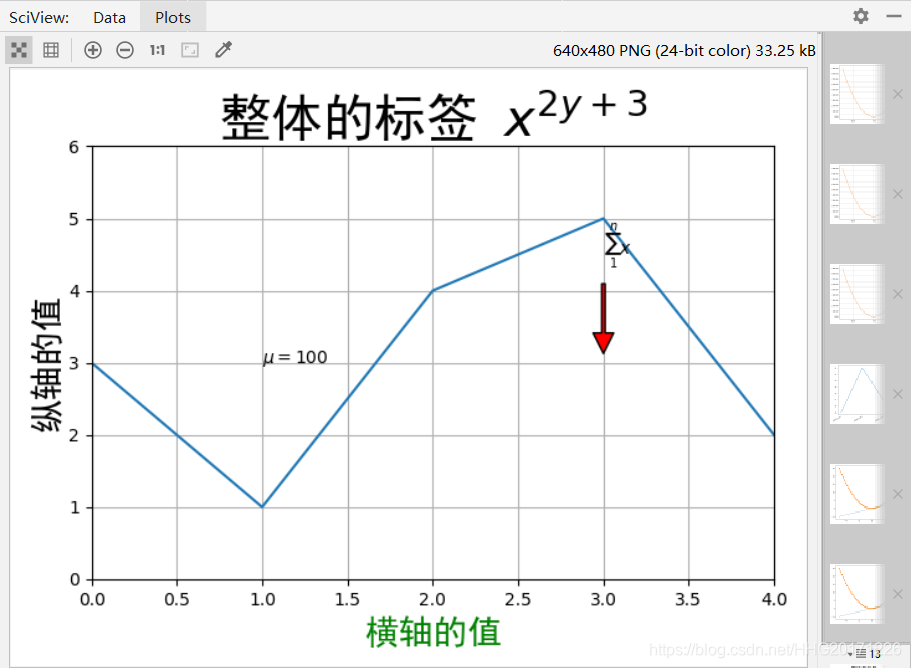
# 整体的标签
plt.title(r"整体的标签 $x^{2y +3}$", fontproperties="SimHei", fontsize=30)
# 显示网格
plt.grid(True)
# 再坐标为(1,3)处输出文字
plt.text(1, 3, r"$\mu=100$")
# 有箭头的文字
plt.annotate(r"$\sum_1^nx$", xy=(3, 3), xytext=(3, 4.5),
arrowprops=dict(facecolor="red", shrink=0.1, width=2))
# 设置坐标轴 x(0, 4) y(0, 6)
plt.axis([0, 4, 0, 6])
plt.show()
annotate:添加注释text:添加注释
import matplotlib.pyplot as plt
import numpy as np
x = np.linspace(-3, 3, 50)
y = 2*x + 1
plt.figure(num=1, figsize=(8, 5),)
plt.plot(x, y,)

# 移动坐标
ax = plt.gca()
ax.spines['right'].set_color('none')
ax.spines['top'].set_color('none')
ax.spines['top'].set_color('none')
ax.xaxis.set_ticks_position('bottom')
ax.spines['bottom'].set_position(('data', 0))
ax.yaxis.set_ticks_position('left')
ax.spines['left'].set_position(('data', 0))

x0 = 1
y0 = 2*x0 + 1
plt.plot([x0, x0,], [0, y0,], 'k--', linewidth=2.5)
# set dot styles
plt.scatter([x0, ], [y0, ], s=50, color='b')

# 添加注释 annotate
plt.annotate(r'$2x+1=%s$' % y0, xy=(x0, y0), xycoords='data', xytext=(+30, -30),
textcoords='offset points', fontsize=16,
arrowprops=dict(arrowstyle='->', connectionstyle="arc3,rad=.2"))

# 添加注释 text
plt.text(-3.7, 3, r'$This\ is\ the\ some\ text. \mu\ \sigma_i\ \alpha_t$',
fontdict={'size': 16, 'color': 'r'})

图形内的添加文本 plt.text() plt.figtext()
'''
第一种方式 text()
text(x,y,s,fontdict=None, withdash=False)
参数说明:(1)x,y 坐标位置
(2) 显示的文本
'''
x = np.arange(0,2*np.pi,0.01)
plt.plot(np.sin(x))
'''x,y 代表着坐标系中数值'''
plt.text(20,0,'sin(0) = 0')
'''
第二种方式 figtext()
使用figtext时候,x,y代表相对值,图片的宽度
'''
x2 = np.arange(0,2*np.pi,0.01)
plt.plot(np.cos(x2))
''''''
plt.figtext(0.5,0.5,'cos(0)=0')
plt.show()

添加注释和箭头 plt.annotate()
'''
添加注释 annotate()
参数 :(1)x : 注释文本
(2)xy:
(3) xytext:
(4) 设置箭头,arrowprops
arrowprops : 是一个dict (字典)
第一种方式:{'width':宽度,'headwidth':箭头宽,'headlength':箭头长,
'shrink':两端收缩总长度分数}
例如:arrowprops={'width':5,'headwidth':10,'headlength':10,'shrink':0.1}
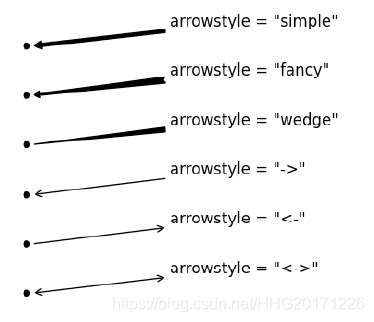
第二种方式:'arrowstyle':样式
例如:
有关arrowstyle的样式:'-' 、'->'、''、' |