Android中ColorFilter滤色器的使用 |
您所在的位置:网站首页 › 滤色英文 › Android中ColorFilter滤色器的使用 |
Android中ColorFilter滤色器的使用
|
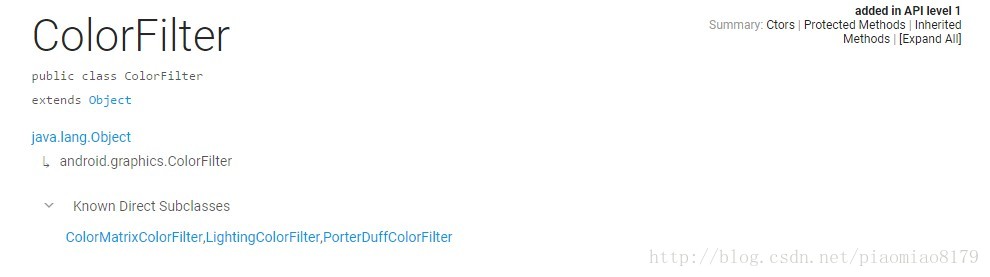
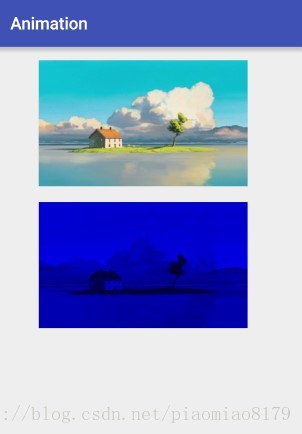
前言: ColorFilter滤色器是主要通过Paint画笔进行像素颜色的处理。 A color filter can be used with a Paint to modify the color of each pixel drawn with that paint.This is an abstract class that should never be used directly.从上面的英文解释中可以看到,这个类不能被直接使用。那么既然不能直接使用,肯定有它对应的实现类。 从上图可以看出,它有三个实现类: ColorMatrixColorFilter,LightingColorFilter,PorterDuffColorFilter我们接下来就详细分析一下这三个实现类。 ColorMatrixColorFilter A color filter that transforms colors through a 4x5 color matrix. This filter can be used to change the saturation of pixels, convert from YUV to RGB, etc.上面大致意思是:这个类主要是通过一个4*5的矩阵进行颜色的变换处理,也可以改变像素的饱和度,把YUV变换成RGB等等。 接下来就要看一下怎样使用它,说起使用肯定是需要看怎样构造他。 *ColorMatrixColorFilter(ColorMatrix matrix)* Create a color filter that transforms colors through a 4x5 color matrix. *ColorMatrixColorFilter(float[] array)* Create a color filter that transforms colors through a 4x5 color matrix.从构造方法中可以看出,他需要一个ColorMatrix对象的支持,这个类实际上就是我们上面说的4*5的矩阵,进行颜色处理的类;那么我们来分析一下ColorMatrix。 ColorMatrix colorMatrix = new ColorMatrix(new float[]{ 1, 0, 0, 0, 0, // 红色向量 0, 1, 0, 0, 0, // 绿色向量 0, 0, 1, 0, 0, // 蓝色向量 0, 0, 0, 1, 0, // 透明度向量 });3.其中,第一行表示的R(红色)的向量,第二行表示的G(绿色)的向量,第三行表示的B(蓝色)的向量,最后一行表示A(透明度)的向量,这一顺序必须要正确不能调换!其中最后一列为颜色的偏移量,第一行偏移量增加就是偏移向红色,第二行偏移向绿色。 4.通过ColorMatrix矩阵进行RGBA颜色变化的本质就是通过矩阵数值的变化。也就是上述矩阵4个1的地方的范围都是0.0F-2.0F之间,1代表和原图一样的颜色。 5. 从下面这个例子中看一下ColorMatrixColorFilter的用法: private Paint mPaint; private Bitmap mBitmap; private final static float[] matrix = new float[] { 0.5f, 0, 0, 0, 0, 0, 0.5f, 0, 0, 0, 0, 0, 0.5f, 0, 0, 0, 0, 0, 1, 0 }; public MyView(Context context, @Nullable AttributeSet attrs, int defStyleAttr) { super(context, attrs, defStyleAttr); mPaint = new Paint(Paint.ANTI_ALIAS_FLAG); mBitmap = BitmapFactory.decodeResource(getResources(),R.drawable.timg); } @Override public void draw(Canvas canvas) { super.draw(canvas); canvas.drawBitmap(mBitmap,50, 20, mPaint); // 使用矩阵颜色变浅50% mPaint.setColorFilter(new ColorMatrixColorFilter(matrix)); canvas.drawBitmap(mBitmap, 50, 250, mPaint); }通过上面的例子我们发现能通过矩阵进行颜色的变换。可能有人会问怎样进行平移旋转或者缩放呢,这个是通过Matrix进行变化的,篇幅所限,后续会另开一篇进行讲解,这个ColorFilter只是进行颜色的处理。 LightingColorFilter LightingColorFilter是上面ColorMatrixColorFilter的一个简化版本,构造函数也比较简单: LightingColorFilter(int mul, int add) -- mul代表multiply,也就是乘法 -- add代表加法,也就是颜色偏移量使用方法如下: Bitmap bitmap = BitmapFactory.decodeResource(getContext().getResources(), R.drawable.home); canvas.drawBitmap(bitmap, 100, 0, paint); LightingColorFilter filter = new LightingColorFilter(0x888888, 0x000000); paint.setColorFilter(filter); canvas.drawBitmap(bitmap, 100, 500, paint); LightingColorFilter filter2 = new LightingColorFilter(0x888888, 0x555555); paint.setColorFilter(filter2); canvas.drawBitmap(bitmap, 100, 1000, paint);看第二张图片的ColorFilter构造new LightingColorFilter(0x888888, 0x000000); 其中mul为0x888888,那么RGB通道对应的mul值都为88,add为0x000000则对应的偏移量都为0。第二张图变暗了,基本可以看出计算方法。 color = color*mul/255+add (计算结果大于等于255都指定为255) 其中color可以为RGB三种通道中的一种,mul和add分别为通道对应的值。假设R通道的值就为 R=R*0x88/0xff+0 0x88/0xff肯定是小于1的,所以颜色变暗了。 第三张图的mul值和第二张相同,但是由于第三张图的add值比较大,所以反而比第一张图还亮。 PorterDuffColorFilter PorterDuffColorFilter(int srcColor, PorterDuff.Mode mode)srcColor源颜色, mode是色彩的混合模式,这里的混合模式我们不作详细讲解,想要了解可以自己查看,这里简单看一个示例。 Bitmap bitmap = BitmapFactory.decodeResource(getContext().getResources(), R.drawable.home); canvas.drawBitmap(bitmap, 100, 0, paint); PorterDuffColorFilter filter = new PorterDuffColorFilter(Color.BLUE, PorterDuff.Mode.MULTIPLY); paint.setColorFilter(filter); canvas.drawBitmap(bitmap, 100, 500, paint);效果如下: 这里PorterDuffColorFilter的两个参数分别是Color.BLUE以及PorterDuff.Mode.MULTIPLY; 先不要纠结PorterDuff.Mode.MULTIPLY的含义,这里主要是将Color.BLUE提供的蓝色和原图进行一定的合并运算。就得到了上面的效果,那么传入不同PorterDuff.Mode值就能得到不同的效果。 总结 我们平时使用主要是第一种和第二种,所以第三种不做详细讲解,第三种PorterDuffColorFilter其实就是把图片和定义的颜色通过算法进行合并。 参考博客 1. http://blog.csdn.net/cquwentao/article/details/51396466 2. http://www.cnblogs.com/tianzhijiexian/p/4297104.html |
【本文地址】