基于全志H3芯片的ARM开发环境搭建 |
您所在的位置:网站首页 › 海岛奇兵雕像高属性 › 基于全志H3芯片的ARM开发环境搭建 |
基于全志H3芯片的ARM开发环境搭建
|
基于全志H3芯片的ARM开发环境搭建
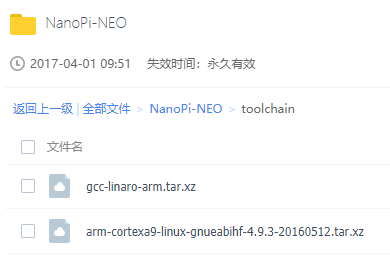
最近买了个友善之臂的NanoPi M1板子,又在网上申请了个NanoPi NEO板子,这两个都是基于全志H3芯片的Crotex-A7四核ARM开发板,两个板子可以共用一套开发环境,本文就以NanoPi NEO为例,简单讲述基于全志H3芯片的ARM开发环境搭建。 1. 安装交叉编译工具 1.1 获取交叉编译工具在百度网盘中,给出了Nanopi NEO的交叉编译工具:
注意: 第一个 gcc-linaro-arm.tar.xz 是用友善之臂给出的脚本编译生成固件的; 如果需要交叉编译工具编译应用程序或者内核,需要使用第二个 arm-cortexa9-linux-gnueabihf-4.9.3-20160512.tar.xz 工具。 1.2 安装交叉编译工具解压:arm-cortexa9-linux-gnueabihf-4.9.3-20160512.tar.xz,得到 4.9.3 目录,与其他平台搭建交叉编译环境方法一样,将该目录复制到 /usr/local/arm/ 目录下 设置环境变量,在 ~/.bashrc 最后添加: # vim ~/.bashrc PATH=$PATH:/usr/local/arm/4.9.3/bin/ export PATH重启或者注销用户再登录即可使用该交叉编译工具。 1.3 验证安装是否成功验证交叉编译工具是否安装成功: $ arm-cortexa9-linux-gnueabihf-gcc -v Using built-in specs. COLLECT_GCC=arm-cortexa9-linux-gnueabihf-gcc COLLECT_LTO_WRAPPER=/usr/local/arm/4.9.3/bin/../libexec/gcc/arm-cortexa9-linux-gnueabihf/4.9.3/lto-wrapper Target: arm-cortexa9-linux-gnueabihf Configured with: /work/toolchain/build/src/gcc-4.9.3/configure --build=x86_64-build_pc-linux-gnu --host=x86_64-build_pc-linux-gnu --target=arm-cortexa9-linux-gnueabihf --prefix=/opt/FriendlyARM/toolchain/4.9.3 --with-sysroot=/opt/FriendlyARM/toolchain/4.9.3/arm-cortexa9-linux-gnueabihf/sys-root --enable-languages=c,c++ --with-arch=armv7-a --with-tune=cortex-a9 --with-fpu=vfpv3 --with-float=hard --with-pkgversion=ctng-1.21.0-229g-FA --with-bugurl=http://www.friendlyarm.com/ --enable-__cxa_atexit --disable-libmudflap --disable-libgomp --disable-libssp --disable-libquadmath --disable-libquadmath-support --disable-libsanitizer --with-gmp=/work/toolchain/build/arm-cortexa9-linux-gnueabihf/buildtools --with-mpfr=/work/toolchain/build/arm-cortexa9-linux-gnueabihf/buildtools --with-mpc=/work/toolchain/build/arm-cortexa9-linux-gnueabihf/buildtools --with-isl=/work/toolchain/build/arm-cortexa9-linux-gnueabihf/buildtools --with-cloog=/work/toolchain/build/arm-cortexa9-linux-gnueabihf/buildtools --with-libelf=/work/toolchain/build/arm-cortexa9-linux-gnueabihf/buildtools --enable-lto --with-host-libstdcxx='-static-libgcc -Wl,-Bstatic,-lstdc++,-Bdynamic -lm' --enable-threads=posix --enable-linker-build-id --with-linker-hash-style=gnu --enable-plugin --enable-gold --disable-multilib --with-local-prefix=/opt/FriendlyARM/toolchain/4.9.3/arm-cortexa9-linux-gnueabihf/sys-root --enable-long-long Thread model: posix gcc version 4.9.3 (ctng-1.21.0-229g-FA) 1.4 验证交叉编译工具是否能正常编译验证安装的交叉编译工具编译的程序在Nanopi NEO板子上能够运行: 1)先写一个简单的验证程序,也就是程序员”家喻户晓“的 Hello world! $ cat hello.c #include int main(void) { printf("Hello world!\n"); return 0; } 2)将程序交叉编译为板子能运行的程序: $ arm-cortexa9-linux-gnueabihf-gcc hello.c -o hello 3)编译完成后生成的hello程序,查看文件属性: $ file hello hello: ELF 32-bit LSB executable, ARM, EABI5 version 1 (SYSV), dynamically linked, interpreter /lib/ld-linux-armhf.so.3, for GNU/Linux 3.0.8, BuildID[sha1]=e471478037c7cf740dadac9ec82136aad38f0c4e, not stripped 2. 将程序通过NFS文件系统复制到开发板 2.1 先让板子连上网 1)确保板子已经能够正常联网: # ifconfig eth0 Link encap:Ethernet HWaddr **:**:**:**:**:** inet addr:***.***.*.*** Bcast:***.***.*.255 Mask:255.255.255.0 inet6 addr: ****::****:****:****:****/64 Scope:Link UP BROADCAST RUNNING MULTICAST MTU:1500 Metric:1 RX packets:820 errors:0 dropped:0 overruns:0 frame:0 TX packets:637 errors:0 dropped:0 overruns:0 carrier:0 collisions:0 txqueuelen:1000 RX bytes:513171 (501.1 KiB) TX bytes:49921 (48.7 KiB) Interrupt:114 lo Link encap:Local Loopback inet addr:127.0.0.1 Mask:255.0.0.0 inet6 addr: ::1/128 Scope:Host UP LOOPBACK RUNNING MTU:16436 Metric:1 RX packets:33 errors:0 dropped:0 overruns:0 frame:0 TX packets:33 errors:0 dropped:0 overruns:0 carrier:0 collisions:0 txqueuelen:0 RX bytes:3304 (3.2 KiB) TX bytes:3304 (3.2 KiB) 2)ping外网,检测是否能和外网通讯: # ping www.baidu.com PING www.baidu.com (163.177.151.110) 56(84) bytes of data. 64 bytes from www.baidu.com (163.177.151.110): icmp_seq=1 ttl=53 time=11.1 ms 64 bytes from www.baidu.com (163.177.151.110): icmp_seq=2 ttl=53 time=10.3 ms 64 bytes from www.baidu.com (163.177.151.110): icmp_seq=3 ttl=53 time=10.6 ms ^C --- www.baidu.com ping statistics --- 3 packets transmitted, 3 received, 0% packet loss, time 2003ms rtt min/avg/max/mdev = 10.356/10.740/11.183/0.350 ms 2.2 安装NFS服务器并配置NFS目录 1)安装NFS服务器 # sudo apt-get install nfs-kernel-server 2)创建NFS目录: # vim /etc/exports 添加: /mnt *(rw,sync,no_root_squash,no_subtree_check) 3)重启NFS服务器: # systemctl restart nfs-kernel-server 4)检查nfs是否启动: # ps -aux | grep nfs root 39 0.0 0.0 0 0 ? S< 14:53 0:00 [nfsiod] root 29118 0.0 0.0 0 0 ? S 15:55 0:00 [nfsd] root 29119 0.0 0.0 0 0 ? S 15:55 0:00 [nfsd] root 29120 0.0 0.0 0 0 ? S 15:55 0:00 [nfsd] root 29121 0.0 0.0 0 0 ? S 15:55 0:00 [nfsd] root 29122 0.0 0.0 0 0 ? S 15:55 0:00 [nfsd] root 29123 0.0 0.0 0 0 ? S 15:55 0:00 [nfsd] root 29124 0.0 0.0 0 0 ? S 15:55 0:00 [nfsd] root 29125 0.0 0.0 0 0 ? S 15:55 0:00 [nfsd] root 29142 0.0 0.1 4136 748 ttyS0 S+ 15:56 0:00 grep nfs 2.3 通过NFS网络服务器传输文件通过NFS网络服务器挂载,将文件拷贝到板子上: 1)在PC的虚拟机上安装NFS客户端: $ sudo apt-get install nfs-common 2)将板子的 /mnt/nfs 目录挂载到PC虚拟机的 /mnt 目录: $ sudo mount -t nfs -o intr,nolock 192.168.4.113:/mnt/nfs /mnt 3)将PC虚拟机上编译好的程序拷贝到板子上: $ sudo cp hello /mnt在板子上的/mnt/nfs目录下就可以看到拷贝过来的程序了: # ls /mnt hello在开发板上运行程序,验证程序是否可以在板子上运行: # ./hello Hello world!验证成功,由交叉编译工具编译的程序在板子上可以正常运行。 至此,基于全志H3芯片的开发环境搭建完成,可以进行开发工作了。 |
【本文地址】
今日新闻 |
推荐新闻 |