3D控件Aspose.3D入门教程(9):在 C# 中创建 3D 圆柱体 |
您所在的位置:网站首页 › 楼梯3d建模怎么建 › 3D控件Aspose.3D入门教程(9):在 C# 中创建 3D 圆柱体 |
3D控件Aspose.3D入门教程(9):在 C# 中创建 3D 圆柱体

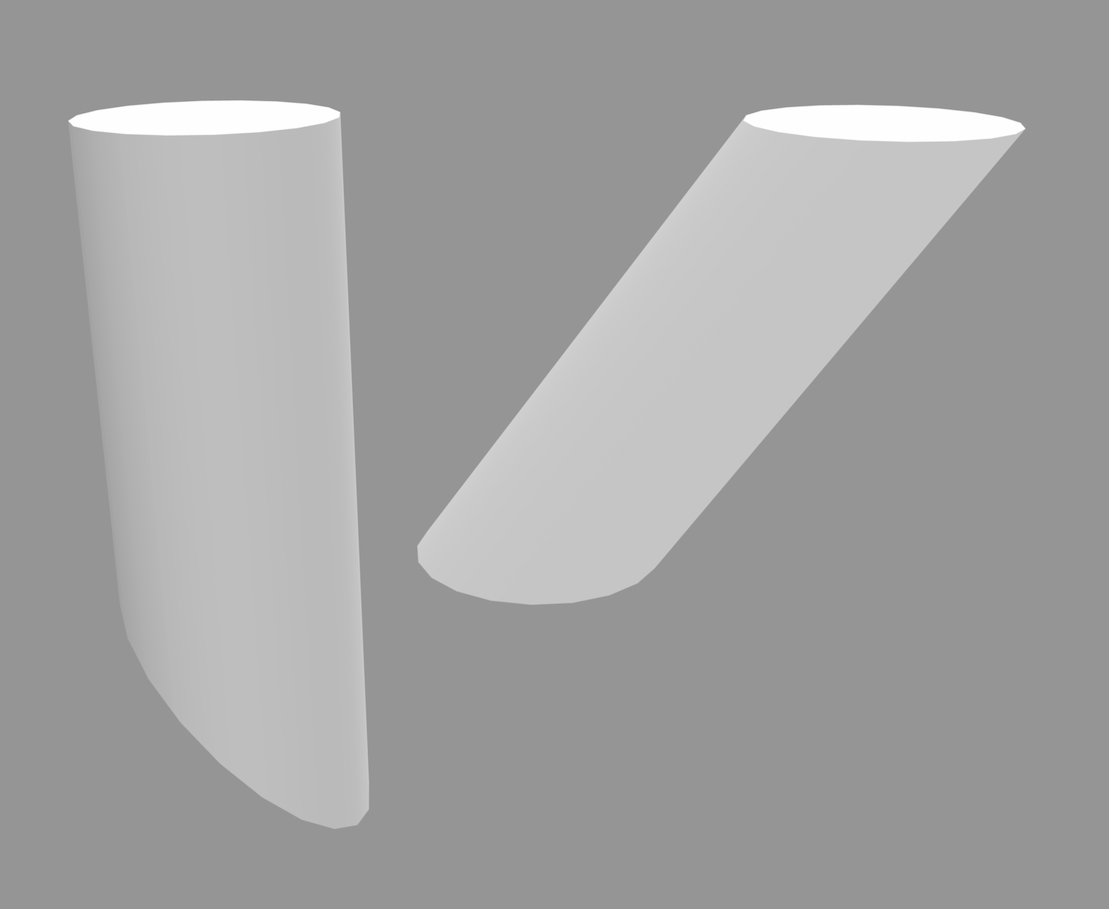
Aspose.3D 是一个功能丰富的游戏软件和计算机辅助设计(CAD)的API,可以在不依赖任何3D建模和渲染软件的情况下操作文档。API支持Discreet3DS, WavefrontOBJ, FBX (ASCII, Binary), STL (ASCII, Binary), Universal3D, Collada, glTF, GLB, PLY, DirectX, Google Draco文件格式等等。开发人员可以轻松地创建,读取,转换,修改和控制3D文件格式的实质。 Aspose.3D 最新下载 圆柱体常用于三维场景。在不同的图形处理应用程序中,您可能需要创建不同类型的圆柱体。在这里我们将讨论如何制作各种具有不同变换和变化的三维圆柱体。它解释了如何在 C# 中以编程方式创建具有剪切底部、剪切顶部和具有不同 theta 长度的风扇圆柱体的 3D 圆柱体。 (一) 以编程方式创建 3D 圆柱体 – C# API 安装Aspose.3D for .NET API 可用于创建或操作 3D 场景和对象。此外,您无需安装任何其他 3D 处理应用程序或工具即可使用 API。只需从New Releases页面快速配置 API或运行下面的NuGet安装命令: PM> Install-Package Aspose.3D (二) 在 C# 中制作一个圆柱体您可以按照以下步骤在三维场景中制作圆柱体: 初始化Scene类的对象。 设置顶点以变换底部的偏移量。 将圆柱体添加到场景中。 创建另一个圆柱体并自定义剪切底部。 添加圆柱体并保存输出场景。下面的代码片段演示了如何按照这些步骤在 C# 中以编程方式制作圆柱体: // Create a scene Scene scene = new Scene(); // Create cylinder 1 var cylinder1 = new Aspose.ThreeD.Entities.Cylinder(2, 2, 10, 20, 1, false); // Set OffsetBottom cylinder1.OffsetBottom = new Aspose.ThreeD.Utilities.Vector3(5, 3, 0); // Add cylinder to without a ShearBottom to the scene scene.RootNode.CreateChildNode(cylinder1); // Create cylinder 2 var cylinder2 = new Aspose.ThreeD.Entities.Cylinder(2, 2, 10, 20, 1, false); // Customized shear bottom for cylinder 2 cylinder2.ShearBottom = new Aspose.ThreeD.Utilities.Vector2(0, 0.83); // Add cylinder 2 to the scene scene.RootNode.CreateChildNode(cylinder2).Transform.Translation = new Aspose.ThreeD.Utilities.Vector3(10, 0, 0); // Save scene scene.Save("CustomizedCylinder.obj", FileFormat.WavefrontOBJ);
此外,下图显示了使用上述代码片段生成的输出图像。
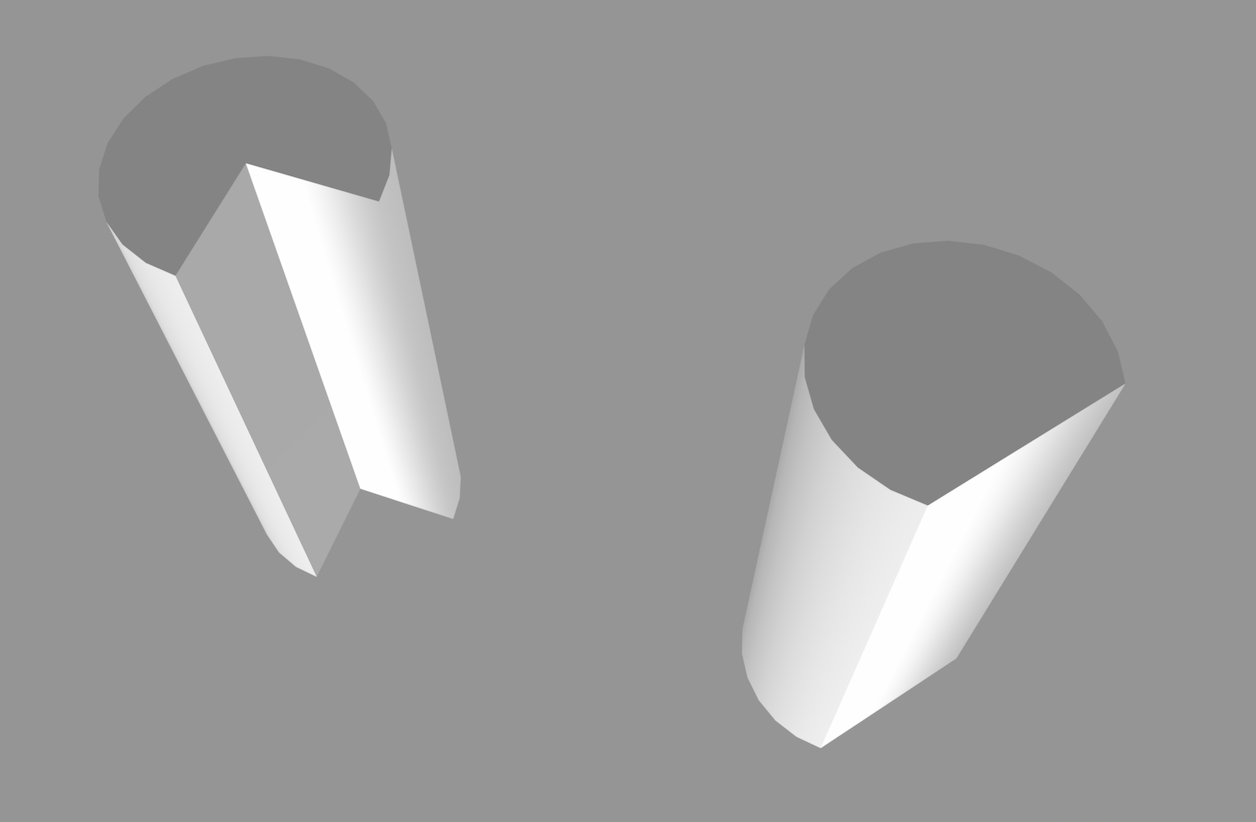
以下步骤说明了如何在 3D 场景中创建风筒: 创建一个场景类对象。 创建一个圆柱体并将 GenerateFanCylinder 设置为 true。 设置 theta 的长度并创建一个子节点。 创建一个没有风扇的圆柱体并重复上述步骤。 保存输出场景。以下代码片段详细说明了如何在 C# 中以编程方式创建风扇圆柱体: // Create a Scene Scene scene = new Scene(); // Create a cylinder var fan = new Aspose.ThreeD.Entities.Cylinder(2, 2, 10, 20, 1, false); // Set GenerateGanCylinder to true fan.GenerateFanCylinder = true; // Set ThetaLength fan.ThetaLength = Aspose.ThreeD.Utilities.MathUtils.ToRadian(270); // Create ChildNode scene.RootNode.CreateChildNode(fan).Transform.Translation = new Aspose.ThreeD.Utilities.Vector3(10, 0, 0); // Create a cylinder without a fan var nonfan = new Aspose.ThreeD.Entities.Cylinder(2, 2, 10, 20, 1, false); // Set GenerateGanCylinder to false nonfan.GenerateFanCylinder = false; // Set ThetaLengeth nonfan.ThetaLength = Aspose.ThreeD.Utilities.MathUtils.ToRadian(270); // Create ChildNode scene.RootNode.CreateChildNode(nonfan); // Save scene scene.Save("FanCylinder.obj", FileFormat.WavefrontOBJ);
以下屏幕截图显示了使用此示例代码创建的输出场景:
以上便是如何在 C# 中创建 3D 圆柱体。如有任何疑问,请随时与我们联系。 欢迎下载|体验更多Aspose产品 获取更多信息请咨询慧都在线客服 或 加入Aspose技术交流群(761297826) 标签:本站文章除注明转载外,均为本站原创或翻译。欢迎任何形式的转载,但请务必注明出处、不得修改原文相关链接,如果存在内容上的异议请邮件反馈至[email protected] 上一篇:Word控件Spire.Doc 【页眉页脚】教程(3):仅在文档的第一页添加页眉 下一篇:Word控件Spire.Doc 【页眉页脚】教程(2):为 Word 插入图像页眉和页脚 |
【本文地址】