|
目录
一 什么是Windows窗体应用程序?二 如何创建Windows窗体应用程序?1.创建步骤2.熟悉界面
三 Windows窗体及消息框1)窗体3.1.1 常用属性3.1.2 常用事件3.1.3 常用方法
2) 消息框3.2.1 MessageBoxButtons枚举成员3.2.2 MessageBoxIcon枚举成员3.2.3 DialogResult枚举成员3.2.4 使用消息框显示信息
四 常见的Windows控件及使用1. 为窗体添加控件2.调整控件3.常见控件及其属性4.3.0 属性4.3.1 按钮控件4.3.2 文本控件4.3.2.1 Label控件4.3.2.2 TextBox控件4.3.2.3 RichTextBox控件
4.3.3 容器控件4.3.3.1 GroupBox控件4.3.3.2 Panel控件
4.3.4 选择控件4.3.4.1 RadioButton控件4.3.4.2 CheckBox
4.3.5 列表框、组合框控件4.3.5.1 ListBox4.3.5.2 ComboBox
4.3.6 进度条控件4.3.7 定时器控件4.3.8 PictureBox控件4.3.9 通用对话框4.3.9.1 打开文件对话框4.3.9.2 保留文件对话框4.3.9.3 颜色对话框4.3.9.4 字体对话框
4.3.10 菜单4.3.10.1 菜单项的设计4.3.10.2 分隔条4.3.10.2 访问键和快捷键4.3.10.3 ContextMenuStrip控件
五 综合应用——学生管理系统的设计
一 什么是Windows窗体应用程序?
Windows窗体应用程序指的是在Windows操作系统上运行的应用程序,它们使用了Windows窗体库来创建用户界面。Windows窗体应用程序通常具有窗体、按钮、文本框、菜单等控件,用户可以通过与这些控件交互来完成各种任务。
开发Windows窗体应用程序一般使用Visual Studio等集成开发环境(IDE),通过拖拽和配置控件,开发人员可以快速地创建用户界面。在创建窗体应用程序时,开发人员可以使用C#、VB.NET等编程语言来编写逻辑代码,与控件进行交互,处理用户输入,展示数据等。
Windows窗体应用程序具有以下特点:
1.用户友好:通过图形化界面和丰富的控件,使得用户可以直观地操作应用程序。 2.可视化设计:开发人员可以通过可视化界面设计工具来设计窗体布局和控件样式。 3.交互性:用户可以与控件进行交互,例如点击按钮、输入文本等,触发相应的事件。 4.数据展示:窗体应用程序可以从数据库、文件或其他数据源中获取数据,并将其展示给用户。 5.多线程支持:开发人员可以使用多线程来实现复杂的操作,避免应用程序在执行耗时任务时出现假死现象。
二 如何创建Windows窗体应用程序?
1.创建步骤
文件->新建->项目 
选择Windows窗体应用程序->确定
创建成功 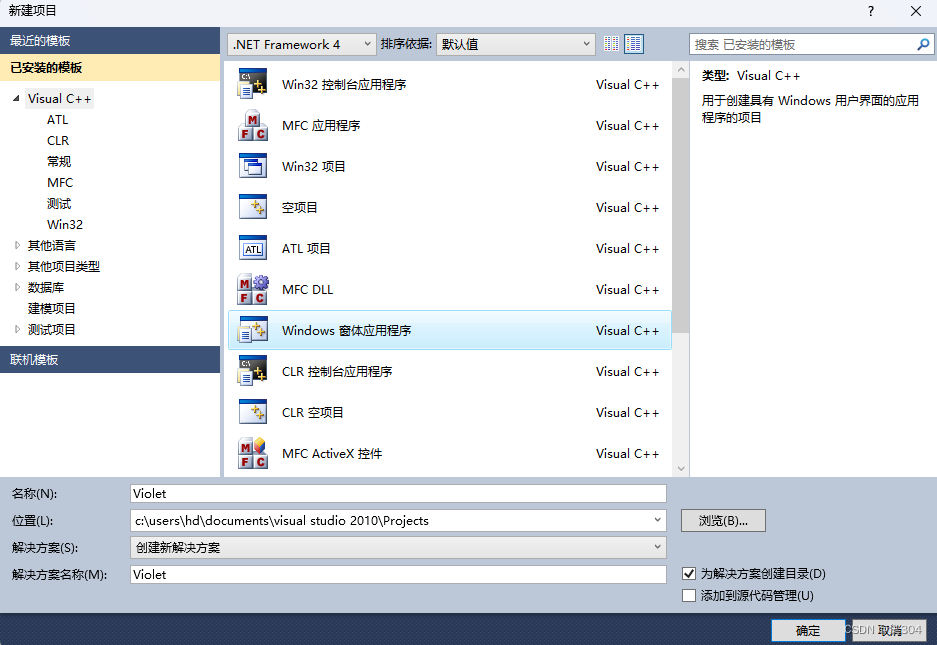
2.熟悉界面
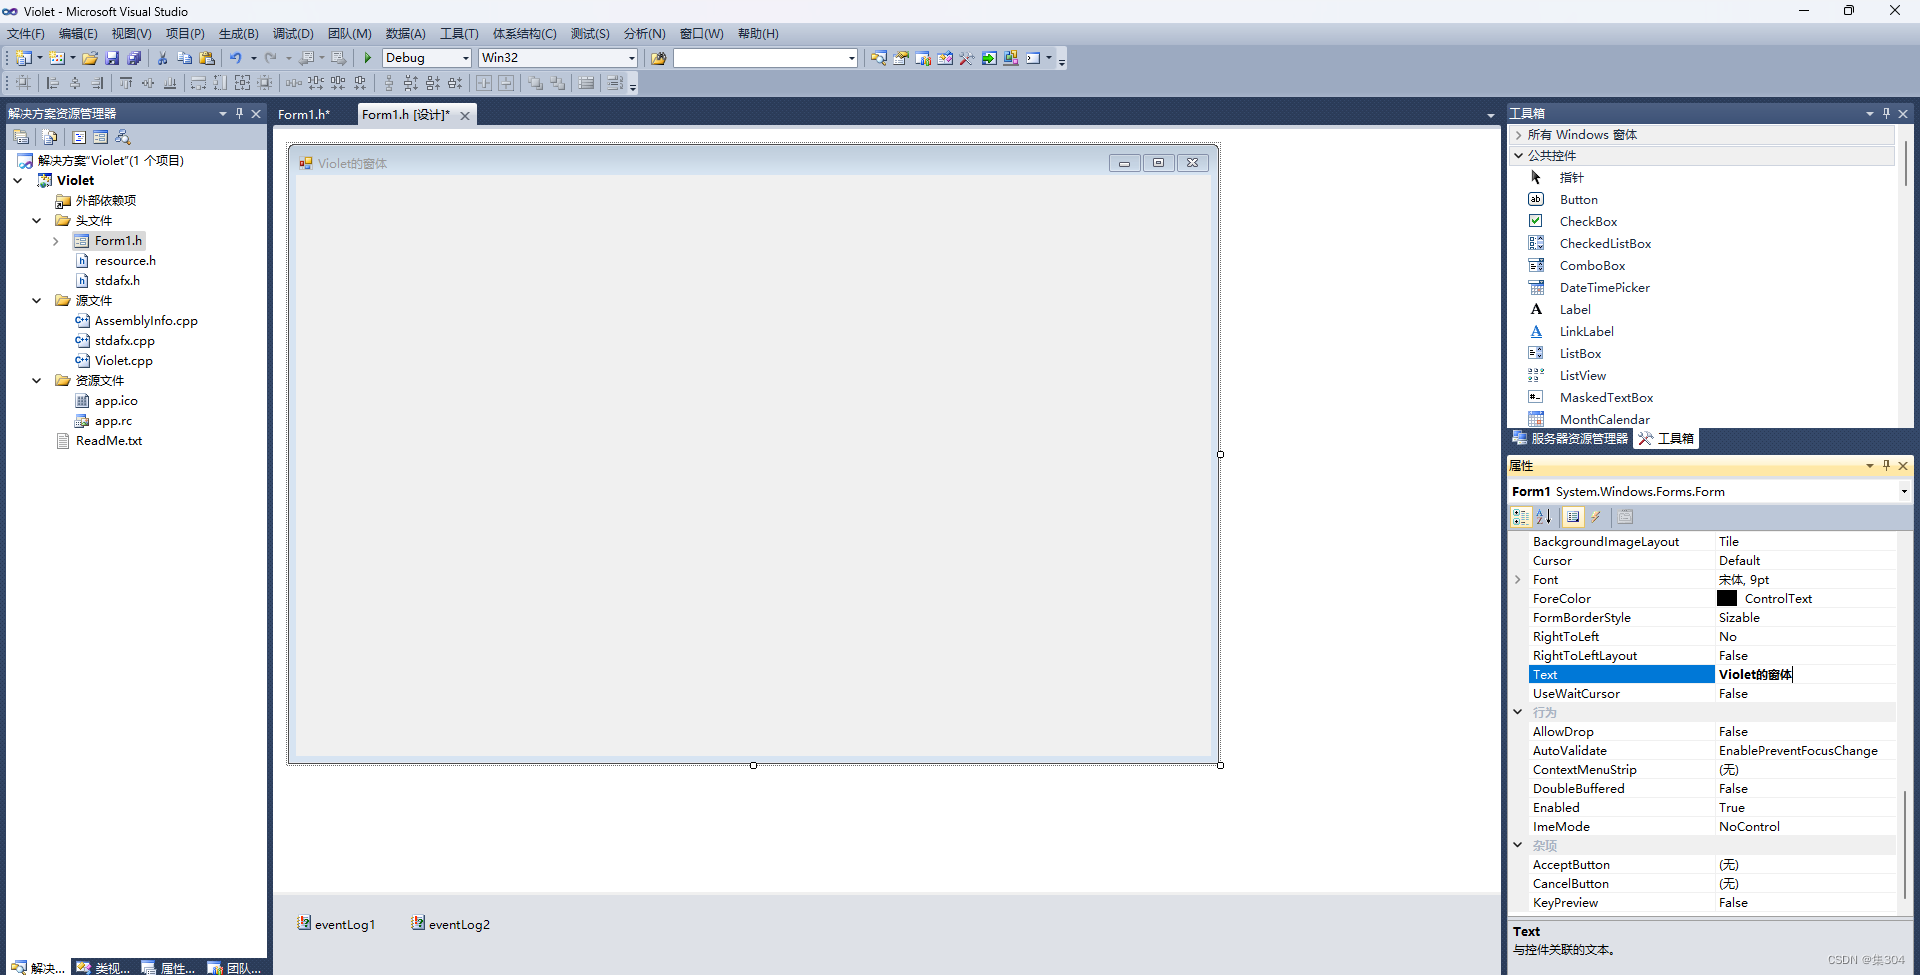
页面左侧为解决方案资源管理器(视图->解决方案管理器)
页面中间即为所创建的窗体 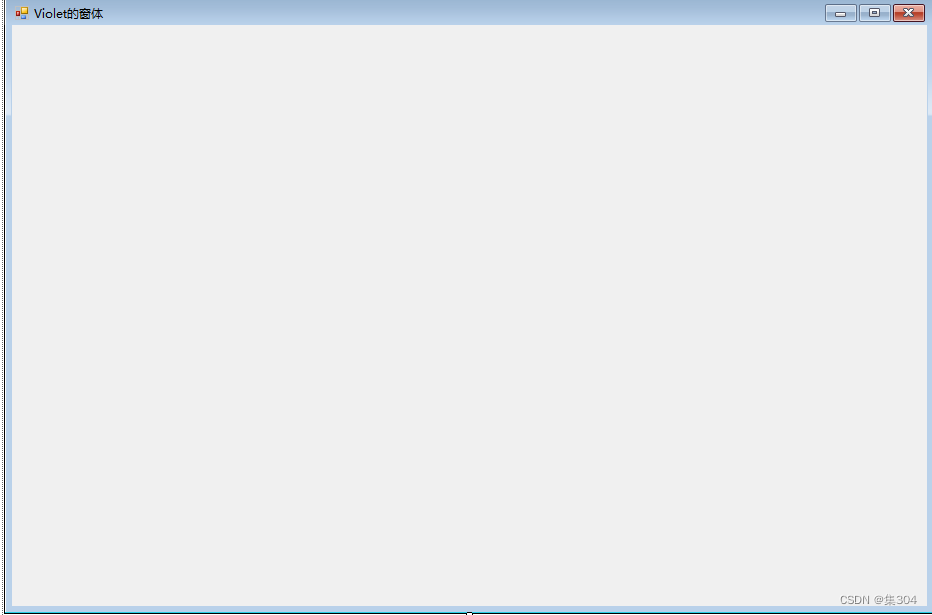
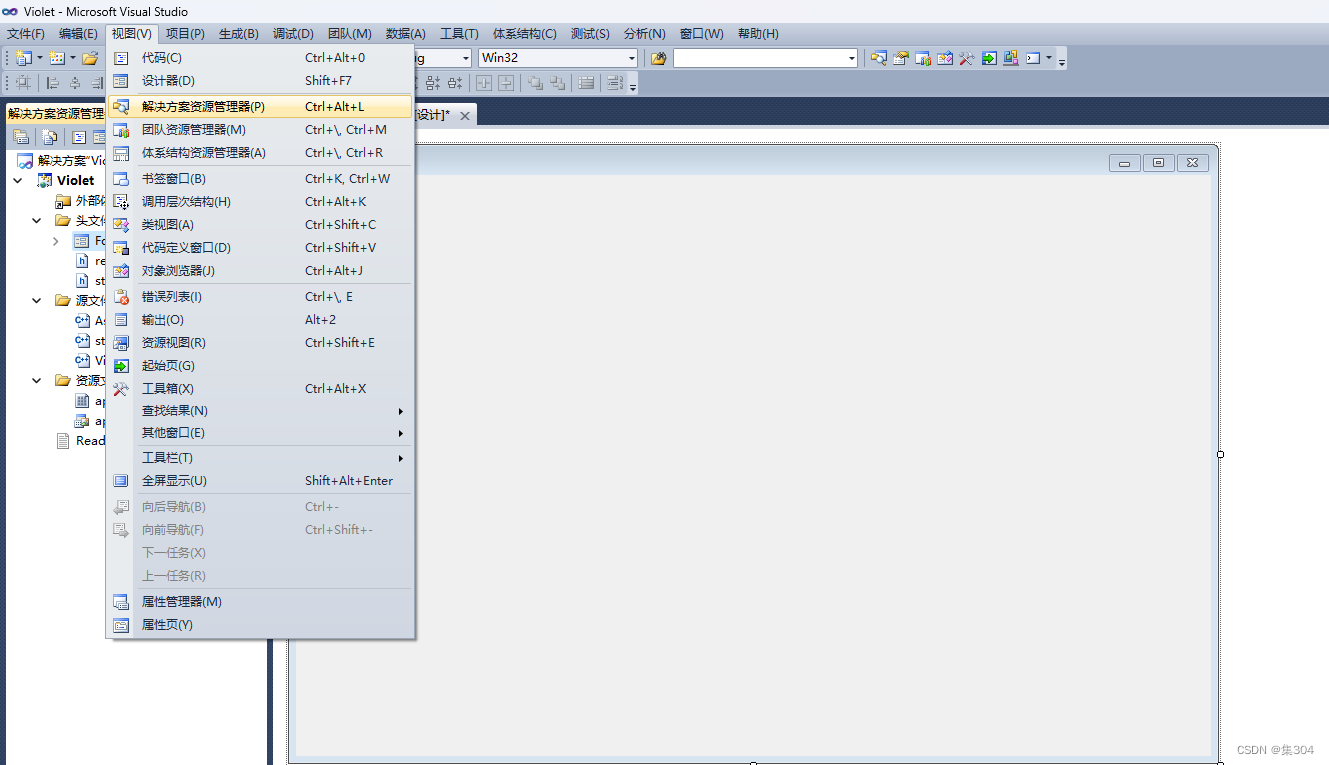
页面右上侧为工具箱(视图->工具箱) 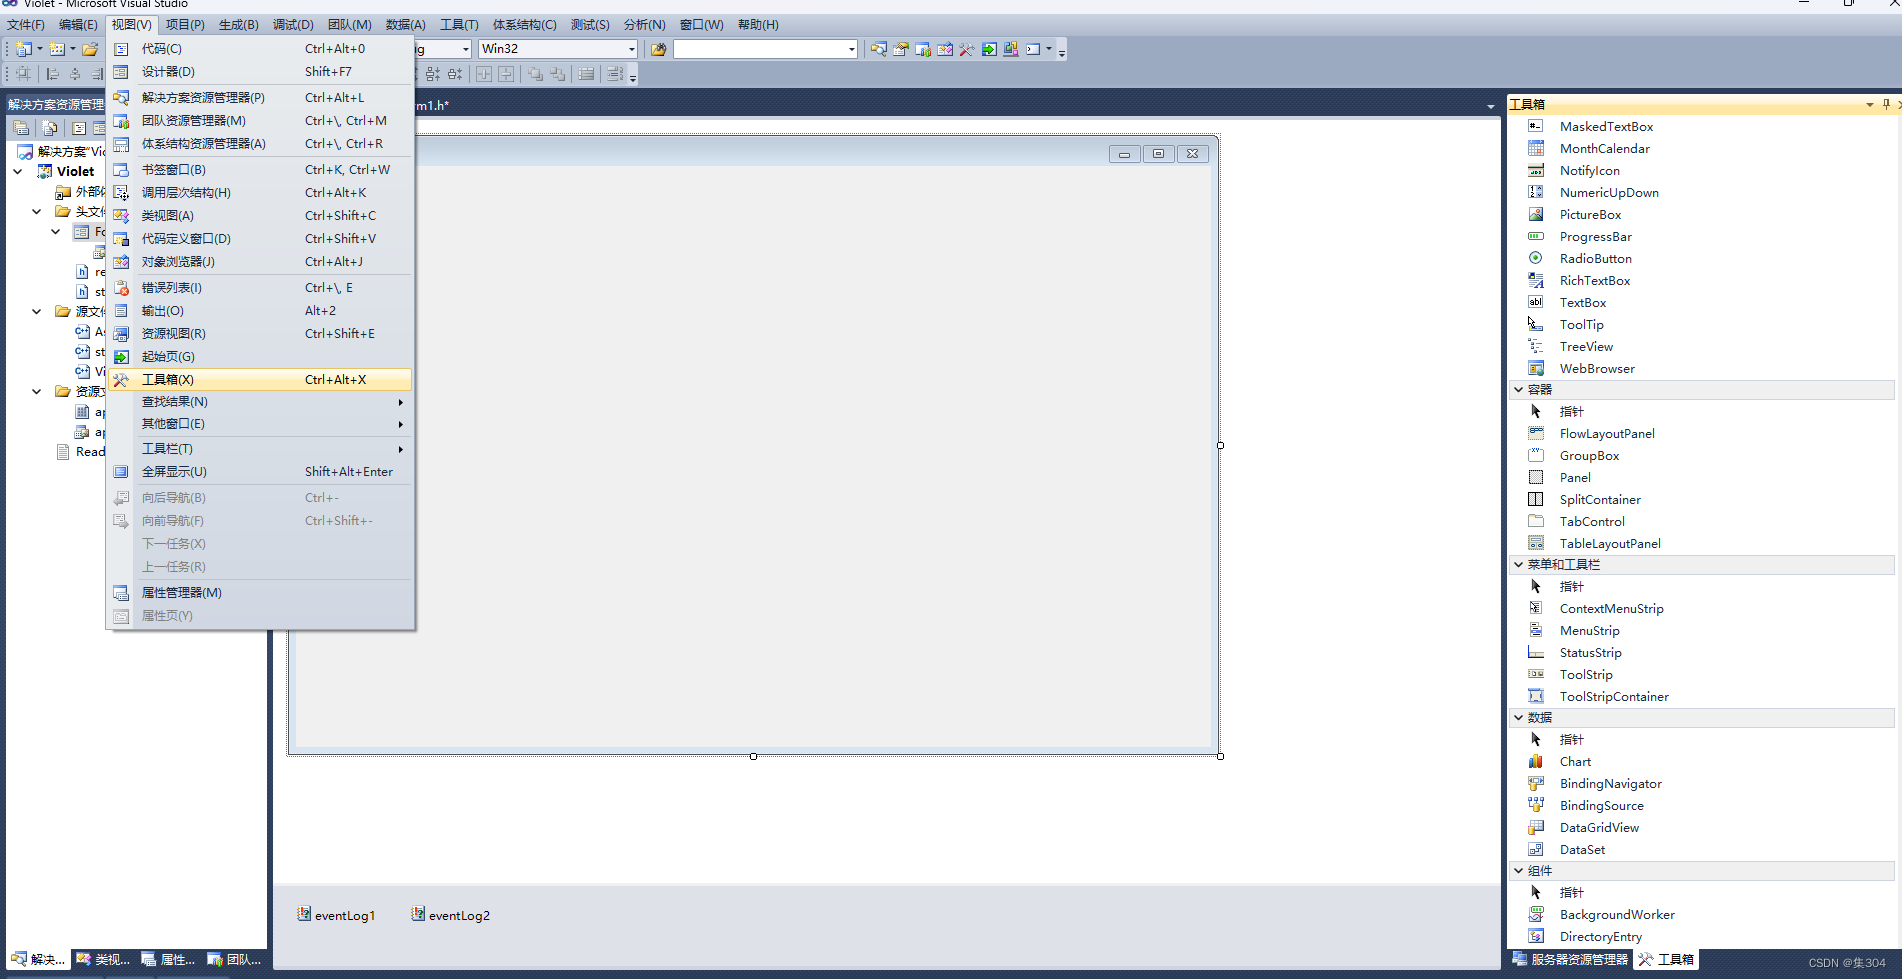
右下侧为工具箱控件属性(右击窗体->属性) 
三 Windows窗体及消息框
1)窗体
3.1.1 常用属性
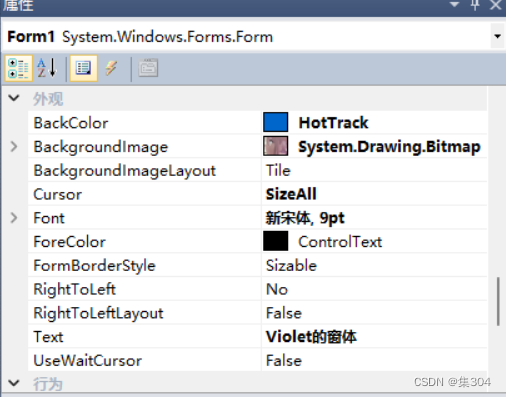
属性含义Text设置窗体的标题Size设置窗体的大小BackColor设置对象背景颜色Font设置或者获取显示文字的字体ForeColor设置对象前景颜色Icon设置窗体的图标MinimizeBox设置窗体的最小化按钮MaximizeBox设置窗体的最大化按钮
3.1.2 常用事件
事件含义Load在第一次显示窗体前发生Click当程序运行后用鼠标单击对象时触发的事件Move移动控件时触发该事件Closed关闭窗体时触发该事件
3.1.3 常用方法
方法含义Close()关闭窗体Refresh()清除窗体中生成的图形或文字CreateGraphics()创建Graphics对象Activate()激活窗体并获得焦点ResetBackColor()重置BackColor属性为默认值ShowDialog()将窗体显示为模式对话框Show()显示控件Hide()隐藏控件Dispose()释放所使用的资源
2) 消息框
3.2.1 MessageBoxButtons枚举成员
成员说明Ok“确定”按钮OkCancel“确定”、“取消”按钮YesNo“是”、“否”按钮YesNoCancel“是”、“否”、“取消”按钮AbortRetryIgnore“终止”、“重试”、“忽略”按钮RetryCancel重试”、“取消”按钮
3.2.2 MessageBoxIcon枚举成员
成员说明None无提示图标Hand Question Question Exclamation Exclamation Asterisk Asterisk Stop Stop Error Error Warning Warning Information Information 3.2.3 DialogResult枚举成员
成员说明None没有单击消息框按钮,模式消息框继续运行OK单击了消息框“确定”按钮Cancel单击了消息框“取消”按钮Abort单击了消息框“终止”按钮Retry单击了消息框“重试”按钮Ignore单击了消息框“忽略”按钮Yes单击了消息框“是”按钮No单击了消息框“否”按钮
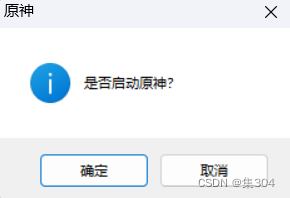
3.2.4 使用消息框显示信息
private: System::Void Form1_Load(System::Object^ sender, System::EventArgs^ e)
{
MessageBox::Show(" 是否启动原神? ","原神",MessageBoxButtons::OKCancel,MessageBoxIcon::Asterisk);
//if(MessageBox::Show("顺其自然","坦荡",MessageBoxButtons::OKCancel,MessageBoxIcon::Asterisk)==System::Windows::Forms::DialogResult::OK)
// this->Close();
}
3.2.3 DialogResult枚举成员
成员说明None没有单击消息框按钮,模式消息框继续运行OK单击了消息框“确定”按钮Cancel单击了消息框“取消”按钮Abort单击了消息框“终止”按钮Retry单击了消息框“重试”按钮Ignore单击了消息框“忽略”按钮Yes单击了消息框“是”按钮No单击了消息框“否”按钮
3.2.4 使用消息框显示信息
private: System::Void Form1_Load(System::Object^ sender, System::EventArgs^ e)
{
MessageBox::Show(" 是否启动原神? ","原神",MessageBoxButtons::OKCancel,MessageBoxIcon::Asterisk);
//if(MessageBox::Show("顺其自然","坦荡",MessageBoxButtons::OKCancel,MessageBoxIcon::Asterisk)==System::Windows::Forms::DialogResult::OK)
// this->Close();
}
四 常见的Windows控件及使用
Windows常用控件有标签、按钮、文本框、单选按钮、复选按钮、列表框、组合框、分组框、面板、图片框等。本节分别介绍窗体中添加控件方法及常用控件的使用。
1. 为窗体添加控件
1)双击工具箱中的控件,将在窗体的默认位置添加默认大小的控件。 2)在工具箱中选中一个控件,按住鼠标左键不放,把鼠标指针移到窗体的相应位置,然后松开鼠标左键。 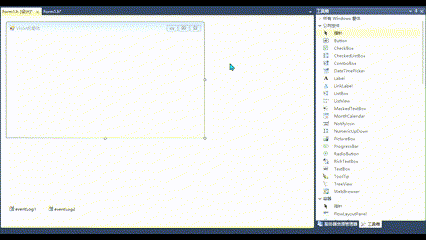
2.调整控件
控件添加到窗体中之后,可以对控件进行调整,包括其位置、大小、对齐方式等。 要调整控件的摆放,首先要选中窗体中的控件(如果要选择多个控件时,可以先按下CTRL键或SHIFT键,同时用鼠标单击要选择的其他控件;或者按下鼠标左键拖动鼠标,选择一个范围,该范围内的控件均被选中),然后通过格式菜单或工具栏上的格式按钮进行调整。

3.常见控件及其属性
4.3.0 属性
事 件描 述Click在单击控件时发生DoubleClick在双击控件时发生DragDrop完成拖放时发生DragEnter当被拖动的对象进入控件的边界时发生DragLeave当被拖动的对象离开控件的边界时发生MouseDown当鼠标指针位于控件上并按下鼠标键时发生MouseUp当鼠标指针位于控件上并释放鼠标键时发生MouseMove鼠标指针移到控件上时发生KeyPress控件有焦点的情况下,按下任一键时发生KeyDown控件有焦点的情况下,按下并释放键时发生KeyUp控件有焦点的情况下,释放任一键时发生GotFocus在控件获得焦点时发生LostFocus当控件失去焦点时发生Paint在重绘控件时发生Resize在调整控件大小时发生Validated在控件完成验证时发生Validating在控件正在验证时发生
4.3.1 按钮控件
Button(按钮)控件,在工具箱中的图标是
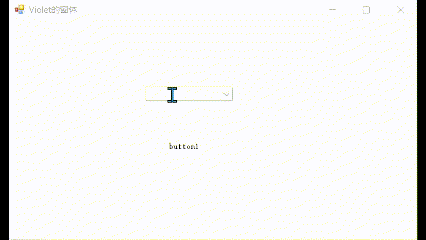
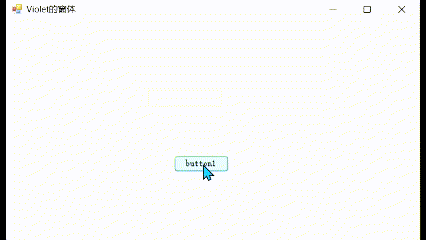
 用户单击按钮后,会触发Click(单击)事件处理程序。 按钮控件不支持DoubleClick(双击)事件。 例: 1).在窗体上拖放一个按钮Button1。 2).选中Button1,打开属性窗口的属性标签页 选择单击 用户单击按钮后,会触发Click(单击)事件处理程序。 按钮控件不支持DoubleClick(双击)事件。 例: 1).在窗体上拖放一个按钮Button1。 2).选中Button1,打开属性窗口的属性标签页 选择单击 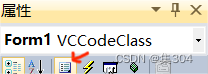 选择Text属性,为该属性赋值为“我很帅,但很坏” 选择Text属性,为该属性赋值为“我很帅,但很坏” 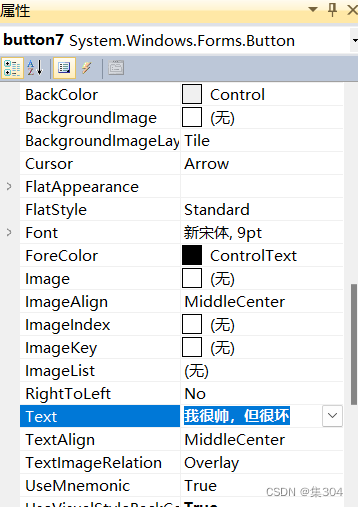 3) 选择Button1,打开属性窗口的事件标签页 单击图标 3) 选择Button1,打开属性窗口的事件标签页 单击图标 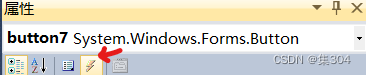 双击它的单击事件 双击它的单击事件
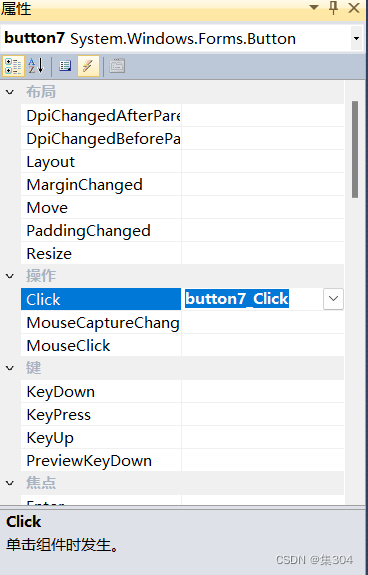 就会跳转到代码编辑器 ,并自动生成Button1的单击事件的框架,代码如下: 就会跳转到代码编辑器 ,并自动生成Button1的单击事件的框架,代码如下:
private: System::Void button7_Click(System::Object^ sender, System::EventArgs^ e)
{
button7->Text="我很丑,可是我很温柔!";
button7->Size= System::Drawing::Size(170, 80);
}
4)运行程序,用鼠标单击按钮,结果如下: 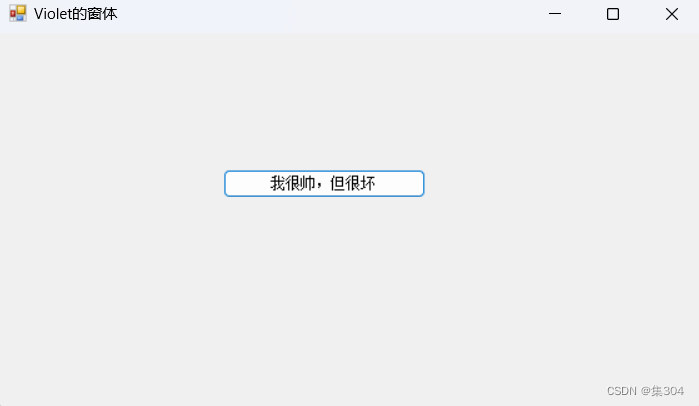 图单击按钮前的界面 图单击按钮前的界面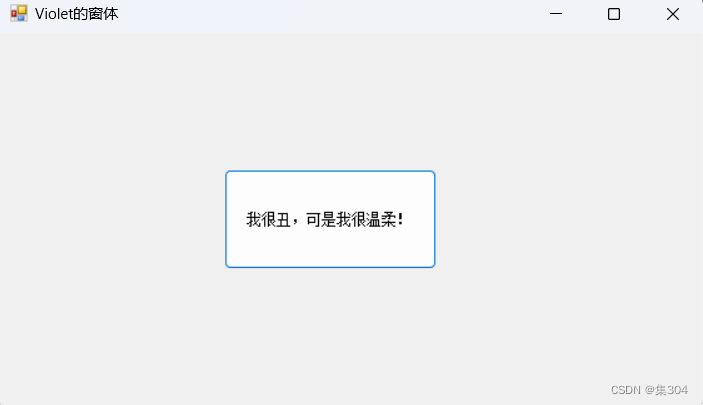 图 单击按钮后的界面 图 单击按钮后的界面
4.3.2 文本控件
4.3.2.1 Label控件
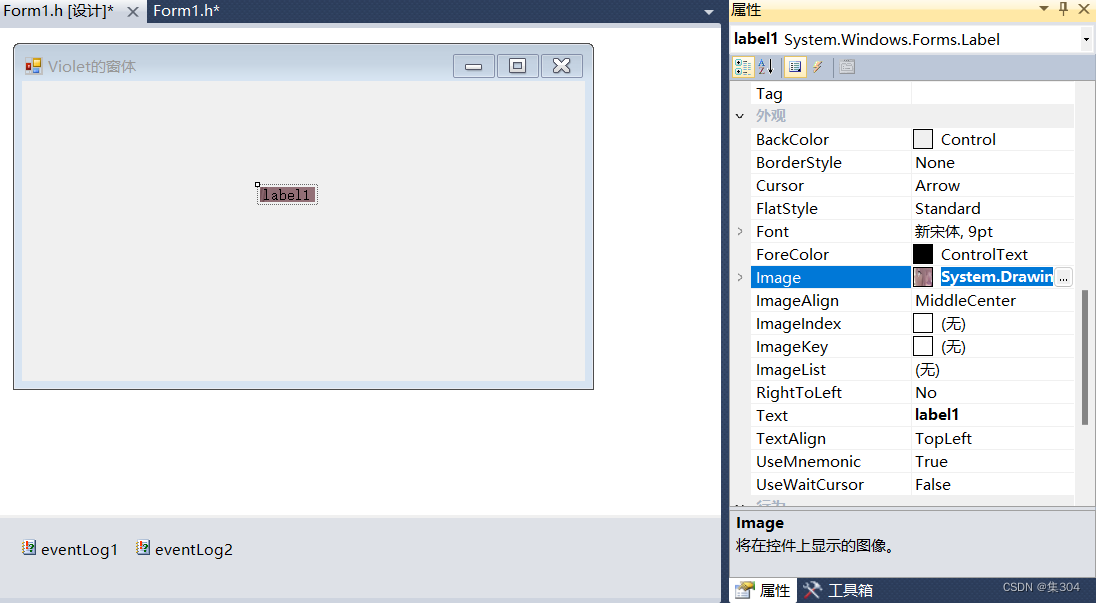
Label控件又称为标签控件,在工具箱中的图标是  通常用来输出标题、显示处理后的结果、标识窗体上的对象或者输出文本信息等,这些信息不能被编辑,标签一般也不用于事件的触发。 标签中常用属性: 通常用来输出标题、显示处理后的结果、标识窗体上的对象或者输出文本信息等,这些信息不能被编辑,标签一般也不用于事件的触发。 标签中常用属性:
属性说明Text于显示标签的内容,是标签控件的重要属性之一AutoSize设置控件大小是否随标签的Text属性的内容大小自动调整,取值为True或者False,默认值为True。Image用于设置图像
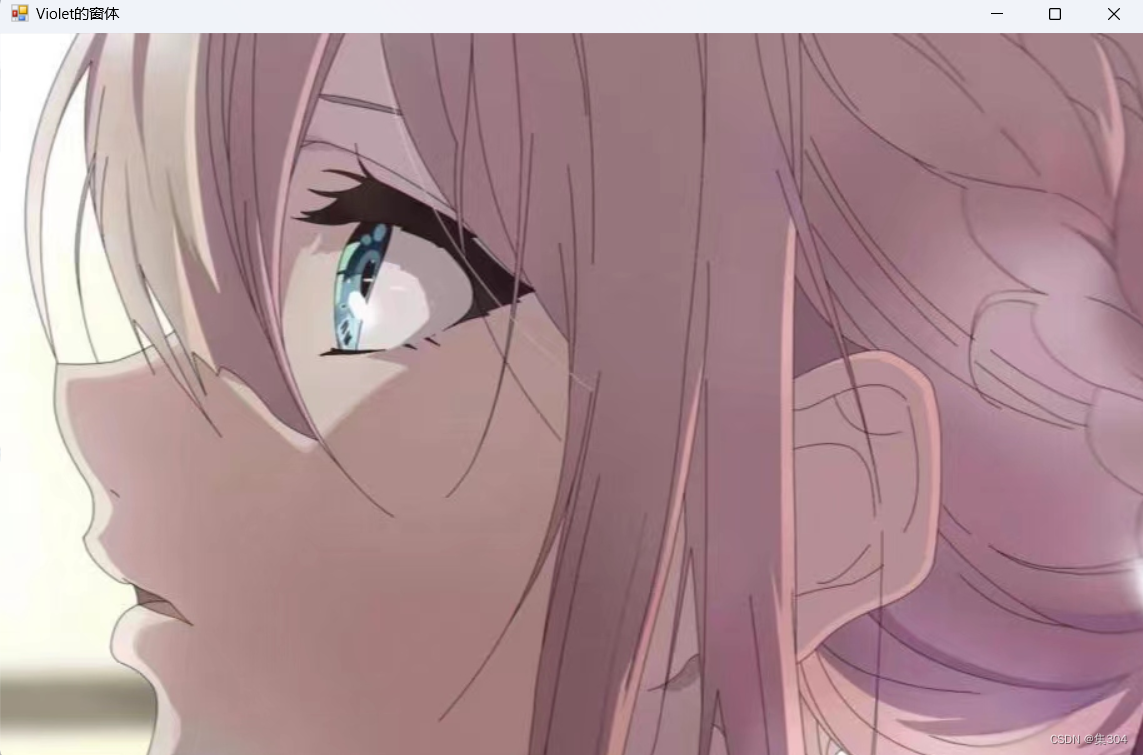
选择Label控件,打开属性窗口,在Image属性右侧有一个带三个逗点的按钮  单击该按钮,显示一个打开文件页面,找到保存图像文件的相应位置,且选择该文件,并单击“打开”按钮,这样就完成了对标签控件的图像设置。 单击该按钮,显示一个打开文件页面,找到保存图像文件的相应位置,且选择该文件,并单击“打开”按钮,这样就完成了对标签控件的图像设置。
4.3.2.2 TextBox控件
TextBox控件又称为文本框控件,在工具箱中的图标是  该控件可以输入信息,并且可以显示输出信息,同时还可以修改、编辑文本框的内容。 常用属性: 该控件可以输入信息,并且可以显示输出信息,同时还可以修改、编辑文本框的内容。 常用属性:
属性说明WordWrap多行编辑控件是否自动换行MaxLength设置文本框允许输入字符的最大长度,该属性为0时,其最大长度仅受内存限制MultiLine设置是否可以输入多行文本,当取值为True时,允许输入多行的文本(此时通常也把WordWrap设置为True),当取值为False时,只能输入一行文本,超过文本框部分的文本不能显示PasswordChar允许设置一个字符,程序在运行时,文本框中所有的Text属性的内容全部被PasswordChar属性所设定的值代替ReadOnly表示只读,其值为布尔型ScrollBars设置滚动条模式,None为无滚动条,Horizontal为水平滚动条,Vertical为垂直滚动条,Both为水平和垂直滚动条SelectedText在文本框中选中的文本内容
TextBox常用方法
方法说明Clear()清除文本框中的内容Copy()将文本框中选中的文本复制到剪贴板Cut()将文本框中选中的文本剪切到剪贴板Paste()将剪贴板中的内容粘贴到文本框中当前光标所在位置Redo()重新应用控件中上一次撤销的操作Select ()选中文本框中的部分或者全部文本SelectAll()选中文本框中的全部内容Undo()撤销对文本框的上一个编辑操作
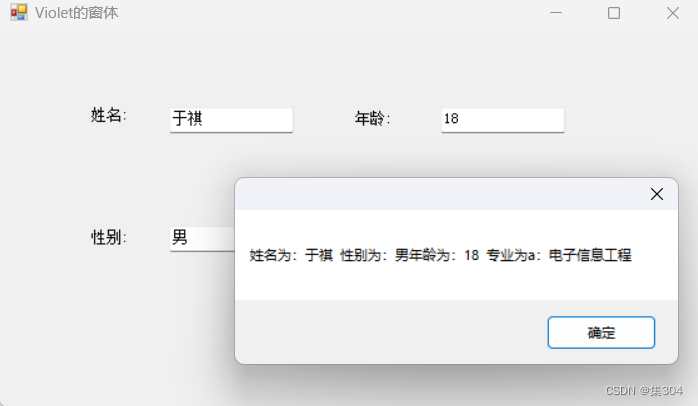
例设计一段程序,完成在相应编辑框中输入姓名、性别、年龄、专业,然后单击确定按钮,弹出一个消息框,显示你所填写的内容。 在窗体上添加四个Label控件,修改它们的Text属性如表所示 控件属性设置
 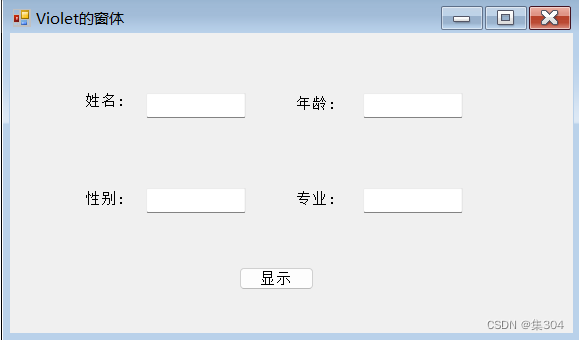 在button的单机事件中编写如下代码: 在button的单机事件中编写如下代码:
public: System::Void button1_Click_1(System::Object^ sender, System::EventArgs^ e)
{
String^ aa;//托管
aa="ddd";
aa="姓名为:"+name->Text +" "+"性别为:"+ sex->Text+"年龄为:"+age->Text +" "+"专业为a:"+ major->Text;;
name->Cut();
sex->Paste();
MessageBox::Show(aa);
}
 动态创建: 动态创建:
TextBox^ a=gcnew TextBox();
this->Controls->Add(a);
a->Location=System::Drawing::Point(20,200);
// ^代表托管指针
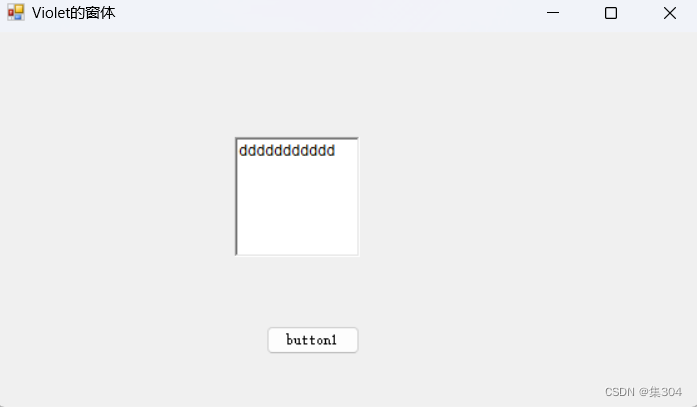
4.3.2.3 RichTextBox控件
RichTextBox控件又称为富文本控件,在工具箱中的图标是  该控件用于显示、输入和操作带有格式的文本,该控件提供了比TextBox更高级的格式设置。 RichTextBox控件常用属性见表所示 该控件用于显示、输入和操作带有格式的文本,该控件提供了比TextBox更高级的格式设置。 RichTextBox控件常用属性见表所示  例 使用RichTextBox控件的SelectionColor属性和SelectionFont属性对选中的文本进行颜色和字体的设置 例 使用RichTextBox控件的SelectionColor属性和SelectionFont属性对选中的文本进行颜色和字体的设置
private: System::Void button1_Click(System::Object^ sender, System::EventArgs^ e)
{
richTextBox1->SelectionFont= gcnew System::Drawing::Font("Dotum",12,FontStyle::Italic);
richTextBox1->SelectionColor=System::Drawing::Color::Blue;
}
 选中后点击button的结果 选中后点击button的结果 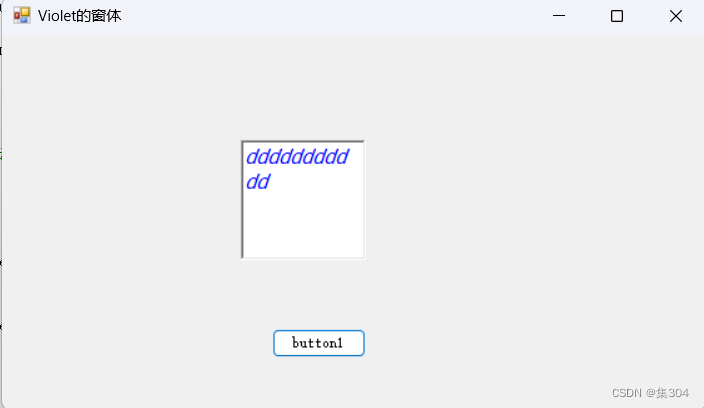
private: System::Void button2_Click(System::Object^ sender, System::EventArgs^ e)
{
textBox1->Text=richTextBox1->SelectedText;
//丢失选中文本的格式
}
4.3.3 容器控件
4.3.3.1 GroupBox控件
GroupBox控件又称为分组框,在工具箱中的图标是  该控件可以为其他控件提供可识别的分组。分组框本身是一个容器类控件,根据程序设计的需要,把可归为同一组的一些控件放在一个GroupBox控件中,这样,GroupBox控件就成为这些控件的父控件,在移动GroupBox控件时,它内部的其他控件也随之移动 该控件可以为其他控件提供可识别的分组。分组框本身是一个容器类控件,根据程序设计的需要,把可归为同一组的一些控件放在一个GroupBox控件中,这样,GroupBox控件就成为这些控件的父控件,在移动GroupBox控件时,它内部的其他控件也随之移动
4.3.3.2 Panel控件
Panel控件也是一个容器控件,在工具箱中的图标是  该控件没有Text属性,而GroupBox控件具有Text属性。Panel控件把其他控件组合在一起,放在一个面板上,更易于管理这些控件 该控件没有Text属性,而GroupBox控件具有Text属性。Panel控件把其他控件组合在一起,放在一个面板上,更易于管理这些控件 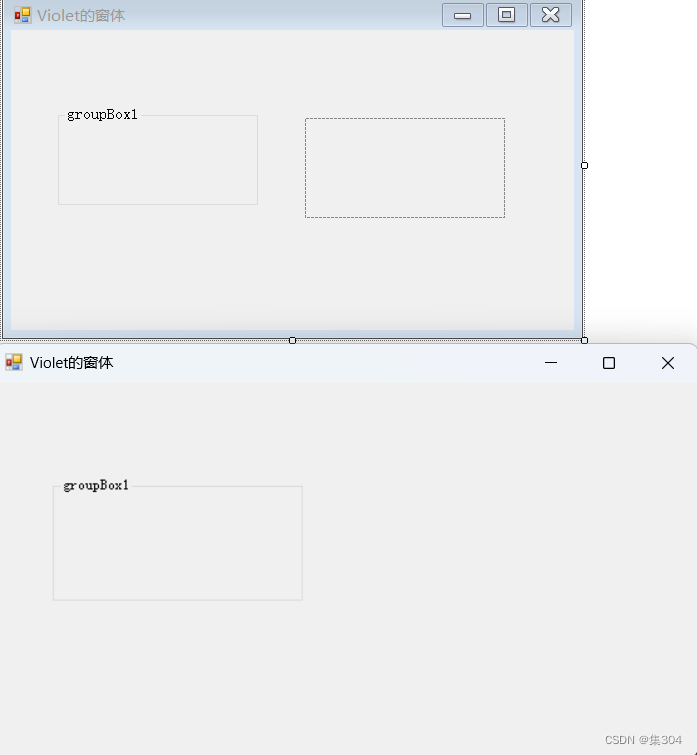
4.3.4 选择控件
4.3.4.1 RadioButton控件
RadioButton控件又称为单选按钮控件,在工具箱中的图标是  在同一个容器中的多个RadioButton控件中,只能有一个RadioButton控件为选中状态。 在同一个容器中的多个RadioButton控件中,只能有一个RadioButton控件为选中状态。
Checked属性:单选按钮是否被选中,该值为True,表示被选中。
if(radioButton1->Checked)
textBox1->Text=richTextBox1->SelectedText;
Appearance属性:当取值为Normal时,单选按钮选中状态为 没有选中状态为 没有选中状态为 当取值为Button时,外观看起来像标准的按钮,但工作方式类似于开关,选中状态为 当取值为Button时,外观看起来像标准的按钮,但工作方式类似于开关,选中状态为 没有选中状态为 没有选中状态为  CheckedChanged事件:当Checked属性值发生改变时,触发该事件。 CheckedChanged事件:当Checked属性值发生改变时,触发该事件。 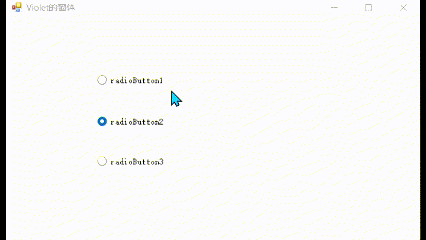
4.3.4.2 CheckBox
CheckBox控件又称为复选框,在工具箱中的图标是  在同一个容器中的多个CheckBox控件中,可以有多个CheckBox控件为选中状态。它们之间并不互相排斥。 ThreeState属性 若把该属性设置为True,则复选框就有如下三个CheckState 枚举值可选。 Checked:复选框有选中标记。 UnChecked:复选框没有选中标记。 Indeterminate:复选框为灰色显示。 在同一个容器中的多个CheckBox控件中,可以有多个CheckBox控件为选中状态。它们之间并不互相排斥。 ThreeState属性 若把该属性设置为True,则复选框就有如下三个CheckState 枚举值可选。 Checked:复选框有选中标记。 UnChecked:复选框没有选中标记。 Indeterminate:复选框为灰色显示。 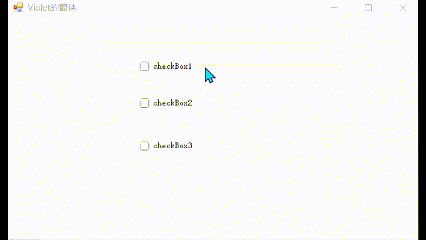
4.3.5 列表框、组合框控件
4.3.5.1 ListBox
ListBox控件又称为列表框,在工具箱中的图标是  它允许用户从所列出的表项中进行单项或多项选择,被选择的项呈高亮度显示,列表框一般带有一个垂直滚动条。列表框分单选列表框和多重选择列表框两种。单选列表框一次只能选择一个列表项,而多重选择列表框可以选择多个列表项。 列表框的常用属性: 它允许用户从所列出的表项中进行单项或多项选择,被选择的项呈高亮度显示,列表框一般带有一个垂直滚动条。列表框分单选列表框和多重选择列表框两种。单选列表框一次只能选择一个列表项,而多重选择列表框可以选择多个列表项。 列表框的常用属性: 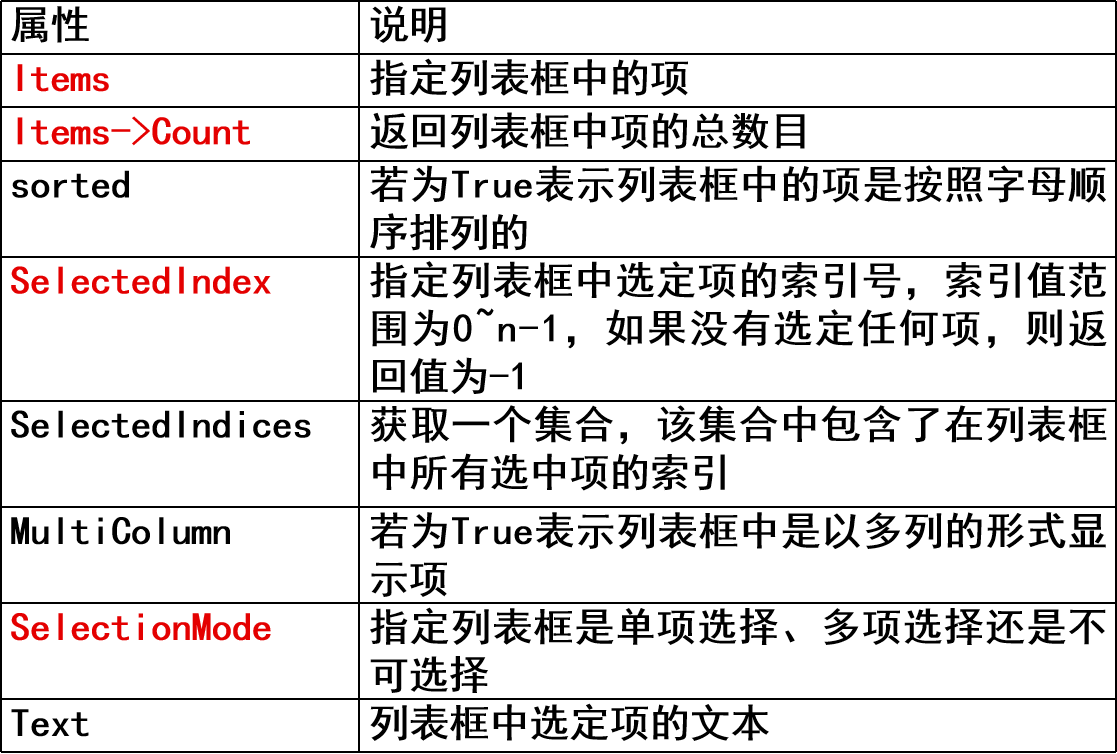 向列表框中添加项目的内容的方法: 向窗体中拖放一个列表框控件,选中该列表框,然后打开属性窗口,单击Items属性右侧的按钮,在弹出的字符串集合编辑器中输入各个项目的内容,输入结束后,单击确定按钮,这样在窗体中即可看到列表框中各个项的内容,如果项目较多,会自动添加一个垂直的滚动条。 向列表框中添加项目的内容的方法: 向窗体中拖放一个列表框控件,选中该列表框,然后打开属性窗口,单击Items属性右侧的按钮,在弹出的字符串集合编辑器中输入各个项目的内容,输入结束后,单击确定按钮,这样在窗体中即可看到列表框中各个项的内容,如果项目较多,会自动添加一个垂直的滚动条。 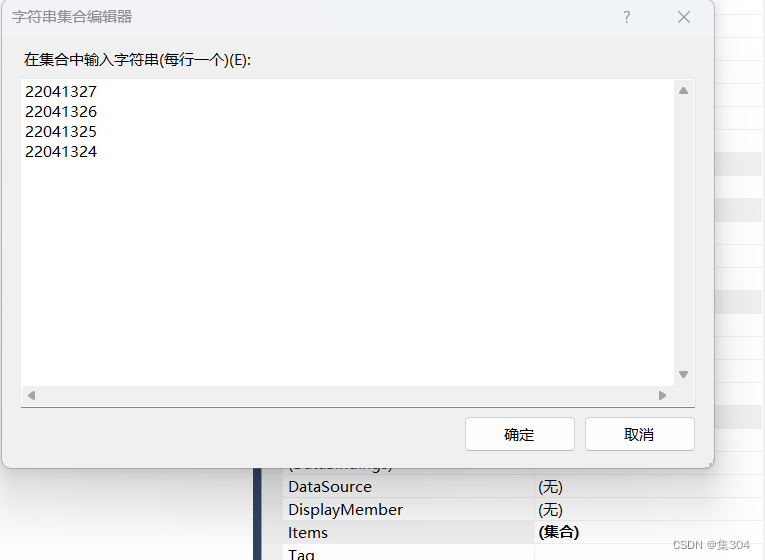 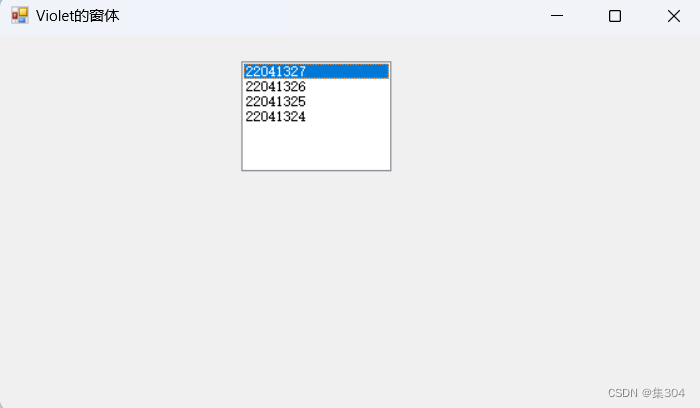
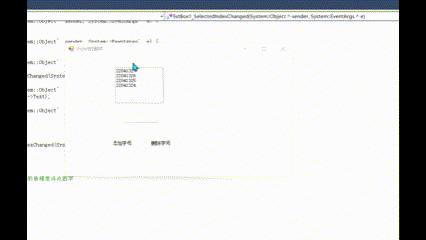
列表框的Items属性ListBox::ObjectCollection类表示。 该类的主要方法见下表所示  列表框的常用事件 : 当鼠标单击列表框中的某一项时会触发SelectIndexChanged事件 例 完成向列表框中添加项、删除项 添加项: 列表框的常用事件 : 当鼠标单击列表框中的某一项时会触发SelectIndexChanged事件 例 完成向列表框中添加项、删除项 添加项:
private: System::Void button1_Click_4(System::Object^ sender, System::EventArgs^ e)
{
listBox1->Items->Add(textBox1->Text);
}
 删除项: 删除项:
private: System::Void button2_Click_3(System::Object^ sender, System::EventArgs^ e)
{
String^ s;
s=listBox1->SelectedItem->ToString();
listBox1->Items->Remove(s);
}
 单击某一项显示该项的指针值: 单击某一项显示该项的指针值:
int n;
String^ s;
n=listBox1->SelectedIndex;
s= System::Convert::ToString(System::Convert::ToSingle(n));
//ToSingle将指定整数的值转换为等效的单精度浮点数字
MessageBox::Show(s);
4.3.5.2 ComboBox
ComboBox控件又称为组合框,在工具箱中的图标是 是文本框和列表框的组合,因此有与文本框和列表框相似的属性、方法、事件 是文本框和列表框的组合,因此有与文本框和列表框相似的属性、方法、事件  添加项: 添加项:
private: System::Void button1_Click_5(System::Object^ sender, System::EventArgs^ e)
{
if((!comboBox1->Items->Contains(comboBox1->Text)))
comboBox1->Items->Add(comboBox1->Text);
}
4.3.6 进度条控件
ProgressBar控件又叫进度条控件,在工具箱中的图标是  该控件是在较长操作时间的状态下,告知用户正在进行某个操作,指示用户等待 ProgressBar控件常用属性如表所示 该控件是在较长操作时间的状态下,告知用户正在进行某个操作,指示用户等待 ProgressBar控件常用属性如表所示

private: System::Void button1_Click_6(System::Object^ sender, System::EventArgs^ e)
{
if(progressBar1->Value==progressBar1->Maximum)
progressBar1->Value=0;
else
progressBar1->Value=progressBar1->Value+5;
//注意,每次加的值应该为Maxmun的因子
}
4.3.7 定时器控件
Timer控件也叫定时器控件,在工具箱中的图标是 定时器的重要属性: Interval设置定时器触发事件的间隔时间,单位是毫秒。 定时器的常用方法: 定时器的重要属性: Interval设置定时器触发事件的间隔时间,单位是毫秒。 定时器的常用方法:
方法说明Start()启动定时器Stop()停止定时器
定时器的常用事件: Tick事件:Interval属性设置后,启动定时器,每经过Interval指定时间会触发一次Tick事件。 例1:
private: System::Void timer1_Tick(System::Object^ sender, System::EventArgs^ e)
{
if(progressBar1->Value==progressBar1->Maximum)
progressBar1->Value=0;
else
progressBar1->Value=progressBar1->Value+5;
}
private: System::Void button1_Click_7(System::Object^ sender, System::EventArgs^ e)
{
timer1->Start();
}
private: System::Void button2_Click_4(System::Object^ sender, System::EventArgs^ e)
{
timer1->Stop();
}
例1 动态显示时间:
private: System::Void timer1_Tick(System::Object^ sender, System::EventArgs^ e)
{
DateTime currentTime ;
currentTime= DateTime::Now;
textBox1->Text=currentTime.ToString();
}
private: System::Void button1_Click_7(System::Object^ sender, System::EventArgs^ e)
{
timer1->Start();
}
private: System::Void button2_Click_4(System::Object^ sender, System::EventArgs^ e)
{
timer1->Stop();
}

4.3.8 PictureBox控件
PictureBox控件用于显示图像,在工具箱中的图标是 PictureBox控件常用属性 PictureBox控件常用属性 
private: System::Void button1_Click_8(System::Object^ sender, System::EventArgs^ e)
{
pictureBox1->Image = Image::FromFile("C:\\图片\\6.jpg");
}
private: System::Void button2_Click_5(System::Object^ sender, System::EventArgs^ e)
{
pictureBox1->Load("C:\\图片\\1.jpg");
}
4.3.9 通用对话框
4.3.9.1 打开文件对话框
OpenFileDialog控件提供了一个Windows标准的打开文件对话框,在工具箱中的图标  用户可以使用打开文件对话框浏览计算机中的文件,并选择打开一个或多个文件 常用属性: 用户可以使用打开文件对话框浏览计算机中的文件,并选择打开一个或多个文件 常用属性:  常用方法: 常用方法:  常用事件: 常用事件: 
private: System::Void pictureBox1_Click(System::Object^ sender, System::EventArgs^ e)
{
OpenFileDialog^ ofd=gcnew OpenFileDialog();
ofd->Filter="Bmp|*.bmp|jpg|*.jpg";
if(ofd->ShowDialog()==System::Windows::Forms::DialogResult::OK && ofd->FileName->Length>0)
{
pictureBox1->Load(ofd->FileName);
}
}
4.3.9.2 保留文件对话框
SaveFileDialog控件用于保存文件的对话框,在工具箱中的图标是  常用的属性和OpenFileDialog控件大致相同。 常用的属性和OpenFileDialog控件大致相同。
private: System::Void pictureBox1_Click(System::Object^ sender, System::EventArgs^ e)
{
SaveFileDialog^ saveFileDialog1 = gcnew SaveFileDialog();
saveFileDialog1->Filter = "txt files (*.txt)|*.txt|All files (*.*)|*.*";
saveFileDialog1->FilterIndex = 2;
saveFileDialog1->RestoreDirectory = true;
saveFileDialog1->ShowDialog() ;
}
4.3.9.3 颜色对话框
ColorDialog控件,用于显示可使用的颜色和用户自定义的颜色,在工具箱中的图标是  其常用属性见下表 其常用属性见下表  方法 方法
方法说明ShowDialog运行通用对话框ToString返回表示ColorDialog的字符串
private: System::Void button1_Click_9(System::Object^ sender, System::EventArgs^ e)
{
ColorDialog^ colorDialog = gcnew ColorDialog();
colorDialog->AllowFullOpen = true;
colorDialog->FullOpen = true;
//自定义颜色控件在对话框打开时是否可见
colorDialog->ShowDialog();
textBox1->BackColor=colorDialog->Color;
}
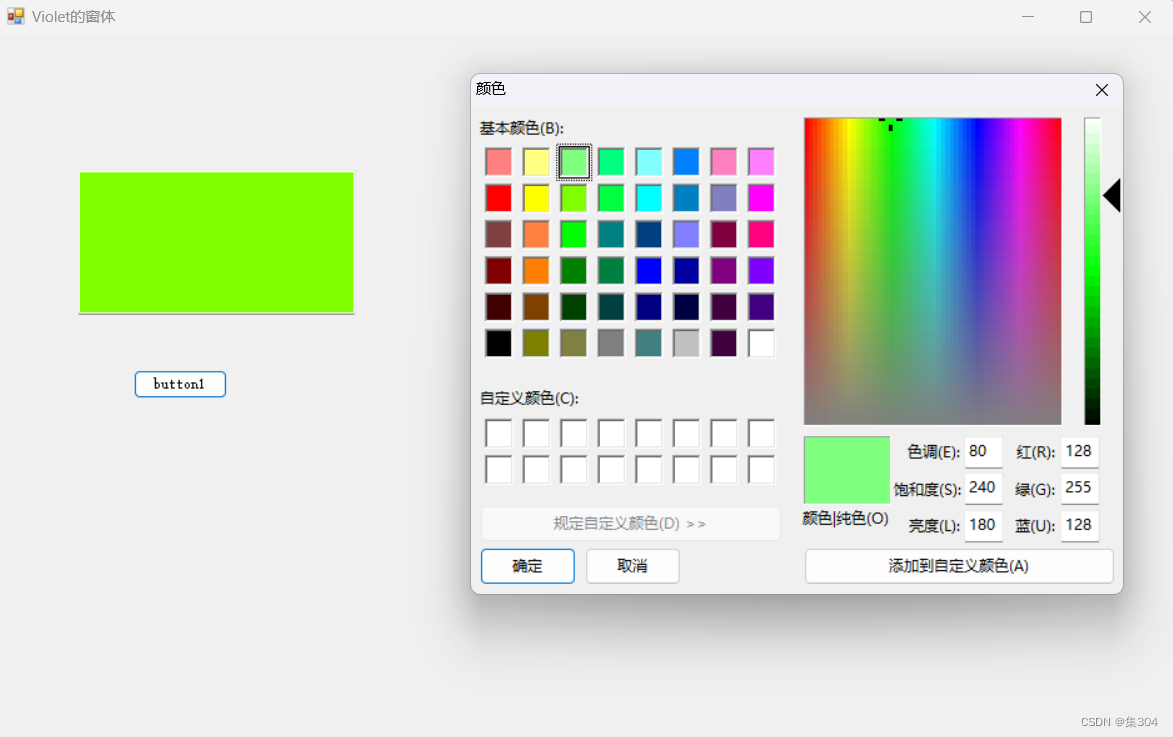
4.3.9.4 字体对话框
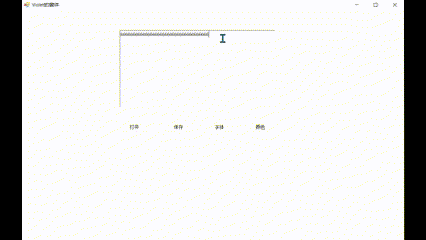
FontDialog控件,用于选择本地计算机上安装的一种字体,在工具箱中的图标是  常用属性如下表: 常用属性如下表:  例题:在窗体中通过使用通用对话框控件来控制富文本框中的内容及字体 在窗体的头文件中添加如下代码: 例题:在窗体中通过使用通用对话框控件来控制富文本框中的内容及字体 在窗体的头文件中添加如下代码:
using namespace System::IO;
StreamReader类用于从文本文件中读取信息。 常用方法: Read:读取一个字节或指定字节数 ReadLine:读取一行 ReadToEnd :读取到文件结束 Close:关闭数据流 Stream Writer类以特定的编码方式将字符写入流中 常用方法: Write 将字符串写入流 Close关闭数据流
private: System::Void button1_Click_9(System::Object^ sender, System::EventArgs^ e)
{
openFileDialog1->InitialDirectory="C:\\Users\\HD\\OneDrive\\桌面\\22041327袁帅\\";
openFileDialog1->Filter="文本文件(*.txt)|*.txt";
if(openFileDialog1->ShowDialog()==Windows::Forms::DialogResult::OK)
{
StreamReader ^str=gcnew StreamReader(openFileDialog1->FileName);
richTextBox1->Text=str->ReadToEnd();
str->Close();
}
}
打开 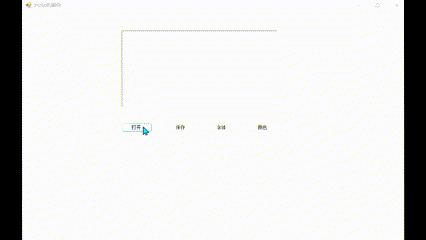
private: System::Void button2_Click_6(System::Object^ sender, System::EventArgs^ e)
{
if(saveFileDialog1->ShowDialog()==Windows::Forms::DialogResult::OK)
{
StreamWriter ^str=gcnew StreamWriter(saveFileDialog1->FileName);
str->Write(richTextBox1->Text);
str->Close();
}
}
保存
private: System::Void button3_Click_1(System::Object^ sender, System::EventArgs^ e)
{
fontDialog1->ShowColor=true;//是否显示颜色选择
if(fontDialog1->ShowDialog()==Windows::Forms::DialogResult::OK)
{
richTextBox1->Font=fontDialog1->Font;
richTextBox1->ForeColor=fontDialog1->Color;
}
}
字体 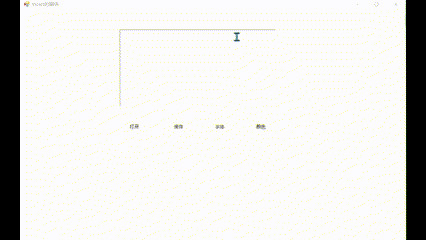
private: System::Void button4_Click(System::Object^ sender, System::EventArgs^ e)
{
if(colorDialog1->ShowDialog()==Windows::Forms::DialogResult::OK)
{
richTextBox1->ForeColor=colorDialog1->Color;
}
}
颜色 
4.3.10 菜单
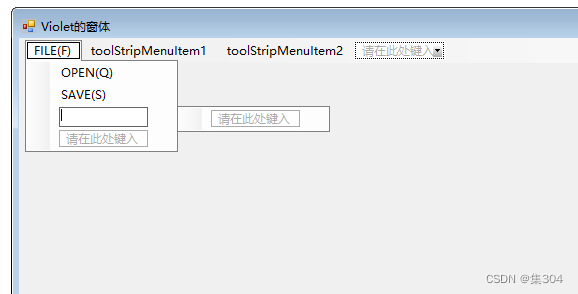
MenuStrip控件也叫菜单控件,在工具栏中的图标是  Windows应用程序通常提供菜单,菜单包括各种基本命令,并按照主题分组。将MenuStrip控件添加到窗体后,它出现在Windows窗体设计器底部的栏中,同时在窗体的顶部将出现主菜单设计器 Windows应用程序通常提供菜单,菜单包括各种基本命令,并按照主题分组。将MenuStrip控件添加到窗体后,它出现在Windows窗体设计器底部的栏中,同时在窗体的顶部将出现主菜单设计器
4.3.10.1 菜单项的设计
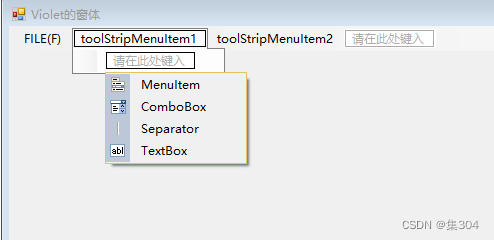
当菜单控件添加到窗体中以后,可以直接在标题栏下的菜单项中添加各个菜单项。 可以在属性窗口中单击菜单的Items属性右侧的按钮,打开项集合编辑器,在该编辑器中添加各个菜单项。 Items属性是ToolStrip类型的集合,该集合中可以包含所有从ToolStrip类派生的各种控件元素,有ToolStripMenuItem、ToolStripComboBox、ToolStripSepatator、ToolStripTextBox。 在将要添加菜单项的编辑框的右侧有个小下拉箭头,点中该箭头将显示ToolStrip类中的几种控件类型
4.3.10.2 分隔条
当二级菜单中选项较多时,可以使用分隔条将其分组。使得菜单结构更加清晰。在将输入的菜单项上输入一个“-”可以在选项的上面添加一个分隔条 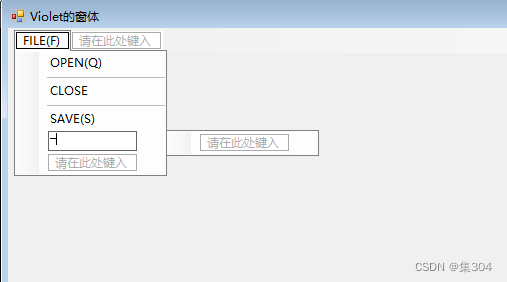
4.3.10.2 访问键和快捷键
访问键(Access key):访问键是菜单项文字后面的括号中带下划线的字符,它是在菜单设计时定义的。在菜单项的标题文字后面加上一个由”&”引导的字母。即可完成访问键的设定。定义访问键后,运行时按下”ALT+访问键”,就相当于用鼠标单击了一下该菜单项。
快捷键(ShortCut key):设置每个菜单项时,在属性窗口”ShortCutKeys”属性右端,单击下拉箭头,就可在列表中选择一个合适的快捷键。 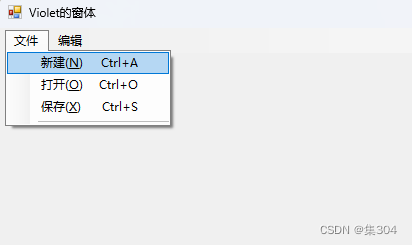 向窗体中添加控件,各个控件的属性如下表所示: 向窗体中添加控件,各个控件的属性如下表所示: 
private: System::Void cLOSEToolStripMenuItem_Click(System::Object^ sender, System::EventArgs^ e) {
openFileDialog1->InitialDirectory="C:\\Users\\HD\\OneDrive\\桌面\\文本文件.txt";
openFileDialog1->Filter="文本文件(*.txt)|*.txt";
if(openFileDialog1->ShowDialog()==Windows::Forms::DialogResult::OK)
{
StreamReader ^str=gcnew StreamReader(openFileDialog1->FileName);
richTextBox1->Text=str->ReadToEnd();
str->Close();
}
}
private: System::Void radioButton1_CheckedChanged_1(System::Object^ sender, System::EventArgs^ e) {
if (radioButton1->Checked == true)
richTextBox1->Text += "学位:" + radioButton1->Text + "\n";
}
private: System::Void radioButton2_CheckedChanged(System::Object^ sender, System::EventArgs^ e) {
if (radioButton2->Checked == true)
richTextBox1->Text += "学位:" + radioButton2->Text + "\n";
}
private: System::Void radioButton3_CheckedChanged(System::Object^ sender, System::EventArgs^ e) {
if (radioButton3->Checked == true)
richTextBox1->Text += "学位:" + radioButton3->Text + "\n";
}
private: System::Void textBox1_KeyPress(System::Object^ sender, System::Windows::Forms::KeyPressEventArgs^ e) {
if(e->KeyChar==13)
richTextBox1->Text += "姓名:" + textBox1->Text + "\n";
//textBox1中有键按下时触发textBox1_KeyPress事件
}
private: System::Void 清除ToolStripMenuItem_Click(System::Object^ sender, System::EventArgs^ e) {
richTextBox1->Clear();
}
private: System::Void comboBox1_KeyPress(System::Object^ sender, System::Windows::Forms::KeyPressEventArgs^ e) {
if ((e->KeyChar==13)&&comboBox1->Text!="")
richTextBox1->Text+="性别:"+comboBox1->Text+"\n";
}
private: System::Void checkBox1_CheckedChanged_1(System::Object^ sender, System::EventArgs^ e) {
if (checkBox1->Checked == true)
richTextBox1->Text += "爱好:" + checkBox1->Text + "\n";
}
private: System::Void checkBox2_CheckedChanged(System::Object^ sender, System::EventArgs^ e) {
if (checkBox2->Checked == true)
richTextBox1->Text += "爱好:" + checkBox2->Text + "\n";
}
private: System::Void checkBox3_CheckedChanged(System::Object^ sender, System::EventArgs^ e) {
if (checkBox3->Checked == true)
richTextBox1->Text += "爱好:" + checkBox3->Text + "\n";
}
private: System::Void listBox1_SelectedIndexChanged_1(System::Object^ sender, System::EventArgs^ e) {
richTextBox1->Text+="专业:"+listBox1->SelectedItem+"\n";
}
private: System::Void comboBox1_SelectedIndexChanged_1(System::Object^ sender, System::EventArgs^ e) {
richTextBox1->Text += "性别:" + comboBox1->Text + "\n";
}
private: System::Void sAVESToolStripMenuItem1_Click(System::Object^ sender, System::EventArgs^ e) {
if(saveFileDialog1->ShowDialog()==Windows::Forms::DialogResult::OK)
{
StreamWriter ^str=File::CreateText(saveFileDialog1->FileName);
str->Write(richTextBox1->Text);
str->Close();
}
}
private: System::Void 退出ToolStripMenuItem_Click(System::Object^ sender, System::EventArgs^ e) {
this->Close();
}
private: System::Void 新建ToolStripMenuItem_Click(System::Object^ sender, System::EventArgs^ e) {
richTextBox1->Clear();
textBox1->Clear();
comboBox1->Text="";
}
private: System::Void 复制ToolStripMenuItem_Click(System::Object^ sender, System::EventArgs^ e) {
richTextBox1->Copy();
}
private: System::Void 粘贴ToolStripMenuItem_Click(System::Object^ sender, System::EventArgs^ e) {
richTextBox1->Paste();
}
private: System::Void 剪切ToolStripMenuItem_Click(System::Object^ sender, System::EventArgs^ e) {
richTextBox1->Cut();
}
private: System::Void 撤销ToolStripMenuItem_Click(System::Object^ sender, System::EventArgs^ e) {
richTextBox1->Undo();
}
private: System::Void 替换ToolStripMenuItem_Click(System::Object^ sender, System::EventArgs^ e) {
String^ str1 = richTextBox1->SelectedText;
richTextBox1->SelectedText = str1->Replace("爱好", "擅长");
//richTextBox1->Show(str1);
}
private: System::Void 查找ToolStripMenuItem_Click(System::Object^ sender, System::EventArgs^ e) {
int position = richTextBox1->Text->IndexOf("爱好");
int startindex=position;
int nextindex = 0;
if(position==0) nextindex=1;
while (nextindex != startindex)
{
richTextBox1->Select(position,2);
richTextBox1->SelectionColor = Color::Blue;
nextindex=richTextBox1->Find("爱好", position + 2,RichTextBoxFinds::WholeWord);
if (nextindex == -1)
nextindex =startindex;
position = nextindex;
}
}
视频
4.3.10.3 ContextMenuStrip控件
使用ContextMenuStrip控件可以建立快捷菜单,也称为上下文菜单,在工具箱中的图标是 
设置某个控件的ContextMenuStrip属性,这样就把该特定控件和该上下文菜单联系起来,当用户在右击该控件时,就可显示该上下文菜单的各菜单项。选中其中一个菜单项,即可执行该菜单项的Click事件 我也不太懂…
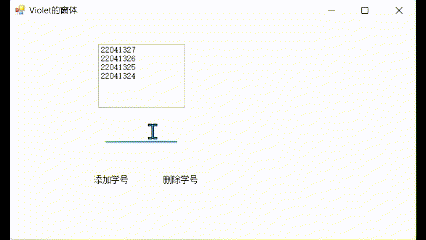
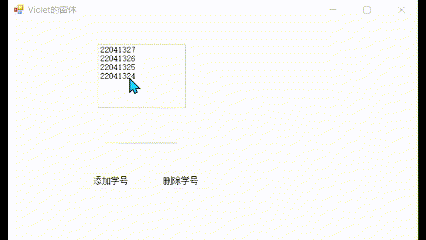
五 综合应用——学生管理系统的设计
待更新…
|