STM32MP157 AP6236 WiFi蓝牙模块 |
您所在的位置:网站首页 › 无线网卡及蓝牙驱动 › STM32MP157 AP6236 WiFi蓝牙模块 |
STM32MP157 AP6236 WiFi蓝牙模块
|
STM32MP157 AP6236 WiFi蓝牙模块
1. 介绍2. 修改设备树3. 配置Linux内核3.1 配置支持WiFi设备3.2 配置支持IEEE 802.113.3 配置支持蓝牙
4. 配置Buildroot5. 板子配置6. 验证6.1 WiFi6.2 蓝牙
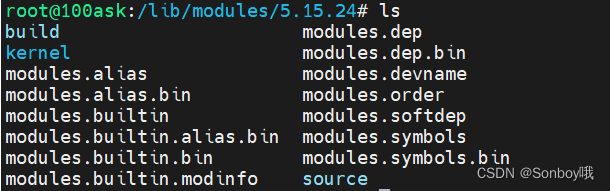
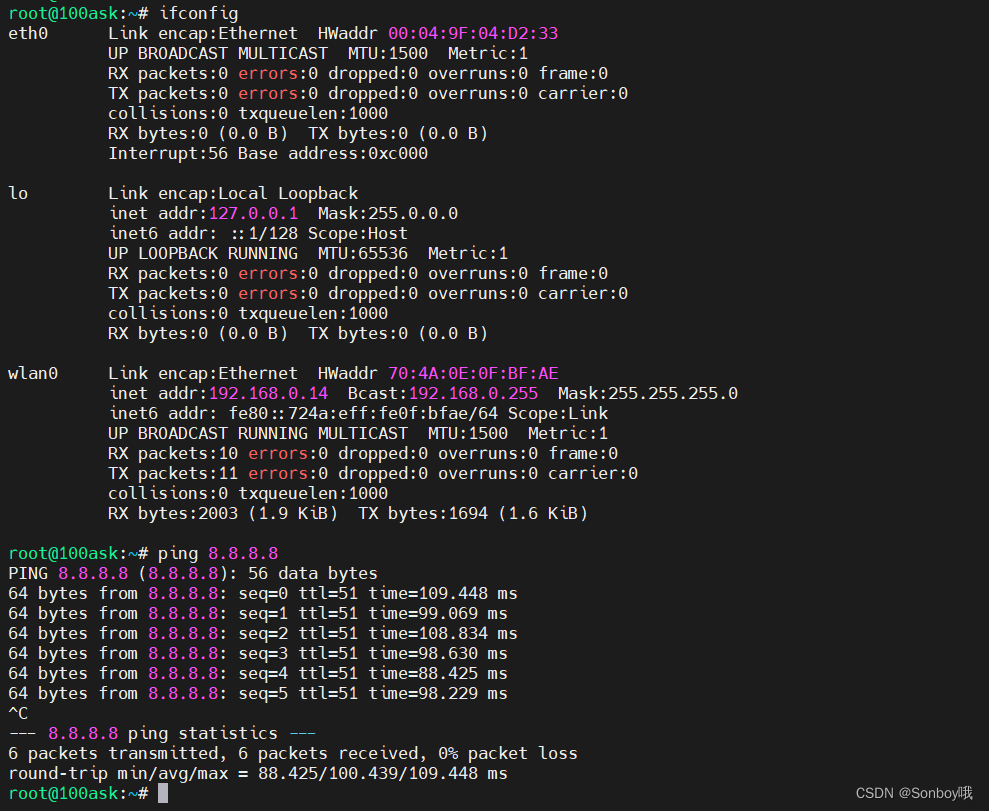
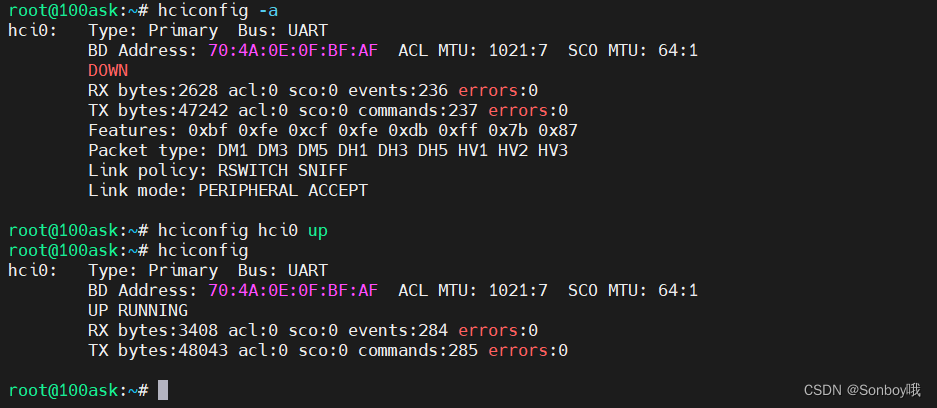
移植参考开发板为100ASK_STM32MP157_V11。 1. 介绍AP6236是采用BCM43430B0方案,2.4G单频单通道SDIO接口支持BT4.2单频蓝牙WiFi二合一模块。 2. 修改设备树BCM43430B0 WiFi采用SDIO接口,蓝牙采用uart接口。下面我们给出必要配置,需要根据理解修改自己的设备树。SDIO接口使用的是sdmmc3, uart接口使用的是usart1 。因为i2c4的引脚和usart1 的引脚有重叠,所以我们先将其disabled以免影响。使能sdmmc3后mmc设备号发生了改变,sdmmc3对应0,sdmmc2(SD卡)对应1,sdmmc1(EMMC)对应2,所以后面需要修改Linux启动参数。 #include / { aliases { serial2 = &usart1; }; vdd_wifi: regulator-vdd-wifi { pinctrl-names = "default"; pinctrl-0 = ; compatible = "regulator-fixed"; regulator-name = "vdd_wifi"; regulator-min-microvolt = ; regulator-max-microvolt = ; startup-delay-us = ; regulator-boot-on; regulator-pull-down; }; wifi_pwrseq: wifi-pwrseq { compatible = "mmc-pwrseq-simple"; reset-gpios = ; }; }; &pinctrl { vdd_wifi_pins_a: vdd_wifi { gpio { pinmux = ; drive-push-down; bias-pull-up; output-low; slew-rate = ; }; }; }; &pinctrl_z { usart1_pins_a: usart1-0 { pins1 { pinmux = , /* USART1_RX */ ; /* USART1_CTS */ bias-disable; }; pins2 { pinmux = , /* USART1_TX */ ; /* USART1_RTS */ bias-disable; drive-push-pull; slew-rate = ; }; }; usart1_idle_pins_a: usart1-idle-1 { pins1 { pinmux = , /* USART1_TX */ ; /* USART1_CTS */ }; pins2 { pinmux = ; /* USART1_RTS */ bias-disable; drive-push-pull; slew-rate = ; }; pins3 { pinmux = ; /* USART1_RX */ bias-disable; }; }; usart1_sleep_pins_a: usart1-sleep-0 { pins { pinmux = , /* USART1_RX */ , /* USART1_TX */ , /* USART1_CTS */ ; /* USART1_RTS */ }; }; }; &rtc { st,lsco = ; pinctrl-0 = ; pinctrl-names = "default"; status = "okay"; }; &sdmmc3 { pinctrl-names = "default", "opendrain", "sleep"; pinctrl-0 = ; pinctrl-1 = ; pinctrl-2 = ; arm,primecell-periphid = ; non-removable; st,neg-edge; bus-width = ; vmmc-supply = ; mmc-pwrseq = ; #address-cells = ; #size-cells = ; keep-power-in-suspend; status = "okay"; brcmf: bcrmf@1 { reg = ; compatible = "brcm,bcm4329-fmac"; }; }; &usart1 { pinctrl-names = "default", "sleep", "idle"; pinctrl-0 = ; pinctrl-1 = ; pinctrl-2 = ; uart-has-rtscts; status = "okay"; bluetooth { shutdown-gpios = ; compatible = "brcm,bcm43438-bt"; max-speed = ; }; }; 3. 配置Linux内核ST官方提供的BSP支持包中的配置已默认支持了BCM43436B0模块,我们下面简单列出必要的配置。 3.1 配置支持WiFi设备 Device Drivers ---> [*] Network device support ---> [*] Wireless LAN ---> [*] Broadcom devices Broadcom FullMAC WLAN driver [*] SDIO bus interface support for FullMAC driver Broadcom specific AMBA ---> --- Broadcom specific AMBA [*] Support for BCMA in a SoC [*] ChipCommon-attached serial flash support [*] BCMA Broadcom GBIT MAC COMMON core driver [*] BCMA GPIO driver 3.2 配置支持IEEE 802.11 [*] Networking support ---> -*- Wireless ---> cfg80211 - wireless configuration API Generic IEEE 802.11 Networking Stack (mac80211) 3.3 配置支持蓝牙 [*] Networking support ---> Bluetooth subsystem support ---> [*] Bluetooth Classic (BR/EDR) features [*] Bluetooth Low Energy (LE) features Bluetooth 6LoWPAN support [*] Export Bluetooth internals in debugfs Bluetooth device drivers ---> HCI UART driver [*] Broadcom protocol support 4. 配置Buildroot测试使用WiFi和蓝牙需要用到bluez和wpa_supplicant工具,直接从Buildroot中添加这两个工具。另外我们将根文件系统分区调大至500M,因为我们要将内核的模块全部安装到跟文件系统。 Target packages ---> Networking applications ---> [*] bluez-utils [*] build tools [*] install deprecated tools [*] wireless tools [*] wpa_supplicant ---> [*] Enable nl80211 support 5. 板子配置编译并下载,启动开发板。由于EMMC的设备号发生了改变,所以需要更改u-boot的Linux的启动参数。 #SD卡设置 setenv bootcmd 'ext4load mmc 1:8 c2000000 uImage; ext4load mmc 1:8 c4000000 stm32mp157d-100ask.dtb; bootm c2000000 - c4000000' setenv bootargs 'console=ttySTM0,115200 root=/dev/mmcblk1p9 rootwait rw' #EMMC设置 setenv bootcmd 'ext4load mmc 2:6 c2000000 uImage; ext4load mmc 2:6 c4000000 stm32mp157d-100ask.dtb; bootm c2000000 - c4000000' setenv bootargs 'console=ttySTM0,115200 root=/dev/mmcblk2p7 rootwait rw'由于我们编译Linux内核将一些组件编译成了模块,所以要使用这些组件的功能必须将模块安装进跟文件系统中。使用make ARCH=arm INSTALL_MOD_PATH="$PWD/install_artifact" modules_install命令将Linux模块安装在install_artifact目录中,然后我们将install_artifact目录下的所有文件拷贝到根文件系统的根目录下。 修改/etc/wpa_supplicant.conf文件,配置要连接的WiFi。 #ctrl_interface=/var/run/wpa_supplicant ap_scan=1 network={ ssid="WiFi名" psk="密码" priority=0 }修改/etc/network/interfaces文件,添加如下配置自动获取IP并连接WiFi。 auto wlan0 iface wlan0 inet dhcp pre-up wpa_supplicant -B -Dnl80211 -iwlan0 -c/etc/wpa_supplicant.conf post-down killall -q wpa_supplicant重启开发板,可以看到wlan0网卡启动正常,上网正常。 使用hciconfig -a查看蓝牙设备,启动蓝牙hciconfig hci0 up。 移植源码获取: git clone https://github.com/Sonboy97/arm-ostl-linux-gnueabi.git 版本:cc0bae894417d0985d6567dd7674cea303848cdd |
 重启开发板,打印显示没有找到相应的固件。
 我们需要BCM43430B0.hcd、brcmfmac43430b0-sdio.txt、brcmfmac43430b0-sdio.bin、brcmfmac43430b0-sdio.st,stm32mp157d-100ask.txt、brcmfmac43430b0-sdio.st,stm32mp157d-100ask.bin 这几个文件复制到/lib/firmware/brcm目录中,其中brcmfmac43430b0-sdio.txt和brcmfmac43430b0-sdio.st,stm32mp157d-100ask.txt、brcmfmac43430b0-sdio.bin和brcmfmac43430b0-sdio.st,stm32mp157d-100ask.bin是一样的只是文件名不同。这几个文件可在网上自找,也可在我的BSP工程的rootfs-patch文件夹中获取。
 打开手机蓝牙设为可被发现,使用hcitool scan扫描附件蓝牙设备,l2ping搜索到的设备正常。
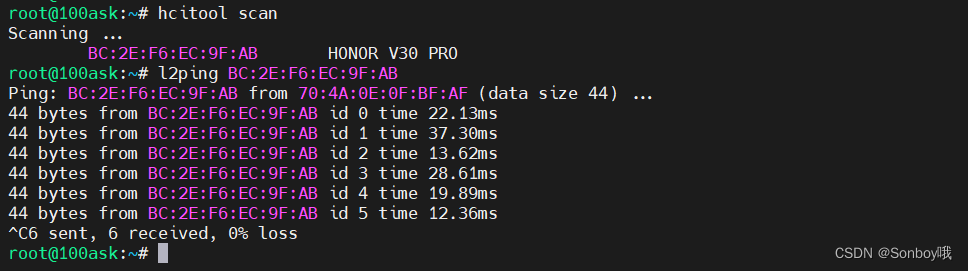
【本文地址】
今日新闻 |
推荐新闻 |