Python使用Matplotlib绘制三维折线图(进阶篇) |
您所在的位置:网站首页 › 折线图做法图例怎么做 › Python使用Matplotlib绘制三维折线图(进阶篇) |
Python使用Matplotlib绘制三维折线图(进阶篇)
|
1.0简介:
三维图像技术是现在国际最先进的计算机展示技术之一,任何普通电脑只需要安装一个插件,就可以在网络浏览器中呈现三维的产品,不但逼真,而且可以动态展示产品的组合过程,特别适合远程浏览。 立体图视觉上层次分明色彩鲜艳,具有很强的视觉冲击力,让观看的人驻景时间长,留下深刻的印象。立体图给人以真实、栩栩如生,人物呼之欲出,有身临其境的感觉,有很高的艺术欣赏价值。 今天我们就通过这篇文章来了解如何用python中的matplotlib库绘制漂亮的三位论文图吧!秀翻你的朋友! 2.0三维图画法与类型首先要安装Matplotlib库可以使用pip: pip install matplotlib假设已经安装了matplotlib工具包。 利用matplotlib.figure.Figure创建一个图框: import matplotlib.pyplot as plt from mpl_toolkits.mplot3d import Axes3D fig = plt.figure() ax = fig.add_subplot(111, projection='3d')
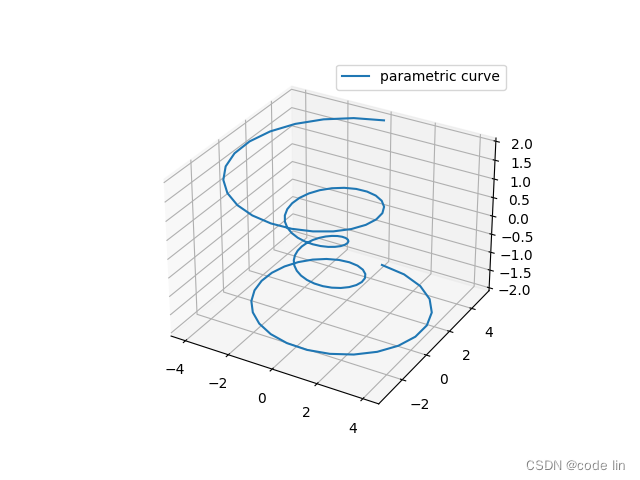
1、直线绘制(Line plots) 基本用法:ax.plot(x,y,z,label=' ') 代码如下: import matplotlib as mpl from mpl_toolkits.mplot3d import Axes3D import numpy as np import matplotlib.pyplot as plt mpl.rcParams['legend.fontsize'] = 10 fig = plt.figure() ax = fig.add_subplot(projection='3d') theta = np.linspace(-4 * np.pi, 4 * np.pi, 100) z = np.linspace(-2, 2, 100) r = z ** 2 + 1 x = r * np.sin(theta) y = r * np.cos(theta) ax.plot(x, y, z, label='parametric curve') ax.legend()效果如下:
基本语法: ax.scatter(xs, ys, zs, s=20, c=None, depthshade=True, *args, *kwargs) 代码大意为: xs,ys,zs:输入数据;s:scatter点的尺寸c:颜色,如c = 'r’就是红色;depthshase:透明化,True为透明,默认为True,False为不透明*args等为扩展变量,如maker = ‘o’,则scatter结果为’o‘的形状 示例代码: from mpl_toolkits.mplot3d import Axes3D import matplotlib.pyplot as plt import numpy as np def randrange(n, vmin, vmax): ''' Helper function to make an array of random numbers having shape (n, ) with each number distributed Uniform(vmin, vmax). ''' return (vmax - vmin)*np.random.rand(n) + vmin fig = plt.figure() ax = fig.add_subplot(111, projection='3d') n = 100 # For each set of style and range settings, plot n random points in the box # defined by x in [23, 32], y in [0, 100], z in [zlow, zhigh]. for c, m, zlow, zhigh in [('r', 'o', -50, -25), ('b', '^', -30, -5)]: xs = randrange(n, 23, 32) ys = randrange(n, 0, 100) zs = randrange(n, zlow, zhigh) ax.scatter(xs, ys, zs, c=c, marker=m) ax.set_xlabel('X Label') ax.set_ylabel('Y Label') ax.set_zlabel('Z Label') plt.show()效果:
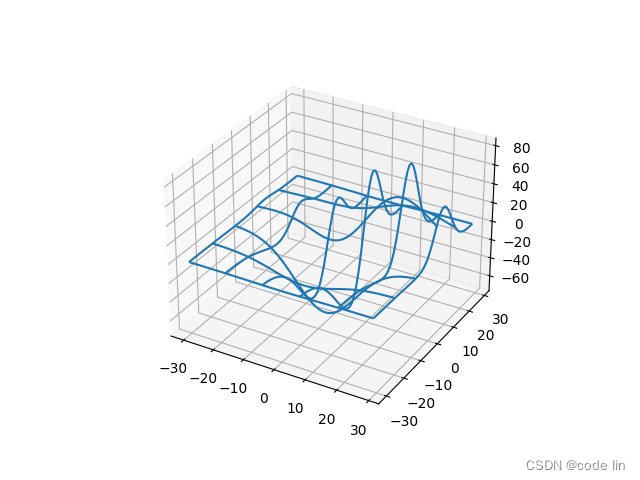
基本用法:ax.plot_wireframe(X, Y, Z, *args, **kwargs) X,Y,Z:输入数据rstride:行步长cstride:列步长rcount:行数上限ccount:列数上限示例代码: from mpl_toolkits.mplot3d import axes3d import matplotlib.pyplot as plt fig = plt.figure() ax = fig.add_subplot(100, projection='3d') # Grab some test data. X, Y, Z = axes3d.get_test_data(0.12) # Plot a basic wireframe. ax.plot_wireframe(X, Y, Z, rstride=10, cstride=10) plt.show()
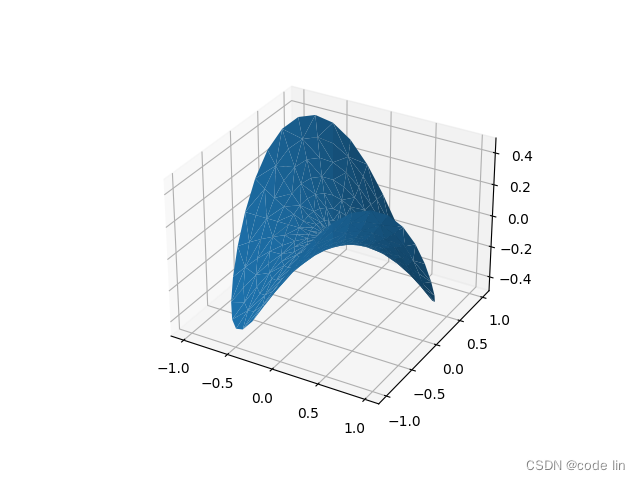
有点丑。。。大家可以自行更改绘图数据,美化图像。 4、三角表面图(Tri-Surface plots)基本用法:ax.plot_trisurf(*args, **kwargs) ax.plot_trisurf(*args, **kwargs) X,Y,Z:数据 其他参数类似surface-plot from mpl_toolkits.mplot3d import Axes3D import matplotlib.pyplot as plt import numpy as np n_radii = 8 n_angles = 36 radii = np.linspace(0.125, 1.0, n_radii) angles = np.linspace(0, 2*np.pi, n_angles, endpoint=False) angles = np.repeat(angles[..., np.newaxis], n_radii, axis=1) # points in the (x, y) plane. x = np.append(0, (radii*np.cos(angles)).flatten()) y = np.append(0, (radii*np.sin(angles)).flatten()) z = np.sin(-x*y) fig = plt.figure() ax = fig.add_subplot(projection='3d') ax.plot_trisurf(x, y, z, linewidth=0.2, antialiased=True) plt.show() 运行效果图:
利用scatter生成随机散点图。 函数定义: #函数定义 matplotlib.pyplot.scatter(x, y, s=None, #散点的大小 array scalar c=None, #颜色序列 array、sequency marker=None, #点的样式 cmap=None, #colormap 颜色样式 norm=None, #归一化 归一化的颜色camp vmin=None, vmax=None, #对应上面的归一化范围 alpha=None, #透明度 linewidths=None, #线宽 verts=None, # edgecolors=None, #边缘颜色 data=None, **kwargs ) 示例代码: import numpy as np import matplotlib.pyplot as plt #定义坐标轴 fig4 = plt.figure() ax4 = plt.axes(projection='3d') #生成三维数据 xx = np.random.random(20)*10-5 #取100个随机数,范围在5~5之间 yy = np.random.random(20)*10-5 X, Y = np.meshgrid(xx, yy) Z = np.sin(np.sqrt(X**2+Y**2)) #作图 ax4.scatter(X,Y,Z,alpha=0.3,c=np.random.random(400),s=np.random.randint(10,20,size=(20, 20))) #生成散点.利用c控制颜色序列,s控制大小 plt.show()效果:
谢谢大家阅读本文,今天又要在编辑器里写下什么呢? |


【本文地址】
今日新闻 |
推荐新闻 |