如何更改Windows 10锁定屏幕超时 |
您所在的位置:网站首页 › 屏幕超时时间 › 如何更改Windows 10锁定屏幕超时 |
如何更改Windows 10锁定屏幕超时
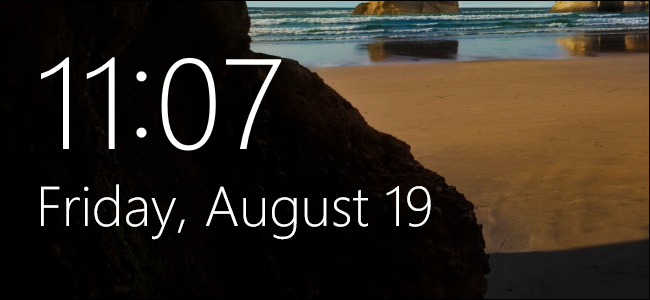
By default, Windows 10’s lock screen times out and switches off your monitor after one minute. If you’d like it to stick around longer than that–say, if you have background picture you like looking at or you enjoy having Cortana handy–there’s a simple Registry hack that will add the setting to your power options. 默认情况下,Windows 10的锁定屏幕超时并在一分钟后关闭显示器。 如果您希望它的使用时间更长-例如,如果您有想要观看的背景图片,或者喜欢手持Cortana ,则有一个简单的Registry hack,可以将设置添加到电源选项中。 First, you’ll need to tackle the Registry to add the timeout setting to your PC’s power options. You can do that by editing the Registry manually or downloading our one-click hacks. After adding the setting, you’ll then set your timeout using the standard Power Options applet in the Control Panel. Here’s how to get it all done. 首先,您需要解决注册表问题,将超时设置添加到PC的电源选项中。 您可以通过手动编辑注册表或下载我们的一键式技巧来做到这一点。 添加设置后,您将使用“控制面板”中的标准“电源选项”小程序设置超时时间。 这是完成所有工作的方法。 通过手动编辑注册表将超时设置添加到电源选项 (Add Timeout Setting to Power Options by Editing the Registry Manually)To add the timeout setting to power options, you just need to make an adjustment to one setting in the Windows Registry. 要将超时设置添加到电源选项,您只需要对Windows注册表中的一个设置进行调整。 Standard warning: Registry Editor is a powerful tool and misusing it can render your system unstable or even inoperable. This is a pretty simple hack and as long as you stick to the instructions, you shouldn’t have any problems. That said, if you’ve never worked with it before, consider reading about how to use the Registry Editor before you get started. And definitely back up the Registry (and your computer!) before making changes. 标准警告:注册表编辑器是一个功能强大的工具,滥用它会使您的系统不稳定甚至无法运行。 这是一个非常简单的技巧,只要您按照说明进行操作,就不会有任何问题。 也就是说,如果您以前从未使用过它,请在开始之前考虑阅读有关如何使用注册表编辑器的信息。 并在进行更改之前一定要备份注册表(和您的计算机!)。 Open the Registry Editor by hitting Start and typing “regedit.” Press Enter to open Registry Editor and give it permission to make changes to your PC. 通过单击开始并键入“ regedit”来打开注册表编辑器。 按Enter键打开注册表编辑器,并授予其对PC进行更改的权限。 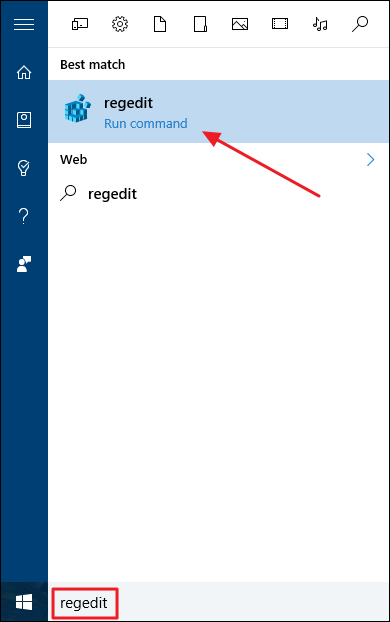
In the Registry Editor, use the left sidebar to navigate to the following key: 在注册表编辑器中,使用左侧边栏导航至以下键: HKEYLOCAL_MACHINE\SYSTEM\CurrentControlSet\Control\Power\PowerSettings\7516b95f-f776-4464-8c53-06167f40cc99\8EC4B3A5-6868-48c2-BE75-4F3044BE88A7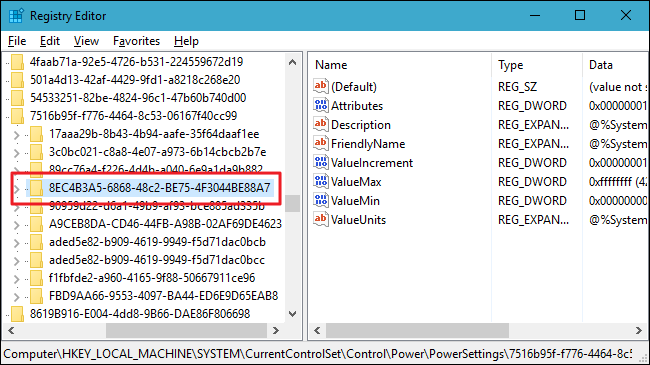
In the right-hand pane, double-click the Attributes value to open its properties window. 在右侧窗格中,双击“ Attributes值以打开其属性窗口。 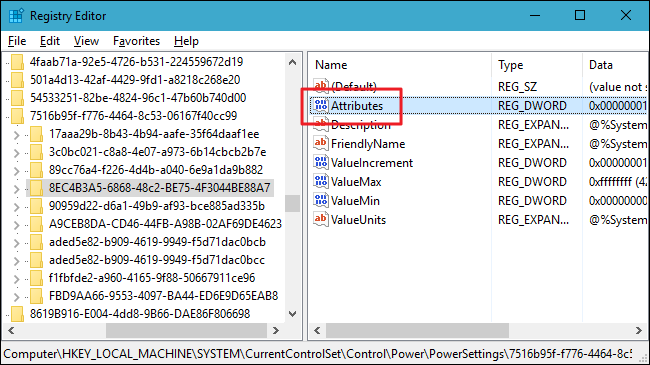
Change the value in the “Value data” box from 1 to 2, and then click OK. 将“数值数据”框中的值从1更改为2,然后单击“确定”。 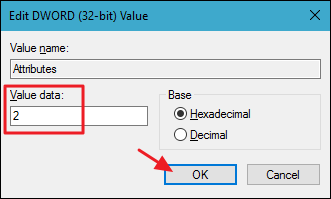
That’s all you have to do in the Registry. Your next step will be changing the timeout setting using Power Options. Should you ever want to remove that setting from Power Options, just go back and change the Attributes value from 2 back to 1. 这就是您在注册表中要做的所有事情。 下一步将使用“电源选项”更改超时设置。 如果您想从“电源选项”中删除该设置,只需返回并将“ Attributes值从2更改为1。 下载我们的一键式Hack (Download Our One-Click Hack)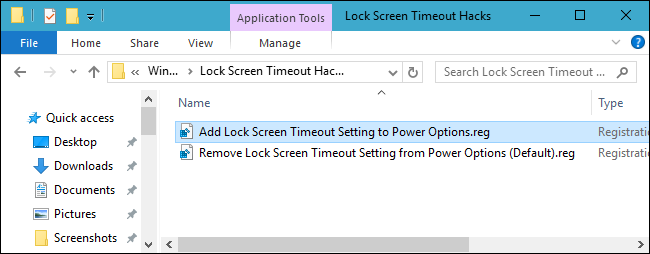
If you don’t feel like diving into the Registry yourself, we’ve created some a couple of registry hacks you can use. The “Add Lock Screen Timeout Setting to Power Options” hack creates the changes the Attributes value from 1 to 2. The “Remove Lock Screen Timeout Setting from Power Options (Default)” hack changes the Attributes value from 2 back to 1, restoring its default setting. Both hacks are included in the following ZIP file. Double-click the one you want to use and click through the prompts. When you’ve applied the hack you want, the changes will take place immediately. 如果您不想自己进入注册表,我们已经创建了一些可以使用的注册表黑客。 “将锁定屏幕超时设置添加到电源选项” hack将Attributes值从1更改为2。“将锁定屏幕超时设置从电源选项删除(默认)” hack将Attributes值从2更改为1,恢复其Attributes值。默认设置。 这两种黑客都包含在以下ZIP文件中。 双击您要使用的一个,然后单击提示。 应用所需的技巧后, 更改将立即进行。 Lock Screen Timeout Hacks 锁屏超时黑客 These hacks are really just the 8EC4B3A5-6868-48c2-BE75-4F3044BE88A7 key, stripped down to the Attributes value we talked about in the previous section and then exported to a .REG file. Running either of the enable sets that value to the appropriate number. And if you enjoy fiddling with the Registry, it’s worth taking the time to learn how to make your own Registry hacks. 这些技巧实际上只是8EC4B3A5-6868-48c2-BE75-4F3044BE88A7密钥,被精简为上一节中讨论的“属性”值,然后导出到.REG文件。 运行任何一个启用都会将该值设置为适当的数字。 而且,如果您喜欢使用注册表,则值得花时间学习如何制作自己的注册表黑客。 在电源选项中更改超时设置 (Change the Timeout Setting in Power Options)Now that you’ve enabled the timeout setting, it’s time to fire up Power Options and put it to work. Hit Start, type “Power Options,” and then hit Enter to open Power Options. 现在您已经启用了超时设置,是时候启动电源选项并将其投入使用了。 单击开始,键入“电源选项”,然后按Enter打开电源选项。 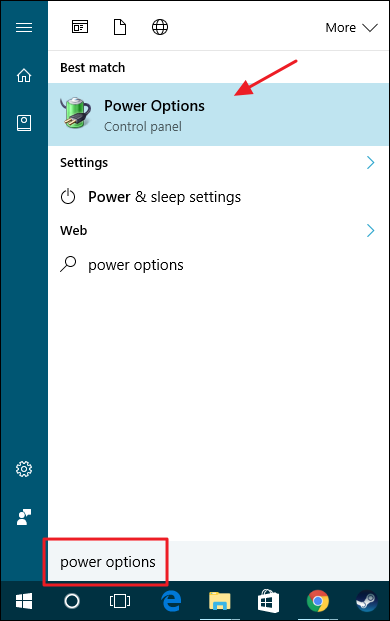
In the Power Options window, click the “Change plan settings” link next to whatever power plan you’re using. 在“电源选项”窗口中,单击所使用的任何电源计划旁边的“更改计划设置”链接。 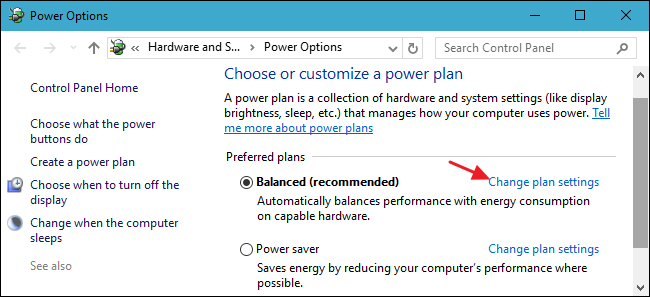
In the Edit Plan Settings window, click the “Change advanced power settings” link. 在“编辑计划设置”窗口中,单击“更改高级电源设置”链接。 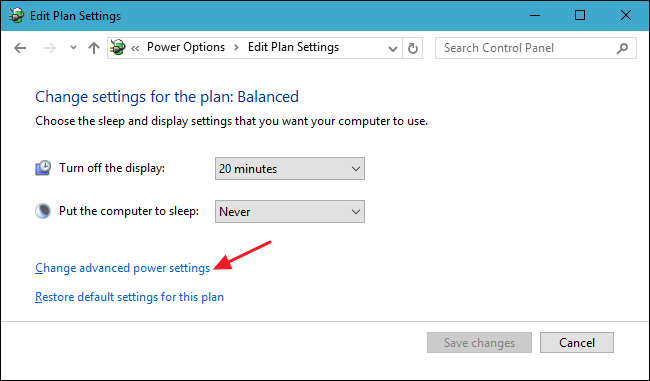
In the Power Options dialog, expand the “Display” item and you’ll see the new setting you added listed as “Console lock display off timeout.” Expand that and you can then set the timeout for however many minutes you want. 在“电源选项”对话框中,展开“显示”项,您将看到添加的新设置,列为“控制台锁定显示超时”。 展开它,然后可以将超时设置为所需的分钟数。 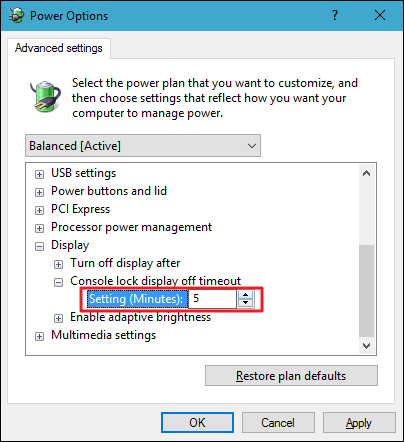
It’s a bit of a hassle having to deal with the Registry just to make this setting available, but at least it’s there. And if you have a desktop PC or a laptop plugged into a power source, it’s nice knowing you can leave that lock screen up for longer than a minute if you want to. 只是为了使此设置可用而不得不处理注册表有点麻烦,但是至少它存在。 而且,如果您将台式PC或笔记本电脑插入了电源,那么很高兴知道您可以将锁定屏幕停留一分钟以上。 翻译自: https://www.howtogeek.com/267893/how-to-change-the-windows-10-lock-screen-timeout/ |
【本文地址】
今日新闻 |
推荐新闻 |