使用Qt绘制艺术字(字体硬发光效果) |
您所在的位置:网站首页 › 如何添加艺术字样式 › 使用Qt绘制艺术字(字体硬发光效果) |
使用Qt绘制艺术字(字体硬发光效果)
|
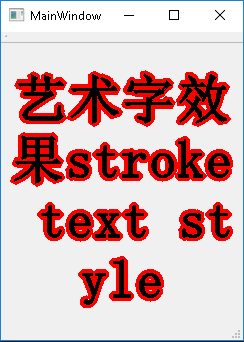
最近的项目中有用到艺术字,网上也找不到合适的用例(也有其他绘制艺术字的示例,但都不支持回车键和自适应对齐方式),在这样的情况下只能自己动手丰衣足食。 原理也很简单,使用QPainterPath先把文字添加进去,然后使用strokePath函数先生成文字对应的路径,然后再用画刷把这个路径给填充(fillPath),这样就做出了字的发光效果, 然后在使用drawPath把字原来的样子给画出来。发光效果+字原来的效果 = 硬发光艺术字。 这个艺术字长啥样?看图:
图1 使用了红色作为发光,字本身是黑色。绘制的文本内容为: QString text = QString(QStringLiteral("艺术字效果\nstroke \ntext\n style"));
当然,把效果做出来还不够,因为我的要求是能够自定义适应居中方式。让我们把上图中绘制的文字内容的'\n'去掉,然后我用居中方式显示看看: 尺寸1:
图2 尺寸2
图3 尺寸3
图4 可以看到我们的艺术字针对窗口的大小进行自适应居中了。 要做到自适应居中就需要在绘制文字之前把内容按照窗口的大小进行处理,根据宽度切割成N个片段一次使用QPainterPath来绘制艺术字。 下面就分享本例代码, 使用到的函数: /// /// \brief GetTextByWidth 根据宽度得到文字 /// \param fm /// \param text /// \param width /// \return /// QString GetTextByWidth(const QFontMetrics& fm, const QString& text, int width) { if(width pen(); QPen strokePen = QPen(strokeColor,strokeWidth); QStringList textList = GetTextLinesByRectSize(painter->fontMetrics(), text, rect.size()); int fontHeight = painter->fontMetrics().height(); int lineHeight = painter->fontMetrics().lineSpacing(); for(int i = 0; i < textList.count(); i++) { QString textLine = textList[i]; QRect textLineBoundingRect = painter->fontMetrics().boundingRect(rect,option.flags(),textLine); QSize textLineSize = textLineBoundingRect.size(); int offsetX = 0; int offsetY = i * lineHeight; //offset x if(option.alignment().testFlag(Qt::AlignLeft)) { offsetX = 0; } if(option.alignment().testFlag(Qt::AlignRight)) { offsetX = rect.width() - textLineBoundingRect.width(); } if(option.alignment().testFlag(Qt::AlignHCenter)) { offsetX = (rect.width() - textLineBoundingRect.width())/2; } //offset y if(option.alignment().testFlag(Qt::AlignTop)) { //offsetY = 0; } if(option.alignment().testFlag(Qt::AlignBottom)) { offsetY += rect.height() - textList.count() * lineHeight; } if(option.alignment().testFlag(Qt::AlignVCenter)) { offsetY += (rect.height() - textList.count() * lineHeight)/2; } textLineBoundingRect.setLeft(rect.left() + offsetX); textLineBoundingRect.setRight(textLineBoundingRect.left() + textLineSize.width()); textLineBoundingRect.setTop(rect.top() + offsetY); textLineBoundingRect.setBottom(textLineBoundingRect.top() + textLineSize.height()); QPainterPath strokePath; strokePath.addText(textLineBoundingRect.bottomLeft(), font, textLine); painter->strokePath(strokePath, strokePen); //painter->drawPath(strokePath);//debug painter->fillPath(strokePath, QBrush(oldPen.color())); } //for .debug //painter->drawText(rect, text, option); painter->restore(); }
看看如何使用: 新建一个Qt UI项目,重载mainwindow类的paintEvent回调函数: void MainWindow::paintEvent(QPaintEvent *e) { QPainter p(this); QString text = QString(QStringLiteral("艺术字效果stroke text style")); QFont font; font.setPointSize(40); font.setBold(true); return PaintStrokeText(&p, rect(), text, font, 8, Qt::red, QTextOption(Qt::AlignCenter)); }运行之后得到结果:
至此本例就结束了, 利用这个效果也可以做成软发光,渐变发光等等的效果,他们的区别只是在于fillPath的时候使用不同的画刷而已。
|


【本文地址】