【OpenCV教程】对图像的各种常用操作 |
您所在的位置:网站首页 › 好看的三维函数图像有哪些 › 【OpenCV教程】对图像的各种常用操作 |
【OpenCV教程】对图像的各种常用操作
|
文章目录
1.图片读取2.创建窗口3.图片显示4.图片保存5.视频输入输出5.1 filename5.2 index5.3 fourcc5.4 apiPreference(not important)5.5 演示
6.通道分离与合并6.1 分离API(一)API(二)
6.2 合并API(一)API(二)
7.图片色彩模式转换7.1 API7.2 转换类型和转换码
8.改变图片的对比度和亮度8.1 概述8.2 手动(使用saturate_cast函数确保输出值不溢出范围)8.3 API8.4 效果
9.图片混合10.图片尺寸调整10.1 插值算法(not important)10.2 注意事项
11.图像金字塔(常用于神经网络的池化层,对图像进行成倍的放大或缩小)12.二值化(对灰度图)12.1 阈值类型阈值二值化(Threshold Binary)阈值反二值化(Threshold Binary Inverted)截断(Truncate)阈值取零(Threshold To Zero)阈值反取零(Threshold To Zero Inverted)
13.图片裁剪13.1 方式一13.2 方式二13.3 Rect类构造
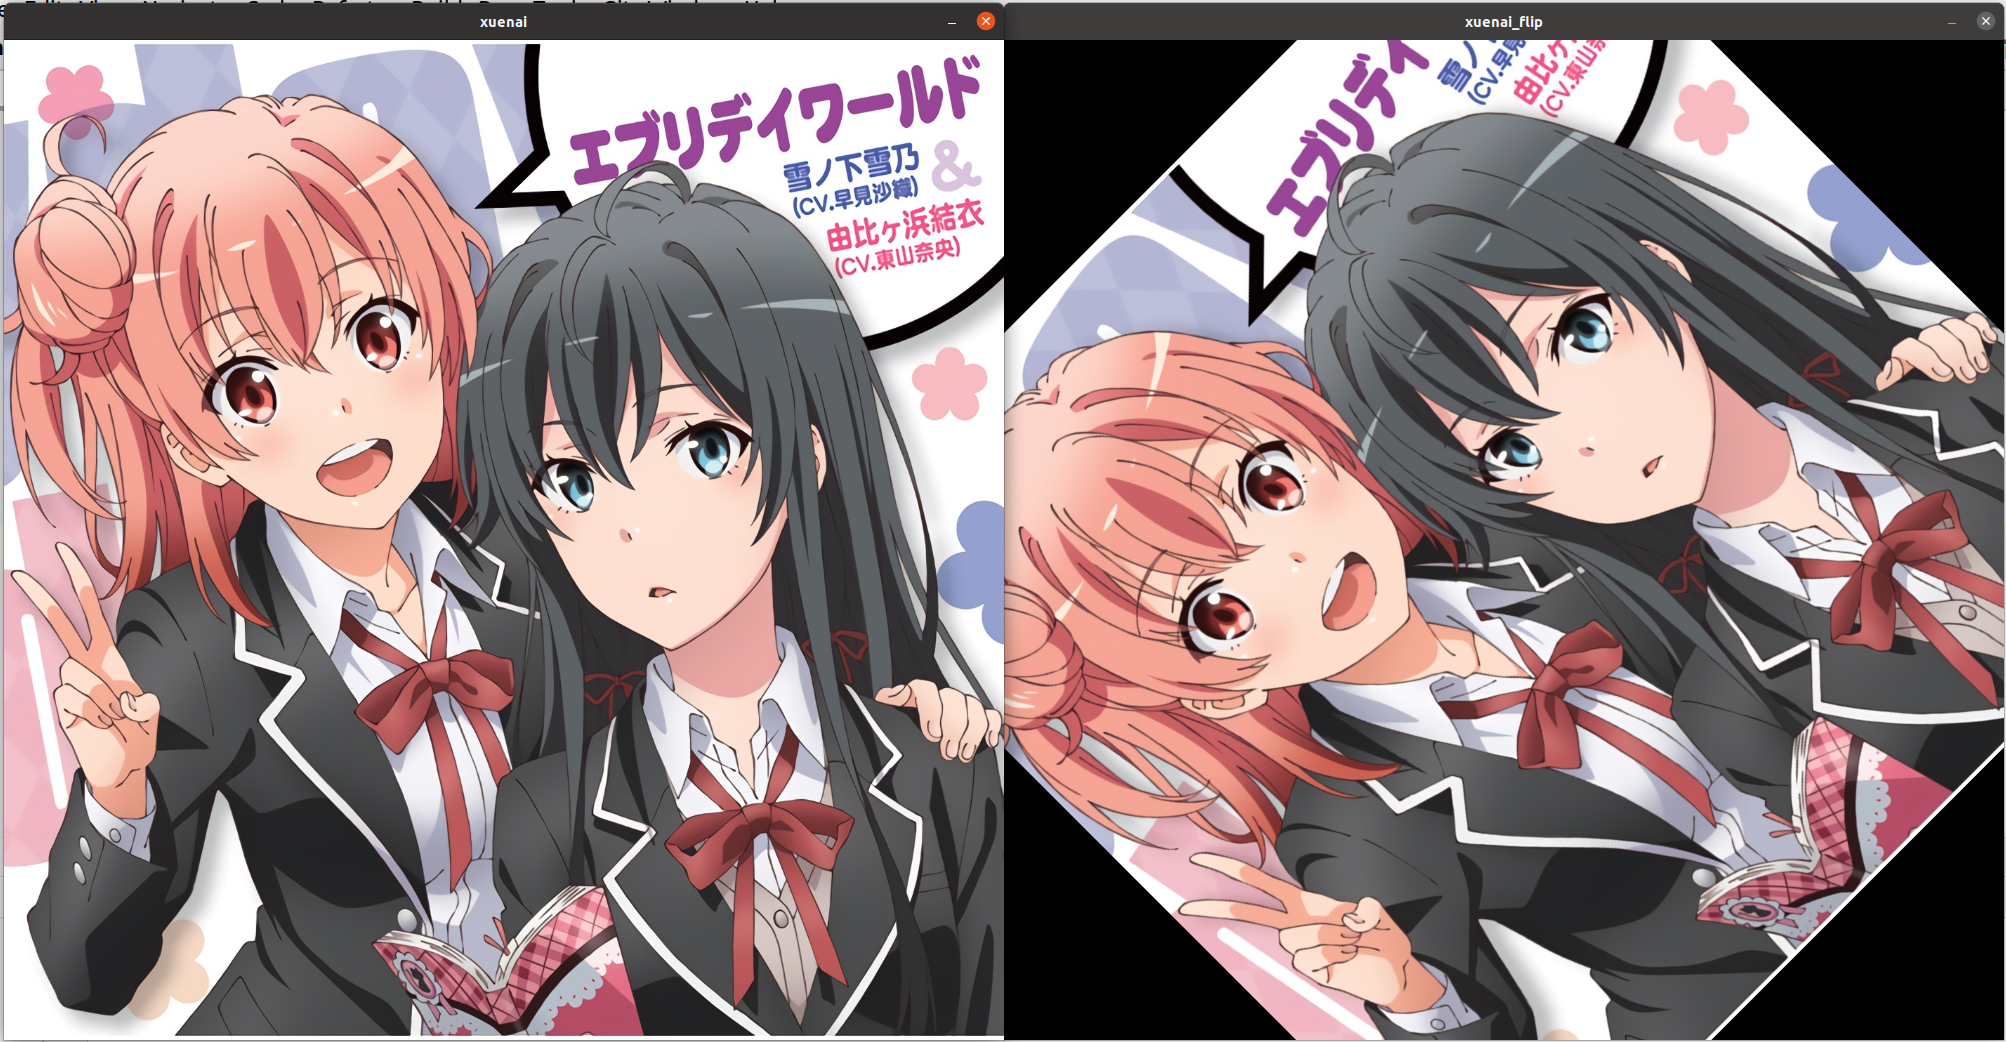
14.基本变换14.1 翻转效果
14.2 90°旋转效果
15.仿射变换15.1 API15.2 平移效果
15.3 任意角度旋转获得变换矩阵M效果
15.4 仿射(不破坏几何关系)获得变换矩阵M
16.透射变换(破坏几何关系)16.1 API进行变换已知变换后图片,逆推变换矩阵M获得变换矩阵M
16.2 效果
1.图片读取
CV_EXPORTS_W Mat imread( const String& filename, int flags = IMREAD_COLOR );
enum ImreadModes {
IMREAD_UNCHANGED = -1,
//!< If set, return the loaded image as is (with alpha channel, otherwise it gets cropped). Ignore EXIF orientation.
IMREAD_GRAYSCALE = 0,
//!< If set, always convert image to the single channel grayscale image (codec internal conversion).
IMREAD_COLOR = 1,
//!< If set, always convert image to the 3 channel BGR color image.
IMREAD_ANYDEPTH = 2,
//!< If set, return 16-bit/32-bit image when the input has the corresponding depth, otherwise convert it to 8-bit.
IMREAD_ANYCOLOR = 4,
//!< If set, the image is read in any possible color format.
IMREAD_LOAD_GDAL = 8,
//!< If set, use the gdal driver for loading the image.
IMREAD_REDUCED_GRAYSCALE_2 = 16,
//!< If set, always convert image to the single channel grayscale image and the image size reduced 1/2.
IMREAD_REDUCED_COLOR_2 = 17,
//!< If set, always convert image to the 3 channel BGR color image and the image size reduced 1/2.
IMREAD_REDUCED_GRAYSCALE_4 = 32,
//!< If set, always convert image to the single channel grayscale image and the image size reduced 1/4.
IMREAD_REDUCED_COLOR_4 = 33,
//!< If set, always convert image to the 3 channel BGR color image and the image size reduced 1/4.
IMREAD_REDUCED_GRAYSCALE_8 = 64,
//!< If set, always convert image to the single channel grayscale image and the image size reduced 1/8.
IMREAD_REDUCED_COLOR_8 = 65,
//!< If set, always convert image to the 3 channel BGR color image and the image size reduced 1/8.
IMREAD_IGNORE_ORIENTATION = 128
//!< If set, do not rotate the image according to EXIF's orientation flag.
};
2.创建窗口
CV_EXPORTS_W void namedWindow(const String& winname, int flags = WINDOW_AUTOSIZE);
参数如下
参数含义winname(window name)窗体名
3.图片显示
CV_EXPORTS_W void imshow(const String& winname, InputArray mat);
参数如下
参数含义winname(window name)窗体名mat输入的欲显示的图片
若窗体未创建,会自动进行创建
CV_EXPORTS_W int waitKey(int delay = 0);
控制图片的展示时间,如设置delay=0,则表示一直展示,按SPACE停止展示 如设置delay不为0,则表示停留delay毫秒 4.图片保存 CV_EXPORTS_W bool imwrite( const String& filename, InputArray img, const std::vector& params = std::vector()); 参数如下 参数含义filename保存的文件名img(image)要保存的图片 5.视频输入输出 CV_WRAP explicit VideoCapture::VideoCapture(const String& filename, int apiPreference = CAP_ANY); CV_WRAP explicit VideoCapture::VideoCapture(const String& filename, int apiPreference, const std::vector& params); CV_WRAP explicit VideoCapture::VideoCapture(int index, int apiPreference = CAP_ANY); CV_WRAP explicit VideoCapture::VideoCapture(int index, int apiPreference, const std::vector& params); CV_WRAP VideoWriter::VideoWriter(const String& filename, int fourcc, double fps,Size frameSize, bool isColor = true); CV_WRAP VideoWriter::VideoWriter(const String& filename, int fourcc, double fps, const Size& frameSize,const std::vector& params); CV_WRAP VideoWriter::VideoWriter(const String& filename, int apiPreference, int fourcc, double fps,const Size& frameSize, const std::vector& params); //fps:帧率 //frameSize:输出视频中每一帧的尺寸 5.1 filename 影片档案名称(例如video.avi)图片序列(例如img_%02d.jpg,将读取像这样的样本img_00.jpg, img_01.jpg, img_02.jpg, …)视频流的网址(例如protocol://host:port/script_name?script_params|auth)。请注意,每个视频流或IP摄像机源均具有其自己的URL方案。请参考源流的文档以了解正确的URL。 5.2 index 要打开的视频捕获设备的ID。要使用默认后端打开默认摄像头,只需传递0。当apiPreference为CAP_ANY时,使用camera_id + domain_offset(CAP_ *)向后兼容有效。 5.3 fourcc 用于编码视频文件的编码器,通过VideoWriter::fourcc函数获得 CV_WRAP static int fourcc(char c1, char c2, char c3, char c4); 参数如下 代码含义VideoWriter::fourcc(‘P’,‘I’,‘M’,‘1’)MPEG-1编码,输出文件拓展名aviVideoWriter::fourcc(‘X’,‘V’,‘I’,‘D’)MPEG-4编码,输出文件拓展名aviVideoWriter::fourcc(‘M’,‘P’,‘4’,‘V’)旧MPEG-4编码,输出文件拓展名aviVideoWriter::fourcc(‘I’,‘4’,‘2’,‘0’)YUV编码,输出文件拓展名aviVideoWriter::fourcc(‘X’,‘2’,‘6’,‘4’)MPEG-4编码,输出文件拓展名mp4VideoWriter::fourcc(‘T’,‘H’,‘E’,‘O’)ogg vorbis编码,输出文件拓展名ogvVideoWriter::fourcc(‘F’,L’,‘V’,‘1’)flash video编码,输出文件拓展名flv 5.4 apiPreference(not important)首选使用的Capture API后端。如果有多个可用的读取器实现,则可以用于实施特定的读取器实现。 设置读取的摄像头编号,默认CAP_ANY=0,自动检测摄像头。多个摄像头时,使用索引0,1,2,…进行编号调用摄像头。 apiPreference = -1时单独出现窗口,选取相应编号摄像头。 5.5 演示 VideoCapture video("demo.mp4"); Mat fps; video.read(fps); VideoWriter video_out("demo_out.avi",VideoWriter::fourcc('P','I','M','1'),30,fps.size()); while (1){ Mat fps; video>>fps; //video.read(fps); fps>>video_out; //video_out.write(fps); imshow("video",fps); waitKey(10);//控制帧率 } 6.通道分离与合并 6.1 分离 API(一) CV_EXPORTS void split(const Mat& src, Mat* mvbegin); 参数如下 参数含义src(source)输入图像mvbegin(mat vector begin)分离后的Mat数组的地址 API(二) CV_EXPORTS_W void split(InputArray m, OutputArrayOfArrays mv); 参数如下 参数含义m(mat)输入图像mv(mat vector)分离后的的Mat数组,可以使用STL容器vector。 6.2 合并 API(一) CV_EXPORTS void merge(const Mat* mv, size_t count, OutputArray dst); 参数如下 参数含义mv(mat vector)欲合并的图像数组的地址count欲合并的图像的个数dst(destination)输出图片 API(二) CV_EXPORTS_W void merge(InputArrayOfArrays mv, OutputArray dst); 参数如下 参数含义mv(mat vector)欲合并的图像数组,可以使用STL容器vector。dst(destination)输出图片 7.图片色彩模式转换 7.1 API CV_EXPORTS_W void cvtColor( InputArray src, OutputArray dst, int code, int dstCn = 0 ); 参数如下 参数含义src(source)源图像dst(destination)输出图片code转换码 7.2 转换类型和转换码 RGB和BGR(opencv默认的彩色图像的颜色空间是BGR)颜色空间的转换cv::COLOR_BGR2RGB cv::COLOR_RGB2BGR cv::COLOR_RGBA2BGRA cv::COLOR_BGRA2RGBA 向RGB和BGR图像中增添alpha通道cv::COLOR_RGB2RGBA cv::COLOR_BGR2BGRA 从RGB和BGR图像中去除alpha通道cv::COLOR_RGBA2RGB cv::COLOR_BGRA2BGR 从RBG和BGR颜色空间转换到灰度空间cv::COLOR_RGB2GRAY cv::COLOR_BGR2GRAY cv::COLOR_RGBA2GRAY cv::COLOR_BGRA2GRAY 从灰度空间转换到RGB和BGR颜色空间cv::COLOR_GRAY2RGB cv::COLOR_GRAY2BGR cv::COLOR_GRAY2RGBA cv::COLOR_GRAY2BGRA RGB和BGR颜色空间与BGR565颜色空间之间的转换cv::COLOR_RGB2BGR565 cv::COLOR_BGR2BGR565 cv::COLOR_BGR5652RGB cv::COLOR_BGR5652BGR cv::COLOR_RGBA2BGR565 cv::COLOR_BGRA2BGR565 cv::COLOR_BGR5652RGBA cv::COLOR_BGR5652BGRA 灰度空间与BGR565之间的转换cv::COLOR_GRAY2BGR555 cv::COLOR_BGR5552GRAY RGB和BGR颜色空间与CIE XYZ之间的转换cv::COLOR_RGB2XYZ cv::COLOR_BGR2XYZ cv::COLOR_XYZ2RGB cv::COLOR_XYZ2BGR RGB和BGR颜色空间与uma色度(YCrCb空间)之间的转换cv::COLOR_RGB2YCrCb cv::COLOR_BGR2YCrCb cv::COLOR_YCrCb2RGB cv::COLOR_YCrCb2BGR RGB和BGR颜色空间与HSV颜色空间之间的相互转换cv::COLOR_RGB2HSV cv::COLOR_BGR2HSV cv::COLOR_HSV2RGB cv::COLOR_HSV2BGR RGB和BGR颜色空间与HLS颜色空间之间的相互转换cv::COLOR_RGB2HLS cv::COLOR_BGR2HLS cv::COLOR_HLS2RGB cv::COLOR_HLS2BGR RGB和BGR颜色空间与CIE Lab颜色空间之间的相互转换cv::COLOR_RGB2Lab cv::COLOR_BGR2Lab cv::COLOR_Lab2RGB cv::COLOR_Lab2BGR RGB和BGR颜色空间与CIE Luv颜色空间之间的相互转换cv::COLOR_RGB2Luv cv::COLOR_BGR2Luv cv::COLOR_Luv2RGB cv::COLOR_Luv2BGR Bayer格式(raw data)向RGB或BGR颜色空间的转换cv::COLOR_BayerBG2RGB cv::COLOR_BayerGB2RGB cv::COLOR_BayerRG2RGB cv::COLOR_BayerGR2RGB cv::COLOR_BayerBG2BGR cv::COLOR_BayerGB2BGR cv::COLOR_BayerRG2BGR cv::COLOR_BayerGR2BGR 8.改变图片的对比度和亮度 8.1 概述 Mat.ptr(i,j)=Mat.ptr(i,j)*a+ba:控制对比度增益 b:控制亮度增益 8.2 手动(使用saturate_cast函数确保输出值不溢出范围) Mat xuenai = imread("xuenai.jpg"); imshow("xuenai", xuenai); for(int i=0;i for(int k=0;k /** nearest neighbor interpolation */ INTER_NEAREST = 0, /** bilinear interpolation */ INTER_LINEAR = 1, /** bicubic interpolation */ INTER_CUBIC = 2, /** resampling using pixel area relation. It may be a preferred method for image decimation, as it gives moire'-free results. But when the image is zoomed, it is similar to the INTER_NEAREST method. */ INTER_AREA = 3, /** Lanczos interpolation over 8x8 neighborhood */ INTER_LANCZOS4 = 4, /** Bit exact bilinear interpolation */ INTER_LINEAR_EXACT = 5, /** Bit exact nearest neighbor interpolation. This will produce same results as the nearest neighbor method in PIL, scikit-image or Matlab. */ INTER_NEAREST_EXACT = 6, /** mask for interpolation codes */ INTER_MAX = 7, /** flag, fills all of the destination image pixels. If some of them correspond to outliers in the source image, they are set to zero */ WARP_FILL_OUTLIERS = 8, /** flag, inverse transformation For example, #linearPolar or #logPolar transforms: - flag is __not__ set: \f$dst( \rho , \phi ) = src(x,y)\f$ - flag is set: \f$dst(x,y) = src( \rho , \phi )\f$ */ WARP_INVERSE_MAP = 16 }; 10.2 注意事项使用注意事项: dsize和fx/fy不能同时为0 指定dsize的值,让fx和fy空置直接使用默认值。让dsize为0,指定好fx和fy的值,比如fx=fy=0.5,那么就相当于把原图两个方向缩小一倍。 11.图像金字塔(常用于神经网络的池化层,对图像进行成倍的放大或缩小) //缩小一倍 CV_EXPORTS_W void pyrDown( InputArray src, OutputArray dst, const Size& dstsize = Size(), int borderType = BORDER_DEFAULT ); //放大一倍 CV_EXPORTS_W void pyrUp( InputArray src, OutputArray dst, const Size& dstsize = Size(), int borderType = BORDER_DEFAULT ); 参数如下 参数含义src(source)输入图片dst(destination)输出图片dstsize(destination size)输出图片的尺寸,默认自动调整borderType边界填充方式,默认为黑边。如果没有设置dstsize,则不会出现黑边,因为已经进行了自动调整 12.二值化(对灰度图) CV_EXPORTS_W double threshold( InputArray src, OutputArray dst, double thresh, double maxval, int type ); 参数如下 参数含义src(source)输入图片dst(destination)输出图片thresh(threshold)阈值maxval(max value)最大值type阈值类型 12.1 阈值类型 enum ThresholdTypes { THRESH_BINARY = 0, //!< \f[\texttt{dst} (x,y) = \fork{\texttt{maxval}}{if \(\texttt{src}(x,y) > \texttt{thresh}\)}{0}{otherwise}\f] THRESH_BINARY_INV = 1, //!< \f[\texttt{dst} (x,y) = \fork{0}{if \(\texttt{src}(x,y) > \texttt{thresh}\)}{\texttt{maxval}}{otherwise}\f] THRESH_TRUNC = 2, //!< \f[\texttt{dst} (x,y) = \fork{\texttt{threshold}}{if \(\texttt{src}(x,y) > \texttt{thresh}\)}{\texttt{src}(x,y)}{otherwise}\f] THRESH_TOZERO = 3, //!< \f[\texttt{dst} (x,y) = \fork{\texttt{src}(x,y)}{if \(\texttt{src}(x,y) > \texttt{thresh}\)}{0}{otherwise}\f] THRESH_TOZERO_INV = 4, //!< \f[\texttt{dst} (x,y) = \fork{0}{if \(\texttt{src}(x,y) > \texttt{thresh}\)}{\texttt{src}(x,y)}{otherwise}\f] THRESH_MASK = 7, THRESH_OTSU = 8, //!< flag, use Otsu algorithm to choose the optimal threshold value THRESH_TRIANGLE = 16 //!< flag, use Triangle algorithm to choose the optimal threshold value }; 阈值二值化(Threshold Binary)首先指定像素的灰度值的阈值,遍历图像中像素值,如果像素的灰度值大于这个阈值,则将这个像素设置为最大像素值(8位灰度值最大为255);若像素的灰度值小于阈值,则将该像素点像素值赋值为0。公式以及示意图如下:
首先也要指定一个阈值,不同的是在对图像进行阈值化操作时与阈值二值化相反,当像素的灰度值超过这个阈值的时候为该像素点赋值为0;当该像素的灰度值低于该阈值时赋值为最大值。公式及示意图如下:
给定像素值阈值,在图像中像素的灰度值大于该阈值的像素点被设置为该阈值,而小于该阈值的像素值保持不变。公式以及示意图如下:
与截断阈值化相反,像素点的灰度值如果大于该阈值则像素值不变,如果像素点的灰度值小于该阈值,则该像素值设置为0.公式以及示意图如下:
像素值大于阈值的像素赋值为0,而小于该阈值的像素值则保持不变,公式以及示意图如下:
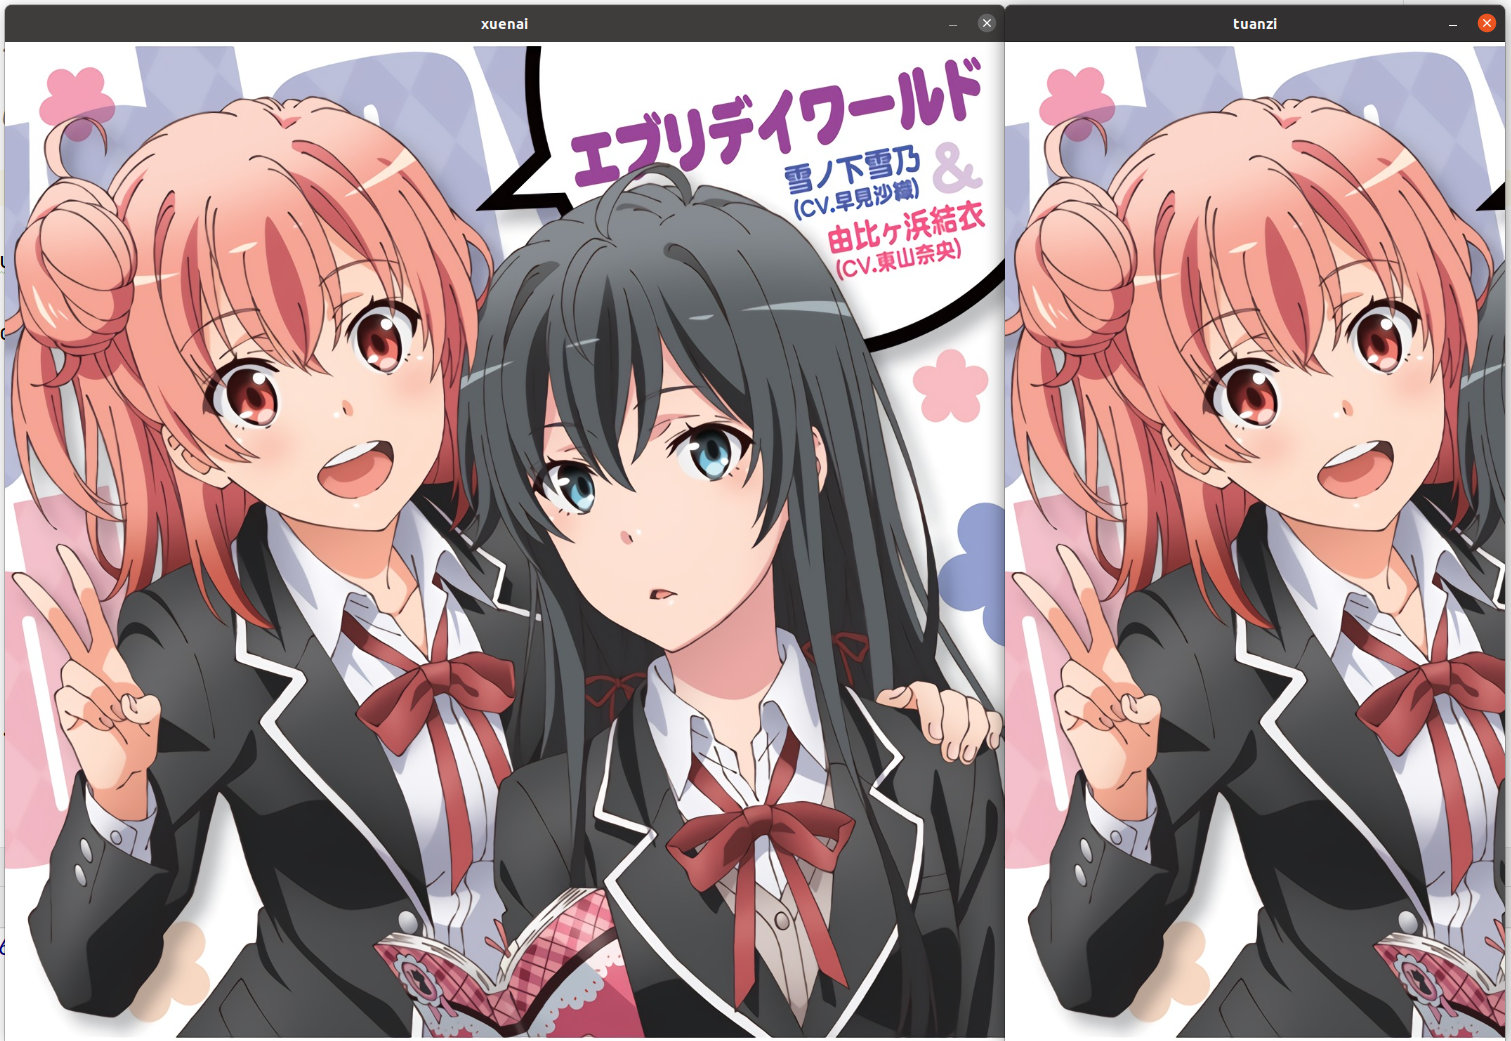
以下为实例 Mat xuenai = imread("xuenai.jpg"); resize(xuenai,xuenai,Size(1000,1000)); imshow("xuenai", xuenai); Mat tuanzi(xuenai,(Rect(0,0,500,1000))); imshow("tuanzi",tuanzi); waitKey(); 13.2 方式二 Mat::Mat(const Mat& m, const Rect& roi);以下为实例 Mat xuenai = imread("xuenai.jpg"); resize(xuenai,xuenai,Size(1000,1000)); imshow("xuenai", xuenai); Mat tuanzi(xuenai(Rect(0,0,500,1000))); imshow("tuanzi",tuanzi); waitKey();
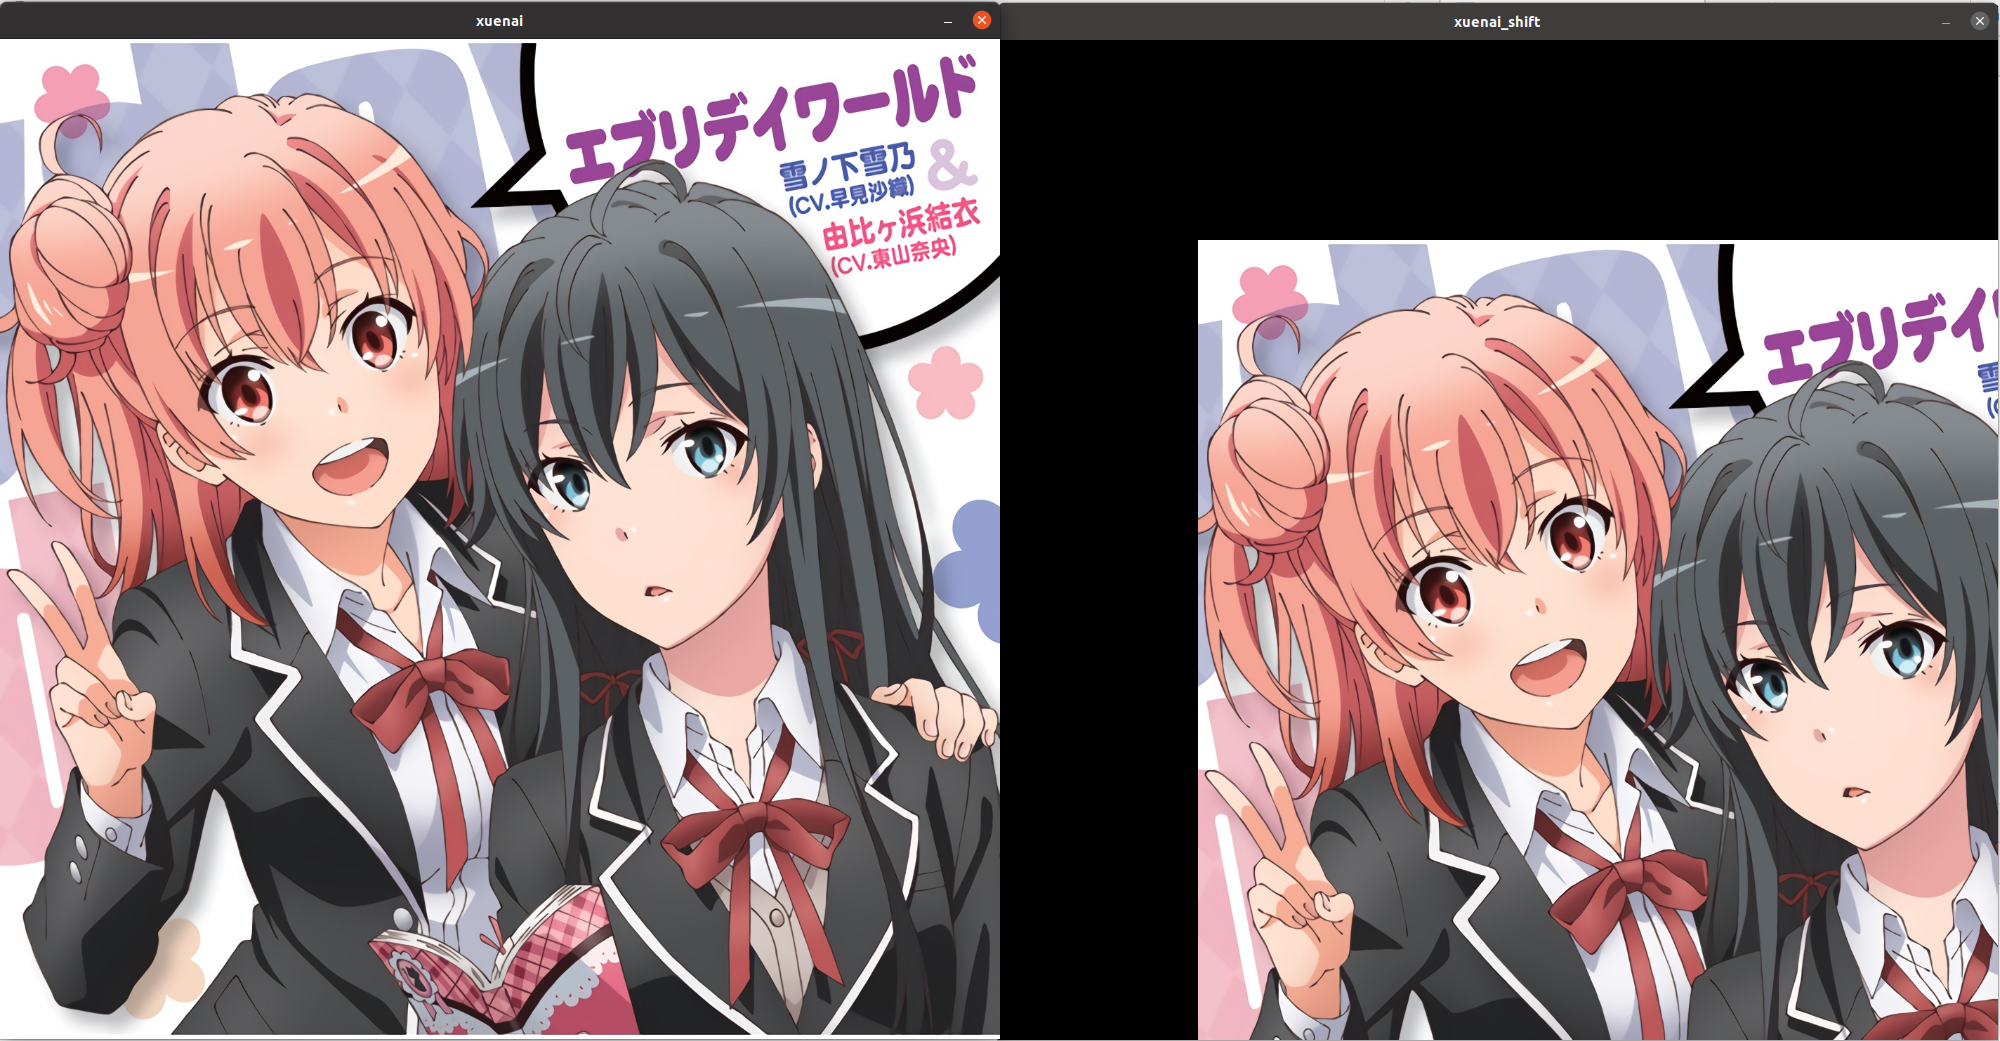
delta_x:x方向上的偏移量 delta_y:y方向上的偏移量 M_values:必须是浮点类型的数组对象 M:必须是CV_32F,不能用逗号式分隔创建 效果 Mat xuenai = imread("xuenai.jpg"); imshow("xuenai",xuenai); double M_values[]={1,0,200, 0,1,200}; Mat M(Size(3,2), CV_64F,M_values); Mat xuenai_shift(xuenai.size(),xuenai.type()); warpAffine(xuenai,xuenai_shift,M,xuenai.size()); imshow("xuenai_shift",xuenai_shift); waitKet();
|


【本文地址】