基于yolov5 |
您所在的位置:网站首页 › 口罩检验报告图片 › 基于yolov5 |
基于yolov5
|
项目ui如下:
本系统主要用到了anaconda3+python3.9.0+torch==1.13.0+cu116+torchvision==0.14.0+cu116 强烈推荐用anaconda3虚拟环境,因为本项目对plotting.py模块做了改动,如果不用独立的虚拟环境,以后有项目再用到plotting.py的地方会报错 anaconda安装包(附图文安装教程): http://链接:https://pan.baidu.com/s/1nM62y_F9fHxLL_CoUOATjA?pwd=1111 torch安装包: http://链接:https://pan.baidu.com/s/1eUQjUhe8We5UejfmfKOzWQ?pwd=1111 torchvision安装包: https://pan.baidu.com/s/1wd8Srv8hSE7Lsr-yD6baYg?pwd=1111 torch和torchvision安装教程: https://pan.baidu.com/s/1gPRB_UwREi2yM7-pydCdKw?pwd=1111 yolov5源码: https://github.com/ultralytics/yolov5
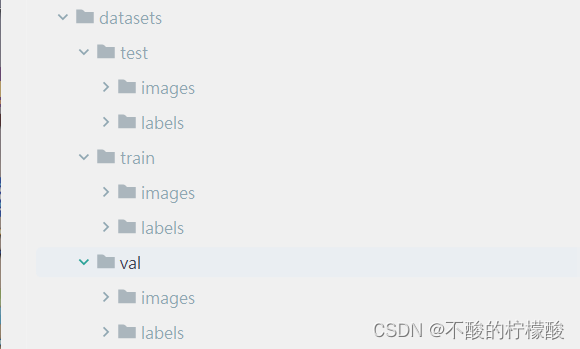
第一次用yolov5的话,需要先下载模型,有时候下载挺慢的,我把我下载好的模型文件放下下面: https://pan.baidu.com/s/1pTKzTDA5nQY-7IsjJkj1fw?pwd=1111 下载完把yolov5.pt放在源码文件夹里, 放在yolov5-master下一级就好 二 准备数据集:我的数据集是在kaggle上找到的,有需要自取: person and car mark 里边的yaml文件是要用的,也要下载哦 下载后我们要进行划分(因为我的数据集已经是经过数据增强的了) 数据增强: import math import os # -*- coding=utf-8 -*- # 包括: # 1. 改变亮度 # 2. 加噪声 # 3. 对比度 # 注意: # random.seed(),相同的seed,产生的随机数是一样的!! import random import shutil import cv2 as cv import numpy as np from skimage import exposure # 调整亮度 from tqdm import tqdm def changeLight(img, inputtxt, outputiamge, outputtxt): # random.seed(int(time.time())) flag = random.uniform(0.5, 1.5) # flag>1为调暗,小于1为调亮 label = round(flag, 2) (filepath, tempfilename) = os.path.split(inputtxt) (filename, extension) = os.path.splitext(tempfilename) outputiamge = os.path.join(outputiamge + "/" + filename + "_" + '1' + ".jpg") outputtxt = os.path.join(outputtxt + "/" + filename + "_" + '1' + extension) ima_gamma = exposure.adjust_gamma(img, 0.5) shutil.copyfile(inputtxt, outputtxt) cv.imwrite(outputiamge, ima_gamma) # 加噪声 def gasuss_noise(image, inputtxt, outputiamge, outputtxt, mean=0, var=0.01): """ 添加高斯噪声 mean : 均值 var : 方差 """ image = np.array(image / 255, dtype=float) noise = np.random.normal(mean, var ** 0.5, image.shape) out = image + noise if out.min() < 0: low_clip = -1. else: low_clip = 0. out = np.clip(out, low_clip, 1.0) out = np.uint8(out * 255) (filepath, tempfilename) = os.path.split(inputtxt) (filename, extension) = os.path.splitext(tempfilename) outputiamge = os.path.join(outputiamge + "/" + filename + "_2" + "_" + ".jpg") outputtxt = os.path.join(outputtxt + "/" + filename + "_2" + "_" + extension) shutil.copyfile(inputtxt, outputtxt) cv.imwrite(outputiamge, out) # 对比度调整算法 def ContrastAlgorithm(rgb_img, inputtxt, outputiamge, outputtxt): img_shape = rgb_img.shape temp_imag = np.zeros(img_shape, dtype=float) for num in range(0, 3): # 通过直方图正规化增强对比度 in_image = rgb_img[:, :, num] # 求输入图片像素最大值和最小值 Imax = np.max(in_image) Imin = np.min(in_image) # 要输出的最小灰度级和最大灰度级 Omin, Omax = 0, 255 # 计算a 和 b的值 a = float(Omax - Omin) / (Imax - Imin) b = Omin - a * Imin # 矩阵的线性变化 out_image = a * in_image + b # 数据类型的转化 out_image = out_image.astype(np.uint8) temp_imag[:, :, num] = out_image (filepath, tempfilename) = os.path.split(inputtxt) (filename, extension) = os.path.splitext(tempfilename) outputiamge = os.path.join(outputiamge + "/" + filename + "_3" + ".jpg") outputtxt = os.path.join(outputtxt + "/" + filename + "_3" + extension) shutil.copyfile(inputtxt, outputtxt) cv.imwrite(outputiamge, temp_imag) if __name__ == '__main__': inputiamge = "mydata/mark_image" inputtxt = "mydata/mark_label" outputiamge = "mydata/mark_image" outputtxt = "mydata/mark_label" angle = [30, 60, 90, 120, 150, 180] tempfilename = os.listdir(inputiamge) for file in tqdm(tempfilename, desc="Processing"): (filename, extension) = os.path.splitext(file) input_image = os.path.join(inputiamge + "/" + file) input_txt = os.path.join(inputtxt + "/" + filename + ".txt") img = cv.imread(input_image) # 图像亮度变化 changeLight(img, input_txt, outputiamge, outputtxt) # 加高斯噪声 gasuss_noise(img, input_txt, outputiamge, outputtxt, mean=0, var=0.001) # 改变图像对比度 ContrastAlgorithm(img, input_txt, outputiamge, outputtxt) print("###finished!!!")接下来是划分数据集: # 将图片和标注数据按比例切分为 训练集和测试集 import shutil import random import os # 原始路径 image_original_path = 'E:/mydata/classroom/dataset/images/' label_original_path = 'E:/mydata/classroom/dataset/labels/' # 训练集路径 train_image_path = 'datasets/train/images/' train_label_path = 'datasets/train/labels/' # 验证集路径 val_image_path = 'datasets/val/images/' val_label_path = 'datasets/val/labels/' # 测试集路径 test_image_path = 'datasets/test/images/' test_label_path = 'datasets/test/labels/' # 数据集划分比例,训练集75%,验证集15%,测试集15% train_percent = 0.7 val_percent = 0.15 test_percent = 0.15 # 检查文件夹是否存在 def mkdir(): if not os.path.exists(train_image_path): os.makedirs(train_image_path) if not os.path.exists(train_label_path): os.makedirs(train_label_path) if not os.path.exists(val_image_path): os.makedirs(val_image_path) if not os.path.exists(val_label_path): os.makedirs(val_label_path) if not os.path.exists(test_image_path): os.makedirs(test_image_path) if not os.path.exists(test_label_path): os.makedirs(test_label_path) def main(): mkdir() total_txt = os.listdir(label_original_path) num_txt = len(total_txt) list_all_txt = range(num_txt) # 范围 range(0, num) num_train = int(num_txt * train_percent) num_val = int(num_txt * val_percent) num_test = num_txt - num_train - num_val train = random.sample(list_all_txt, num_train) # train从list_all_txt取出num_train个元素 # 所以list_all_txt列表只剩下了这些元素:val_test val_test = [i for i in list_all_txt if not i in train] # 再从val_test取出num_val个元素,val_test剩下的元素就是test val = random.sample(val_test, num_val) # 检查两个列表元素是否有重合的元素 # set_c = set(val_test) & set(val) # list_c = list(set_c) # print(list_c) # print(len(list_c)) print("训练集数目:{}, 验证集数目:{},测试集数目:{}".format(len(train), len(val), len(val_test) - len(val))) for i in list_all_txt: name = total_txt[i][:-4] srcImage = image_original_path + name + '.jpg' srcLabel = label_original_path + name + '.txt' if i in train: dst_train_Image = train_image_path + name + '.jpg' dst_train_Label = train_label_path + name + '.txt' shutil.copyfile(srcImage, dst_train_Image) shutil.copyfile(srcLabel, dst_train_Label) elif i in val: dst_val_Image = val_image_path + name + '.jpg' dst_val_Label = val_label_path + name + '.txt' shutil.copyfile(srcImage, dst_val_Image) shutil.copyfile(srcLabel, dst_val_Label) else: dst_test_Image = test_image_path + name + '.jpg' dst_test_Label = test_label_path + name + '.txt' shutil.copyfile(srcImage, dst_test_Image) shutil.copyfile(srcLabel, dst_test_Label) if __name__ == '__main__': main()划分完应该是:
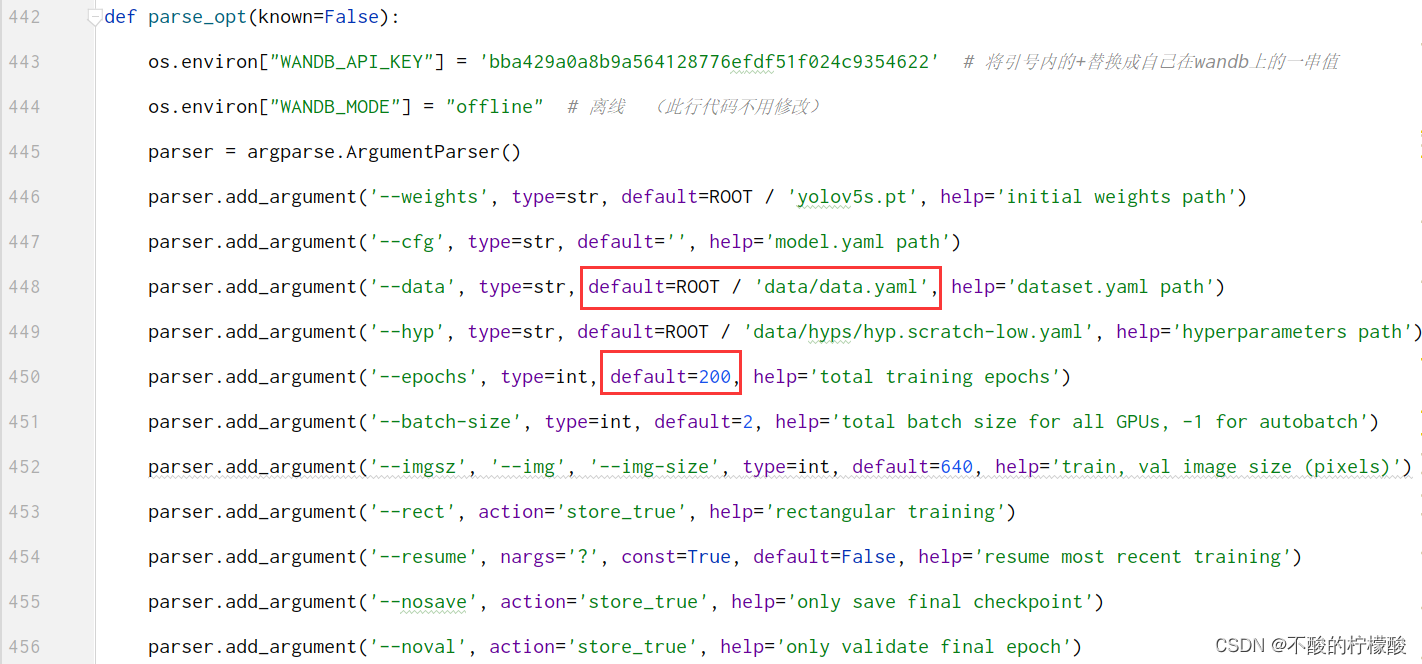
yaml文件放到data文件夹下,注意更改里边的目录,改为你的数据集的绝对路径(相对路径容易报错) 准备好了之后可以修改train.py里的参数了
改为你的yaml文件,200是我的训练轮数 好了可以开始训练了 训练结果是runs/exp/weight/best.pt 将它保存下来 三 着手项目:在文件夹里新建weight文件夹,用来存放模型
pyqt5搭建ui
UI设计:
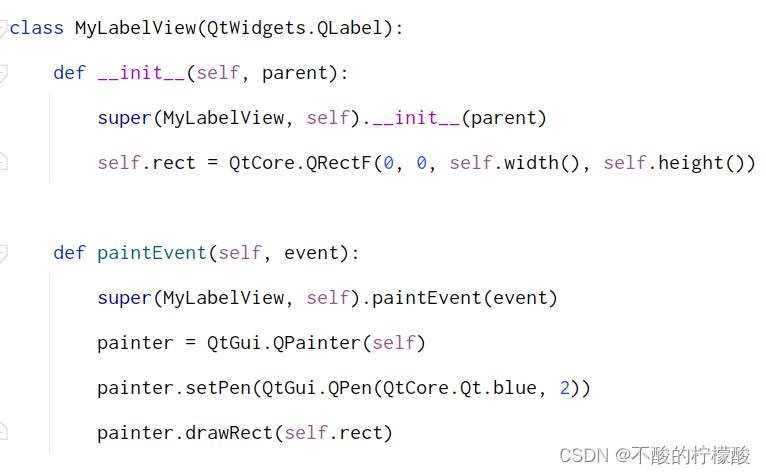
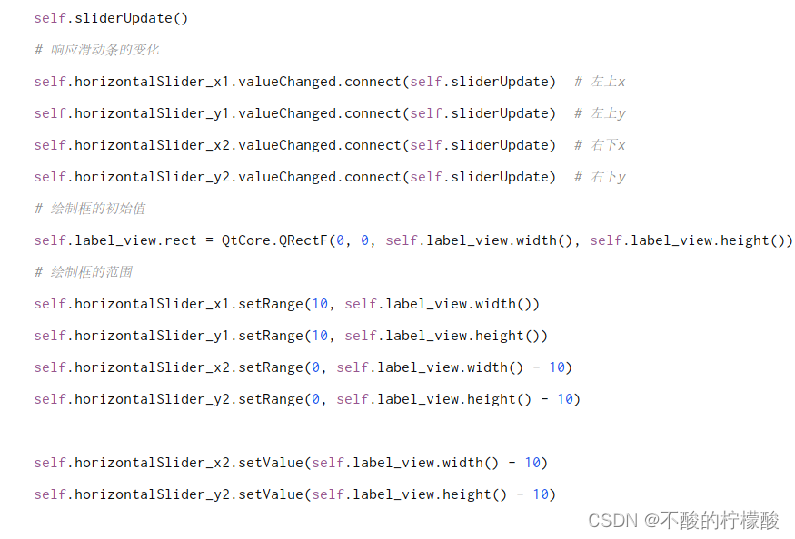
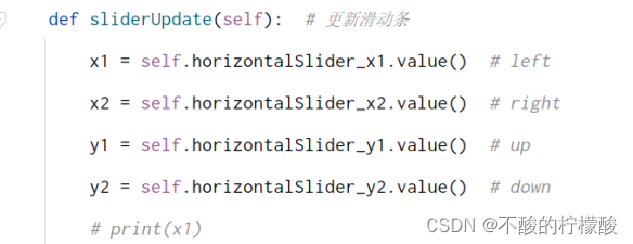
在pyuic生成的py文件里,通过paintEvent绘制一个蓝色方框,作为检测范围 设置模型:
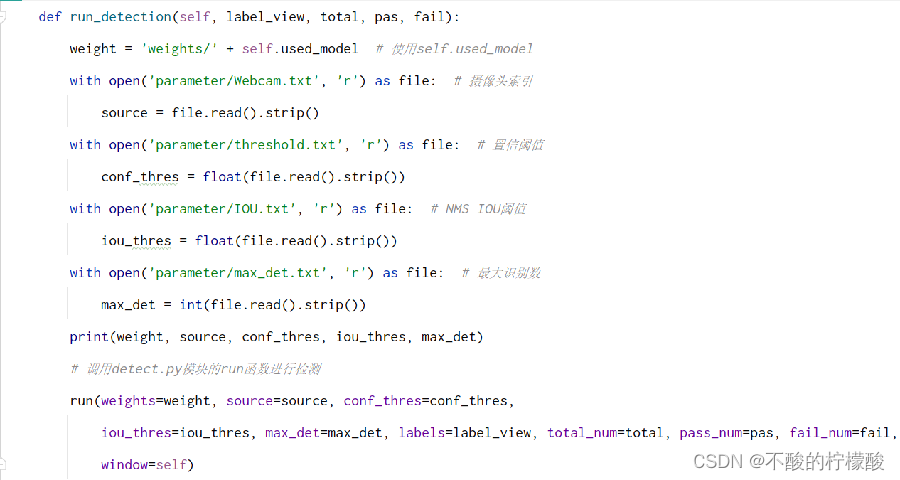
detect模块里:
main.py里调用
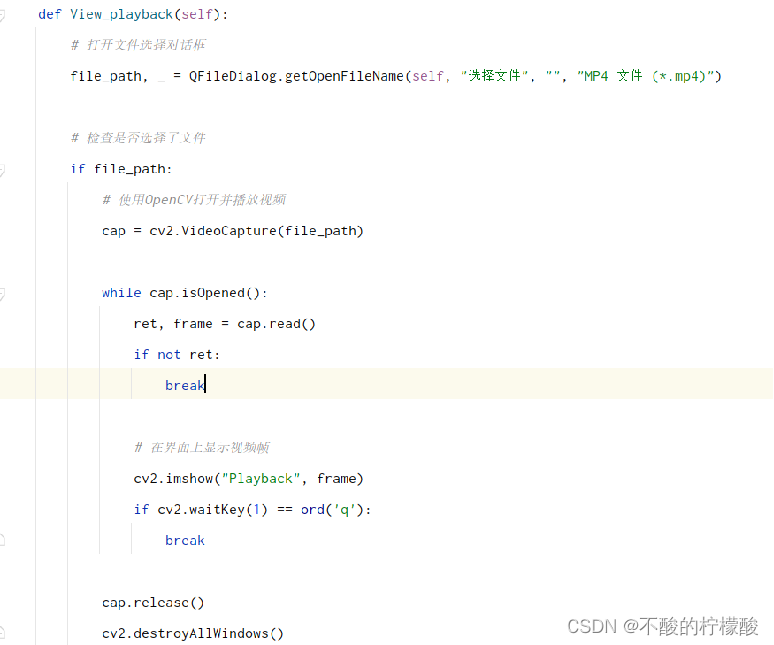
查看回放功能:
查看检测记录:
detect.py:
plotting.py:
|


【本文地址】
今日新闻 |
推荐新闻 |