「react进阶」一文吃透React高阶组件(HOC) (上) |
您所在的位置:网站首页 › 发现5的电瓶在什么位置充电 › 「react进阶」一文吃透React高阶组件(HOC) (上) |
「react进阶」一文吃透React高阶组件(HOC) (上)
|
一 前言
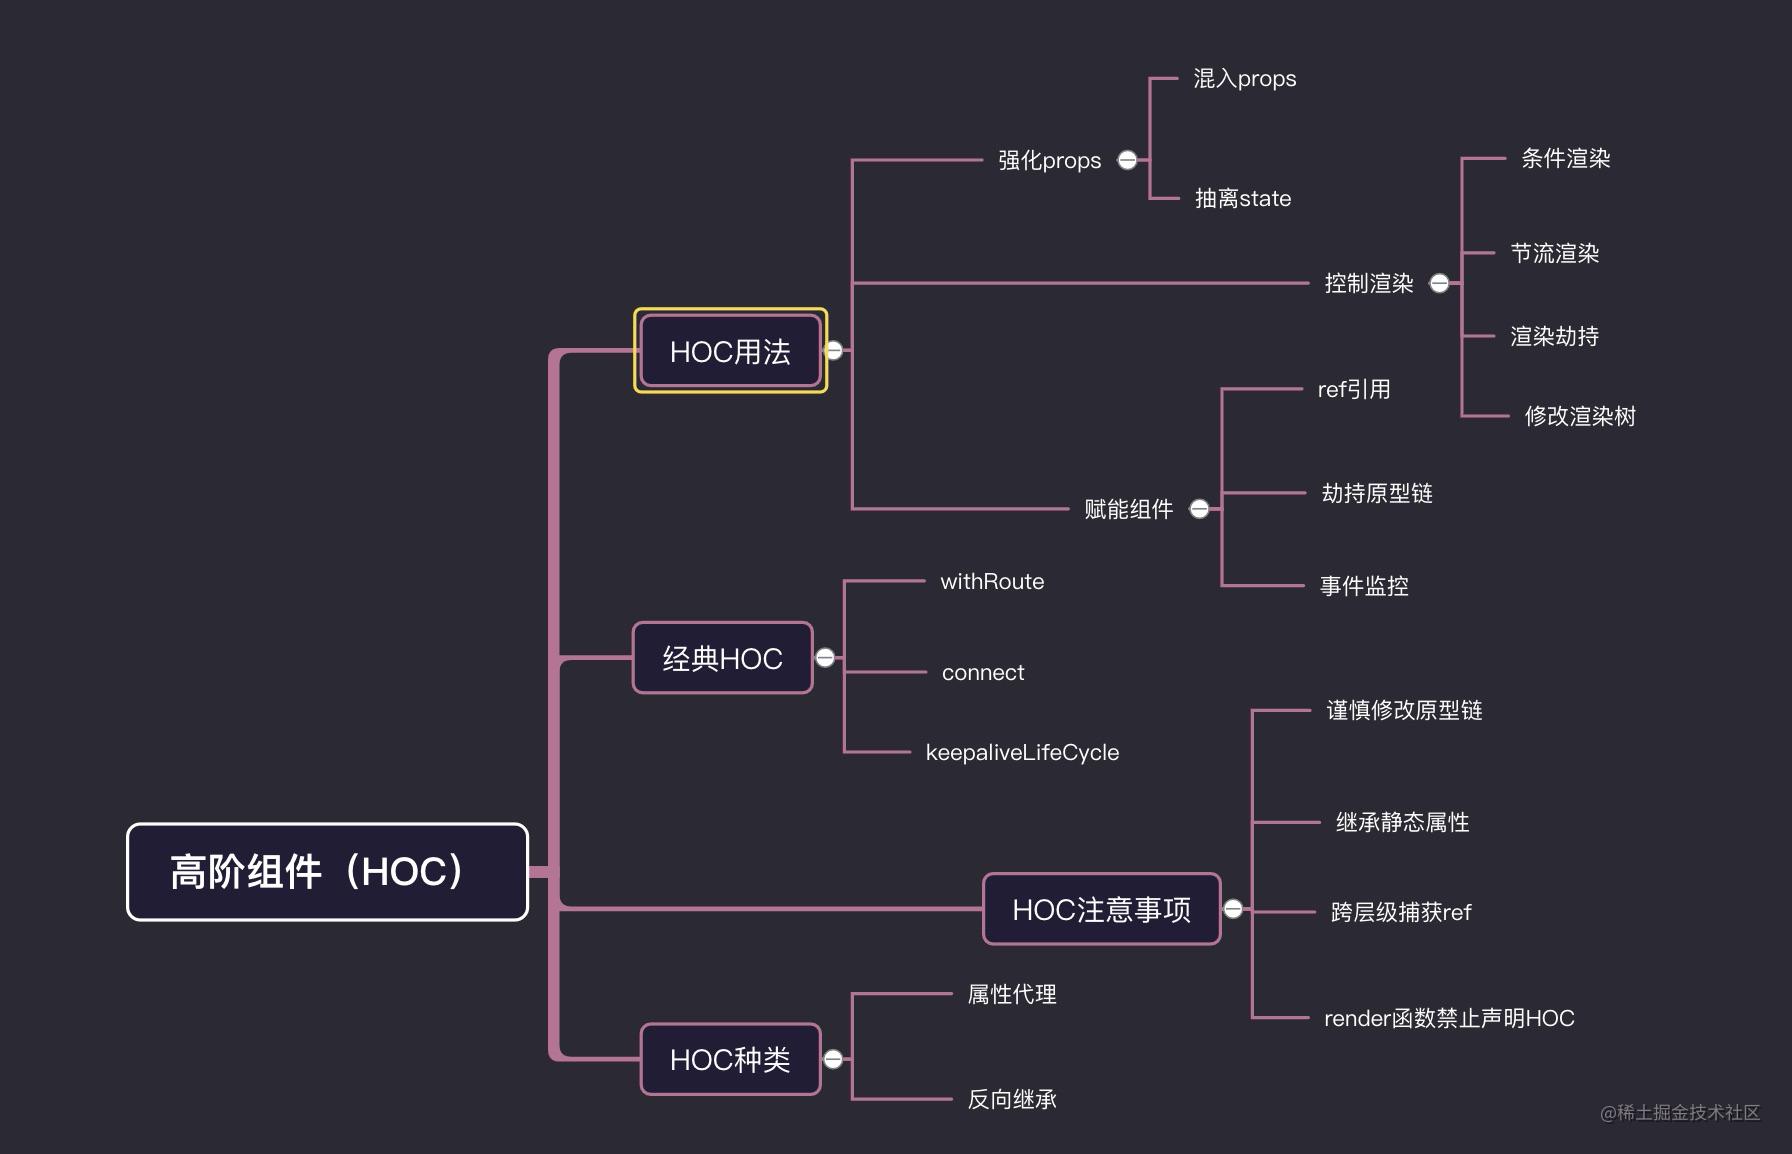
React高阶组件(HOC),对于很多react开发者来说并不陌生,它是灵活使用react组件的一种技巧,高阶组件本身不是组件,它是一个参数为组件,返回值也是一个组件的函数。高阶作用用于强化组件,复用逻辑,提升渲染性能等作用。高阶组件也并不是很难理解,其实接触过后还是蛮简单的,接下来我将按照,高阶组件理解?,高阶组件具体怎么使用?应用场景, 高阶组件实践(源码级别) 为突破口,带大家详细了解一下高阶组件。本文篇幅比较长,建议收藏观看 我们带着问题去开始今天的讨论: 1 什么是高阶组件,它解决了什么问题? 2 有几种高阶组件,它们优缺点是什么? 3 如何写一个优秀高阶组件? 4 hoc怎么处理静态属性,跨层级ref等问题? 5 高阶组件怎么控制渲染,隔离渲染? 6 高阶组件怎么监控原始组件的状态? ...高阶组件(HOC)是 React 中用于复用组件逻辑的一种高级技巧。HOC 自身不是 React API 的一部分,它是一种基于 React 的组合特性而形成的设计模式。
原型图
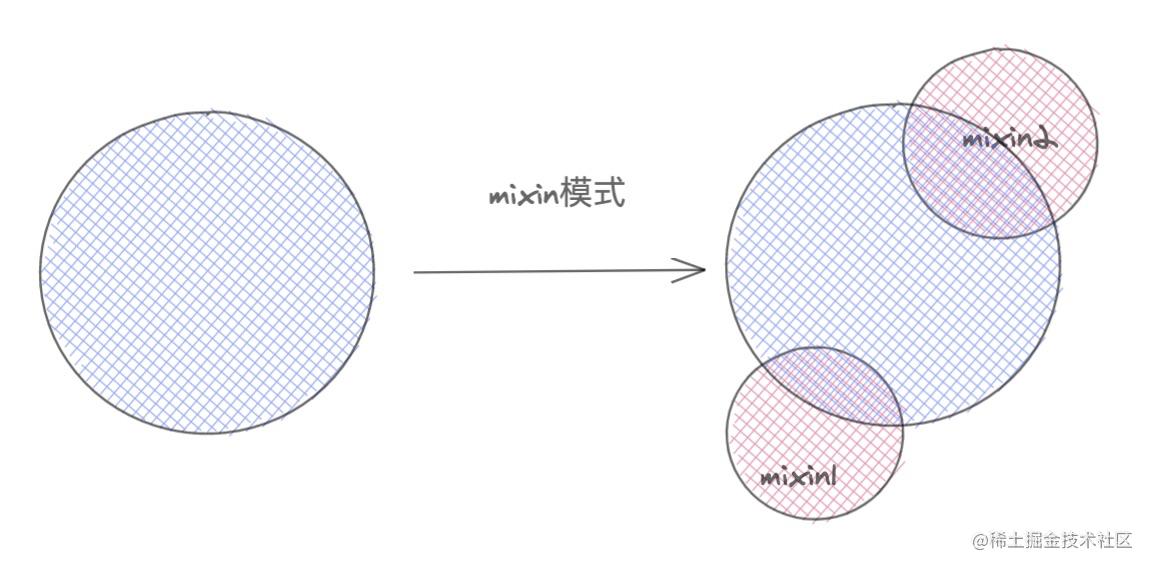
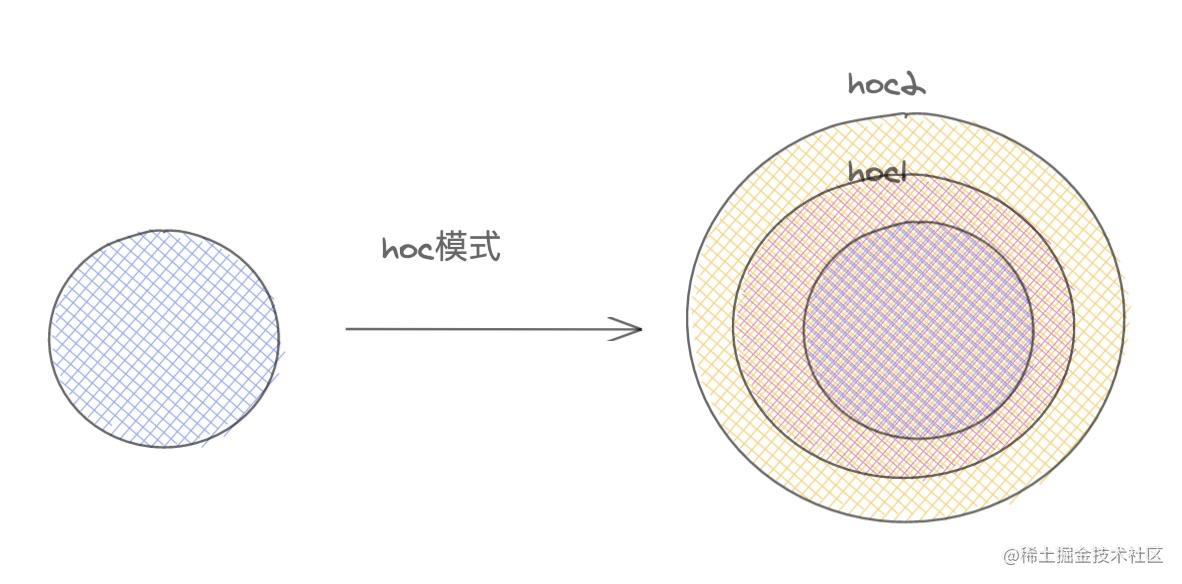
在react初期提供一种组合方法。通过React.createClass,加入mixins属性,具体用法和vue中mixins相似。具体实现如下。 const customMixin = { componentDidMount(){ console.log( '------componentDidMount------' ) }, say(){ console.log(this.state.name) } } const APP = React.createClass({ mixins: [ customMixin ], getInitialState(){ return { name:'alien' } }, render(){ const { name } = this.state return hello ,world , my name is { name } } })这种mixins只能存在createClass中,后来React.createClass连同mixins这种模式被废弃了。mixins会带来一些负面的影响。 1 mixin引入了隐式依赖关系。 2 不同mixins之间可能会有先后顺序甚至代码冲突覆盖的问题 3 mixin代码会导致滚雪球式的复杂性 衍生方式createClass的废弃,不代表mixin模式退出react舞台,在有状态组件class,我们可以通过原型链继承来实现mixins。 const customMixin = { /* 自定义 mixins */ componentDidMount(){ console.log( '------componentDidMount------' ) }, say(){ console.log(this.state.name) } } function componentClassMixins(Component,mixin){ /* 继承 */ for(let key in mixin){ Component.prototype[key] = mixin[key] } } class Index extends React.Component{ constructor(){ super() this.state={ name:'alien' } } render(){ return hello,world constructor(){ super() this.state={ name:'alien' } } say(){ console.log('base components') } render(){ return hello,world componentDidMount(){ console.log( this.state.name ) } say(){ /* 会覆盖基类中的 say */ console.log('extends components') } } export default Index ③HOC模式原型图
HOC是我们本章主要的讲的内容,具体用法,我们接下来会慢慢道来,我们先简单尝试一个HOC。 function HOC(Component) { return class wrapComponent extends React.Component{ constructor(){ super() this.state={ name:'alien' } } render=()=> ...this.state } /> } } @HOC class Index extends React.Component{ say(){ const { name } = this.props console.log(name) } render(){ return hello,world /* ... */ }我们要注意一下包装顺序,越靠近Index组件的,就是越内层的HOC,离组件Index也就越近。 对于无状态组件(函数声明)我们可以这么写: function Index(){ /* .... */ } export default withStyles(styles)(withRouter( keepaliveLifeCycle(Index) )) 模型:嵌套HOC对于不需要传递参数的HOC,我们编写模型我们只需要嵌套一层就可以,比如withRouter, function withRouter(){ return class wrapComponent extends React.Component{ /* 编写逻辑 */ } }对于需要参数的HOC,我们需要一层代理,如下: function connect (mapStateToProps){ /* 接受第一个参数 */ return function connectAdvance(wrapCompoent){ /* 接受组件 */ return class WrapComponent extends React.Component{ } } }我们看出两种hoc模型很简单,对于代理函数,可能有一层,可能有很多层,不过不要怕,无论多少层本质上都是一样的,我们只需要一层一层剥离开,分析结构,整个hoc结构和脉络就会清晰可见。吃透hoc也就易如反掌。 4 两种不同的高阶组件常用的高阶组件有两种方式正向的属性代理和反向的组件继承,两者之前有一些共性和区别。接下具体介绍两者区别,在第三部分会详细介绍具体实现。 正向属性代理所谓正向属性代理,就是用组件包裹一层代理组件,在代理组件上,我们可以做一些,对源组件的代理操作。在fiber tree 上,先mounted代理组件,然后才是我们的业务组件。我们可以理解为父子组件关系,父组件对子组件进行一系列强化操作。 function HOC(WrapComponent){ return class Advance extends React.Component{ state={ name:'alien' } render(){ return ...this.state } /> } } } 优点 ① 正常属性代理可以和业务组件低耦合,零耦合,对于条件渲染和props属性增强,只负责控制子组件渲染和传递额外的props就可以,所以无须知道,业务组件做了些什么。所以正向属性代理,更适合做一些开源项目的hoc,目前开源的HOC基本都是通过这个模式实现的。 ② 同样适用于class声明组件,和function声明的组件。 ③ 可以完全隔离业务组件的渲染,相比反向继承,属性代理这种模式。可以完全控制业务组件渲染与否,可以避免反向继承带来一些副作用,比如生命周期的执行。 ④ 可以嵌套使用,多个hoc是可以嵌套使用的,而且一般不会限制包装HOC的先后顺序。 缺点① 一般无法直接获取业务组件的状态,如果想要获取,需要ref获取组件实例。 ② 无法直接继承静态属性。如果需要继承需要手动处理,或者引入第三方库。 例子: class Index extends React.Component{ render(){ return hello,world } } Index.say = function(){ console.log('my name is alien') } function HOC(Component) { return class wrapComponent extends React.Component{ render(){ return ...this.state } /> } } } const newIndex = HOC(Index) console.log(newIndex.say)打印结果
反向继承和属性代理有一定的区别,在于包装后的组件继承了业务组件本身,所以我们我无须在去实例化我们的业务组件。当前高阶组件就是继承后,加强型的业务组件。这种方式类似于组件的强化,所以你必要要知道当前 class Index extends React.Component{ render(){ return hello,world } } function HOC(Component){ return class wrapComponent extends Component{ /* 直接继承需要包装的组件 */ } } export default HOC(Index) 优点 ① 方便获取组件内部状态,比如state,props ,生命周期,绑定的事件函数等 ② es6继承可以良好继承静态属性。我们无须对静态属性和方法进行额外的处理。 class Index extends React.Component{ render(){ return hello,world } } Index.say = function(){ console.log('my name is alien') } function HOC(Component) { return class wrapComponent extends Component{ } } const newIndex = HOC(Index) console.log(newIndex.say)打印结果
接下来我们来看看,如何编写一个高阶组件,你可以参考如下的情景,去编写属于自己的HOC。 1 强化props ① 混入props这个是高阶组件最常用的功能,承接上层的props,在混入自己的props,来强化组件。 有状态组件(属性代理) function classHOC(WrapComponent){ return class Idex extends React.Component{ state={ name:'alien' } componentDidMount(){ console.log('HOC') } render(){ return ...this.state } /> } } } function Index(props){ const { name } = props useEffect(()=>{ console.log( 'index' ) },[]) return hello,world , my name is { name } } export default classHOC(Index)有状态组件(属性代理) 同样也适用与无状态组件。 function functionHoc(WrapComponent){ return function Index(props){ const [ state , setState ] = useState({ name :'alien' }) return ...state } /> } }效果
高阶组件可以将HOC的state的配合起来,控制业务组件的更新。这种用法在react-redux中connect高阶组件中用到过,用于处理来自redux中state更改,带来的订阅更新作用。 我们将上述代码进行改造。 function classHOC(WrapComponent){ return class Idex extends React.Component{ constructor(){ super() this.state={ name:'alien' } } changeName(name){ this.setState({ name }) } render(){ return ...this.state } changeName={ this.changeName.bind(this) } /> } } } function Index(props){ const [ value ,setValue ] = useState(null) const { name ,changeName } = props return hello,world , my name is { name } 改变name ()=> changeName(value) } >确定 } export default classHOC(Index)效果
控制渲染是高阶组件的一个很重要的特性,上边说到的两种高阶组件,都能完成对组件渲染的控制。具体实现还是有区别的,我们一起来探索一下。 2.1 条件渲染 ① 基础 :动态渲染对于属性代理的高阶组件,虽然不能在内部操控渲染状态,但是可以在外层控制当前组件是否渲染,这种情况应用于,权限隔离,懒加载 ,延时加载等场景。 实现一个动态挂载组件的HOC function renderHOC(WrapComponent){ return class Index extends React.Component{ constructor(props){ super(props) this.state={ visible:true } } setVisible(){ this.setState({ visible:!this.state.visible }) } render(){ const { visible } = this.state return visible ? this.setVisible.bind(this) } /> : } } } } class Index extends React.Component{ render(){ const { setVisible } = this.props return hello,my name is alien const render = renderQueue.shift() if(!render) return setTimeout(()=>{ render() /* 执行下一段渲染 */ },300) } /* HOC */ function renderHOC(WrapComponent){ return function Index(props){ const [ isRender , setRender ] = useState(false) useEffect(()=>{ renderQueue.push(()=>{ /* 放入待渲染队列中 */ setRender(true) }) if(!isFirstrender) { tryRender() /**/ isFirstrender = true } },[]) return isRender ? ...props } /> : } } /* 业务组件 */ class Index extends React.Component{ componentDidMount(){ const { name , tryRender} = this.props /* 上一部分渲染完毕,进行下一部分渲染 */ tryRender() console.log( name+'渲染') } render(){ return } } /* 高阶组件包裹 */ const Item = renderHOC(Index) export default () => { return }效果
大致流程,初始化的时候,HOC中将渲染真正组件的渲染函数,放入renderQueue队列中,然后初始化渲染一次,接下来,每一个项目组件,完成 didMounted 状态后,会从队列中取出下一个渲染函数,渲染下一个组件, 一直到所有的渲染任务全部执行完毕,渲染队列清空,有效的进行分片的渲染,这种方式对海量数据展示,很奏效。 用HOC实现了条件渲染-分片渲染的功能,实际条件渲染理解起来很容易,就是通过变量,控制是否挂载组件,从而满足项目本身需求,条件渲染可以演变成很多模式,我这里介绍了条件渲染的二种方式,希望大家能够理解精髓所在。 ③ 进阶:异步组件(懒加载)不知道大家有没有用过dva,里面的dynamic就是应用HOC模式实现的组件异步加载,我这里简化了一下,提炼核心代码,如下: /* 路由懒加载HOC */ export default function AsyncRouter(loadRouter) { return class Content extends React.Component { state = { Component: null} componentDidMount() { if (this.state.Component) return loadRouter() .then(module => module.default) .then(Component => this.setState({ Component}, )) } render() { const { Component} = this.state return Component ? render() { if (this.props.visible) { return super.render() } else { return 暂无数据 } } } ⑤ 反向继承:修改渲染树修改渲染状态(劫持render替换子节点) class Index extends React.Component{ render(){ return react vue Angular } } function HOC (Component){ return class Advance extends Component { render() { const element = super.render() const otherProps = { name:'alien' } /* 替换 Angular 元素节点 */ const appendElement = React.createElement('li' ,{ } , `hello ,world , my name is ${ otherProps.name }` ) const newchild = React.Children.map(element.props.children.props.children,(child,index)=>{ if(index === 2) return appendElement return child }) return React.cloneElement(element, element.props, newchild) } } } export default HOC(Index)效果
我们用劫持渲染的方式,来操纵super.render()后的React.element元素,然后配合 createElement , cloneElement , React.Children 等 api,可以灵活操纵,真正的渲染react.element,可以说是偷天换日,不亦乐乎。 2.2节流渲染hoc除了可以进行条件渲染,渲染劫持功能外,还可以进行节流渲染,也就是可以优化性能,具体怎么做,请跟上我的节奏往下看。 ① 基础: 节流原理hoc可以配合hooks的useMemo等API配合使用,可以实现对业务组件的渲染控制,减少渲染次数,从而达到优化性能的效果。如下案例,我们期望当且仅当num改变的时候,渲染组件,但是不影响接收的props。我们应该这样写我们的HOC。 function HOC (Component){ return function renderWrapComponent(props){ const { num } = props const RenderElement = useMemo(() => render(){ console.log(`当前组件是否渲染`,this.props) return hello,world, my name is alien } } const IndexHoc = HOC(Index) export default ()=> { const [ num ,setNumber ] = useState(0) const [ num1 ,setNumber1 ] = useState(0) const [ num2 ,setNumber2 ] = useState(0) return num1} num2={ num2 } /> () => setNumber1(num1 + 1) } >num1++ return function (Component){ return function renderWrapComponent(props){ const dep = rule(props) const RenderElement = useMemo(() => render(){ console.log(`组件一渲染`,this.props) return 组件一 : hello,world } } /* 只有 props 中 num1 变化 ,渲染组件 */ @HOC((props)=> props['num1']) class IndexHoc1 extends React.Component{ render(){ console.log(`组件二渲染`,this.props) return 组件二 : my name is alien } } export default ()=> { const [ num ,setNumber ] = useState(0) const [ num1 ,setNumber1 ] = useState(0) const [ num2 ,setNumber2 ] = useState(0) return num1} num2={ num2 } /> num1} num2={ num2 } /> () => setNumber1(num1 + 1) } >num1++ const proDidMount = Component.prototype.componentDidMount Component.prototype.componentDidMount = function(){ console.log('劫持生命周期:componentDidMount') proDidMount.call(this) } return class wrapComponent extends React.Component{ render(){ return componentDidMount(){ console.log('———didMounted———') } render(){ return hello,world } }效果
反向继承,因为在继承原有组件的基础上,可以对原有组件的生命周期或事件进行劫持,甚至是替换。 function HOC (Component){ const didMount = Component.prototype.componentDidMount return class wrapComponent extends Component{ componentDidMount(){ console.log('------劫持生命周期------') if (didMount) { didMount.apply(this) /* 注意 `this` 指向问题。 */ } } render(){ return super.render() } } } @HOC class Index extends React.Component{ componentDidMount(){ console.log('———didMounted———') } render(){ return hello,world } } 3.2 事件监控HOC还可以对原有组件进行监控。比如对一些事件监控,错误监控,事件监听等一系列操作。 ① 组件内的事件监听接下来,我们做一个HOC,只对组件内的点击事件做一个监听效果。 function ClickHoc (Component){ return function Wrap(props){ const dom = useRef(null) useEffect(()=>{ const handerClick = () => console.log('发生点击事件') dom.current.addEventListener('click',handerClick) return () => dom.current.removeEventListener('click',handerClick) },[]) return ...props} /> } } @ClickHoc class Index extends React.Component{ render(){ return hello,world 组件内部点击 } } export default ()=>{ return 组件外部点击 }效果
对于属性代理我们虽然不能直接获取组件内的状态,但是我们可以通过ref获取组件实例,获取到组件实例,就可以获取组件的一些状态,或是手动触发一些事件,进一步强化组件,但是注意的是:class声明的有状态组件才有实例,function声明的无状态组件不存在实例。 ① 属性代理-添加额外生命周期我们可以针对某一种情况, 给组件增加额外的生命周期,我做了一个简单的demo,监听number改变,如果number改变,就自动触发组件的监听函数handerNumberChange。具体写法如下 function Hoc(Component){ return class WrapComponent extends React.Component{ constructor(){ super() this.node = null } UNSAFE_componentWillReceiveProps(nextprops){ if(nextprops.number !== this.props.number ){ this.node.handerNumberChange && this.node.handerNumberChange.call(this.node) } } render(){ return (node) => this.node = node } /> } } } @Hoc class Index extends React.Component{ handerNumberChange(){ /* 监听 number 改变 */ } render(){ return hello,world } }这种写法有点不尽人意,大家不要着急,在第四部分,源码实战中,我会介绍一种更好的场景。方便大家理解Hoc对原有组件的赋能。 4 总结上面我分别按照hoc主要功能,强化props , 控制渲染 ,赋能组件 三个方向对HOC编写做了一个详细介绍,和应用场景的介绍,目的让大家在理解高阶组件的时候,更明白什么时候会用到?,怎么样去写?`里面涵盖的知识点我总一个总结。 对于属性代理HOC,我们可以: 强化props & 抽离state。 条件渲染,控制渲染,分片渲染,懒加载。 劫持事件和生命周期 ref控制组件实例 添加事件监听器,日志对于反向代理的HOC,我们可以: 劫持渲染,操纵渲染树 控制/替换生命周期,直接获取组件状态,绑定事件。每个应用场景,我都举了例子🌰🌰,大家可以结合例子深入了解一下其原理和用途。 |


【本文地址】
今日新闻 |
推荐新闻 |