Java实现人脸识别(各项目结构都有案例说明) |
您所在的位置:网站首页 › 假脸怎么做 › Java实现人脸识别(各项目结构都有案例说明) |
Java实现人脸识别(各项目结构都有案例说明)
|
功能简述
感觉人脸识别功能有点意思,就尝试写了一个小demo,然后将其整合到自己的项目中;下面是基于Java实现的人脸识别demo。 功能流程 调用摄像头获取图像 判断是否为新用户 判断是否为新用户
然后就会跳转:
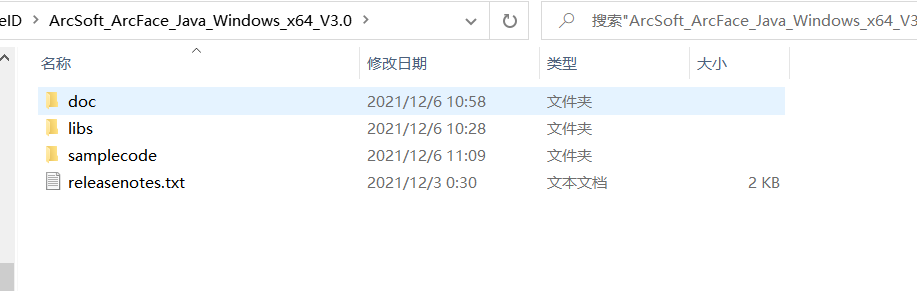
下面会具体分析 SDK这个人脸识别的功能是调用的第三方SDK,自己不会写~~。 注册之后,可以免费使用100个应用;且适用于多平台,我这里是windows64位; 下载后的SDK目录如下:
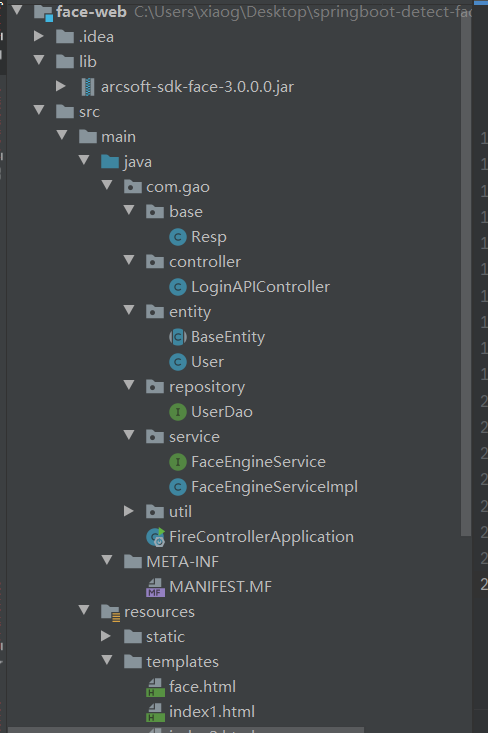
里面有说明文档、jar包以及依赖文件和一个demo。 JavaWeb版这里是官网给的JavaWeb版案例,我做了一些注释: import com.arcsoft.face.*; import com.arcsoft.face.enums.*; import com.arcsoft.face.toolkit.ImageInfo; import java.io.File; import java.util.ArrayList; import java.util.List; import com.arcsoft.face.toolkit.ImageInfoEx; import static com.arcsoft.face.toolkit.ImageFactory.getGrayData; import static com.arcsoft.face.toolkit.ImageFactory.getRGBData; public class FaceEngineTest { public static void main(String[] args) { //从官网获取 String appId = ""; String sdkKey = ""; FaceEngine faceEngine = new FaceEngine("D:\\arcsoft_lib"); //激活引擎,只需要一次 int errorCode = faceEngine.activeOnline(appId, sdkKey); if (errorCode != ErrorInfo.MOK.getValue() && errorCode != ErrorInfo.MERR_ASF_ALREADY_ACTIVATED.getValue()) { System.out.println("引擎激活失败"); } ActiveFileInfo activeFileInfo=new ActiveFileInfo(); errorCode = faceEngine.getActiveFileInfo(activeFileInfo); if (errorCode != ErrorInfo.MOK.getValue() && errorCode != ErrorInfo.MERR_ASF_ALREADY_ACTIVATED.getValue()) { System.out.println("获取激活文件信息失败"); } //引擎配置,保存默认即可 EngineConfiguration engineConfiguration = new EngineConfiguration(); engineConfiguration.setDetectMode(DetectMode.ASF_DETECT_MODE_IMAGE); engineConfiguration.setDetectFaceOrientPriority(DetectOrient.ASF_OP_ALL_OUT); engineConfiguration.setDetectFaceMaxNum(10); engineConfiguration.setDetectFaceScaleVal(16); //功能配置,可以设置面容识别时是否分析年龄、性别、3d等。 FunctionConfiguration functionConfiguration = new FunctionConfiguration(); functionConfiguration.setSupportAge(true); functionConfiguration.setSupportFace3dAngle(true); functionConfiguration.setSupportFaceDetect(true); functionConfiguration.setSupportFaceRecognition(true); functionConfiguration.setSupportGender(true); functionConfiguration.setSupportLiveness(true); functionConfiguration.setSupportIRLiveness(true); engineConfiguration.setFunctionConfiguration(functionConfiguration); //初始化引擎 errorCode = faceEngine.init(engineConfiguration); if (errorCode != ErrorInfo.MOK.getValue()) { System.out.println("初始化引擎失败"); } //人脸检测 ImageInfo imageInfo = getRGBData(new File("d:\\aaa.jpg")); List faceInfoList = new ArrayList(); errorCode = faceEngine.detectFaces(imageInfo.getImageData(), imageInfo.getWidth(), imageInfo.getHeight(), imageInfo.getImageFormat(), faceInfoList); System.out.println(faceInfoList); //特征提取 FaceFeature faceFeature = new FaceFeature(); errorCode = faceEngine.extractFaceFeature(imageInfo.getImageData(), imageInfo.getWidth(), imageInfo.getHeight(), imageInfo.getImageFormat(), faceInfoList.get(0), faceFeature); System.out.println("特征值大小:" + faceFeature.getFeatureData().length); //人脸检测2 ImageInfo imageInfo2 = getRGBData(new File("d:\\ccc.jpg")); List faceInfoList2 = new ArrayList(); errorCode = faceEngine.detectFaces(imageInfo2.getImageData(), imageInfo2.getWidth(), imageInfo2.getHeight(),imageInfo.getImageFormat(), faceInfoList2); System.out.println(faceInfoList); //特征提取2 FaceFeature faceFeature2 = new FaceFeature(); errorCode = faceEngine.extractFaceFeature(imageInfo2.getImageData(), imageInfo2.getWidth(), imageInfo2.getHeight(), imageInfo.getImageFormat(), faceInfoList2.get(0), faceFeature2); System.out.println("特征值大小:" + faceFeature.getFeatureData().length); //特征比对 FaceFeature targetFaceFeature = new FaceFeature(); targetFaceFeature.setFeatureData(faceFeature.getFeatureData()); FaceFeature sourceFaceFeature = new FaceFeature(); sourceFaceFeature.setFeatureData(faceFeature2.getFeatureData()); FaceSimilar faceSimilar = new FaceSimilar(); errorCode = faceEngine.compareFaceFeature(targetFaceFeature, sourceFaceFeature, faceSimilar); System.out.println("相似度:" + faceSimilar.getScore()); //设置活体测试 errorCode = faceEngine.setLivenessParam(0.5f, 0.7f); //人脸属性检测,如果上面功能配置没有的话,这里就不可用 FunctionConfiguration configuration = new FunctionConfiguration(); configuration.setSupportAge(true); configuration.setSupportFace3dAngle(true); configuration.setSupportGender(true); configuration.setSupportLiveness(true); errorCode = faceEngine.process(imageInfo.getImageData(), imageInfo.getWidth(), imageInfo.getHeight(), imageInfo.getImageFormat(), faceInfoList, configuration); //性别检测,如果上面功能配置没有的话,这里就不可用 List genderInfoList = new ArrayList(); errorCode = faceEngine.getGender(genderInfoList); System.out.println("性别:" + genderInfoList.get(0).getGender()); //年龄检测,如果上面功能配置没有的话,这里就不可用 List ageInfoList = new ArrayList(); errorCode = faceEngine.getAge(ageInfoList); System.out.println("年龄:" + ageInfoList.get(0).getAge()); //3D信息检测,如果上面功能配置没有的话,这里就不可用 List face3DAngleList = new ArrayList(); errorCode = faceEngine.getFace3DAngle(face3DAngleList); System.out.println("3D角度:" + face3DAngleList.get(0).getPitch() + "," + face3DAngleList.get(0).getRoll() + "," + face3DAngleList.get(0).getYaw()); //活体检测,如果上面功能配置没有的话,这里就不可用 List livenessInfoList = new ArrayList(); errorCode = faceEngine.getLiveness(livenessInfoList); System.out.println("活体:" + livenessInfoList.get(0).getLiveness()); //IR属性处理,如果上面功能配置没有的话,这里就不可用 ImageInfo imageInfoGray = getGrayData(new File("d:\\IR_480p.jpg")); List faceInfoListGray = new ArrayList(); errorCode = faceEngine.detectFaces(imageInfoGray.getImageData(), imageInfoGray.getWidth(), imageInfoGray.getHeight(), imageInfoGray.getImageFormat(), faceInfoListGray); FunctionConfiguration configuration2 = new FunctionConfiguration(); configuration2.setSupportIRLiveness(true); errorCode = faceEngine.processIr(imageInfoGray.getImageData(), imageInfoGray.getWidth(), imageInfoGray.getHeight(), imageInfoGray.getImageFormat(), faceInfoListGray, configuration2); //IR活体检测,如果上面功能配置没有的话,这里就不可用 List irLivenessInfo = new ArrayList(); errorCode = faceEngine.getLivenessIr(irLivenessInfo); System.out.println("IR活体:" + irLivenessInfo.get(0).getLiveness()); ImageInfoEx imageInfoEx = new ImageInfoEx(); imageInfoEx.setHeight(imageInfo.getHeight()); imageInfoEx.setWidth(imageInfo.getWidth()); imageInfoEx.setImageFormat(imageInfo.getImageFormat()); imageInfoEx.setImageDataPlanes(new byte[][]{imageInfo.getImageData()}); imageInfoEx.setImageStrides(new int[]{imageInfo.getWidth() * 3}); List faceInfoList1 = new ArrayList(); errorCode = faceEngine.detectFaces(imageInfoEx, DetectModel.ASF_DETECT_MODEL_RGB, faceInfoList1); FunctionConfiguration fun = new FunctionConfiguration(); fun.setSupportAge(true); errorCode = faceEngine.process(imageInfoEx, faceInfoList1, functionConfiguration); List ageInfoList1 = new ArrayList(); int age = faceEngine.getAge(ageInfoList1); System.out.println("年龄:" + ageInfoList1.get(0).getAge()); FaceFeature feature = new FaceFeature(); errorCode = faceEngine.extractFaceFeature(imageInfoEx, faceInfoList1.get(0), feature); //引擎卸载 errorCode = faceEngine.unInit(); } }其中的关键faceEngine类在arcsoft-sdk-face-3.0.0.0.jar包中,导入即可。 SpringBoot版源码地址: https://github.com/LittleCoolguy/face-web 项目采用JPA,不需要你建表,即下即用。项目结构如下:
在配置文件application.yml中进行配置: 配置mysql数据库配置SDK中的APP_ID和KEY_ID以及下载的配置文件路径。
在启动项目时,可能会碰到detect_face字段无法插入,这是因为JPA在创建表时把User中的btye[]字段映射成了tiny_int型,导致out range,手动将MYSQL中detect_face字段修改为blob型即可。 |


【本文地址】
今日新闻 |
推荐新闻 |