(一)mysql 运维基础篇(Linux云计算从入门到精通) |
您所在的位置:网站首页 › 云计算下载mysql环境 › (一)mysql 运维基础篇(Linux云计算从入门到精通) |
(一)mysql 运维基础篇(Linux云计算从入门到精通)
|
学习预览:
(一)mysql 运维基础篇(Linux云计算从入门到精通) (二)mysql 索引和视图(数据库运维基础补充) (三)mysql 触发器、存储过程和函数(数据库运维基础补充) (四)MySQL安全机制和日志管理(mysql运维) (五)mysql数据备份—物理备份(完备+lvm快照+xtrabackup)+逻辑备份(mysqldump+导入导出) (六)mysql复制技术—M-S主从配置(传统+GTID)+M-M-S-S主从配置(GTID) (七)mysql中间件mycat配置和部署(基于M-M-S-S) (八) 数据库集群技术—Galera Cluster安装与配置 (九)数据库集群技术Galera+mycat(数据库运维学习终章) 声明: 如果我们是从事Linux运维方面的话,学习mysql就必不可少呐,但是我们主要不是做数据库开发,而主要负责mysql管理上。尤其在Linux云计算中,主备复制、读写分离、HA架构、分布式数据库、压力测试、性能优化、自动化运维就显得格外重要呐。这篇博客依旧是我的学习笔记,主要介绍数据的基本知识,尤其是SQL语句。这个不仅仅是开发人员关注的,运维人员也要做一定的了解。所以,Let's get started .😃 CONTENT一、 了解mysql及安装mysql8 1.1 认识mysql 1.2 安装mysql8最新版 1.3 忘记密码怎么办? 二、数据库(database)的基本学习 2.1 数据库基本操作 2.2 MySQL数据类型 2.2.1 整型int学习 2.2.2 浮点数学习 2.2.3 时间类型学习 2.2.4 字符串类型学习 2.2.5 枚举类型和集合类型 三、表完整性约束 3.1 设置单列主键(primary key) 3.2 设置复合主键 3.3 设置foreign外键 四、修改表 ALTER TABLE 五、数据操纵语言DML(insert,update,delete) 5.1 插入数据INSERT 5.2 更新数据 5.3 删除数据DELETE 六、mysql查询语句 6.1单表查询 6.1.1 简单查询 6.1.2 条件查询 6.1.3 查询排序 6.1.4 限制查询的记录数(limit) 6.1.5 使用集合函数查询 6.1.6 分组查询 6.1.7 使用正则表达式查询 6.2 多表查询 6.2.1 交叉连接(笛卡尔积,不使用任何匹配条件) 6.2.2 内连接(只连接匹配的行) 6.2.3 外连接 6.2.4 子查询 结束语: 一、 了解mysql及安装mysql8 1.1 认识mysql先了解下关于数据库的基本概念哦。1.1.1 数据的存储方式 1.人工管理阶段(显然效率很低)2.文件系统阶段(能存取海量数据,但是读取数据很慢)3.数据库系统管理阶段(不仅能存取海量数据,还建立了索引,这样读取数据非常快)1.1.2 数据库技术构成 (1)数据库系统DBS、数据库管理系统( DataBase Management System, DBMS ) 、 SQL(RDS,关系型数据系统):ORACLE、 Oracle MySQL、MariaDB、 Percona server、DB2NoSQL(非关系型): Redis、 MongoDB、 Memcache(2) SQL语言(结构化查询语言) A. DDL语句数据库定义语言:数据库、表、视图、索引、存储过程、函数,CREATE DROP ALTER //开发人员B. DML语句数据库操纵语言 :插入数据INSERT.删除数据DELETE、更新数据UPDATE //开发人员关注的C. DQL语句数据库查询语言 :查询数据SELECTD. DCL语句数据库控制语言 :例如控制用户的访问权限GRANT、REVOKE(3)数据访问技术(让这些php或Java这样开发语言能够访问数据库,例如我们在部署LAMP时,php-mysql就类似于这种) A. ODBC PHP B. JDBC JAVA 1.2 安装mysql8最新版安装方式基本有三种:“二进制rpm-yum repository”、“预编译-Generic”、和源码包安装-source code。 各自包的形式的如下图,我采用 yum安装。各种安装包类型如图所示,我们选择的是第一种:
1.2.1 到官网上找到yum仓库,点击适合我们系统的linux7 版本
1.2.2 右键点击“No thanks,just start my download”,复制链接地址哦!
1.2.3 下面就开始安装咯,具体步骤看下面咯! #方便做实验,我就偷个懒,关掉selinux和防火墙啦 [root@Centos7-host1 ~]# sed -ri '/^SELINUX=/cSELINUX=disabled' /etc/selinux/config [root@Centos7-host1 ~]# setenforce 0 setenforce: SELinux is disabled [root@Centos7-host1 ~]# systemctl stop firewalld#开始wget 我们刚刚复制的链接,然后直接用rpm安装 ,用md5sum检查哈希值有没有问题(与官网上核对就好了)防止下载有问题呐。yum repolist检查仓库里有没有mysql哦,有的话就开始漫长的下载过程(400M呢),大家也可以找其他的yum源安装,网速快就OK。 [root@Centos7-host1 ~]# wget https://dev.mysql.com/get/mysql80-community-release-el7-3.noarch.rpm [root@Centos7-host1 ~]# rpm -ivh mysql80-community-release-el7-3.noarch.rpm [root@Centos7-host1 ~]# md5sum mysql80-community-release-el7-3.noarch.rpm 893b55d5d885df5c4d4cf7c4f2f6c153 mysql80-community-release-el7-3.noarch.rpm [root@Centos7-host1 ~]# yum repolist [root@Centos7-host1 ~]# yum install mysql-community-server.x86_64 -y
#启动mysql并设置开机自启动,设置密码,通过以下方式获取密码登录 [root@Centos7-host1 ~]# systemctl restart mysqld [root@Centos7-host1 ~]# systemctl enable mysqld [root@Centos7-host1 ~]# grep 'password' /var/log/mysqld.log 2020-04-05T22:10:55.715318Z 5 [Note] [MY-010454] [Server] A temporary password is generated for root@localhost: qdqGdjGeu7;T [root@Centos7-host1 ~]# mysql -uroot -p'qdqGdjGeu7;T' #登陆上去初始化密码,密码要符合要求不能太简单,不然通不过 mysql> ALTER USER 'root'@'localhost' IDENTIFIED BY 'Root@123';
1.3 忘记密码怎么办? 说明下我这是mysql8版本的修改方式,不同版本修改方式不一样呐,不过没有关系,上网查一下就知道啦。 #编辑/etc/my.cnf,添加skip-grant-tables [root@Centos7-host1 ~]# vim /etc/my.cnf [mysqld] skip-grant-tables #然后先重启mysqld,再用mysql命令登入,跳过密码呐 [root@Centos7-host1 ~]# systemctl restart mysqld [root@Centos7-host1 ~]# mysql #修改root密码为空,刷新以下并重设密码就好了 mysql> update mysql.user set authentication_string='' where User='root'; mysql> flush privileges; mysql> ALTER USER 'root'@'localhost' IDENTIFIED BY 'Root@123'; #最后记得回到/etc/my.cnf删掉或注释掉skip-grant-tables#最后退出,编辑/etc/my.cnf,把skip-grant-tables删掉或注释掉重新登录,如下图就修改好了:
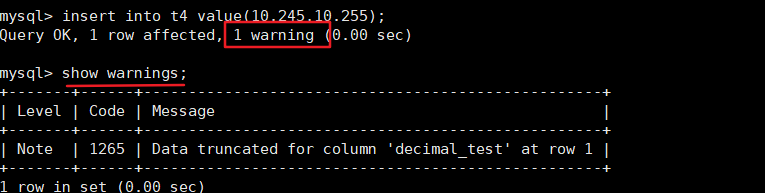
(1)show databases;(先查看本地的数据库,可以了解其概念) 系统数据库: information_ schema:虚拟库 ,主要存储了系统中的一些数据库对象的信息,例如用户表信息、列信息、权限信息、字符信息等performance_ schema:主要存储数据库服务器的性能参数mysql :授权库,主要存储系统用户的权限信息sys:主要存储数据库服务器的性能参数业务数据库:就是我们后面所创建的数据库... (2)创建业务数据库DDL #创建数据库格式:CREATE DATABASE 数据库名;#查看数据库:SHOW DATABASES;#选择数据库:SELECT database();USE 数据库名#删除数据库:DROP DATABASE 数据库名;(3)刚开始不知道指令或者忘记指令可借助help指令哦。 mysql> help List of all MySQL commands: Note that all text commands must be first on line and end with ';' ? (\?) Synonym for `help'. clear (\c) Clear the current input statement. connect (\r) Reconnect to the server. Optional arguments are db and host. delimiter (\d) Set statement delimiter. edit (\e) Edit command with $EDITOR. ego (\G) Send command to mysql server, display result vertically. exit (\q) Exit mysql. Same as quit. ………………………… 2.2 MySQL数据类型在MySQL数据库管理系统中,可以通过存储引擎来决定表的类型。同时, MySQL数据库管理系统也提供了数据类型决定表存储数据的类型。MySQL数据库管理系统提供的数据类型(颜色标明的比较常见): 数值类型: 整数类型:TINYINT SMALLINT MEDIUMINT INT BIGINT 浮点数类型:FLOAT DOUBLE 定点数类型:DEC 位类型:BIT字符串类型: CHAR系列:CHAR VARCHAR TEXT系列:TINYTEXT TEXT MEDIUMTEXT LONGTEXT BLOB系列:TINYBLOB BLOB MEDIUMBLOB LONGBLOB BINARY系列:BINARY VARBINARY枚举类型: ENUM集合类型: SET时间和日期类型: DATE TIME DATETIME TIMESTAMP YEAR 2.2.1 整型int学习大家所看到的别人所创建的int(10),指的是整型的宽度,并不是数值位的限制。所以整型没有必要指定宽度哦,默认就好了。 --有符号,默认是有符号的, create database learning; --创建数据库 use learning; --使用数据库 create table t1(tinyint_t1 tinyint, int_t1 int); --在数据库中创建字段 desc t1; --查看表的结构 +------------+---------+------+-----+---------+-------+ | Field | Type | Null | Key | Default | Extra | +------------+---------+------+-----+---------+-------+ | tinyint_t1 | tinyint | YES | | NULL | | | int_t1 | int | YES | | NULL | | +------------+---------+------+-----+---------+-------+ insert into t1 values(111,111); --向表中插入数据 select * from t1; --查看t1中数据 +------------+--------+ | tinyint_t1 | int_t1 | +------------+--------+ | 111 | 111 | +------------+--------+ 1 row in set (0.00 sec) --创建无符号的,unsigned,只能存正值。自己插入数据,查看试试。因为没有符号,所以数值范围又大了 create table t2(tinyint_t2 tinyint unsigned, int_t2 int unsigned); 2.2.2 浮点数学习作用:用于存储用户的身高、体重、薪水等浮点数(float)和定点数(decimal)都可以用类型名称后加(M,D)的方式来表示,(M,D)表示共显示M位数字(整数位+小数位) ,其中D位于小数点后面,M和D又称为精度和标度。float和double在不指定精度时,默认会按照实际的精度(由实际的硬件和操作系统决定)来显示,而decimal在不指定精度时,默认的整数位为10 ,默认的小数位为0 定点数在MySQL内部以字符串形式存储,比浮点数更精确,适合用来表示货币等精度高的数据。 float和decimal 如果加(M,D)它们的数值就受到限制了,他们两主要是精度不一样,下面可以观察下,同样插入一个数据,精度却不一样。 create table t4(float_test float(5,2),decimal_test decimal(5,2)); insert into t4 value(10.245,10.245); desc t4; +--------------+--------------+------+-----+---------+-------+ | Field | Type | Null | Key | Default | Extra | +--------------+--------------+------+-----+---------+-------+ | float_test | float(5,2) | YES | | NULL | | | decimal_test | decimal(5,2) | YES | | NULL | | +--------------+--------------+------+-----+---------+-------+ select * from t4; +------------+--------------+ | float_test | decimal_test | +------------+--------------+ | 10.24 | 10.25 | +------------+--------------+当我们遇到下面warning的提示时,可以通过show warnings 查看警告信息。但在这边并没有什么影响。
2.2.3 时间类型学习 时间和日期类型测试:year. date. time. datetime. timestamp 作用:用于存储用户的注册时间,文章的发布时间,文章的更新时间,员工的入职时间等 咱们可以创建个表看看他们的区别,我们用now()函数获取当前的时间: create table t5(y year,d date,t time,dt datetime); insert into t5 value(now(),now(),now(),now()); desc t5; +-------+----------+------+-----+---------+-------+ | Field | Type | Null | Key | Default | Extra | +-------+----------+------+-----+---------+-------+ | y | year | YES | | NULL | | | d | date | YES | | NULL | | | t | time | YES | | NULL | | | dt | datetime | YES | | NULL | | +-------+----------+------+-----+---------+-------+ select * from t5; +------+------------+----------+---------------------+ | y | d | t | dt | +------+------------+----------+---------------------+ | 2020 | 2020-04-06 | 11:35:01 | 2020-04-06 11:35:01 | +------+------------+----------+---------------------+但是我们要注意的有:其它的时间, 按要求插入,当插入年份时,尽量使用4位值 插入两位年份时,如果数值=70,以19开头,比如82,结果1982 看如下这个例子知道了吧,所以不能偷懒呀,最好输入四位日期。 create table t6(born_year year); insert into t6 value(47),(80); select * from t6; +-----------+ | born_year | +-----------+ | 2047 | | 1980 | +-----------+ 2.2.4 字符串类型学习字符串类型测试: CHAR、 VARCHAR 作用:用于存储用户的姓名、爱好、发布的文章等(可以限定字符串个数)CHAR:列的长度固定为创建表时声明的长度: 0~ 255 VARCHAR:列中的值为可变长字符串,长度: 0~ 65535注:在检索的时候, CHAR列删除了尾部的空格,而VARCHAR则保留这些空格 create table t7(ch1 char(4),var1 varchar(4)); insert into t7 value('abcd','abcd'); select * from t7; 2.2.5 枚举类型和集合类型ENUM类型即枚举类型、集合类型SET测试,这个很实用的。 字段的值只能在给定范围中选择 常见的是单选按钮和复选框enum 单选只能在给定的范围内选 一个值,如性别sex男male/女female set 多选在给定的范围内可以选择 一个或一个以上的值(爱好1,爱好2,爱好3... ) 表 school.student3 姓名 name varchar(50) 性别 sex enum('m','f) 爱好 hobby set('music,'book,'game',disc") 操作下: create table student_info(name varchar(50),sex enum('man','woman'),hobby set('readding','music','skiing','game')); desc student_info; +-------+----------------------------------------+------+-----+---------+-------+ | Field | Type | Null | Key | Default | Extra | +-------+----------------------------------------+------+-----+---------+-------+ | name | varchar(50) | YES | | NULL | | | sex | enum('man','woman') | YES | | NULL | | | hobby | set('reading','music','skiing','game') | YES | | NULL | | +-------+----------------------------------------+------+-----+---------+-------+ --通过下面这个命令查看创建表的语句 show create table student_info\G; *************************** 1. row *************************** Table: student_info Create Table: CREATE TABLE `student_info` ( `name` varchar(50) DEFAULT NULL, `sex` enum('man','woman') DEFAULT NULL, `hobby` set('reading','music','skiing','game') DEFAULT NULL ) ENGINE=InnoDB DEFAULT CHARSET=utf8mb4 COLLATE=utf8mb4_0900_ai_ci 1 row in set (0.00 sec) insert into student_info values('Jack','man','game'); insert into student_info values('Jackson','man','reading,music'); select * from student_info; +---------+------+---------------+ | name | sex | hobby | +---------+------+---------------+ | Jack | man | game | | Jackson | man | reading,music | +---------+------+---------------+三、表完整性约束 作用:用于保证数据的完整性和一致性 约束条件 说明 PRIMARY KEY (PK) 标识该字段为该表的主键,可以唯一的标识记录,不可以为空 UNIQUE + NOT NULLFOREIGN KEY (FK) 标识该字段为该表的外键,实现表与表(父表主键/子表1外键/子表2外键)之间的关联NOT NULL 标识该字段不能为空UNIQUE KEY (UK) 标识该字段的值是唯一的,可以为空,一个表中可以有多个UNIQUE KEYAUTO INCREMENT 标识该字段的值自动增长(整数类型,而且为主键)DEFAULT 为该字段设置默认值UNSIGNED 无符号,正数ZEROFILL 使用0填充下例如000001说明: 1.是否允许为空,默认NULL,可设置NOT NULL ,字段不允许为空,必须赋值 2.字段是否有默认值,缺省的默认值是NULL ,如果插入记录时不给字段赋值,此字段使用默认值 sex enum('male',female) not null default 'male' age int unsigned NOT NULL default 20 必须为正值(无符号),不允许为空,默认是20 3.是否是key 主键 primary key 外键 foreign key 索引 (index,unique...) 熟悉上面的约束条件,下面我们开始学习如何设置单列主键,唯一约束(unique),复合主键和外键(foreign) 3.1 设置单列主键(primary key)首先知道设置成主键的字段不允许重复,且不允许为null,所以说它是(unique+not null)。设置为unique的字段就不允许重复啦,但可以为空,咱们看下面这个实例(把前面学习应用一下哟): create database employment; use employment; create table employee( -> name varchar(20), -> sex enum('male','female') not null default 'male', -> age int not null default 18, -> employ_date date not null, -> anth_id varchar(18), -> unique(name), -> primary key(anth_id) -> ); --一般我们在最后声明unique和主键,当然也可以在前面就定义好。 --观察上面的SQL语句在对应下面的表的结构看一下,一目了然是不是 desc employee; +-------------+-----------------------+------+-----+---------+-------+ | Field | Type | Null | Key | Default | Extra | +-------------+-----------------------+------+-----+---------+-------+ | name | varchar(20) | YES | UNI | NULL | | | sex | enum('male','female') | NO | | male | | | age | int | NO | | 18 | | | employ_date | date | NO | | NULL | | | anth_id | varchar(18) | NO | PRI | NULL | | +-------------+-----------------------+------+-----+---------+-------+ --插入两行数据 insert into employee values('Jack','male',20,20101221,'3342145544'),('alice','femaale',19,20191212,'12367446'); select * from employee; +-------+--------+-----+-------------+------------+ | name | sex | age | employ_date | anth_id | +-------+--------+-----+-------------+------------+ | alice | female | 19 | 2019-12-12 | 12367446 | | Jack | male | 20 | 2010-12-21 | 3342145544 | +-------+--------+-----+-------------+------------+ --假如插入一个alice同名的怎么办,很明显报错,因为已经有alice啦 insert into employee values('alice','female',29,20111012,'1224456636'); ERROR 1062 (23000): Duplicate entry 'alice' for key 'employee.name' --现在插入一个id为null的数据也是不可以的,因为主键不能为空哦 insert into employee values('aee','female',29,20111012,null); ERROR 1048 (23000): Column 'anth_id' cannot be null 3.2 设置复合主键有时候只用一个主键还不能唯一标识行,这就需要两个主键啦,例如下面这种情况只能用两个字段作为主键咯! host _ip 存储主机IP service_ name 服务名 port 服务对应的端口 allow(Y,N) 服务是否允许访问主键:host_ip + port = primary key create table service( -> ip varchar(15), -> service varchar(10) not null, -> port int not null, -> allow enum('yes','no') default 'no', -> primary key(ip,port)); desc service; +---------+------------------+------+-----+---------+-------+ | Field | Type | Null | Key | Default | Extra | +---------+------------------+------+-----+---------+-------+ | ip | varchar(15) | NO | PRI | NULL | | | service | varchar(10) | NO | | NULL | | | port | int | NO | PRI | NULL | | | allow | enum('yes','no') | YES | | no | | +---------+------------------+------+-----+---------+-------+这个很简单,只要在后面添加primary key( ),括号里输入对应的字段名就OK了。我就不插入数据测试咯。 3.3 设置foreign外键这就运用在几个表有联系的情况下啦,咱们看如下例子: 我们是基于5.1例子的基础上做的呐,然后创建salary表,employee作为父表,salary子表中name为外键,关联父表( employees主键name ),同步更新,同步删除。 create table salary( -> dep_id int not null auto_increment, -> name varchar(20), -> salary float(8,2) not null, -> primary key(dep_id), -> foreign key(name) references employee(name) on update cascade on delete cascade); desc salary ; +--------+-------------+------+-----+---------+----------------+ | Field | Type | Null | Key | Default | Extra | +--------+-------------+------+-----+---------+----------------+ | dep_id | int | NO | PRI | NULL | auto_increment | | name | varchar(20) | YES | MUL | NULL | | | salary | float(8,2) | NO | | NULL | | +--------+-------------+------+-----+---------+----------------+ --在salary表中插入employee中两个数据,我们只选择name和salary字段,因为dep_id默认整数增长 insert into salary(name,salary) values('alice',40000); insert into salary(name,salary) values( 'Jack',20000); select * from salary; +--------+-------+----------+ | dep_id | name | salary | +--------+-------+----------+ | 1 | alice | 40000.00 | | 2 | Jack | 20000.00 | +--------+-------+----------+ --下面我们开始测试父表和字表之间的连接问题啦,更新一下名字试试 update employee set name='Jackson' where name='Jack'; select * from salary; +--------+---------+----------+ | dep_id | name | salary | +--------+---------+----------+ | 1 | alice | 40000.00 | | 2 | Jackson | 20000.00 | +--------+---------+----------+ --删除用户Alice试试 delete from employee where name='alice'; select * from salary; +--------+---------+----------+ | dep_id | name | salary | +--------+---------+----------+ | 2 | Jackson | 20000.00 | +--------+---------+----------+ 四、修改表 ALTER TABLE语法: 1.修改表名 ALTER TABLE 表名 RENAME 新表名; 2.增加字段ALTER TABLE 表名 ADD 字段名 数据类型 [完整性约束条..] //默认添加在后面 ALTER TABLE 表名 ADD 字段名 数据类型 [完整性约束条件..] FIRST; ALTER TABLE 表名 ADD 字段名 数据类型 [完整性约束条件..] AFTER 字段名; 3.删除字段 ALTER TABLE 表名 DROP 字段名;4.修改字段 ALTER TABLE 表名 MODIFY 字段名 数据类型 [完整性约束条件..];示例: 1.修改存储引擎 mysq|> alter table service engine=innodb; //engine=myisam|memoryl...2.添加字段 mysql> create table student10 (id int); mysq|> alter table student10 -> add name varchar(20) not null, -> add age int not null default 22; mysql> alter table student10 -> add stu_num int not null after name; //添加name字段之后 mysql> alter table student10 -> add sex enum('male','female') default 'male' first; //添加到最前面 3.删除字段 mysql> alter table student10 drop sex; mysql> alter table service drop mac;4.修改字段类型modify mysql> alter table student10 -> modify age tinyint; mysql> alter table student10 -> modify id int not null primary key; //修改字段类型、约束、主键5.增加约束(针对已有的主键增加auto_ increment ) mysql> alter table student10 modify id int not null primary key auto_ increment; //错误,该字段已经是primary, ERROR 1068 (42000): Multiple primary key defined mysql> alter table student10 modify id int not null auto_ increment; //正确这样写,省去primary key 6.增加复合主键 mysql> alter table service -> add primary key(host_ip,port); 7.增加主键 mysql> alter table student1 -> add primary key(id);8.增加主键和自动增长 mysql> alter table student1 -> modify id int not null primary key auto_increment;9.删除主键[ primary key, 如果存在auto_increment]a.先删除自增约束 mysql> alter table student10 modify id int not null;b.删除主键 mysql> alter table student10 -> drop primary key; 另外复制表和删除表也在这说一下: 复制表 复制表结构+记录( key不会复制:主键、外键和索引): mysql> create table new_service select * from service;只复制表结构:mysql> create table new1_ service select * from service where 1=2; //条件为假,查不到任何记录复制表结构,包括Key: mysql> create table t4 like employees;删除表 DROP TABLE 表名; 五、数据操纵语言DML(insert,update,delete) 5.1 插入数据INSERT1.插入完整数据(顺序插入) INSERT INTO 表名 VALUES (值1,值2,值3...值n);2.指定字段插入数据 INSERT INTO表名(字段2,字段... VALUES (值2,3值...);3.插入多条记录INSERT INTO 表名 VALUES (值1,值2,值3...值n), (值1,值2,值3...值n), (值1,值2,值3...值n);4.插入查询结果INSERT INTO 表1(字段1,字段2,字段...字段n) SELECT (字段1,字段2,字段3...字段n) FROM 表2 WHERE [条件] 5.2 更新数据UPDATE 表名 SET 字段1=值1,字段2=值2 WHERE [CONDITION]; 还记得我们密码忘记怎么修改的了嘛,就是利用更新操作呐。 5.3 删除数据DELETE记得加上条件,不然全部都删掉咯 DELETE FROM 表名 WHERE CONITION; 六、mysql查询语句 方便我们后面学习,可以利用下面SQL语句直接参创建employee表 create database company; create table company.employee( id int primary key AUTO_INCREMENT not null, name varchar(30) not null, sex enum('male','female') default 'male' not null, hire_date date not null, post varchar(50) not null, job_description varchar(100), salary double(15,2) not null, office int, dep_id int); insert into company.employee(name,sex,hire_date,post,job_description,salary,office,dep_id) values ('jack','male','20180202','instructor','teach',5000,501,100), ('tom','male','20180203','instructor','teach',5500,501,100), ('robin','male','20180202','instructor','teach',8000,501,100), ('alice','female','20180202','instructor','teach',7200,501,100), ('tianyun','male','20180202','hr','hrcc',600,502,101), ('harry','male','20180202','hr',NULL,6000,502,101), ('emma','female','20180206','sale','salecc',20000,503,102), ('christine','female','20180205','sale','salecc',2200,503,102), ('zhuzhu','male','20180205','sale',NULL,2200,503,102), ('gougou','male','20180205','sale','',2200,503,102); 6.1单表查询 6.1.1 简单查询(1)简单查询 select * from employee; SELECT name, salary, dep_id FROM employee;(2)避免重复 DISTINCT SELECT post FROM employee; SELECT DISTINCT post FROM employee; 注:不能部分使用DISTINCT ,通常仅用于某一字段。(3)通过四则运算查询 SELECT name, salary, salary*14 FROM employee; SELECT name, salary, salary*14 AS 'Annual salary' FROM employee; SELECT name, salary, salary*14 'Annual salary' FROM employee;(4)定义显示格式CONCAT()函数用于连接字符串 SELECT CONCAT(name, ' annual salary: ', salary*14) AS 'Annual salary' FROM employee; 6.1.2 条件查询 (1)单条件查询 select name,post from employee where post='hr';(2)多条件查询 select name,salary from employee where post='hr' and salary>1000;(3)关键词 between and select name,salary from employee where salary between 5000 and 15000; select name,salary from employee where salary not between 5000 and 15000;(4)关键词 is null select name,post from employee where job_description is null; select name,post from employee where job_description is not null;(5)关键字in集合查询 select name,salary from employee where salary =4000 or salary =5000 or salary = 6000; +-------+---------+ | name | salary | +-------+---------+ | jack | 5000.00 | | harry | 6000.00 | +-------+---------+ select name,salary from employee where salary in(4000,5000,6000); select name,salary from employee where salary not in(4000,5000,6000);(6)关键字like模糊查询 select * from employee where name like 'ali%'; --%代表任多个字符,相当于Linux下的* select * from employee where name like 'ali__'; --_一个下划线代表任意一个字符 6.1.3 查询排序(1)单列排序 select * from employee order by salary ; --默认升序 select name ,salary from employee order by salary asc; select name ,salary from employee order by salary desc; --降序(2)多列排序(按照入职时间降序,再按薪水升序) select * from employee order by hire_date desc,salary asc; 6.1.4 限制查询的记录数(limit) select * from employee order by salary desc limit 5; --默认初始位置为0 select * from employee order by salary desc limit 0,5; -- select * from employee order by salary desc limit 4,5; --从第四条开始显示5条 6.1.5 使用集合函数查询 select count(*) from employee; --计数 select count(*) from employee where dep_id = 101; select max(salary) from employee; --求薪资最高的 select min(salary) from employee; --薪资最低 select avg(salary) from employee; --平均值 select sum(salary) from employee; --求和 select sum(salary) from employee where dep_id =101; --101部门的薪资和 select name,sex,hire_date,post,salary,dep_id from employee where salary=(select max(salary) from employee); --查询薪资最高的人的相关信息 +------+--------+------------+------+----------+--------+ | name | sex | hire_date | post | salary | dep_id | +------+--------+------------+------+----------+--------+ | emma | female | 2018-02-06 | sale | 20000.00 | 102 | +------+--------+------------+------+----------+--------+ 6.1.6 分组查询(1)group by 和group_concat()函数一起使用,实现效果可看下面。 select dep_id ,group_concat(name) from employee group by dep_id ; +--------+------------------------------+ | dep_id | group_concat(name) | +--------+------------------------------+ | 100 | jack,tom,robin,alice | | 101 | tianyun,harry | | 102 | emma,christine,zhuzhu,gougou | +--------+------------------------------+ select dep_id ,group_concat(name) as 'employ_members' from employee group by dep_id ; +--------+------------------------------+ | dep_id | employ_members | +--------+------------------------------+ | 100 | jack,tom,robin,alice | | 101 | tianyun,harry | | 102 | emma,christine,zhuzhu,gougou | +--------+------------------------------+ select dep_id ,group_concat(salary) as 'employ_members' from employee group by depp_id ; +--------+----------------------------------+ | dep_id | employ_members | +--------+----------------------------------+ | 100 | 5000.00,5500.00,8000.00,7200.00 | | 101 | 600.00,6000.00 | | 102 | 20000.00,2200.00,2200.00,2200.00 | +--------+----------------------------------+(2)group by函数与集合函数一起使用 select dep_id ,sum(salary ) from employee group by dep_id ; --按部门号分组计算每组工资总和 +--------+--------------+ | dep_id | sum(salary ) | +--------+--------------+ | 100 | 25700.00 | | 101 | 6600.00 | | 102 | 26600.00 | +--------+--------------+ select dep_id ,avg(salary) from employee group by dep_id ; +--------+-------------+ | dep_id | avg(salary) | +--------+-------------+ | 100 | 6425.000000 | | 101 | 3300.000000 | | 102 | 6650.000000 | +--------+-------------+ 6.1.7 使用正则表达式查询 select * from employee where name regexp '^ali'; --找出以ali开头的 +----+-------+--------+------------+------------+-----------------+---------+--------+--------+ | id | name | sex | hire_date | post | job_description | salary | office | dep_id | +----+-------+--------+------------+------------+-----------------+---------+--------+--------+ | 8 | alice | female | 2018-02-02 | instructor | teach | 7200.00 | 501 | 100 | +----+-------+--------+------------+------------+-----------------+---------+--------+--- select * from employee where name regexp 'yun$'; --找出yun结尾的 +----+---------+------+------------+------+-----------------+--------+--------+--------+ | id | name | sex | hire_date | post | job_description | salary | office | dep_id | +----+---------+------+------------+------+-----------------+--------+--------+--------+ | 9 | tianyun | male | 2018-02-02 | hr | hrcc | 600.00 | 502 | 101 | +----+---------+------+------------+------+-----------------+--------+--------+--------+ select * from employee where name regexp 'm{2}'; --找出m出现两次的 +----+------+--------+------------+------+-----------------+----------+--------+--------+ | id | name | sex | hire_date | post | job_description | salary | office | dep_id | +----+------+--------+------------+------+-----------------+----------+--------+--------+ | 11 | emma | female | 2018-02-06 | sale | salecc | 20000.00 | 503 | 102 | +----+------+--------+------------+------+-----------------+----------+--------+--------+总结:对字符串匹配的方式 WHERE name = 'tom'; //精确查询,记不清的话用下面的这两种模糊查询哦WHERE name LIKE 'to%'; WHERE name REGEXP 'yun$'; 6.2 多表查询 多表连接查询复合条件连接查询子查询准备两张表,employee1和department1,分别插入数据。可以直接复制我的,我们主要学习多表查询,创建表就复制下好嘞。 --employee1表 create table company.employee1( -> emp_id int auto_increment primary key not null, -> emp_name varchar(50), -> age int, -> dept_id int ); insert into employee1(emp_name,age,dept_id) values -> ('tianyun',19,200), -> ('Tom',29,201), -> ('Jack',30,201), -> ('Alice',24,202), -> ('robin',40,200), -> ('natasha',28,204); --department1表 create table company.department1(dept_id int,dept_name varchar(50)); insert into department1 values (200,'hr'), (201,'it'), (202,'sale'), (203,'fd'); 6.2.1 交叉连接(笛卡尔积,不使用任何匹配条件) select employee1.emp_name,employee1.age,employee1.dept_id,department1.dept_id,department1.dept_name from employee1,department1; +----------+------+---------+---------+-----------+ | emp_name | age | dept_id | dept_id | dept_name | +----------+------+---------+---------+-----------+ | tianyun | 19 | 200 | 203 | fd | | tianyun | 19 | 200 | 202 | sale | | tianyun | 19 | 200 | 201 | it | | tianyun | 19 | 200 | 200 | hr | | Tom | 29 | 201 | 203 | fd | | Tom | 29 | 201 | 202 | sale | | Tom | 29 | 201 | 201 | it | | Tom | 29 | 201 | 200 | hr | | Jack | 30 | 201 | 203 | fd | | Jack | 30 | 201 | 202 | sale | | Jack | 30 | 201 | 201 | it | | Jack | 30 | 201 | 200 | hr | | Alice | 24 | 202 | 203 | fd | | Alice | 24 | 202 | 202 | sale | | Alice | 24 | 202 | 201 | it | | Alice | 24 | 202 | 200 | hr | | robin | 40 | 200 | 203 | fd | | robin | 40 | 200 | 202 | sale | | robin | 40 | 200 | 201 | it | | robin | 40 | 200 | 200 | hr | | natasha | 28 | 204 | 203 | fd | | natasha | 28 | 204 | 202 | sale | | natasha | 28 | 204 | 201 | it | | natasha | 28 | 204 | 200 | hr | +----------+------+---------+---------+-----------+ 6.2.2 内连接(只连接匹配的行)比如只找出有部门的员工(部门表没有natasha所在的部门) select emp_name,age,employee1.dept_id,dept_name from employee1,department1 where employee1.dept_id=department1.dept_id; +----------+------+---------+-----------+ | emp_name | age | dept_id | dept_name | +----------+------+---------+-----------+ | tianyun | 19 | 200 | hr | | Tom | 29 | 201 | it | | Jack | 30 | 201 | it | | Alice | 24 | 202 | sale | | robin | 40 | 200 | hr | +----------+------+---------+-----------+ 6.2.3 外连接语法:
(1)外连接(左连接) 例如找出所有员工及其所属的部门,包括没有部门的员工 select emp_name,age,dept_name from employee1 left join department1 on employee1.dept_id=department1.dept_id; +----------+------+-----------+ | emp_name | age | dept_name | +----------+------+-----------+ | tianyun | 19 | hr | | robin | 40 | hr | | Tom | 29 | it | | Jack | 30 | it | | Alice | 24 | sale | | natasha | 28 | NULL | +----------+------+-----------+(2)外连接(右连接) 例如找出所有部门包含的员工,包括空部门 select emp_name,age,dept_name from employee1 right join department1 on employee1.ddept_id=department1.dept_id; +----------+------+-----------+ | emp_name | age | dept_name | +----------+------+-----------+ | tianyun | 19 | hr | | Tom | 29 | it | | Jack | 30 | it | | Alice | 24 | sale | | robin | 40 | hr | | NULL | NULL | fd | +----------+------+-----------+ 6.2.4 子查询 子查询是将一个查询语句嵌套在另一个查询语句中。内层查询语句的查询结果,可以为外层查询语句提供查询条件。子查询中可以包含: IN、NOT IN、ANY、ALL、EXISTS和NOT EXISTS等关键字还可以包含比较运算符: =、!=、>、 where dept_id in (select dept_id from department1); +--------+----------+------+---------+ | emp_id | emp_name | age | dept_id | +--------+----------+------+---------+ | 1 | tianyun | 19 | 200 | | 2 | Tom | 29 | 201 | | 3 | Jack | 30 | 201 | | 4 | Alice | 24 | 202 | | 5 | robin | 40 | 200 | +--------+----------+------+---------+ 5 rows in set (0.00 sec)(2)带比较运算符的子查询 =、!=、>、 .>=、 (select distinct dept_id from employee1 where age >= 25); +---------+-----------+ | dept_id | dept_name | +---------+-----------+ | 201 | it | | 200 | hr | +---------+-----------+ 2 rows in set (0.00 sec) (3)带EXISTS关键字的子查询 EXISTS关字键字表示存在。在使用EXISTS关键字时,内层查询语句不返回查询的记录,而是返回一个真假值。当返回Ture时,外层查询语句将进行查询;当返回值为False时,外层查询语句不进行查询 department表中存在dept_id=203 , Ture select * from employee1 -> where exists (select * from department1 where dept_id=203); +--------+----------+------+---------+ | emp_id | emp_name | age | dept_id | +--------+----------+------+---------+ | 1 | tianyun | 19 | 200 | | 2 | Tom | 29 | 201 | | 3 | Jack | 30 | 201 | | 4 | Alice | 24 | 202 | | 5 | robin | 40 | 200 | | 6 | natasha | 28 | 204 | +--------+----------+------+---------+ 6 rows in set (0.00 sec) --输入部门为205时,不存在,false select * from employee1 where exists (select * from department1 where dept_id=205); Empty set (0.00 sec) 结束语:到现在Linux云计算之mysql运维基础篇就结束啦,后面我还会整理数据库的索引、视图,数据备份,mysql中间件和集群技术等。有兴趣的童鞋可以点赞收藏下,期待我的下一次创作吧。😃
|


【本文地址】
今日新闻 |
推荐新闻 |