修改WSL2内核以支持实时调度和UVC摄像头 |
您所在的位置:网站首页 › 不支持摄像头调用 › 修改WSL2内核以支持实时调度和UVC摄像头 |
修改WSL2内核以支持实时调度和UVC摄像头
|
五一假期窝在家里学习ROS2和实时计算相关的内容,修改了WSL2内核来支持实时调度(RT_PREEMPT补丁)和UVC,写文记录一下过程,也分享给需要的朋友。 WSL2基本介绍与安装WSL2是微软自带的linux开发环境,和NT并行运行在hypervisor上,两者通过网络互相访问。WSL2的好处就不赘述了,直接开干 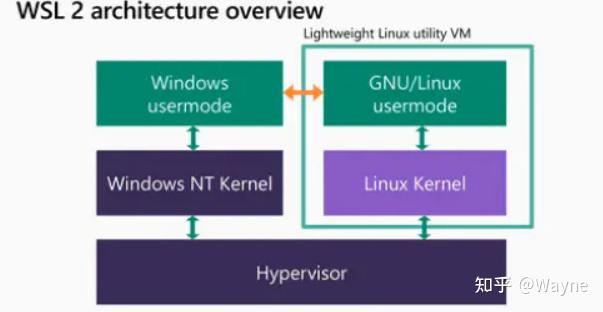 WSL2 安装方法参考微软官网 安装 WSL 内核编译下面开始linux内核编译过程 下载linux内核源码首先建立编译内核的文件夹并进入,下载linux内核源码,解压到当前文件夹。 微软WSL2最新内核是5.10.60版本,由于实时内核没有对应的版本,所以我选择了5.10.100版本的内核 mkdir ~/kernel cd ~/kernel wget linux-x.x.x.tar.gz tar -xzf linux-x.x.x.tar.gz可以选择的国内镜像站 Index of /kernel/linux/kernel/ 下载WSL2内核.config文件.config文件用于指导make,微软已经将WSL2内核调校的很好了,直接从github复制到.config文件 cd ./linux.x.x.xx touch .config vim .configgithub链接:https://github.com/microsoft/WSL2-Linux-Kernel/blob/linux-msft-wsl-5.10.y/Microsoft/config-wsl 实时内核补丁安装回到内核文件夹,下载RT_PREEMPT补丁,解压到内核文件夹 cd .. gunzip patch-xxx.patch.gz进入内核源码目录,安装rt补丁 cd ./linux.x.x.xx patch -p1 < ../patch.xxxxx配置实时内核,输入make menuconfig命令,进入下图页面,更改下面选项 make menuconfig # Enable CONFIG_PREEMPT_RT -> General Setup -> Preemption Model (Fully Preemptible Kernel (Real-Time)) (X) Fully Preemptible Kernel (Real-Time)  # Enable CONFIG_HIGH_RES_TIMERS -> General setup -> Timers subsystem [*] High Resolution Timer Support  # Enable CONFIG_NO_HZ_FULL -> General setup -> Timers subsystem -> Timer tick handling (Full dynticks system (tickless)) (X) Full dynticks system (tickless)  # Set CONFIG_HZ_1000 (note: this is no longer in the General Setup menu, go back twice) -> Processor type and features -> Timer frequency (1000 HZ) (X) 1000 HZ  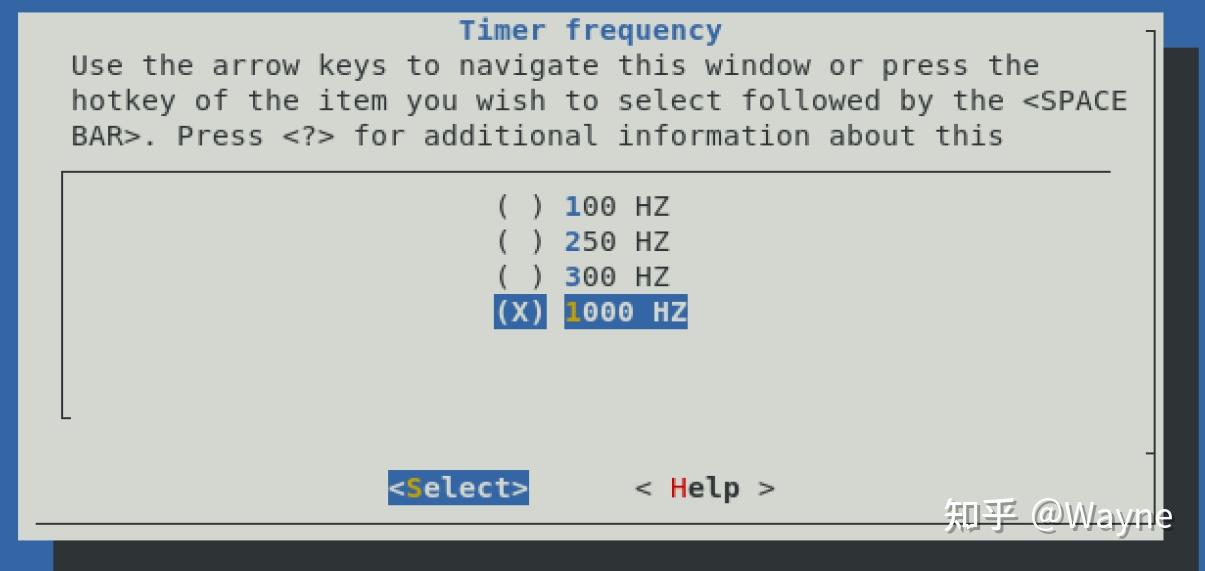 # Set CPU_FREQ_DEFAULT_GOV_PERFORMANCE [=y] -> Power management and ACPI options -> CPU Frequency scaling -> CPU Frequency scaling (CPU_FREQ [=y]) -> Default CPUFreq governor ( [=y]) (X) performance  UVC摄像头驱动 UVC摄像头驱动内核配置界面按下“/”搜索UVC,找到UVC相关的内核设置项  将上面相关的非y选项一个个设置成y就可以了,我这里是设置后的结构 然后保存.config文件  内核编译 内核编译至此,内核就已经配置成功了 如果想要修改内核版本号,可以修改Makefile文件 vim Makefile 如果想修改内核名,可以修改.config文件 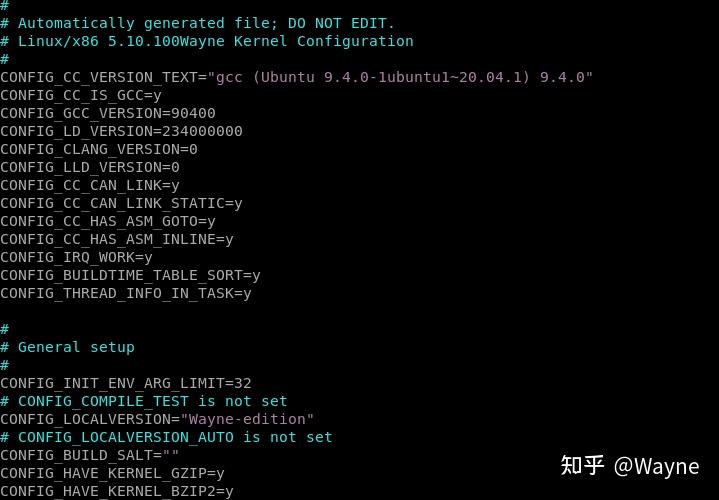 接下来就可以愉快的编译内核了 安装linux内核编译工具 sudo apt upgrade sudo apt update sudo apt-get build-dep linux sudo apt-get install libncurses-dev flex bison openssl libssl-dev dkms libelf-dev libudev-dev libpci-dev libiberty-dev autoconf fakeroot编译模块,这里的 -j4是指用几个CPU核心编译,我只给WSL2分配了4个核,所以这里选4,分配方式可以看下一节的.wslconfig文件 sudo make modules -j4 安装模块 sudo make modules_install 查看是否安装成功 tree /lib/modules 编译内核,看到最后输出内核文件地址就说明成功了 sudo make -j4 更换启动内核 更换启动内核看心情新建一个喜欢的目录存放内核启动镜像,将上面编译好的内核文件复制过去 回到Windows,进入 %USERPROFILE% 目录,新建.wslconfig文件,贴上我的配置文件,重点是第四段 # Settings apply across all Linux distros running on WSL 2 [wsl2] # Limits VM memory to use no more than 4 GB, this can be set as whole numbers using GB or MB memory=12GB # Sets the VM to use two virtual processors processors=4 # Specify a custom Linux kernel to use with your installed distros. The default kernel used can be found at https://github.com/microsoft/WSL2-Linux-Kernel kernel=C:\\Dev\\Kernel\\Kernel # Sets additional kernel parameters, in this case enabling older Linux base images such as Centos 6 kernelCommandLine = vsyscall=emulate # Sets amount of swap storage space to 8GB, default is 25% of available RAM swap=0GB # Sets swapfile path location, default is %USERPROFILE%\AppData\Local\Temp\swap.vhdx swapfile=C:\\temp\\wsl-swap.vhdx # Disable page reporting so WSL retains all allocated memory claimed from Windows and releases none back when free pageReporting=false # Turn off default connection to bind WSL 2 localhost to Windows localhost localhostforwarding=true # Disables nested virtualization nestedVirtualization=false # Turns on output console showing contents of dmesg when opening a WSL 2 distro for debugging debugConsole=false从PowerShell关闭WSL2,等待8秒钟 wsl --shutdown启动WSL2的任意一个发行版,查看linux内核版本,可以看到内核已经换成我们新编译的内核 uname -a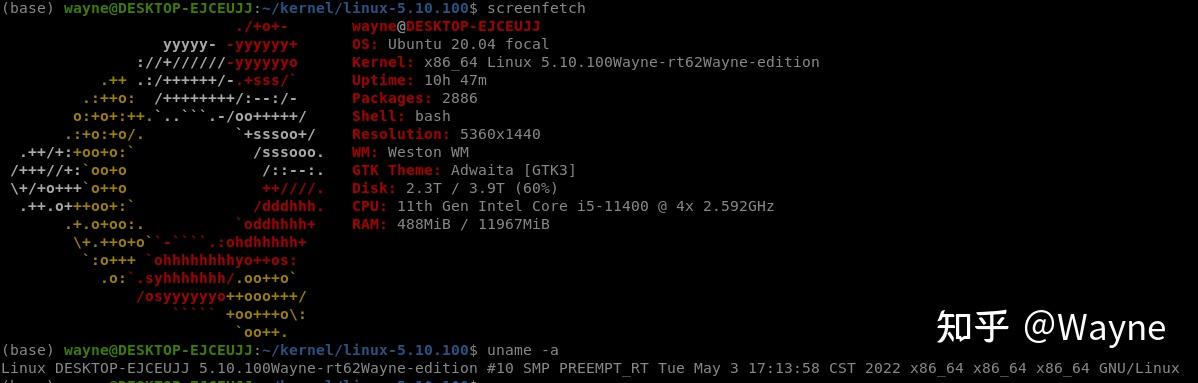 WSL2支持USB设备 WSL2支持USB设备在最新的.config文件已经支持了USB设备,但是linux内核不能直接访问USB总线,需要使用USBIP技术通过IP将USB设备挂载到linux内核  Win11/10安装USBIPD Win11/10安装USBIPD访问链接,下载安装文件: Releases · dorssel/usbipd-win Linux安装USBIP工具sudo apt install linux-tools-5.4.0-77-generic hwdata sudo update-alternatives --install /usr/local/bin/usbip usbip /usr/lib/linux-tools/5.4.0-77-generic/usbip 20连接USB设备win11以管理员身份打开PowerShell usbipd wsl list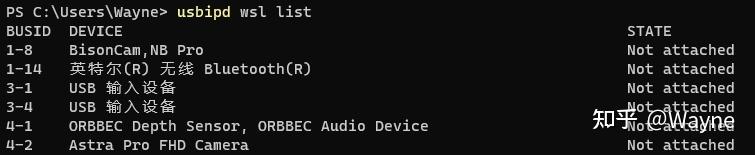 挂载UVC摄像头,如果不成功记得调防火墙 usbipd wsl attach -b 4-2 切换到WSL2 linux,查看USB设备,可以看到USB摄像头 lsusb 确认摄像头连接 确认摄像头连接查看设备下是否有摄像头,确认linux内核可以识别摄像头 ls /dev/video* -al 接下来查看摄像头信息,可以读到,完美 sudo apt install v4l-utils && \ sudo chmod 777 /dev/video0 && \ v4l2-ctl -d /dev/video0 --all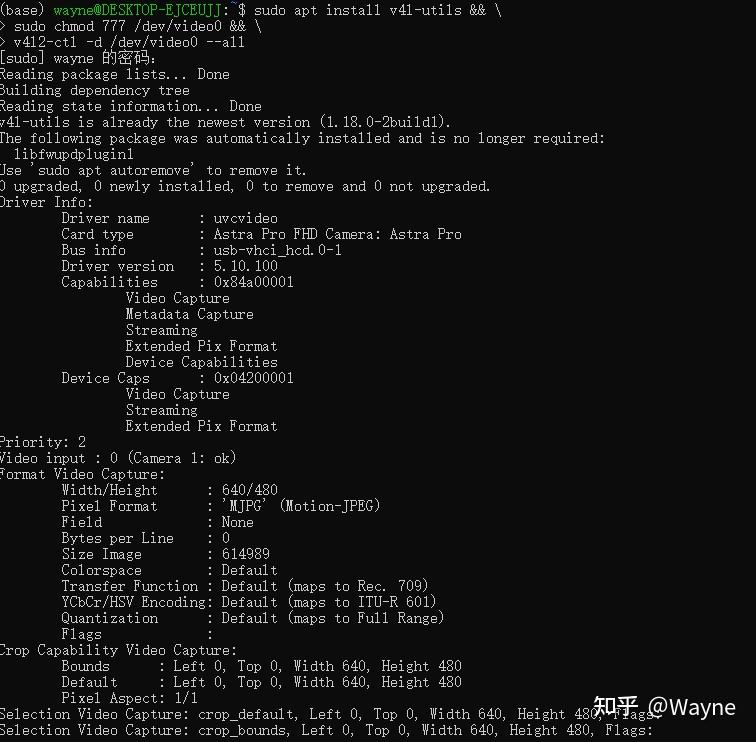 参考文章: 参考文章:安装 WSL https://docs.ros.org/en/galactic/Tutorials/Building-Realtime-rt_preempt-kernel-for-ROS-2.html?highlight=real%20time https://github.com/microsoft/WSL2-Linux-Kernel/blob/linux-msft-wsl-5.10.y/Microsoft/config-wsl 连接 USB 设备 |
【本文地址】
今日新闻 |
推荐新闻 |