WSL2 对外暴露端口 |
您所在的位置:网站首页 › wsl怎么打开 › WSL2 对外暴露端口 |
WSL2 对外暴露端口
|
参考文档 一口气搞定 WSL2 的网络问题从局域网 (LAN) 访问 WSL 2 发行版通过本地网络连接到 WSL2 服务器按照下面的操作步骤进行操作。 1. powershell 支持 sudohttps://github.com/gerardog/gsudo 可以直接下载msi安装:https://github.com/gerardog/gsudo/releases 2. powershell 支持执行脚本官方文档: PowerShell 执行策略 执行下面的命令: Set-ExecutionPolicy -ExecutionPolicy RemoteSigned -Scope CurrentUser 3. 编写便捷脚本在 powershell 中执行 code $profile 使用 vscode 打开配置文件,输入下面的脚本: function setWslNetsh { param ( $Port ) sudo netsh interface portproxy add v4tov4 listenport=$Port connectaddress=localhost connectport=$Port listenaddress=192.168.1.100 protocol=tcp Write-Output "[OK] Port($Port) now is out!" } function unsetWslNetsh { param ( $Port ) sudo netsh interface portproxy delete v4tov4 listenport=$Port listenaddress=192.168.1.100 protocol=tcp Write-Output "[OK] Port($Port) now is not out!" } Set-Alias wsl-netsh-set setWslNetsh Set-Alias wsl-netsh-unset unsetWslNetsh function setFWPort { param ( $Port ) $Port4WSL = "Port4WSL-" + $Port $NetFirewallRule = Get-NetFirewallRule if (-not $NetFirewallRule.DisplayName.Contains($Port4WSL)) { # sudo Remove-NetFireWallRule -DisplayName $Port4WSL sudo New-NetFireWallRule -DisplayName $Port4WSL -Direction Outbound -LocalPort $Port -Action Allow -Protocol TCP sudo New-NetFireWallRule -DisplayName $Port4WSL -Direction Inbound -LocalPort $Port -Action Allow -Protocol TCP Write-Output "[OK] New rule for WSL(Port: $Port)!" } else { Write-Output "[X] Rule for WSL(Port: $Port) exists!" } } function unsetFWPort { param ( $Port ) $Port4WSL = "Port4WSL-" + $Port $NetFirewallRule = Get-NetFirewallRule if (-not $NetFirewallRule.DisplayName.Contains($Port4WSL)) { Write-Output "[X] Rule for WSL(Port: $Port) not exists!" } else { sudo Remove-NetFireWallRule -DisplayName $Port4WSL Write-Output "[OK] Rule for WSL(Port: $Port) removed!" } } Set-Alias fw-port-set setFWPort Set-Alias fw-port-unset unsetFWPort 注意!!!我将 connectaddress 设置为 localhost 而不是 WSL 的 IP 地址,因为默认情况下,转到 localhost 的请求会转发到 WSL。通过这样做,您不需要在每次重新启动计算机时都设置端口转发,因为 WSL 的 IP 地址是动态的。 特别注意: 上面代码中的 listenaddress=192.168.1.100 需要改为你要暴露给外部使用的IP地址(网卡的IP),切记不要使用 0.0.0.0 或者 *,使用这两种方式时,一开始能正常使用,当你WSL2中的服务,如Docker容器关闭后,再次启动的时候就会提示端口已被占用。此时想要解决,需要先从 服务 中关闭下面的 IP Helper 服务:
没有暴露前,WSL的本地服务只能通过localhost和127.0.0.1进行访问,此时你可以通过自己的电脑IP访问,也可以从其他设备访问。 |
 经过验证,当绑定为网卡的具体IP时,容器重启也不会有端口占用的问题。
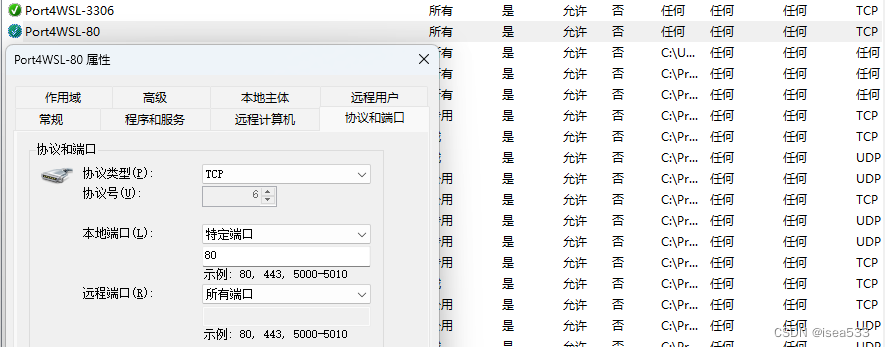
【本文地址】
今日新闻 |
推荐新闻 |