Vue2生命周期详细讲解 |
您所在的位置:网站首页 › vue生命周期以及作用 › Vue2生命周期详细讲解 |
Vue2生命周期详细讲解
|
Vue生命周期
生命周期1.创建数据代理、数据检测beforeCreate()created()
2. 挂载beforeMount()mounted()
3. 更新beforeUpdate()Updated()
4. 销毁beforeDestroy()destroyed()
5. activated 和 deactivatedactivated()deactivated()
6. errorCaptured
完整生命周期图注意事项
生命周期
每个 Vue 实例在被创建时都要经过一系列的初始化过程——例如,需要设置数据监听、编译模板、将实例挂载到 DOM 并在数据变化时更新 DOM 等。同时在这个过程中也会运行一些叫做生命周期钩子(生命周期回调函数、生命周期函数)的函数,这给了用户在不同阶段添加自己的代码的机会。 生命周期函数的名字不可更改,但函数的具体内容是程序员根据需求编写的。 生命周期函数中的this指向是vm 或 组件实例对象。 1.创建数据代理、数据检测
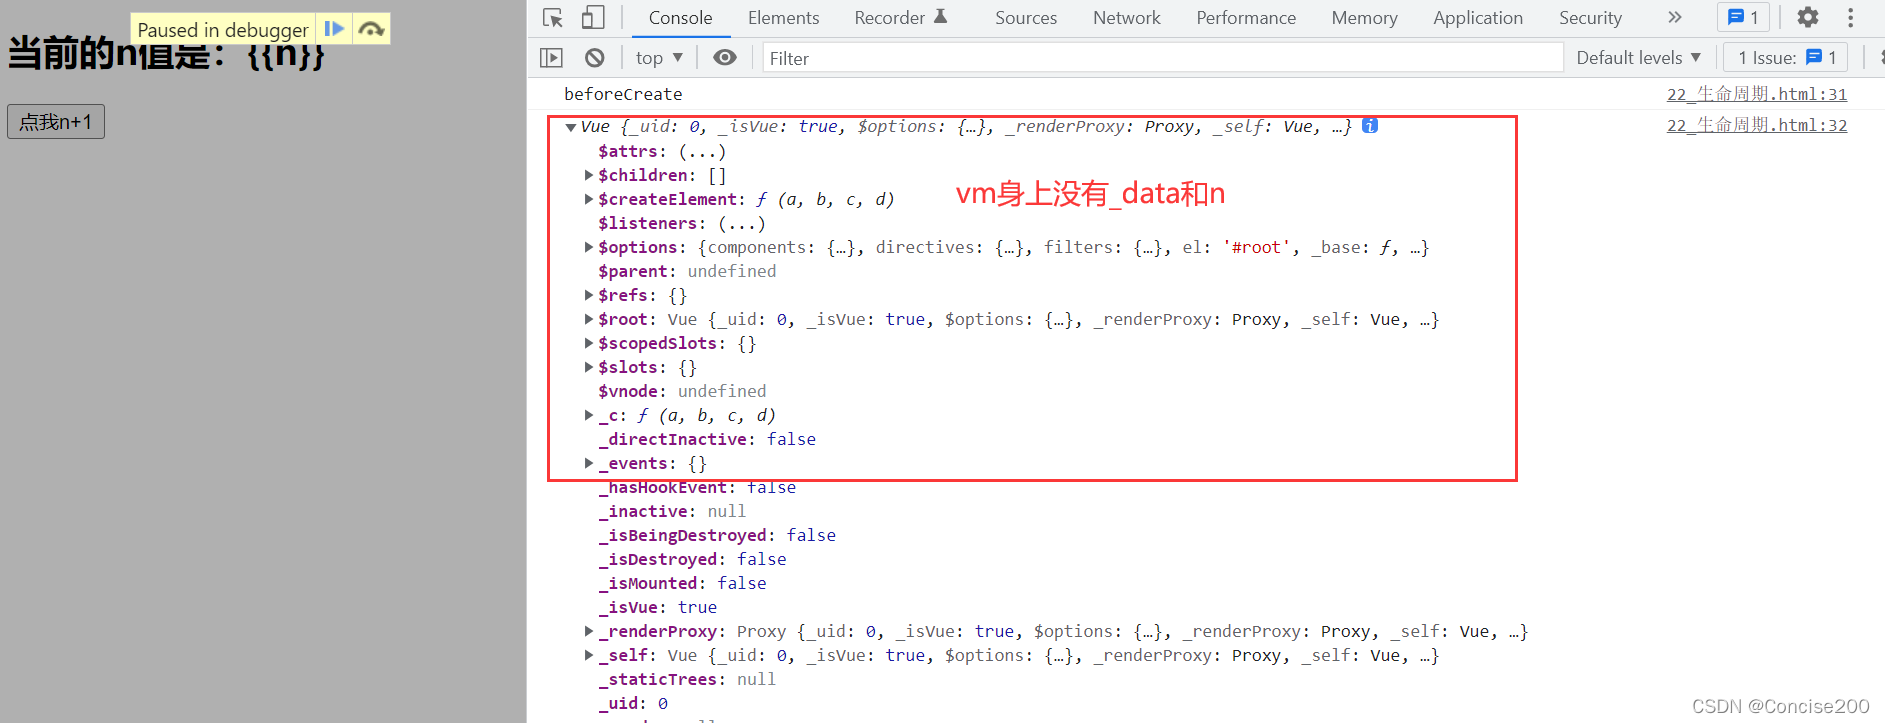
在实例初始化之后,进行数据侦听和事件/侦听器的配置之前同步调用。 此时还没有进行数据代理,数据监测,所有vm身上并没有_data的属性。 DOCTYPE html> 分析生命周期 当前的n值是:{{n}} 点我n+1 Vue.config.productionTip = false //阻止 vue 在启动时生成生产提示。 new Vue({ el:'#root', data:{ n:1 }, methods: { add(){ this.n++ }, }, beforeCreate() { console.log('beforeCreate') console.log(this); // 打断点 debugger; } })
在实例创建完成后被立即同步调用。在这一步中,实例已完成对选项的处理,意味着以下内容已被配置完毕:数据侦听、计算属性、方法、事件/侦听器的回调函数。vm身上也存在_data属性。 new Vue({ el:'#root', data:{ n:1 }, methods: { add(){ this.n++ }, }, beforeCreate() { console.log('beforeCreate') }, created() { console.log('created') console.log(this); debugger; }, })
在挂载开始之前被调用,这时页面中的插值语法都未被解析。该钩子在服务器端渲染期间不被调用。 new Vue({ el:'#root', data:{ n:1 }, methods: { add(){ this.n++ }, }, beforeCreate() { console.log('beforeCreate') }, created() { console.log('created') }, beforeMount() { console.log('beforeMount') console.log(this); debugger; }, })
实例被挂载后调用,页面中的插值语法已经被解析了。该钩子在服务器端渲染期间不被调用。 注意 mounted 不会保证所有的子组件也都被挂载完成。如果你希望等到整个视图都渲染完毕再执行某些操作,可以在 mounted 内部使用 vm.$nextTick。 mounted: function () { this.$nextTick(function () { // 仅在整个视图都被渲染之后才会运行的代码 }) } new Vue({ el:'#root', data:{ n:1 }, methods: { add(){ this.n++ }, }, beforeCreate() { console.log('beforeCreate') }, created() { console.log('created') }, beforeMount() { console.log('beforeMount') }, mounted() { console.log('mounted') console.log(this); debugger; }, })
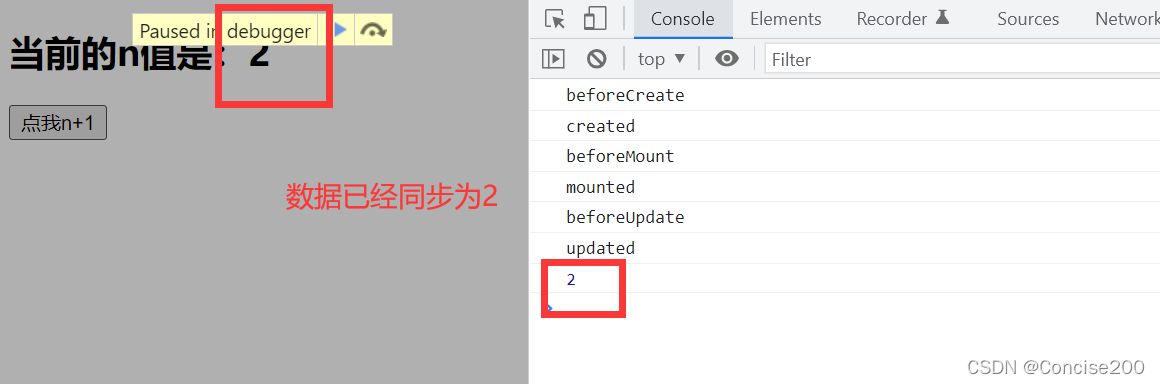
在数据发生改变后,DOM 被更新之前被调用。 该钩子在服务器端渲染期间不被调用,因为只有初次渲染会在服务器端进行。 new Vue({ el:'#root', data:{ n:1 }, methods: { add(){ this.n++ }, }, beforeCreate() { console.log('beforeCreate') }, created() { console.log('created') }, beforeMount() { console.log('beforeMount') }, mounted() { console.log('mounted') }, beforeUpdate() { console.log('beforeUpdate') console.log(this.n); debugger; }, })
在数据更改导致的虚拟 DOM 重新渲染和更新完毕之后被调用。 Updated 不会保证所有的子组件也都被重新渲染完毕。如果你希望等到整个视图都渲染完毕,可以在 updated 里使用 vm.$nextTick. updated: function () { this.$nextTick(function () { // 仅在整个视图都被重新渲染之后才会运行的代码 }) } new Vue({ el:'#root', data:{ n:1 }, methods: { add(){ this.n++ }, }, beforeCreate() { console.log('beforeCreate') }, created() { console.log('created') }, beforeMount() { console.log('beforeMount') }, mounted() { console.log('mounted') }, beforeUpdate() { console.log('beforeUpdate') }, updated() { console.log('updated') console.log(this.n); debugger; }, })
需要调用vm.$destroy()才会销毁(自杀)。而且需要注意,虽然vm被销毁了,但是其解析的页面(工作成果)任然保留。 实例销毁之前调用。在这一步,实例仍然完全可用。 该钩子在服务器端渲染期间不被调用。 DOCTYPE html> 分析生命周期 当前的n值是:{{n}} 点我n+1 点我销毁vm Vue.config.productionTip = false //阻止 vue 在启动时生成生产提示。 new Vue({ el:'#root', data:{ n:1 }, methods: { add(){ console.log('add') this.n++ }, bye(){ console.log('bye') this.$destroy() } }, watch:{ n(){ console.log('n变了') } }, beforeCreate() { console.log('beforeCreate') }, created() { console.log('created') }, beforeMount() { console.log('beforeMount') }, mounted() { console.log('mounted') }, beforeUpdate() { console.log('beforeUpdate') }, updated() { console.log('updated') }, beforeDestroy() { console.log('beforeDestroy') this.add(); console.log(this.n); debugger; }, })
实例销毁后调用。 该钩子被调用后,对应 Vue 实例的所有指令都被解绑,所有的事件监听器被移除,所有的子实例也都被销毁。 该钩子在服务器端渲染期间不被调用。 new Vue({ el:'#root', data:{ n:1 }, methods: { add(){ console.log('add') this.n++ }, bye(){ console.log('bye') this.$destroy() } }, watch:{ n(){ console.log('n变了') } }, beforeCreate() { console.log('beforeCreate') }, created() { console.log('created') }, beforeMount() { console.log('beforeMount') }, mounted() { console.log('mounted') }, beforeUpdate() { console.log('beforeUpdate') }, updated() { console.log('updated') }, beforeDestroy() { console.log('beforeDestroy') }, destroyed() { console.log('destroyed') } })
Vue-router路由组件所独有的两个钩子,用于捕获路由组件的激活状态。 activated()被 keep-alive 缓存的组件激活时调用。该钩子在服务器端渲染期间不被调用。 deactivated()被 keep-alive 缓存的组件失活时调用。 该钩子在服务器端渲染期间不被调用。 6. errorCaptured2.5.0+ 新增,在捕获一个来自后代组件的错误时被调用。此钩子会收到三个参数:错误对象、发生错误的组件实例以及一个包含错误来源信息的字符串。此钩子可以返回 false 以阻止该错误继续向上传播。 类型:(err: Error, vm: Component, info: string) => ?boolean 完整生命周期图
(1)常用的生命周期钩子: mounted: 发送ajax请求、启动定时器、绑定自定义事件、订阅消息等【初始化操作】。beforeDestroy: 清除定时器、解绑自定义事件、取消订阅消息等【收尾工作】。(2)关于销毁Vue实例: 销毁后借助Vue开发者工具看不到任何信息。销毁后自定义事件会失效,但原生DOM事件依然有效。一般不会在beforeDestroy操作数据,因为即便操作数据,也不会再触发更新流程了。 |


【本文地址】
今日新闻 |
推荐新闻 |