python tkinter文本框Text和Entry – 天祺围棋 |
您所在的位置:网站首页 › tkinter清除text › python tkinter文本框Text和Entry – 天祺围棋 |
python tkinter文本框Text和Entry – 天祺围棋
|
python tkinter文本框Text和Entry
#单行文本框Entry #用一个变量绑定textvariable参数 #修改变量的值,自动改变Entry显示内容 strPath = StringVar() Entry(top,textvariable = strPath) strPath.set(‘input your text here’); #多行文本框Text txtResult = Text(top,width=45,height=15) #使用insert函数更新文本 txtResult.insert(tk.INSERT, strResult) 
我们对文本框的主要需求是动态改变文本内容。下面用一个示例说明: #单行文本框Entry #用一个变量绑定textvariable参数 #修改变量的值,自动改变Entry显示内容 strPath = StringVar() Entry(top,textvariable = strPath) strPath.set('input your text here'); #多行文本框Text txtResult = Text(top,width=45,height=15) #使用insert函数更新文本 txtResult.insert(tk.INSERT, strResult)Tkinter教程之Entry篇 #Entry用来输入单行文本 '''1.第一个Entry程序''' from Tkinter import * root = Tk() Entry(root,text = 'input your text here').pack() root.mainloop() #上面的代码目的是创建一个Entry对象,并在Entry上显示'input your text here',运行此代码,并没有看到文本的显示,由此可知与Lable和Button不同,Entry的text属性不可以设置Entry的文本 '''2.在Entry中设定初始值,使用textvariable将变量与Entry绑定''' from Tkinter import * root = Tk() e = StringVar() entry = Entry(root,textvariable = e) e.set('input your text here') entry.pack() root.mainloop() #上面的例子中将变量e与Entry绑定,然后将e的值设置为'input your text here',程序运行时的初始值便设置了。 '''3.设置为只读Entry. Entry的另一个比较有用的属性,设置为只读,不允许用户对它的值改变。 设置state属性为'readonly' ''' from Tkinter import * root = Tk() e = StringVar() entry = Entry(root,textvariable = e) e.set('input your text here') entry.pack() entry['state'] = 'readonly' root.mainloop() #实际上Entry的属性值可以使用的也为normal/active/disabled,'readonly'与disabled一样 '''4.设置为密码输入框 #将Entry作为一个密码输入框来使用,即不显示用户输入的内容值,用特定符号代替。使用用属性 show来指定。 ''' from Tkinter import * root = Tk() e = StringVar() entry = Entry(root,textvariable = e) e.set('input your text here') entry.pack() #使用*来显示输入的内容,如果喜欢可以改为其它字符 entry['show'] = '*' #分别使用*#$显示输入的文本内容 for mask in ['*','#','$']: e = StringVar() entry = Entry(root,textvariable = e) e.set('password') entry.pack() entry['show'] = mask root.mainloop() '''5.验证输入的内容是否符合要求。 使用validate来校验输入的内容 使用validate方法来限制输入的内容 这是一个有问题的例子,无法调用validateText回调函数 ‘''' from Tkinter import * root = Tk() e = StringVar() def validateText(contents): print contents return contents.isalnum() entry = Entry(root,validate = 'key',textvariable = e,validatecommand = validateText) entry.pack() root.mainloop() ''' 文档中说明使用validate来接受的事件,使用validatecommand来确定输入的内容是否合法,但 如何传入参数?没找到相应的说明 ''' #还有其他的属性fg/bg/relief/width/height/justify/state使用方法与Button相同,不再举例。Tkinter教程之Text篇 Text文本组件用于显示和处理多行文本。在Tkinter的所有组件中,Text组件显得异常强大和灵活,它适用于处理多任务,虽然该组件的主要目的是显示多行文本,但它常常被用于作为简单的文本编辑器和网页浏览器使用。 当创建一个Text组件的时候里面是没有内容的。为了给其插入内容,可以使用insert()以及INSERT或END索引号。 1.普通的Text组件 from tkinter import * root = Tk() text1 = Text(root,width=30,height=4) #INSERT索引表示在光标处插入 text1.insert(INSERT,'I Love') #END索引号表示在最后插入 text1.insert(END,' you') text1.pack() mainloop()2.插入Button之后的Text组件 from tkinter import * root = Tk() text1 = Text(root,width=30,height=2) text1.pack() text1.insert(INSERT,'I love you') def show(): print('吆喝,我被点了一下') #text还可以插入按钮 图片等 b1 = Button(text1,text='点我点我',command=show) #在text创建组件的命令 text1.window_create(INSERT,window=b1) mainloop()3.插入图片之后的Text组件 from tkinter import * root = Tk() text1 = Text(root,width=100,height=30) text1.pack() photo = PhotoImage(file='text.gif') def show(): #添加图片用image_create text1.image_create(END,image=photo) b1 = Button(text1,text='点我点我',command=show) #添加插件用window_create text1.window_create(INSERT,window=b1) mainloop()4.Text中的Indexes Indexes(索引)是用来指向Text组件中文本的位置,跟python的序列索引一样,Text的组件索引也是对应实际字符之间的位置。值得注意的是: 行号以1开始 列号以0开始 from tkinter import * root = Tk() text1=Text(root,width=30,height=3) text1.insert(INSERT,'index的练习') #1.2到1.5的范围之间 print(text1.get(1.2,1.5))5.Text中的Marks Marks(标记)通常是嵌入到Text组件文本中的不可见的对象。事实上,Marks是指定字符间的位置,并跟随相应的字符一起移动。Marks有INSERT,CURRENT,和user-defined marks(用户自定义的Marks), 其中,INSERT和CURRENT是Tkinter预定义的特殊Marks,它们是不可能被删除的 INSERT(或insert)用于指定当前插入光标的位置,Tkinter会在该位置绘制一个闪烁的光标(因此并不是所有的Marks都不可见) CURRENT用于指定与鼠标坐标坐标最近最接近的位置,不过,如果你按紧鼠标任何一个按钮,它会直到你松开它才响应 使用mark_set()方法创建和移动Marks 使用mark_unset()方法删除Marks Mark事实上就是索引,用于表示位置 from tkinter import * root = Tk() text1 =Text(root,width=30,height=4) text1.insert(INSERT,'I Love FishC.com') text1.mark_set('here',1.2) #插入是指在前面插入 text1.insert('here','插') text1.pack() mainloop()6.Text中的Tags Tags通常用于改变Text组件中内容的样式和功能,你可以修改文本的字体,尺寸和颜色,另外Tags还允许你将文本、嵌入的组件和图片与键盘相关联,除了user-defined tags(用户自定义的Tags),还有 一个预定义的特殊Tag:SEL from tkinter import * root = Tk() text1 = Text(root,width=30,height=5) text1.pack() text1.insert(INSERT,'I Love FishC.com!') #第一个参数为自定义标签的名字 #第二个参数为设置的起始位置,第三个参数为结束位置 #第四个参数为另一个位置 text1.tag_add('tag1','1.7','1.12','1.14') #用tag_config函数来设置标签的属性 text1.tag_config('tag1',background='yellow',foreground='red') #新的tag会覆盖旧的tag mainloop()7.Tags的事件绑定 Tags还支持事件的绑定,绑定事件使用的是tag_bind()方法,下面代码实现了将文本与鼠标事件进行绑定,当鼠标进入该文本时,鼠标样式切换为‘arrow’形态,离开文本时切换回‘xterm’形态,当触发鼠标‘左键单击操作’事件的时候,使用默认浏览器打开百度。 from tkinter import * import webbrowser root = Tk() text = Text(root,width=30,height=5) text.pack() text.insert(INSERT,"I Love FishC.com!") text.tag_add('link','1.7','1.16') text.tag_config('link',foreground='blue',underline=True) def show_arrow_cursor(event): text.config(cursor='arrow') def show_xterm_cursor(event): text.config(cursor='xterm') def click(event): webbrowser.open('http://www.tianqiweiqi.com') text.tag_bind('link','',show_arrow_cursor) text.tag_bind('link','',show_xterm_cursor) text.tag_bind('link','',click) mainloop()8.使用Text组件中文本的MD5摘要来判断内容是否发生改变 from tkinter import * import hashlib root = Tk() text1 = Text(root,width=30,height=5) text1.pack() text1.insert(INSERT,'I Love FishC.com!') contents = text1.get('1.0',END) def getSig(contents): m=hashlib.md5(contents.encode()) return m.digest() sig=getSig(contents) def check(): contents = text1.get('1.0',END) if sig !=getSig(contents): print('警报,内容发生改变') else: print('风平浪静') Button(root,text="检查",command=check).pack() mainloop()关于Text的组件的相关内容就先介绍到这里,之后会再进行补充。 Python GUI中 text框里实时输出 首先GUI中不同函数的局部变量的问题。发现不同button定义的函数得到的变量无法通用。通过global 函数内的变量可以解决这个问题 def openfiles2(): global s2fname s2fname = filedialog.askopenfilename(title='打开S2文件', filetypes=[('S2out', '*.out'), ('All Files', '*')]) text.insert(tkinter.END, 'S2打开成功\n'+s2fname+'\n') def openfilecgns(): global cgnsfname cgnsfname = filedialog.askopenfilename(title='打开CGNS文件',filetypes=[('CGNSdat', '*.dat'), ('All Files', '*')] ) text.insert(tkinter.END, 'CGNS dat 打开成功\n'+cgnsfname+'\n') def show():-Text文本框的定义和输出定义: text=tkinter.Text(root,width=20,height=20) text.pack(fill=tkinter.X,side=tkinter.BOTTOM )用到fill 可以填充某个方向,这次填充X方向,使得界面更好看。 side可以放置在不同的位置。但是这次用起来很多错误。 以后可以尝试不用import tkinter 可以用from tkinter import * 虽然更危险,但是网上大部分的代码都是这样导出的。更容易参考。 实时更新并查看: # INSERT表示在光标位置插入 text.insert(tkinter.END, 'this Row finished...\n') text.see(tkinter.END) text.update()如果不update就是 等到计算函数计算完之后才可以得到新的insert的数据。用update可以解决这个问题。利用see(END) 解决文本框滚动的问题。自动显示最新的一行信息。类似于各种商业软件求解器。 Entry参数和方法详解 参数: 序号可选项 & 描述1bg输入框背景颜色2bd边框的大小,默认为 2 个像素3cursor光标的形状设定,如arrow, circle, cross, plus 等4font文本字体5exportselection默认情况下,你如果在输入框中选中文本,默认会复制到粘贴板,如果要忽略这个功能刻工艺设置 exportselection=0。6fg文字颜色。值为颜色或为颜色代码,如:’red’,’#ff0000′7highlightcolor文本框高亮边框颜色,当文本框获取焦点时显示8justify显示多行文本的时候,设置不同行之间的对齐方式,可选项包括LEFT, RIGHT, CENTER9relief边框样式,设置控件3D效果,可选的有:FLAT、SUNKEN、RAISED、GROOVE、RIDGE。默认为 FLAT。10selectbackground选中文字的背景颜色11selectborderwidth选中文字的背景边框宽度12selectforeground选中文字的颜色13show指定文本框内容显示为字符,值随意,满足字符即可。如密码可以将值设为 show=”*”14state默认为 state=NORMAL, 文框状态,分为只读和可写,值为:normal/disabled15textvariable文本框的值,是一个StringVar()对象16width文本框宽度17xscrollcommand设置水平方向滚动条,一般在用户输入的文本框内容宽度大于文本框显示的宽度时使用。方法: 序号方法 & 描述1delete ( first, last=None )删除文本框里直接位置值text.delete(10) # 删除索引值为10的值 text.delete(10, 20) # 删除索引值从10到20之前的值 text.delete(0, END) # 删除所有值2get()获取文件框的值3icursor ( index )将光标移动到指定索引位置,只有当文框获取焦点后成立4index ( index )返回指定的索引值5insert ( index, s )向文本框中插入值,index:插入位置,s:插入值6select_adjust ( index )选中指定索引和光标所在位置之前的值7select_clear()清空文本框8select_from ( index )设置光标的位置,通过索引值 index 来设置9select_present()如果有选中,返回 true,否则返回 false。10select_range ( start, end )选中指定索引位置的值,start(包含) 为开始位置,end(不包含) 为结束位置start必须比end小11select_to ( index )选中指定索引与光标之间的值12xview ( index )该方法在文本框链接到水平滚动条上很有用。13xview_scroll ( number, what )用于水平滚动文本框。 what 参数可以是 UNITS, 按字符宽度滚动,或者可以是 PAGES, 按文本框组件块滚动。 number 参数,正数为由左到右滚动,负数为由右到左滚动。Text控件更多用法: Text 控件用来显示多行文本. Tkinter 的 Text 控件很强大, 很灵活, 可以实现很多功能. 虽然这个控件的主要用途是显示多行文本, 但其还可以被用作简单的文本编辑器, 甚至是网页浏览器. Text 控件可以显示网页链接, 图片, HTML页面, 甚至 CSS 样式表. from Tkinter import * root=Tk() text=Text(root,width=100,height=3,fg='red') # insert的第一个参数为索引;第二个为添加的内容 text.insert(1.0,'fgjsdfkjgierjgidfkgjol ') # text.insert(1.0,'uilqwwwwwre ') # text.insert('2.end','\n') text.insert(2.0,'weqrfrfrfrfrfrfrfrf ') text.insert(2.0,'qwrewrrrrrw ') # text.insert(3,'fgjsdfkjgierjgidfkgjol') text.pack() root.mainloop()mark是用来表示在Text中位置的一类符号mark: INSERT/CURRENT/END/SEL_FIRST/SEL_LAST控制添加位置 
使用表达式来增强mark 表达式(expression)可以个性任何的Indexes+ count chars :前移count字符– count chars : 后移+ count字符count lines : 前移– count行count lines : 后移count行 linestart: 移动到行的开始 linesend: 移动到行的结束 wordstart:移动到字的开始wordend:移动到字的结束 from Tkinter import * root = Tk() t = Text() # 向第一行,第一列添加文本0123456789 for i in range(1,10): t.insert(1.0,'0123456789\n') a = 'test_mark' def forwardChars(): # 直接连接字符串 t.mark_set(a,CURRENT + '+ 5 chars') # t.mark_set(a,CURRENT + '+5c') def backwardChars(): # t.mark_set(a,CURRENT + '- 5 chars') t.mark_set(a,CURRENT + '-5c') def forwardLines(): # t.mark_set(a,CURRENT + '+ 5 lines) t.mark_set(a,CURRENT + '+5l') def backwardLines(): # t.mark_set(a,CURRENT + '- 5 lines) t.mark_set(a,CURRENT + '-5l') def lineStart(): # 注意linestart前面的那个空格不可省略 t.mark_set(a,CURRENT + ' linestart') def lineEnd(): # 注意lineend前面的那个空格不可省略 t.mark_set(a,CURRENT + ' lineend') def wordStart(): # 移动到当前字的开始。 t.mark_set(a,CURRENT + ' wordstart') def wordend(): # 移动到当前字的结束 t.mark_set(a,CURRENT + ' wordend') # mark:test_mark默认值为CURRENT t.mark_set(a,CURRENT) Button(root,text = 'forward 5 chars',command = forwardChars).pack(fill = X) Button(root,text = 'backward 5 chars',command = backwardChars).pack(fill = X) Button(root,text = 'forward 5 lines',command = forwardLines).pack(fill = X) Button(root,text = 'backward 5 lines',command = backwardLines).pack(fill = X) Button(root,text = 'line start',command = lineStart).pack(fill = X) Button(root,text = 'line end',command = lineEnd).pack(fill = X) Button(root,text = 'word start',command = lineEnd).pack(fill = X) Button(root,text = 'word end',command = lineEnd).pack(fill = X) # 测试三个位置的不同,CURRENT可以得知是当前光标的位置;mark就表示mark的位置了,INSERT好像一植都在1.0处没有改变。 def insertText(): t.insert(INSERT,'insert') def currentText(): t.insert(CURRENT,'current') def markText(): t.insert(a,'mark') Button(root,text = 'insert jcodeer.cublog.cn',command = insertText).pack(fill = X) Button(root,text = 'current jcodeer.cublog.cn',command = currentText).pack(fill = X) Button(root,text = 'mark jcodeer.cublog.cn',command = markText).pack(fill = X) t.pack() root.mainloop()滑动条移动读取文本: from Tkinter import * root=Tk() S=Scrollbar(root) T=Text(root,height=5,width=50) S.pack(side=RIGHT,fill=Y) T.pack(side=LEFT,fill=Y) S.config(command=T.yview) T.config(yscrollcommand=S.set) quote='T ext widg ets provide advanced capabilities that allow you to edit a multiline text and format the way it has to be displayed, such as chang ing its color and font.\ You can also use eleg ant structures like tabs and marks to locate specific sections of the text, and apply chang es\ to those areas. Moreover, you can embed windows and imag es in the text because this widg et was desig ned to\ handle both plain and formatted text.' T.insert(END,quote) mainloop()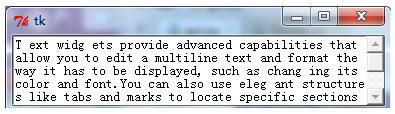
加入图片: from Tkinter import * root=Tk() text1=Text(root,height=20,width=30) photo=PhotoImage(file='D:/temp/1.gif') text1.insert(END,'\n') text1.image_create(END,image=photo) text1.pack(side=LEFT) text2=Text(root,height=20,width=50) scroll=Scrollbar(root,command=text2.yview) text2.tag_config('bold_italics',font=('Arial',12,'bold','italic')) text2.tag_config('big',font=('Verdana',20,'bold')) text2.tag_config('color',foreground='#476042',font=('Tempus Sans ITC',12,'bold')) text2.tag_bind('follow','',lambda e,t=text2:t.insert(END,'NO Pass')) text2.insert(END,'\n Flower\n','big') quto='池中荷花' text2.insert(END,quto,'color') text2.insert(END,'follow-up\n','follow') text2.pack(side=LEFT) scroll.pack(side=RIGHT,fill=Y) root.mainloop()tag _config:您可以使用此方法来配置标记属性,其中包括:对齐(中心、左或右)、选项卡(此属性与文本小部件选项卡的属性具有相同的功能)和下划线(用于下划线标记的文本)。 喜欢围棋和编程。 查看的所有文章 |
【本文地址】
今日新闻 |
推荐新闻 |