ssm+vue前后端分离框架整合(附源码) |
您所在的位置:网站首页 › ssm框架搭建个人博客 › ssm+vue前后端分离框架整合(附源码) |
ssm+vue前后端分离框架整合(附源码)
前言
本文针对Spring+SpringMVC+Mybatis后台开发框架(基于maven构建)与vue前端框架(基于webpack构建)的项目整合进行介绍,对于ssm和vue单独项目的搭建不作为本文的重点,而着重介绍两者之间交互的要点。
SSM
项目结构 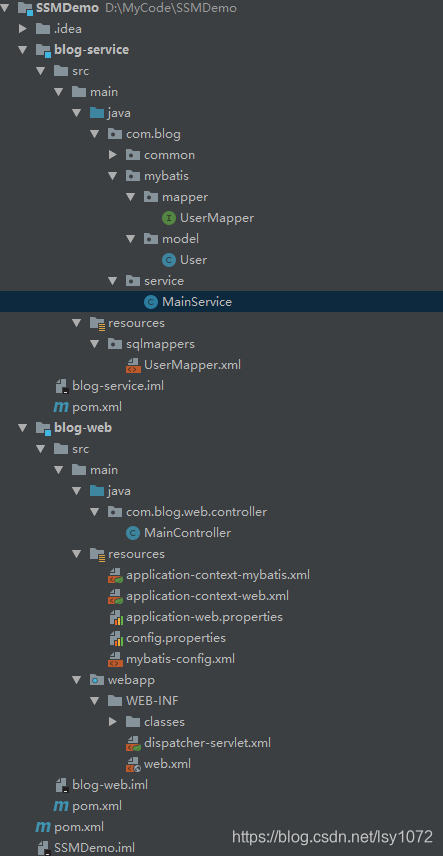 说明 项目有service和web两个子项目组成,web依赖于service,其中web主要是control层内容,service则对应service层,而MyBatis内容放在了service项目中,spring配置文件放在了web项目中。将control层和service层分离成两个子项目,有利于项目的维护。
Vue 说明 项目有service和web两个子项目组成,web依赖于service,其中web主要是control层内容,service则对应service层,而MyBatis内容放在了service项目中,spring配置文件放在了web项目中。将control层和service层分离成两个子项目,有利于项目的维护。
Vue
重点来了,前后端交互无非是前端能够访问后端接口,并且成功接收到后端返回数据。在配置过程中,需要注意两个点,一是配置后端接口地址,二是跨域问题。 配置后端接口地址在vue中,使用的是axios发送ajax请求和后台交互,我们需要main.js中配置axios默认访问地址。 在src/main.js文件中增加 // 引用axios,并设置基础URL为后端服务api地址 var axios = require('axios') axios.defaults.baseURL = "http://127.0.0.1:8080/blog/api" //设置全局,每次ajax请求携带cookies // axios.defaults.withCredentials = true // 将API方法绑定到全局 Vue.prototype.$axios = axios我们配置http://127.0.0.1:8080/blog/api为所有axios的默认请求地址,其中后台端口号为8080,而vue项目默认的端口号也为8080,所有需要修改vue项目中的默认访问端口号,改为8090(不与后台端口冲突即可)。 在config/index.js修改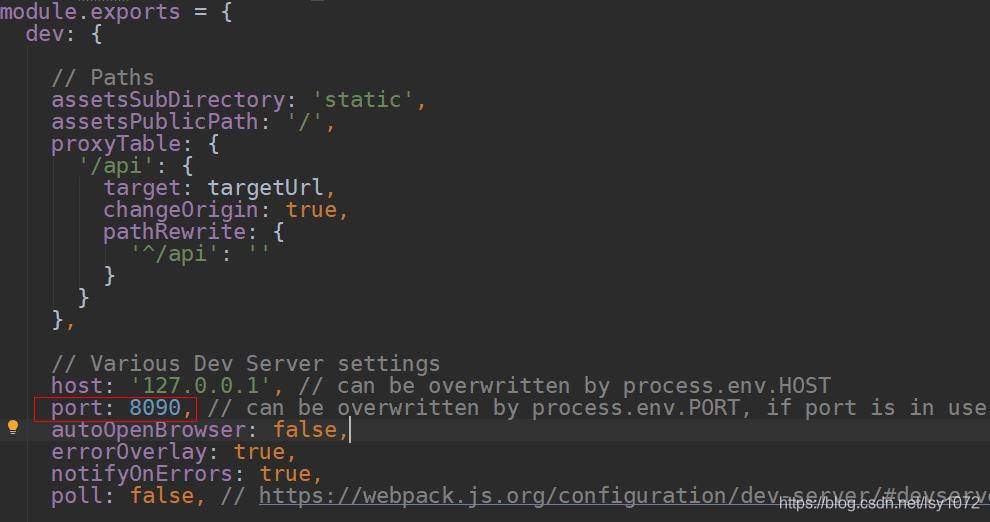 测试代码:
created:function(){
var data = Qs.stringify({});
this.$axios
.post('/check', data)
.then(successResponse => {
this.responseResult = JSON.stringify(successResponse.data)
if (successResponse.data.code === 200) {
this.$notify({
title: '成功',
message: successResponse.data.message,
type: 'success'
});
}else{
this.$notify({
title:"失败",
message:successResponse.data.message,
type:'error'
})
}
})
.catch(failResponse => {})
} 测试代码:
created:function(){
var data = Qs.stringify({});
this.$axios
.post('/check', data)
.then(successResponse => {
this.responseResult = JSON.stringify(successResponse.data)
if (successResponse.data.code === 200) {
this.$notify({
title: '成功',
message: successResponse.data.message,
type: 'success'
});
}else{
this.$notify({
title:"失败",
message:successResponse.data.message,
type:'error'
})
}
})
.catch(failResponse => {})
}
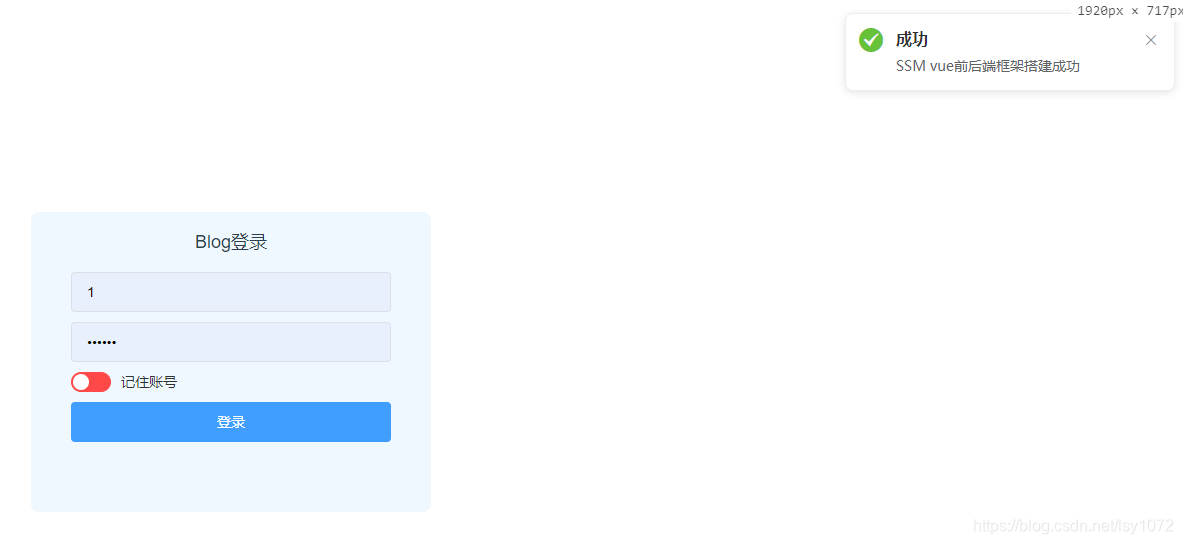
配置好之后,运行项目发现前端仍然是无法访问后台接口,出现以下报错。可以看出是出现跨域问题了。 对于跨域问题,SpringMVC提供了注解@CrossOrigin处理该问题(想知道@CrossOrigin做了什么,请移步Spring @CrossOrigin 注解原理),只需要在对应的接口中增加@CrossOrigin即可(也可通过全局配置的方式设置,这里不做介绍)。 MainController.java: package com.blog.web.controller; import com.blog.common.Result; import org.apache.log4j.Logger; import org.springframework.stereotype.Controller; import org.springframework.web.bind.annotation.CrossOrigin; import org.springframework.web.bind.annotation.RequestMapping; import org.springframework.web.bind.annotation.RequestMethod; import org.springframework.web.bind.annotation.ResponseBody; @Controller @RequestMapping("/blog/api") public class MainController { private Logger logger = Logger.getLogger ( MainController.class ); @RequestMapping ( value = "/check", method = RequestMethod.POST ) @ResponseBody @CrossOrigin public Result check () { logger.info("MainController run"); Result result = new Result(); result.setMessage("SSM vue前后端框架搭建成功"); return result; } }重启项目,返回正确结果。 后台代码:SSMDemo 前端代码:VueDemo |
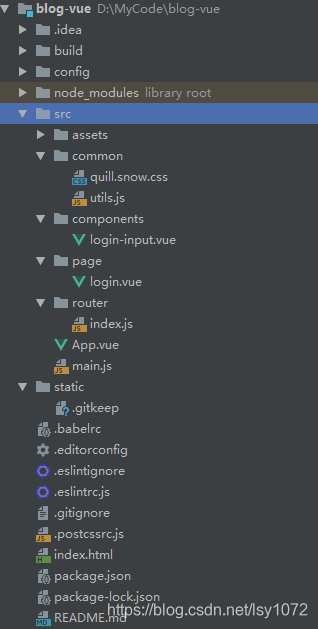 2.可以看出,这个是标准的使用webpack搭建的vue项目
【本文地址】
今日新闻 |
推荐新闻 |