SpringBoot自动扫描管理jar包下Bean |
您所在的位置:网站首页 › spring设置扫描包路径 › SpringBoot自动扫描管理jar包下Bean |
SpringBoot自动扫描管理jar包下Bean
|
目录
一、背景二、准备工作三、启动项目时扫描jar包下bean的三种方式1.@ComponentScan扫描方式2.自定义@Enable****的方式3.自定义xxx-boot-start依赖的方式问题集1.模块之间相互引用成功但打包失败
一、背景
在springboot项目中,我们难免会引入其他的jar包,如果该jar包只是有个简单的工具包倒是很好办直接install到本地然后添加依赖引用就行。那么如果该jar包中有需要在启动项目时也需要被扫描交给spring容器的bean刚刚的方法就无能为力了,那么下面我就给大家讲讲,启动项目时扫描jar包下bean的三种方式 项目地址 https://github.com/ZiXinZhu/runnar_load 二、准备工作
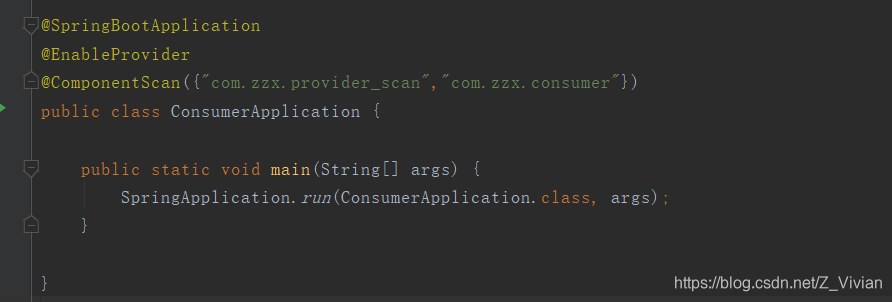
创建一个项目consumer(后面的几个项目我们都会用到这个项目做测试) 1)父pom.xml org.springframework.boot spring-boot-starter-web org.mybatis.spring.boot mybatis-spring-boot-starter 2.1.1 mysql mysql-connector-java 5.1.40 org.projectlombok lombok true org.springframework.boot spring-boot-starter-test test org.junit.vintage junit-vintage-engine2)子pom…xml com.zzx provider 0.0.1-SNAPSHOT com.zzx spring-boot-start-zzx-datasource 0.0.1-SNAPSHOT com.zzx provider_scan 0.0.1-SNAPSHOT3)application.properties server.port=8083 spring.datasource.driver-class-name=com.mysql.jdbc.Driver spring.datasource.url=jdbc:mysql://localhost:3307/hibernate?characterEncoding=utf8&useSSL=false&zeroDateTimeBehavior=convertToNull&autoReconnect=true spring.datasource.username=root spring.datasource.password=123456 zzx.url=jdbc:mysql://localhost:3307/hibernate?characterEncoding=utf8&useSSL=false&zeroDateTimeBehavior=convertToNull&autoReconnect=true zzx.username=root zzx.password=1234564)启动类 import com.zzx.provider.annotation.EnableProvider; import org.springframework.boot.SpringApplication; import org.springframework.boot.autoconfigure.SpringBootApplication; import org.springframework.context.annotation.ComponentScan; @SpringBootApplication @EnableProvider @ComponentScan({"com.zzx.provider_scan","com.zzx.consumer"}) public class ConsumerApplication { public static void main(String[] args) { SpringApplication.run(ConsumerApplication.class, args); } }5)服务层 import com.zzx.common.server.UserServer; import com.zzx.provider.server.EnablePrint; import com.zzx.provider_scan.po.BoyPO; import com.zzx.provider_scan.service.BoyServer; import org.springframework.beans.factory.annotation.Autowired; import org.springframework.stereotype.Service; import java.util.List; @Service public class TestEnablePrintServer { @Autowired(required = false) EnablePrint enablePrint; @Autowired(required = false) UserServer userServer; @Autowired BoyServer boyServer; public void enablePrintTest() { enablePrint.toPrint(); } public void printDataSource(){ userServer.printDataSource(); } public List getAllBoy(){ return boyServer.getAllBoy(); } }6)控制层 import com.zzx.consumer.server.TestEnablePrintServer; import com.zzx.provider_scan.po.BoyPO; import org.springframework.beans.factory.annotation.Autowired; import org.springframework.web.bind.annotation.GetMapping; import org.springframework.web.bind.annotation.RequestMapping; import org.springframework.web.bind.annotation.RestController; import java.util.List; @RestController @RequestMapping("/test") public class TestEnablePrintController { @Autowired private TestEnablePrintServer server; @GetMapping("/enable") public void enablePrintTest(){ server.enablePrintTest(); } @GetMapping("/start") public void printDataSource(){ server.printDataSource(); } @GetMapping("/scan") public List getAllBoy(){ return server.getAllBoy(); } } 三、启动项目时扫描jar包下bean的三种方式 1.@ComponentScan扫描方式篇幅原因provider_scan项目这里我们就不展示出来了 实现方案在consumer的启动类上添加@ComponentScan({“com.zzx.provider_scan”,“com.zzx.consumer”}) 优点我们只需要将provider_scan项目install到本地,然后在consumer中添加依赖,再在主类添加注解便能在启动项目时扫描到该项目 缺点一个字 low 自装逼的大牛们都不会用这种方式,而且用这个注解扫描时自己的项目就不会被扫描到,所以要把自己项目的包路径写进来所以上面扫描了两个路径。 2.自定义@Enable****的方式 实现方案1)先写一个配置类然后在配置类上面添加注解扫描当前项目的所有路径 @ComponentScan("com.zzx.provider") @Component public class EnableConfig { }2)写一个enable****的注解然后把上面的配置类@import进来 @Target({ElementType.TYPE}) @Retention(RetentionPolicy.RUNTIME) @Documented @Import(EnableConfig.class) public @interface EnableProvider { }3)我们使用时需要将项目install到本地,接着在Consumer项目中添加依赖,最后在启动类上添加@EnableProvider注解便可以在项目启动时扫描到该包了 用注解的方式扫描jar包,需要用哪个包就扫描哪一个包不容易引起冲突和遗漏 缺点比起最后一种方式,过程稍微繁琐 3.自定义xxx-boot-start依赖的方式 实现方案 创建spring-boot-satart-zzx-datasource项目作为jar依赖包1)我们需要写一个配置类Properties.jar,获取配置信息 @Data @ConfigurationProperties(prefix = "zzx") public class Properties { private String url; private String password; private String username; }2)创建一个bean装配配置信息并在该类上加@ComponentScan注解扫描整个项目 import lombok.extern.slf4j.Slf4j; import org.springframework.beans.factory.annotation.Autowired; import org.springframework.boot.autoconfigure.jdbc.DataSourceProperties; import org.springframework.boot.context.properties.EnableConfigurationProperties; import org.springframework.context.annotation.Bean; import org.springframework.context.annotation.ComponentScan; import org.springframework.context.annotation.Configuration; @Configuration @EnableConfigurationProperties(Properties.class) @ComponentScan("com.zzx.common") @Slf4j public class DataSourceConfiguration { @Autowired Properties properties; @Autowired DataSourceProperties dataSourceProperties; @Bean public void assembleBean() { log.info("密码:"+properties.getPassword()); dataSourceProperties.setUrl(properties.getUrl()); dataSourceProperties.setPassword(properties.getPassword()); dataSourceProperties.setUsername(properties.getUsername()); log.info("数据库配置完毕!"); } }3)在resources下新建META-INF文件在该文件夹下创建spring.factories文件用于扫描DataSourceConfiguration 配置类 org.springframework.boot.autoconfigure.EnableAutoConfiguration=com.zzx.common.config.DataSourceConfiguration
4)使用时先将spring-boot-satart-zzx-datasource项目install到本地,然后在consumer项目中添加依赖项目启动时边将该jar包中的bean也扫描到了项目中 com.zzx spring-boot-start-zzx-datasource 0.0.1-SNAPSHOT5)启动项目前别忘了在consumer项目的application.properties中添加spring-boot-satart-zzx-datasource包需要的配置 如下: zzx.url=jdbc:mysql://localhost:3307/hibernate?characterEncoding=utf8&useSSL=false&zeroDateTimeBehavior=convertToNull&autoReconnect=true zzx.username=root zzx.password=123456 优点方便,实用最重要的是,装逼! 缺点新手可能用起来有点难度 问题集 1.模块之间相互引用成功但打包失败**场景:**A模块和B模块在同一个父模块下,A模块引用B模块中的VO类,通常我们在A中加入B的依赖就可以完成引用,但是打包时却报错找不到B模块中的VO类! 解决方案: 在pom中修改配置,修改配置前: org.springframework.boot spring-boot-maven-plugin修改配置后: org.springframework.boot spring-boot-maven-plugin exec原因: spring-boot工程打包编译时,会生成两种jar包,一种是普通的jar,另一种是可执行jar。默认情况下,这两种jar的名称相同,在不做配置的情况下,普通的jar先生成,可执行jar后生成,所以可执行jar会覆盖普通的jar。 |


【本文地址】
今日新闻 |
推荐新闻 |