Spring Bean的几种定义方式 |
您所在的位置:网站首页 › spring的几种配置方式 › Spring Bean的几种定义方式 |
Spring Bean的几种定义方式
|
相信学习过Spring以及Spring Boot的同学,都知道Spring框架最大的特点就是:只需要我们定义好对象及其之间的依赖关系,框架就会自动地帮我们创建这些对象,由Spring框架创建的对象都称之为Spring Bean。 无论是现在的Spring Boot开发,还是稍微“传统”一点的Spring框架开发,我们都离不开对Spring Bean的定义和操作等等。 那么我们如何去定义一个Bean及其之间的依赖关系呢? 这篇文章主要是对常用的Spring Bean的定义方式做一个总结,复习一下Spring框架中,定义Bean的几种方式,也可以作为初学者的参考。 本文使用Spring 6.x版本,Java 17作为示例,首先在项目中加入如下依赖: xml复制代码 org.springframework spring-context 6.0.9Spring 5.x版本在定义Bean的方式上也是几乎一样的。 1,基于XML的定义方式这是一种稍微有些“传统”的定义方式了!不过在部分项目以及框架配置中,还是需要使用这种方式定义Spring Bean的,这里进行总结。 这里先在工程的resources目录下(classpath的根路径)创建一个beans.xml文件,编写我们定义的Bean,如下: xml复制代码 (1) 接口 + 实现类例如我们的服务逻辑层中,常常是“接口 + 实现类”的形式,这样定义Bean并不是很难。 例如我这里有接口MessageService: java复制代码package com.gitee.swsk33.xmlbased.service; // 接口+实现类定义Bean public interface MessageService { void print(); }对应实现类MessageServiceImpl: java复制代码package com.gitee.swsk33.xmlbased.service.impl; import com.gitee.swsk33.xmlbased.service.MessageService; public class MessageServiceImpl implements MessageService { @Override public void print() { System.out.println("Hello Spring!"); } }定义好了类,我们就需要编写XML了!在beans.xml文件中定义这个类型的Bean的id等等,这样Spring框架启动时,就可以根据我们定义的Bean生成对应类型对象。 xml复制代码上述定义的Bean,id属性表示这个Bean的名称,需要全局唯一,class属性表示这个Bean的类型,这里要写实现类的全限定名,而非接口。 然后在主类中创建IoC容器对象,并获取Bean试一试: java复制代码package com.gitee.swsk33.xmlbased; import com.gitee.swsk33.xmlbased.service.MessageService; import org.springframework.context.ApplicationContext; import org.springframework.context.support.ClassPathXmlApplicationContext; public class Main { public static void main(String[] args) { // 读取xml文件创建IoC容器实例 ApplicationContext context = new ClassPathXmlApplicationContext("/beans.xml"); // 获取MessageService对象 MessageService messageService = context.getBean("messageService", MessageService.class); // 然后就可以使用了! messageService.print(); } }
可见我们没有手动去new对象,而是通过XML文件定义好这个对象,说明其类型,定义id,Spring框架启动时就自动帮我们创建好了!而无需我们去手动创建对象。 ApplicationContext类型对象就代表Spring框架中的IoC容器,而ClassPathXmlApplicationContext是其实现类,用于从classpath加载XML文件读取Bean的定义并创建Bean。除此之外还有FileSystemXmlApplicationContext,是用于从文件系统中加载XML文件。两者都是通过加载XML文件的方式以创建Bean,只是一个从类路径读取而另一个是从文件系统。 (2) 依赖其它Bean的类在服务层中,有可能一个服务需要调用另一个服务,这通常就是一个Bean依赖另一个Bean的情况。 传统情况下我们手动创建对象,并手动进行依赖注入是很麻烦的,因此通过Spring框架就能够解决这个问题。 例如我这里有SendService接口: java复制代码package com.gitee.swsk33.xmlbased.service; // 依赖其它类的类作为Bean public interface SendService { void send(); }其实现类SendServiceImpl: java复制代码package com.gitee.swsk33.xmlbased.service.impl; import com.gitee.swsk33.xmlbased.service.MessageService; import com.gitee.swsk33.xmlbased.service.SendService; import lombok.Data; @Data public class SendServiceImpl implements SendService { // 本类依赖MessageService类型对象,在此设定为本类字段以调用 private MessageService messageService; @Override public void send() { System.out.print("调用MessageService:"); messageService.print(); } }可见SendServiceImpl中有MessageService类型成员变量(字段),这说明SendService类型对象是依赖于MessageService的。 现在在beans.xml文件中定义这个Bean并指定好依赖关系即可: xml复制代码可见定义好两个Bean之后,在名为sendService的Bean中我们定义了property节点,该节点用于设置Bean的属性值。 property节点中: name 表示要设置的字段名,这里就要给这个Bean的messageService字段(也就是上述SendServiceImpl类中的)设定值ref 引用其他Bean并设定为该属性值,通过指定其他Bean的ID,这里就是使用名为messageService的Bean,设定到对应字段值上(上述SendServiceImpl类中的)上述例子中,我们可以看到SendService要调用MessageService,因此在SendServiceImpl中定义了MessageService类型的字段,字段名是messageService,这里就可以理解为,SendService类型的Bean是依赖一个MessageService类型的Bean的,也就是说,名为messageService的Bean是名为sendService的Bean的依赖。 那么上述在XML文件中,在名为sendService的Bean中设定了属性,属性值引用了messageService,这就指定了两者的依赖,框架启动时会自动帮我们完成依赖注入。 现在,在主类测试一下: java复制代码package com.gitee.swsk33.xmlbased; import com.gitee.swsk33.xmlbased.service.MessageService; import com.gitee.swsk33.xmlbased.service.SendService; import org.springframework.context.ApplicationContext; import org.springframework.context.support.ClassPathXmlApplicationContext; public class Main { public static void main(String[] args) { // 读取xml文件创建IoC容器实例 ApplicationContext context = new ClassPathXmlApplicationContext("/beans.xml"); // 获取MessageService对象 MessageService messageService = context.getBean("messageService", MessageService.class); // 然后就可以使用了! messageService.print(); // 获取SendService对象 SendService sendService = context.getBean("sendService", SendService.class); // 调用 sendService.send(); } }
可见在此,我们使用XML的方式定义好依赖关系后,Spring框架就帮我们自动创建对象并完成了依赖注入了!我们从IoC容器中取出即可。 (3) 单个类作为Bean这就比较简单了,这里以一个POJO类为例: java复制代码package com.gitee.swsk33.xmlbased.model; import lombok.Data; // 单个类用于生成Bean @Data public class Cat { private int id; private String name; }这里使用了Lombok注解省略了getter和setter方法,平时是不能缺少的。 然后在beans.xml文件中定义: xml复制代码可见这里定义了一个Cat类型的Bean名为cat,其中也使用了property节点设定了这个Bean中属性的值,只不过这里property节点中通过value定义值,这是因为这个Bean中属性都是字面值(基本数据类型或者字符串,常量),而不依赖于别的Bean。 在主类读取XML并取出Bean试试: java复制代码package com.gitee.swsk33.xmlbased; import com.gitee.swsk33.xmlbased.model.Cat; import org.springframework.context.ApplicationContext; import org.springframework.context.support.ClassPathXmlApplicationContext; public class Main { public static void main(String[] args) { // 读取xml文件创建IoC容器实例 ApplicationContext context = new ClassPathXmlApplicationContext("/beans.xml"); // 获取cat对象 Cat cat = context.getBean("cat", Cat.class); // 打印 System.out.println(cat); } }
可见我们成功地取出了这个Bean。 2,基于注解的定义方式可见基于XML的定义方式在类比较多的时候,或者依赖复杂的时候,是比较繁琐的,因此现在更加流行使用基于注解的定义方式。 (1) 接口 + 实现类同样地,我这里有接口MessageService: java复制代码package com.gitee.swsk33.annotationbased.service; import org.springframework.stereotype.Service; // 接口+实现类定义Bean @Service public interface MessageService { void print(); }其实现类是MessageServiceImpl: java复制代码package com.gitee.swsk33.annotationbased.service.impl; import com.gitee.swsk33.annotationbased.service.MessageService; import org.springframework.stereotype.Component; @Component public class MessageServiceImpl implements MessageService { @Override public void print() { System.out.println("Hello Spring!"); } }可见接口上标注了注解@Service,实现类上标注了@Component,这些注解就表示这个类是要被用于创建Bean的类,Spring框架启动时,就会去扫描标注了这些注解的类,并将其实例化为Bean。 在Spring中,还有下列注解用于标识类以实现上述作用: Component 是通用的Bean注解Service 表示这个类是服务逻辑Controller 表示这个类是用于Web的Repository 作用于持久化相关Configuration 表示这个类是用于配置的事实上,Service、Controller等等注解,都是基于Component注解实现的,其本质一样,之所以名字不一样是为了让我们好区分不同的类型的Bean,增加代码可读性和可维护性。 好了,现在在主类测试一下: java复制代码package com.gitee.swsk33.annotationbased; import com.gitee.swsk33.annotationbased.service.MessageService; import org.springframework.context.ApplicationContext; import org.springframework.context.annotation.AnnotationConfigApplicationContext; import org.springframework.context.annotation.ComponentScan; // 指定Main类为扫描起点配置类 @ComponentScan public class Main { public static void main(String[] args) { // 以Main配置类作为起点,向下扫描相关Bean注解的类并初始化为Bean ApplicationContext context = new AnnotationConfigApplicationContext(Main.class); // 获取MessageService对象 MessageService messageService = context.getBean(MessageService.class); // 然后就可以使用了! messageService.print(); } }
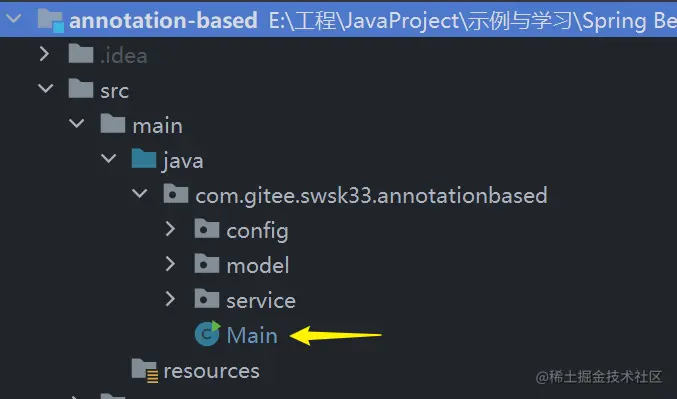
这里也可见主类上标注了@ComponentScan注解,这个注解用于标注Bean的扫描起点,这里标注了Main类为Bean的扫描起点,因此Spring框架启动时,就会去扫描Main类所在的包以及其所有子包下的标注了相关Bean注解(@Component、@Service等等)的类并创建Bean,最后注册到IoC容器中去。 也因此我的Main类放在最顶层位置:
同样地,AnnotationConfigApplicationContext的构造函数就需要我们传入Bean的扫描起点的类。 上述例子中有接口MessageService及其实现类MessageServiceImpl,并且分别标注了@Service和@Component,那么你可以理解为,Spring框架在启动时帮你完成了下列操作: java复制代码MessageService bean = new MessageServiceImpl();这种情况下创建的Bean的名字默认是接口类名的小驼峰形式,例如上述创建的Bean名字为messageService,如果想自定义Bean的名字,给@Service注解以字符串形式传入默认参数即可。 当然了,Spring框架是借助反射完成Bean对象的创建的,这里只是帮助大家理解。 (2) 单个类单个类定义为Bean,你只需要使用@Component注解即可: java复制代码package com.gitee.swsk33.annotationbased.service; import org.springframework.stereotype.Component; // 单个类用于定义Bean @Component public class ExampleService { public void print() { System.out.println("Hello Spring Example!"); } }主类: java复制代码package com.gitee.swsk33.annotationbased; import com.gitee.swsk33.annotationbased.service.ExampleService; import org.springframework.context.ApplicationContext; import org.springframework.context.annotation.AnnotationConfigApplicationContext; import org.springframework.context.annotation.ComponentScan; // 指定Main类为扫描起点配置类 @ComponentScan public class Main { public static void main(String[] args) { // 以Main配置类作为起点,向下扫描相关Bean注解的类并初始化为Bean ApplicationContext context = new AnnotationConfigApplicationContext(Main.class); // 获取ExampleService对象 ExampleService exampleService = context.getBean(ExampleService.class); // 调用 exampleService.print(); } }
我们通常借助自动装配注解@Autowired或者@Resource即可。 例如我有接口SendService: java复制代码package com.gitee.swsk33.annotationbased.service; import org.springframework.stereotype.Service; // 依赖其它类的类作为Bean @Service public interface SendService { void send(); }其实现类SendServiceImpl: java复制代码package com.gitee.swsk33.annotationbased.service.impl; import com.gitee.swsk33.annotationbased.service.MessageService; import com.gitee.swsk33.annotationbased.service.SendService; import org.springframework.beans.factory.annotation.Autowired; import org.springframework.stereotype.Component; @Component public class SendServiceImpl implements SendService { // 本类依赖MessageService类型对象,在此设定为本类字段以调用 // 在基于注解的Bean定义中,使用自动装配即可 @Autowired private MessageService messageService; @Override public void send() { System.out.print("调用MessageService:"); messageService.print(); } }在主类中测试: java复制代码package com.gitee.swsk33.annotationbased; import com.gitee.swsk33.annotationbased.service.SendService; import org.springframework.context.ApplicationContext; import org.springframework.context.annotation.AnnotationConfigApplicationContext; import org.springframework.context.annotation.ComponentScan; // 指定Main类为扫描起点配置类 @ComponentScan public class Main { public static void main(String[] args) { // 以Main配置类作为起点,向下扫描相关Bean注解的类并初始化为Bean ApplicationContext context = new AnnotationConfigApplicationContext(Main.class); // 获取SendService对象 SendService sendService = context.getBean(SendService.class); // 调用 sendService.send(); } }
可见SendServiceImpl中有类型为MessageService的字段,在该类中需要去调用,我们只是定义了这个字段但是没有给其赋值,而是给它标注了@Autowired注解,这样在Spring框架启动时,扫描到@Autowired注解标注的字段,就会去IoC容器中找来这个字段类型的Bean并自动设定上去,这就是自动装配的过程。 可见在基于注解的定义方式中,@Autowired注解定义了各个类之间的依赖关系。 (4) 使用@Bean注解的方法生成Bean这种方式有点“手动生成”Bean的味道,常常在定义配置类型的Bean使用。 首先定义一个POJO类: java复制代码package com.gitee.swsk33.annotationbased.model; import lombok.Data; @Data public class Cat { private int id; private String name; }然后定义一个配置类: java复制代码package com.gitee.swsk33.annotationbased.config; import com.gitee.swsk33.annotationbased.model.Cat; import org.springframework.context.annotation.Bean; import org.springframework.context.annotation.Configuration; // 配置类,在其中可以手动创建对象并将其作为Bean注册到IoC容器 @Configuration public class BeanConfig { /** * 自定义一个Cat对象并返回,返回的对象会被作为Bean注册到IoC容器中 * 默认情况下,这个Bean的名字就是方法名cat,也可以在@Bean注解中传入参数指定bean的名字 */ @Bean public Cat cat() { Cat cat = new Cat(); cat.setId(1); cat.setName("柿饼"); return cat; } }可见,配置类使用@Configuration注解标注,这个注解也是基于@Component的。 其中有方法cat并标注了@Bean,那么这个方法在Spring框架启动时会被自动运行,并将其返回的对象放入IoC容器中注册为Bean。 需要注意的是,@Bean注解也只能在标注了相关的Bean注解(@Service、@Component等等)的类中使用。 现在在主类测试一下: java复制代码package com.gitee.swsk33.annotationbased; import com.gitee.swsk33.annotationbased.model.Cat; import org.springframework.context.ApplicationContext; import org.springframework.context.annotation.AnnotationConfigApplicationContext; import org.springframework.context.annotation.ComponentScan; // 指定Main类为扫描起点配置类 @ComponentScan public class Main { public static void main(String[] args) { // 以Main配置类作为起点,向下扫描相关Bean注解的类并初始化为Bean ApplicationContext context = new AnnotationConfigApplicationContext(Main.class); // 获取Bean:cat Cat cat = context.getBean("cat", Cat.class); // 打印 System.out.println(cat); } }
事实上,标注了@Bean的方法是可以传参的,例如: java复制代码package com.gitee.swsk33.annotationbased.config; import com.gitee.swsk33.annotationbased.model.Cat; import org.springframework.context.annotation.Bean; import org.springframework.context.annotation.Configuration; // 配置类,在其中可以手动创建对象并将其作为Bean注册到IoC容器 @Configuration public class BeanConfig { /** * 自定义一个Cat对象并返回,返回的对象会被作为Bean注册到IoC容器中 * 默认情况下,这个Bean的名字就是方法名cat,也可以在@Bean注解中传入参数指定bean的名字 */ @Bean public Cat cat() { Cat cat = new Cat(); cat.setId(1); cat.setName("柿饼"); return cat; } /** * 带参数的@Bean方法 * * @param cat 这里有个参数,形参名为cat,那么Spring框架启动时,就会从IoC容器中找到名为cat的bean作为这个参数传入该函数并运行 */ @Bean public Cat catTwo(Cat cat) { Cat catTwo = new Cat(); catTwo.setId(2); catTwo.setName(cat.getName() + "2"); return catTwo; } }可见上述catTwo方法,有个参数名为cat,那么Spring框架启动时,就会从IoC容器中找到名为cat的Bean作为这个参数传入该函数并运行。 在主类测试一下: java复制代码package com.gitee.swsk33.annotationbased; import com.gitee.swsk33.annotationbased.model.Cat; import org.springframework.context.ApplicationContext; import org.springframework.context.annotation.AnnotationConfigApplicationContext; import org.springframework.context.annotation.ComponentScan; // 指定Main类为扫描起点配置类 @ComponentScan public class Main { public static void main(String[] args) { // 以Main配置类作为起点,向下扫描相关Bean注解的类并初始化为Bean ApplicationContext context = new AnnotationConfigApplicationContext(Main.class); // 获取Bean:cat Cat cat = context.getBean("cat", Cat.class); // 打印 System.out.println(cat); // 获取Bean:catTwo Cat catTwo = context.getBean("catTwo", Cat.class); System.out.println(catTwo); } }
这里我们介绍了几种常见场景下定义Bean的方式,主要分为通过XML文件定义以及注解定义这两大方式。 对于XML文件定义,大家要明白XML文件中各个节点及其属性的作用。 对于注解方式,大家要明白框架会扫描哪些类并实例化为Bean?从哪里开始扫描?自动装配的方式以及@Bean的作用。 |


【本文地址】
今日新闻 |
推荐新闻 |