SpringBoot开发流程 |
您所在的位置:网站首页 › springboot项目搭建流程 › SpringBoot开发流程 |
SpringBoot开发流程
|
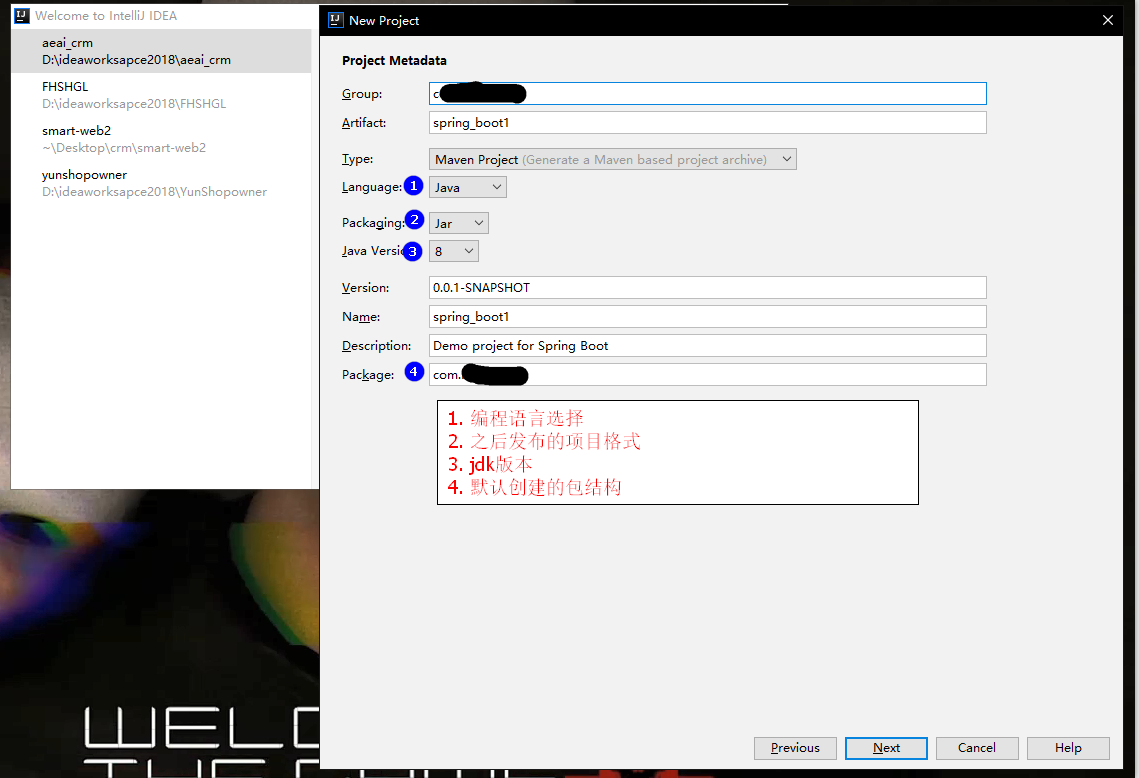
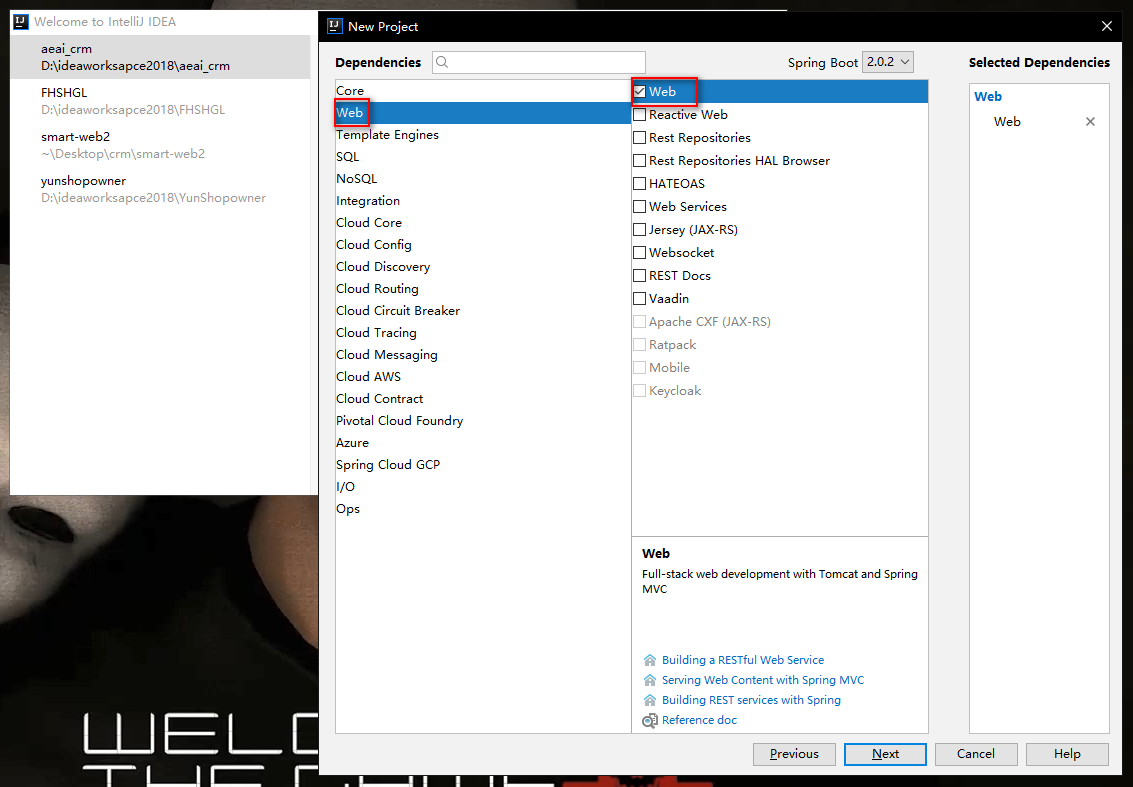
一、 maven创建SpringBoot项目
注意: jdk必须1.8
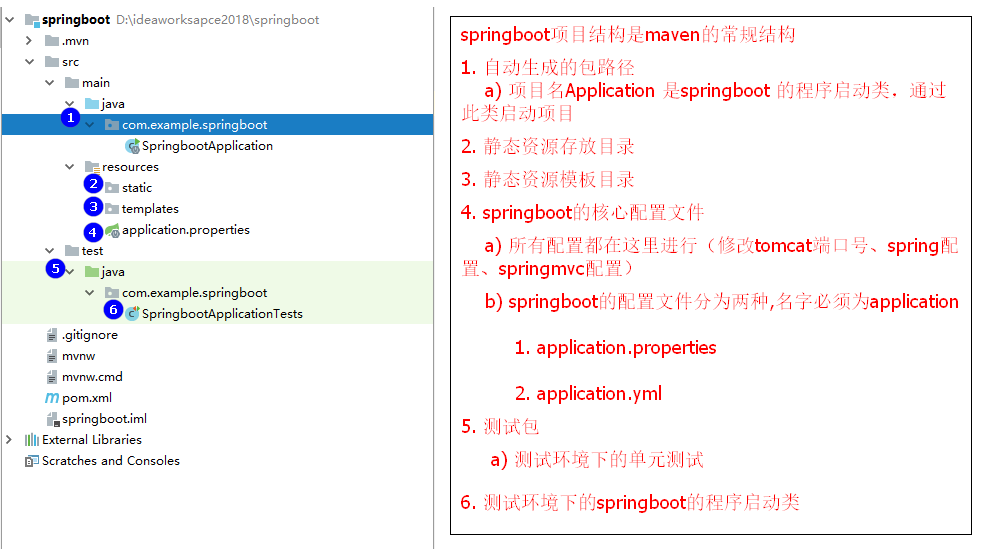
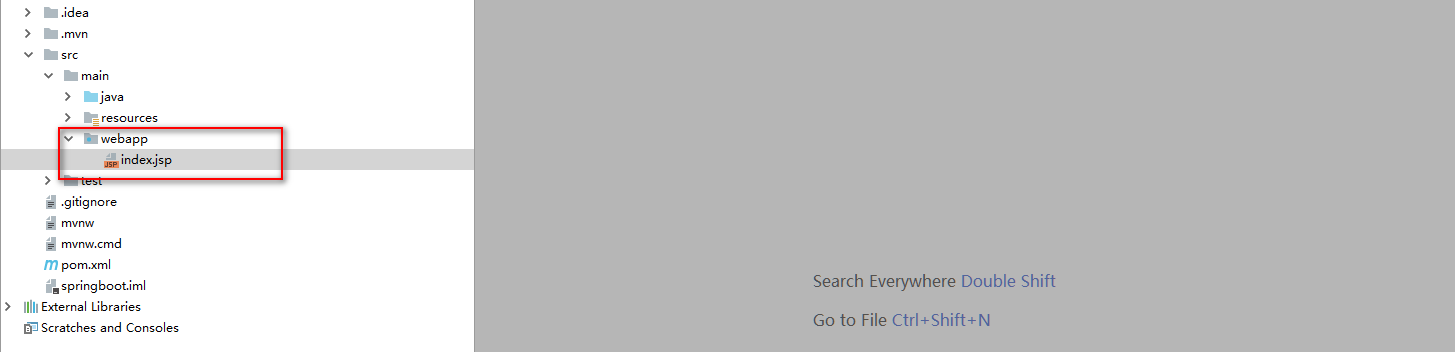
Finish 完成创建 二、项目应用 1.springboot的项目结构
2.springboot的常规开发
由于springboot先天性集成了spring/springmvc,所以我们不需要编写相关配置文件,直接开发即可。
Springboot的核心配置文件主要是来修改一些基本配置(服务器端口号、项目访问名字)以及集成配置(数据源、mybatis、redis等等)
Springboot的核心配置文件分为两种形式:(注意:名字都必须为application) 1.application.properties
3.自定义springboot配置
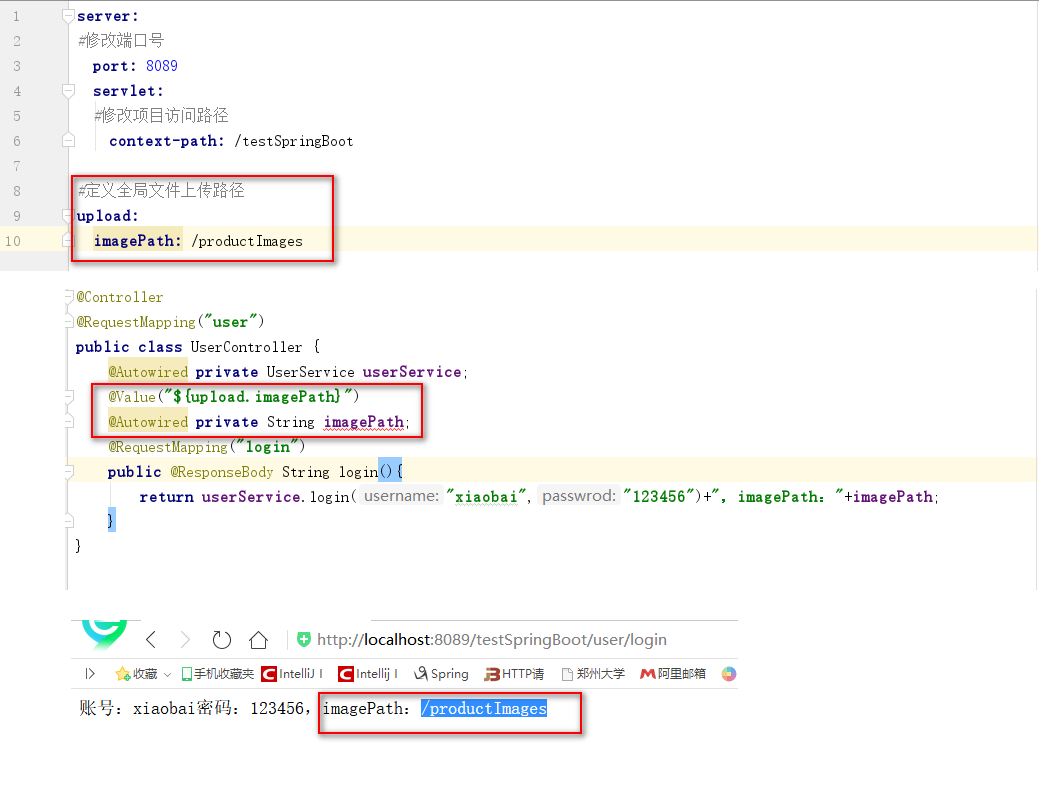
Springboot的application.properties/application.yml 文件还可以配置一些自定义属性,用来给对象属性赋值,方便代码维护,以及解耦合 应用场景:springMvc文件上传,定义全局文件夹路径。 1、在application.yml中添加自定义属性配置
方式一:通过@Value(“${upload.imagePath}”)
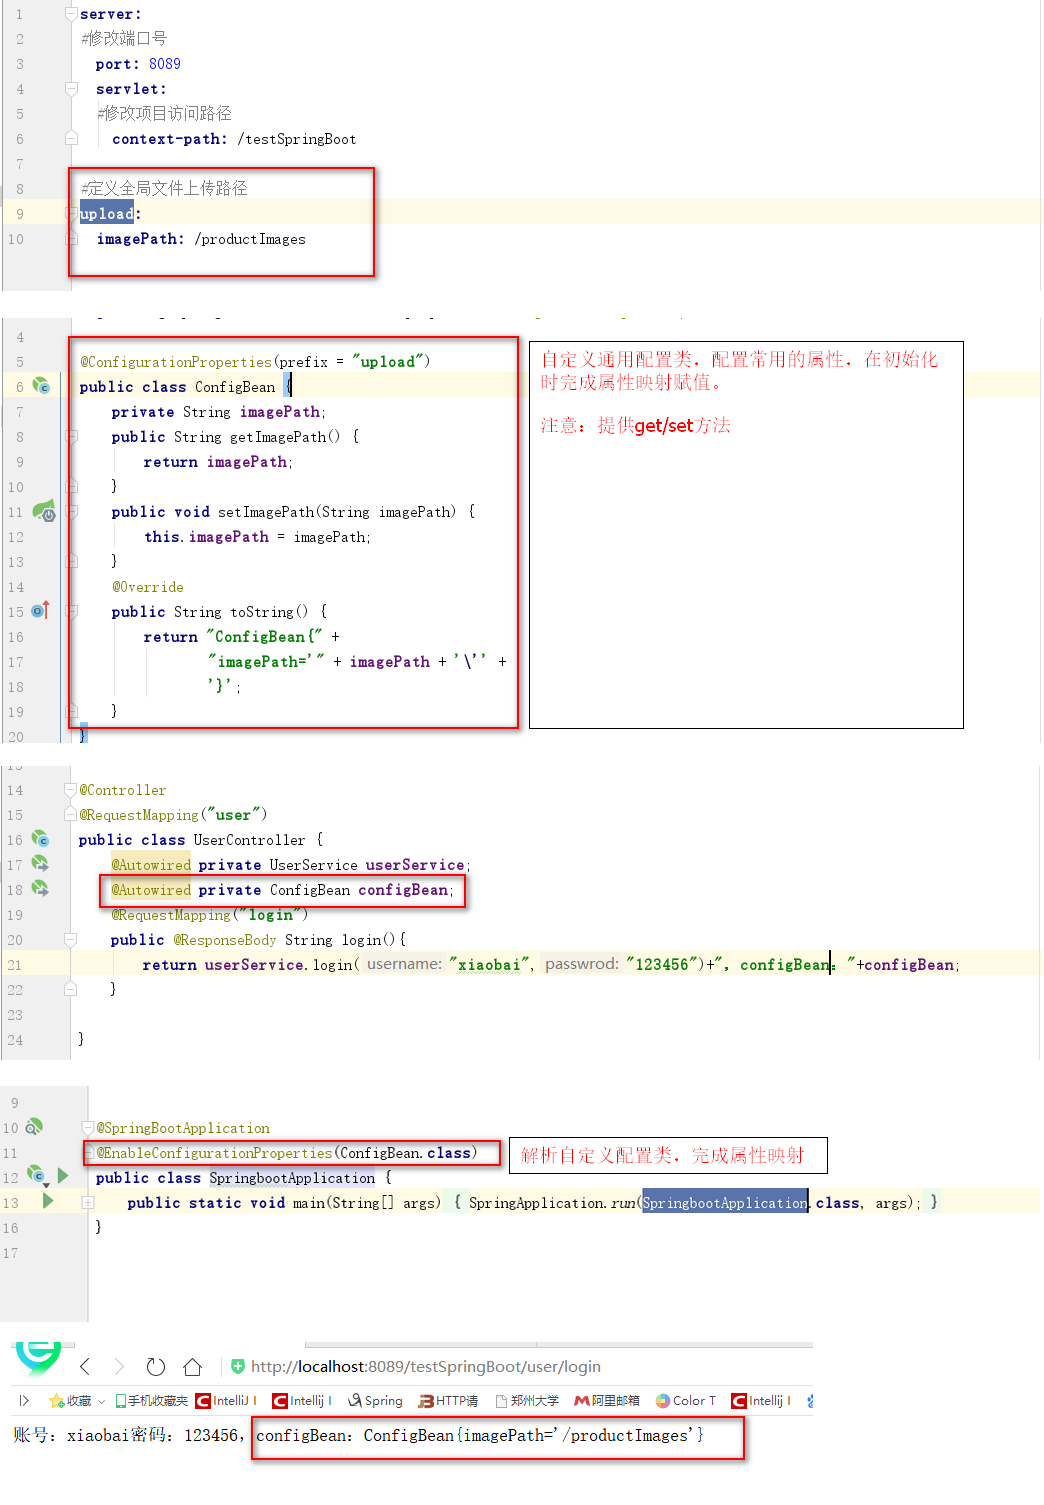
方式二:定义通用映射解析
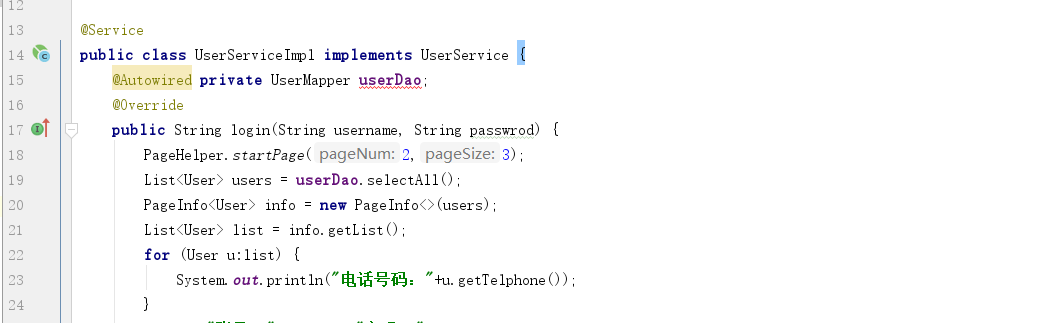
Sam类需要添加@Component注解,让spring在启动的时候扫描到该类,并添加到spring容器中。 第一种:使用spring支持的@Value()加载 package com.sam.demo.conf; import org.springframework.beans.factory.annotation.Value; import org.springframework.stereotype.Component; /** * @author sam * @since 2017/7/15 */ @Component public class Sam { //获取application.properties的属性 @Value("${com.sam.name}") private String name; @Value("${com.sam.age}") private int age; @Value("${com.sam.desc}") private String desc; //getter & setter } 第二种:使用@ConfigurationProperties(prefix="") 设置前缀,属性上不需要添加注解。 package com.sam.demo.conf; import org.springframework.stereotype.Component; /** * @author sam * @since 2017/7/15 */ @Component @ConfigurationProperties(prefix = "com.sam") public class Sam { private String name; private int age; private String desc; //getter & setter }3、在controller中注入并使用Sam这个Bean。 package com.sam.demo.controller; import com.sam.demo.conf.Sam; import org.springframework.beans.factory.annotation.Autowired; import org.springframework.web.bind.annotation.RequestMapping; import org.springframework.web.bind.annotation.RestController; /** * @author sam * @since 2017/7/14 */ @RestController public class IndexController { @Autowired private Sam sam; @RequestMapping("/index") public String index() { System.out.println(sam.getName() + " " + sam.getAge() + " " + sam.getDesc()); return "index"; } } 四、springboot的环境配置
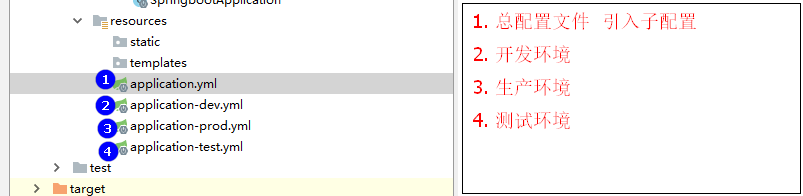
在实际开发过程中,不同的开发环境,我们使用的配置信息也是不一样的,这关系到连接池配置、工厂配置等等 例如: 生产环境(线上环境) 开发环境(线下环境) 测试环境(单元测试) 不同的环境我们要指定不同的配置文件,相对springboot给我们提供了这样的便利。 注意:也可以在application.properties总配置文件中引入application-dev.properties(开发)或application-prod.properties(生产)或application-test.properties(测试) 达到动态切换环境的目的 application.properties:
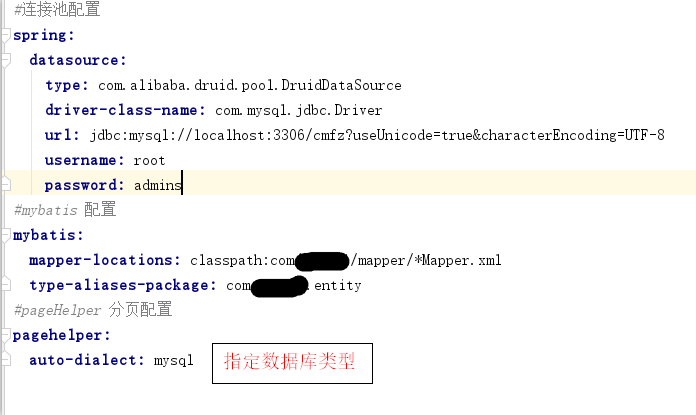
2.在配置文件中加入连接池以及mybatis的相关配置
3.Demo测试
1.引入相关依赖
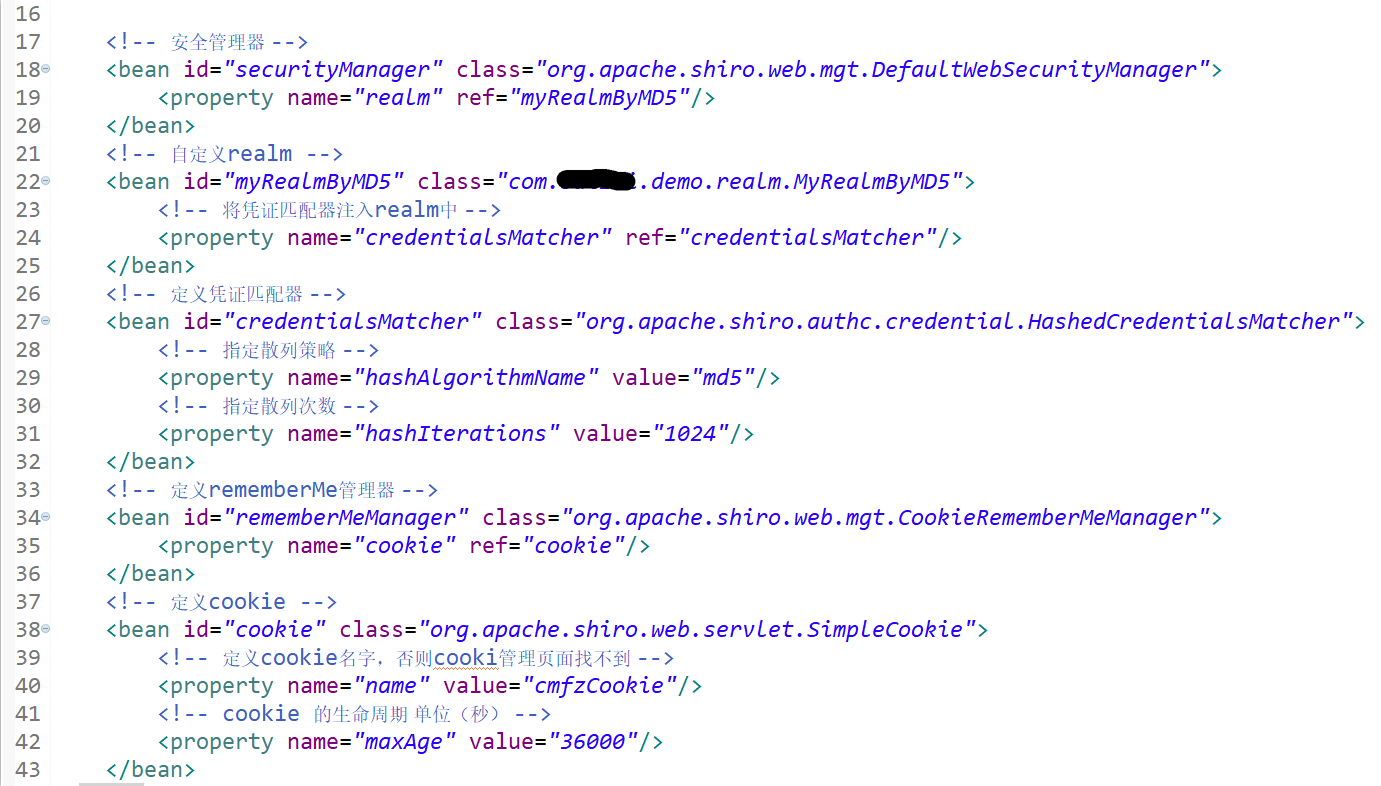
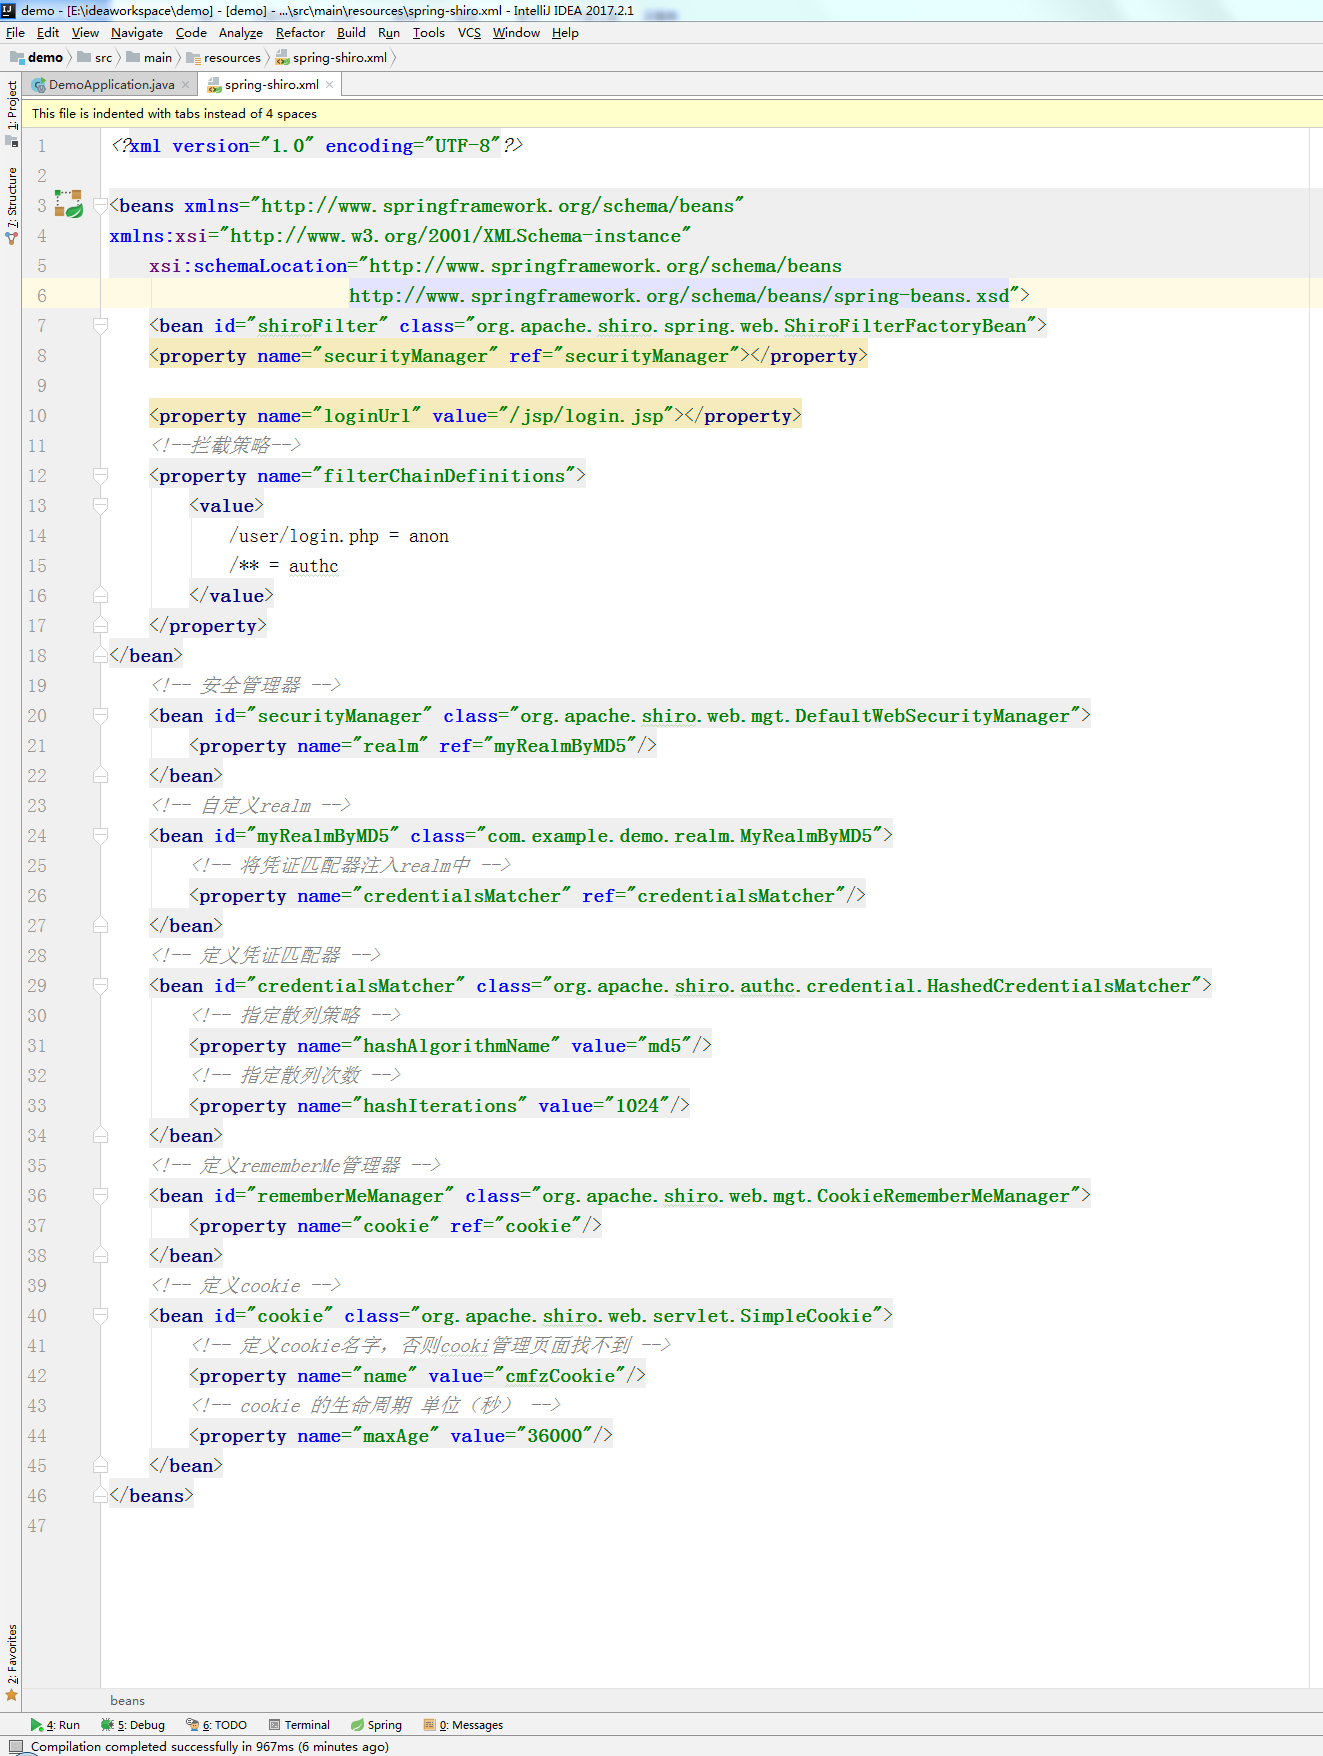
 2.直接引入xml配置文件
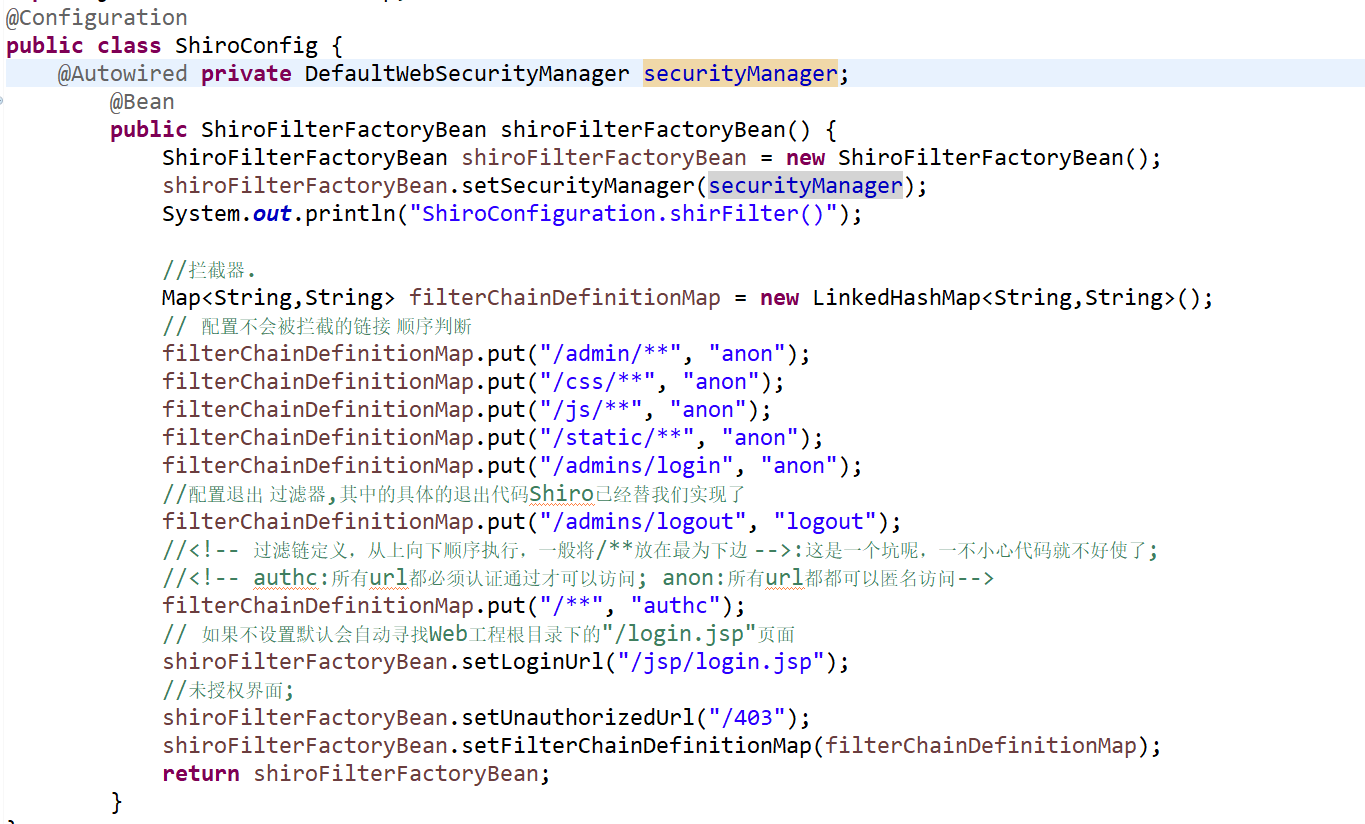
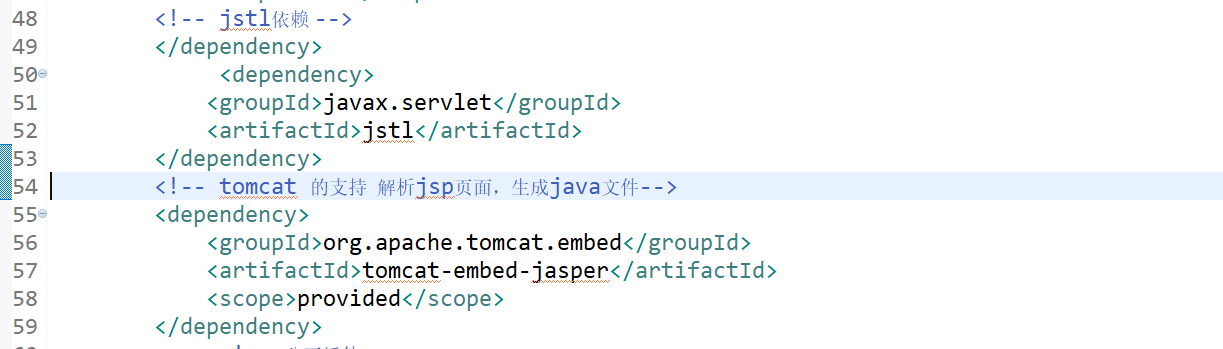
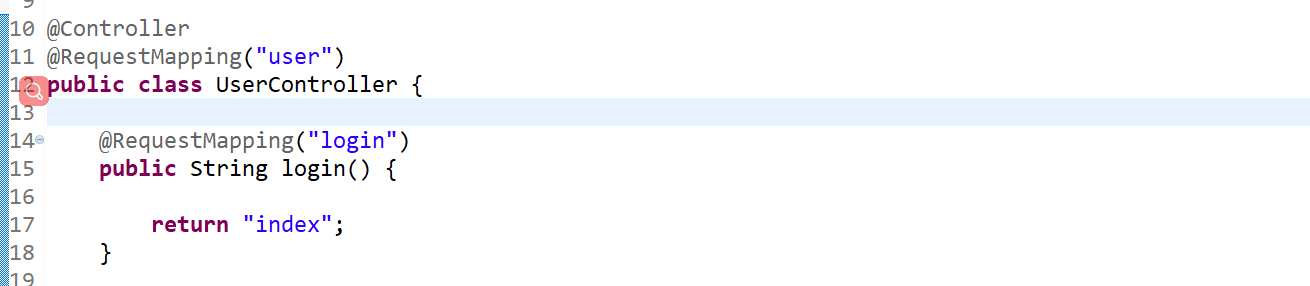
在启动时 在启动类上通过@ImportResource(“classpath:shiro-config.xml”),初始化shiro配置 八、springboot整合JSP 1.引入相关依赖
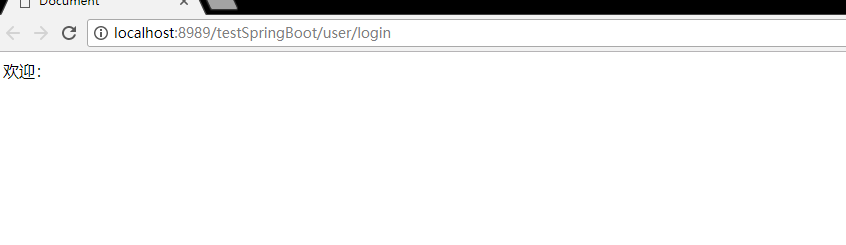
4.启动测试
注意: 如果在访问jsp的过程中 发生下载现象 排除jar的依赖问题 将jar中 设置为 compileSpringBoot不推荐使用JSP作为View,而是推荐我们使用模板(如:thymeleaf、freemarker等模板引擎),原因如下: 1. JSP性能较差 2. 绝对的前后端分离思想,JSP并不利于页面调试(运行依赖于web容器) 3. SpringBoot对内嵌web容器的支持默认也是用tomcat。但tomcat对web资源的处理上写死了要使用文件目录,对于打包成jar包的SpringBoot 应用来说,显然不行,也有的人打包成war,然后还是部署到tomcat上,这样违反了SpringBoot的初衷,这样一来,等于否定了嵌入式容 器,而且程序员还要处理嵌入式环境和外部tomcat环境的不同带来的问题。
|


【本文地址】
今日新闻 |
推荐新闻 |