Java电子签名图片生成工具类 |
您所在的位置:网站首页 › spaLOGO签名图片 › Java电子签名图片生成工具类 |
Java电子签名图片生成工具类
|
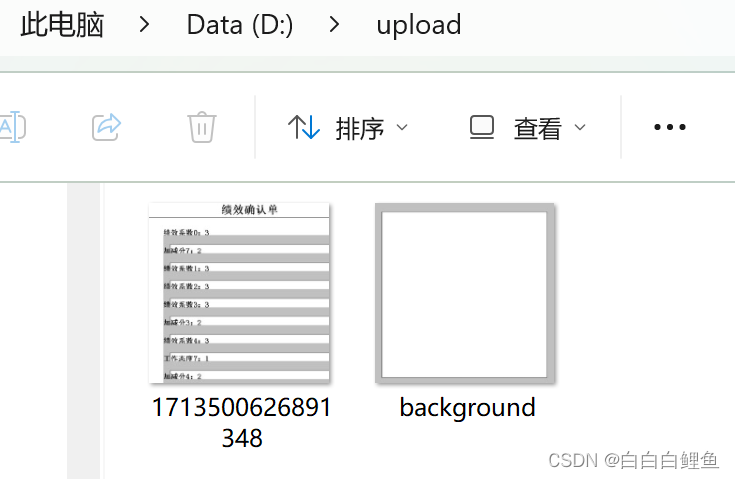
在业务中有需要用户信息确认时候去进行电子签名,在实现电子签名存证时候,可以在前端生成图片也可以在后端生成签名存证图片,这里实现一下关于后端Java实现的方法,并总结成工具类,方便之后调用。 工具类方法一 import com.sun.image.codec.jpeg.JPEGCodec; import com.sun.image.codec.jpeg.JPEGImageEncoder; import javax.imageio.ImageIO; import java.awt.*; import java.awt.image.BufferedImage; import java.io.BufferedOutputStream; import java.io.File; import java.io.FileOutputStream; import java.io.IOException; import java.util.HashMap; import java.util.Map; import java.util.Random; /** * @ClassName JsonToPicture * @Description 根据描述生成对应的图片 * @Version 1.0 */ public class Main { public static void createImage(String fileLocation, BufferedImage image) { try { FileOutputStream fos = new FileOutputStream(fileLocation); BufferedOutputStream bos = new BufferedOutputStream(fos); JPEGImageEncoder encoder = JPEGCodec.createJPEGEncoder(bos); encoder.encode(image); bos.close(); fos.close(); } catch (Exception e) { e.printStackTrace(); } } public static void graphicsGeneration(String path, Map list) throws IOException { int imageWidth = 500;// 图片的宽度 int imageHeight = 500;// 图片的高度 BufferedImage image = new BufferedImage(imageWidth, imageHeight, BufferedImage.TYPE_INT_RGB); Graphics graphics = image.getGraphics(); graphics.setColor(Color.white); graphics.fillRect(0, 0, imageWidth, imageHeight); graphics.setColor(Color.BLACK); int high = 30; int wigth = 0; graphics.setFont(new Font("宋体", Font.BOLD, 30)); graphics.drawString("绩效确认单", 200, high); graphics.setFont(new Font("宋体", Font.BOLD, 20)); high += 10; graphics.drawLine(0, high, 550, high); // for(Map rowMap : list){ // high += 50; // wigth = 40; for (Map.Entry entry : list.entrySet()) { high += 50; wigth = 40; String name = entry.getKey() + ":" + entry.getValue(); if ("title".equals(entry.getKey())) { high += 30; graphics.setFont(new Font("黑体", Font.BOLD, 20)); graphics.drawString(entry.getValue(), wigth, high); graphics.setFont(new Font("宋体", Font.BOLD, 20)); } else { graphics.drawString(name, wigth, high); graphics.drawImage(ImageIO.read(new File("D:\\upload\\background.jpg")), wigth, high, null); wigth += 160; } } // } createImage(path, image); } /** * 图片名生成 **/ public static String genImageName() { //取当前时间的长整形值包含毫秒 long millis = System.currentTimeMillis(); //加上三位随机数 Random random = new Random(); int end3 = random.nextInt(999); //如果不足三位前面补0 String str = millis + String.format("%03d", end3); return str; } public static void main(String[] args) throws IOException { // ArrayList list = new ArrayList(); // for (int i = 0; i < 8; i++) { // Map mapTitle = new HashMap(); // mapTitle.put("单价/克", "20.0"); // mapTitle.put("克数", "1"); // mapTitle.put("名称", "柴胡"); // list.add(mapTitle); // } Map list = new HashMap(); for (int i = 0; i < 8; i++) { list.put("加减分" + i, "2"); list.put("工作态度" + i, "1"); list.put("绩效系数" + i, "3"); } String path = "d:/upload"; File newFileDir = new File(path); //如果不存在 则创建 if (!newFileDir.exists()) { newFileDir.mkdirs(); } graphicsGeneration(path + "/" + genImageName() + ".jpg", list); System.out.println("完成"); } }这个方法需要提前准备一个background背景图片,然后的逻辑是根据前端获取到的数据(当然此处是自己模拟了一些假数据)写在这个图片上,最终将写好数据的图片生成在指定的地方。
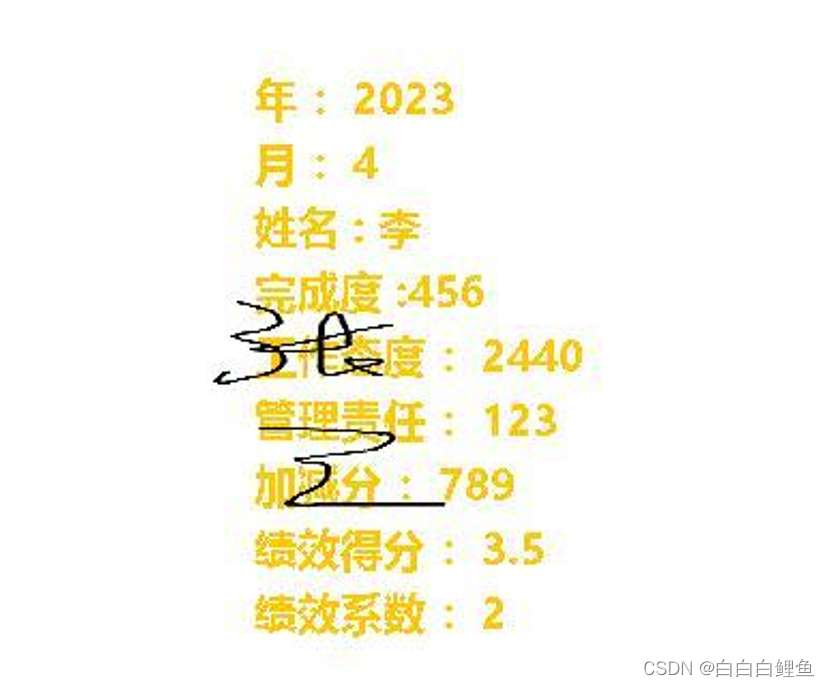
方法二与方法一类似,不过是采用创建对象的方式,获取数据,细节上都大同小异 public class ImgBean { private Integer month ; private Integer year ; private String name; private String degree; private Integer attitude; private Integer duty; private String pMPoints; private Float jxPoints; private boolean checkStatus; private Integer coefficient; public Integer getCoefficient() { return coefficient; } public void setCoefficient(Integer coefficient) { this.coefficient = coefficient; } public Integer getMonth() { return month; } public void setMonth(Integer month) { this.month = month; } public Integer getYear() { return year; } public void setYear(Integer year) { this.year = year; } public String getName() { return name; } public void setName(String name) { this.name = name; } public String getDegree() { return degree; } public void setDegree(String degree) { this.degree = degree; } public Integer getAttitude() { return attitude; } public void setAttitude(Integer attitude) { this.attitude = attitude; } public Integer getDuty() { return duty; } public void setDuty(Integer duty) { this.duty = duty; } public String getpMPoints() { return pMPoints; } public void setpMPoints(String pMPoints) { this.pMPoints = pMPoints; } public Float getJxPoints() { return jxPoints; } public void setJxPoints(Float jxPoints) { this.jxPoints = jxPoints; } public boolean isCheckStatus() { return checkStatus; } public void setCheckStatus(boolean checkStatus) { this.checkStatus = checkStatus; } }首先,根据表上要创建的内容,创建对应的对象和属性 import javax.imageio.ImageIO; import java.awt.*; import java.awt.image.BufferedImage; import java.io.File; /** * 1、month:Integer月 * 2、year:Integer年 * 3、name:String姓名 * 4、degree:String完成度 * 5、attitude:Integer工作态度 * 6、duty:Integer管理责任 * 7、pMPoints:String加减分 * 8、jxPoints:Float 一位小数;绩效得分 * 9、checkStatus:boolean;是否确认 * 10、coefficient:绩效系数 */ public class ImgToBeanUtils { public static String overlapImage( String backgroundPath, ImgBean bean, String outPutPath){ try { String name = "姓名 : "; String degree = "完成度 :"; String duty = "管理责任 :"; String pMPoints = "加减分 :"; String month = "月 :"; String year = "年 :"; String attitude = "工作态度 :"; String jxPoints= "绩效得分 :"; String coefficient= "绩效系数 :"; String checkStatus = "是否确认 :"; String message01 = String.valueOf(bean.getYear());//年 String message1 = year.concat(message01); String message02 = String.valueOf(bean.getMonth()) ;//月 String message2 = month.concat(message02); String message3 = name + bean.getName();//姓名 String message4 = degree + bean.getDegree();//完成度 String message05 = String.valueOf(bean.getAttitude());//工作态度 String message5 = attitude.concat(message05); String message06 = String.valueOf(bean.getDuty());//管理责任 String message6 = duty.concat(message06); String message7 = pMPoints + bean.getpMPoints();//加减分 String message08 = String.valueOf(bean.getJxPoints());//绩效得分 String message8 = jxPoints.concat(message08); String message09 = String.valueOf(bean.getCoefficient());//绩效系数 String message9 = coefficient.concat(message09); String message010 = String.valueOf(bean.isCheckStatus());//是否确认 String message10 = checkStatus.concat(message010); //设置图片大小 //BufferedImage background = resizeImage(618,1000, ImageIO.read(new File(这里是背景图片的路径!))); BufferedImage background = resizeImage(1000,618, ImageIO.read(new File(backgroundPath))); Graphics2D g = background.createGraphics(); g.setColor(Color.ORANGE); g.setFont(new Font("微软雅黑",Font.BOLD,20)); String[] strs = {message1,message2,message3,message4,message5,message6,message7,message8,message9,message10}; int y = 190; for (int i = 0; i < 9; i++) { g.drawString(strs[i],430 ,y ); y= y+30; } g.dispose(); //ImageIO.write(background, jpg, new File(这里是一个输出图片的路径)); ImageIO.write(background, "jpg", new File(outPutPath)); }catch (Exception e){ e.printStackTrace();} return null; } public static BufferedImage resizeImage(int x, int y, BufferedImage bfi){ BufferedImage bufferedImage = new BufferedImage(x, y, BufferedImage.TYPE_INT_RGB); bufferedImage.getGraphics().drawImage( bfi.getScaledInstance(x, y, Image.SCALE_SMOOTH), 0, 0, null); return bufferedImage; } /** * 图片覆盖(覆盖图压缩到width*height大小,覆盖到底图上) * @param baseFilePath 底图 * @param coverFilePath 覆盖图 * @param x 起始x轴 * @param y 起始y轴 * @param width 覆盖宽度 * @param height 覆盖长度度 * @throws Exception */ public static BufferedImage coverImage(String baseFilePath, String coverFilePath, int x, int y, int width, int height) throws Exception{ File baseFile = new File(baseFilePath);//底图 BufferedImage buffImg = ImageIO.read(baseFile); File coverFile = new File(coverFilePath); //覆盖层 BufferedImage coverImg = ImageIO.read(coverFile); buffImg = coverImage(buffImg, coverImg, x, y, width, height); return buffImg; } /** * 图片覆盖(覆盖图压缩到width*height大小,覆盖到底图上) * @param baseBufferedImage 底图 * @param coverBufferedImage 覆盖图 * @param x 起始x轴 * @param y 起始y轴 * @param width 覆盖宽度 * @param height 覆盖长度度 * @throws Exception */ public static BufferedImage coverImage(BufferedImage baseBufferedImage, BufferedImage coverBufferedImage, int x, int y, int width, int height) throws Exception{ // 创建Graphics2D对象,用在底图对象上绘图 Graphics2D g2d = baseBufferedImage.createGraphics(); if(x>= baseBufferedImage.getWidth()){ x = baseBufferedImage.getWidth()-width; } if(y>= baseBufferedImage.getHeight()){ y = baseBufferedImage.getHeight()-height; } // 绘制 g2d.drawImage(coverBufferedImage, x, y, width, height, null); g2d.dispose();// 释放图形上下文使用的系统资源 return baseBufferedImage; } } import javax.imageio.ImageIO; import java.awt.image.BufferedImage; import java.io.File; import static com.example.demo.test.ImgToBeanUtils.overlapImage; public class Test { public static void main(String[] args) throws Exception { ImgBean bean = new ImgBean(); bean.setName("李"); bean.setDegree("456"); bean.setDuty(123); bean.setCheckStatus(true); bean.setJxPoints(3.5F); bean.setAttitude(2440); bean.setYear(2023); bean.setpMPoints("789"); bean.setMonth(4); bean.setCoefficient(2); overlapImage("D:\\background.jpg",bean,"D:\\TextPicture.jpg"); File file = new File("D:\\signature.jpg"); if (null == file || 0 == file.length() || !file.exists()) { System.out.println("文件为空!"); } BufferedImage r = ImgToBeanUtils.coverImage("D:\\TextPicture.jpg", "D:\\signature.jpg", 400, 200, 200, 200); ImageIO.write(r, "jpg", new File("d://result.jpg")); } }原理其实也就是将签名(例如:张三 )和用户绩效确认数据两个图层进行覆盖,最终生成一个电子签名存证文件。
|
【本文地址】
今日新闻 |
推荐新闻 |