Ubuntu20.04搭建RISC |
您所在的位置:网站首页 › riscv-gnu-toolchain编译出现大量头文件错误 › Ubuntu20.04搭建RISC |
Ubuntu20.04搭建RISC
|
1. 前言
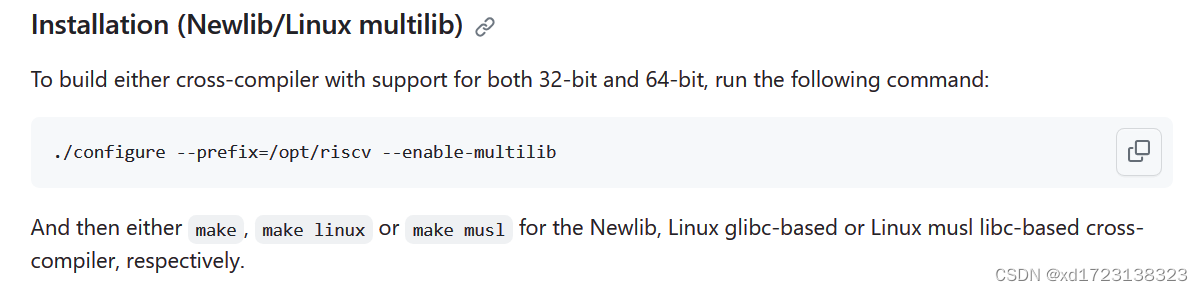
risc-v是一个非常有潜力的指令集框架,最近对其产生了浓厚的兴趣,由于之前对于这方面的知识储备很少,在加上网上的教程都是点到为止,所以安装过程异常曲折。好在最后一步一步积累摸索,终于利用源码安装完成。看到此文章的同学,相信你也对RISC-V感兴趣,并且在安装过程也遇到了一些问题,希望这篇文章能够帮到你。 本文假设你已经安装了ubuntu20.04或者Ubuntu18.04,我在Ubuntu18.04和Ubuntu20.04都安装成功过,Ubuntu18.04默认是python3.6,所以在安装qemu的时候需要升级python,并安装ninga. 本文使用Ubuntu20.04以源码的方式安装RISC-V和qemu,并测试其正常工作。 2. 安装RISC-V 2.1 下载risc-v的源码risc-v地址为GitHub - riscv-collab/riscv-gnu-toolchain: GNU toolchain for RISC-V, including GCCGNU toolchain for RISC-V, including GCC. Contribute to riscv-collab/riscv-gnu-toolchain development by creating an account on GitHub. 下载后会有目录riscv-gnu-toolchain目录,该目录不大,使用GitHub可以很快下载完成。 下载命令为:git clone [email protected]:riscv-collab/riscv-gnu-toolchain.git 先不着急使用configure安装,因为安装过程会从github下载gcc,newlib等子库,速度非常慢,容易中断。继续看第二步下载子模块
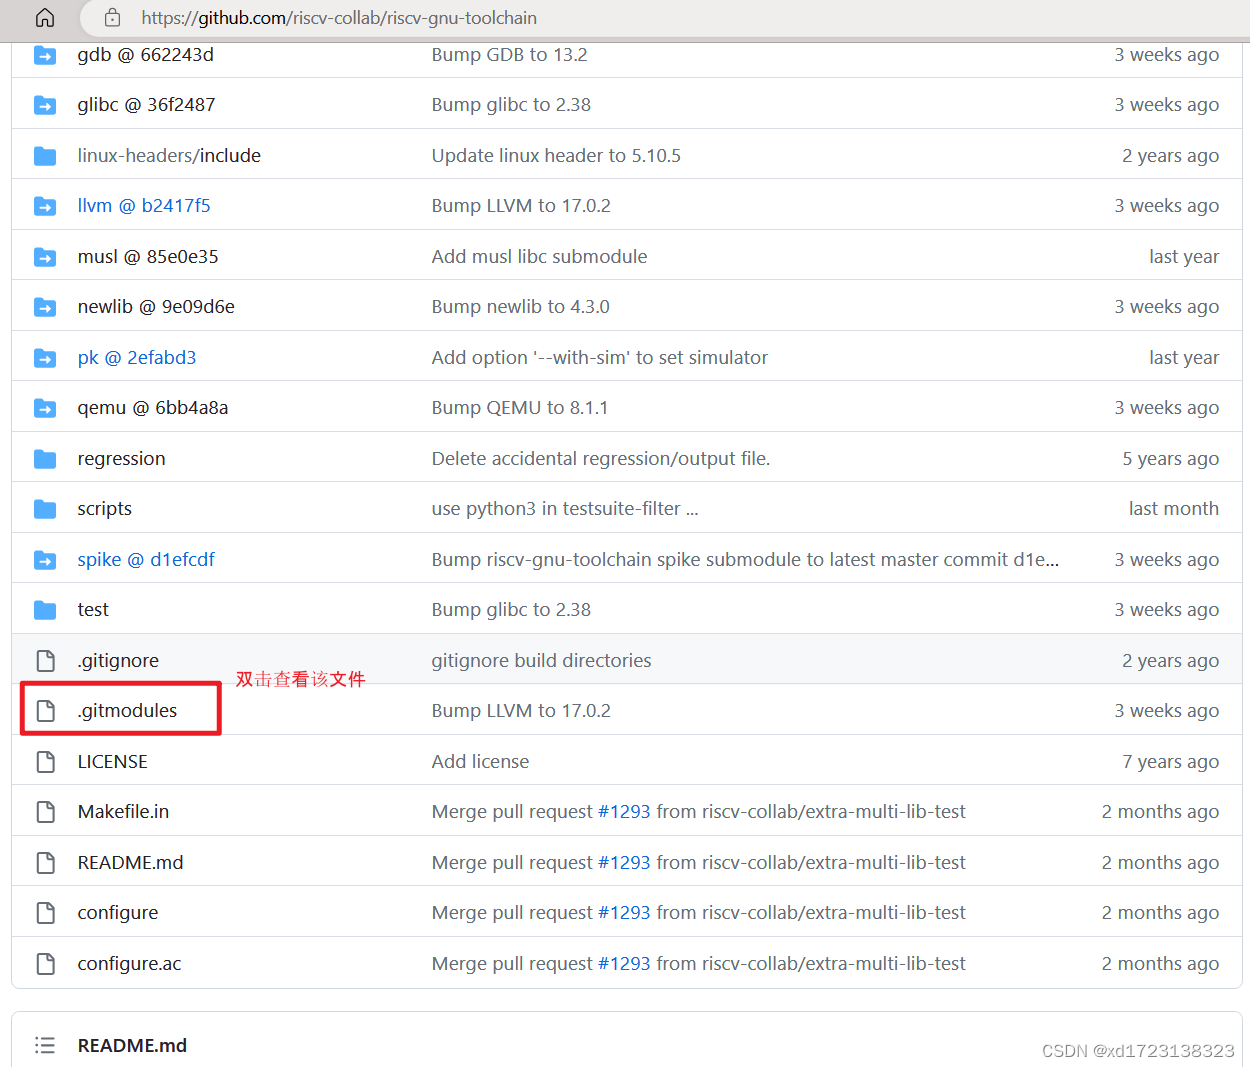
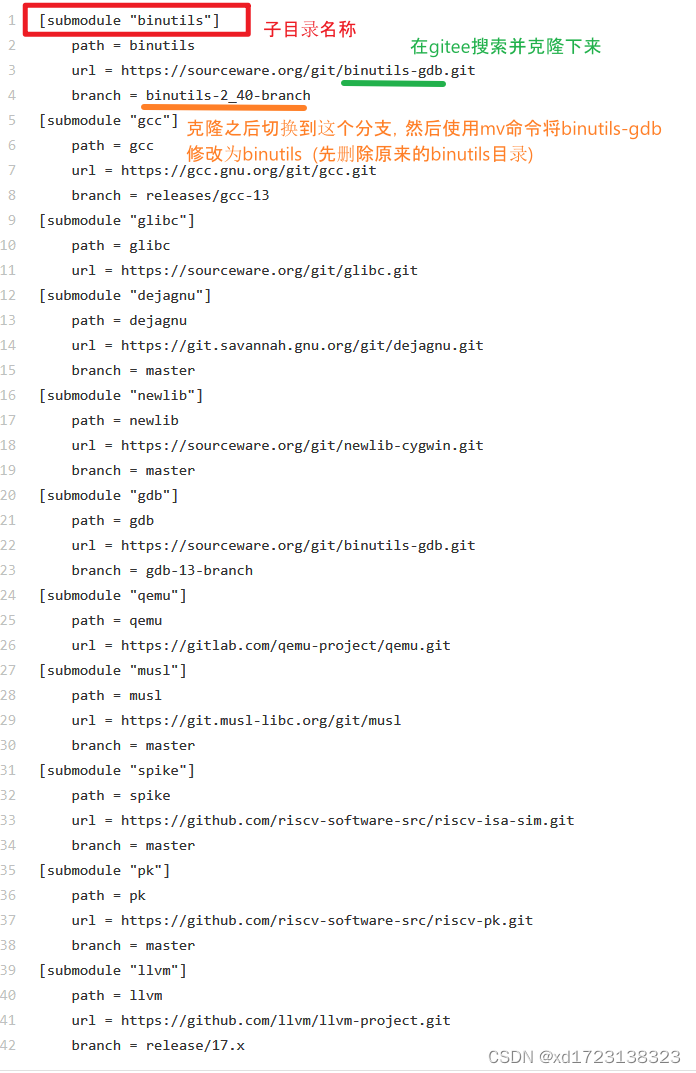
使用浏览器打开https://github.com/riscv-collab/riscv-gnu-toolchain ,然后双击.gitmodules,可以看到每个子模块的路径和分支。根据绿色部分的名字,在国内的gitee上搜索,找到对应的库路径即可。cd riscv-gnu-toolchain 这个路径然后git clone gitee路径。 这里要注意:有的库名字和clone后的目录名字相同,有的不相同,不相同库的在切换到正确的分支后须修改为子目录名称。例如binutils库克隆后的目录为binutils-gdb, 需要先进入binutils-gdb目录,使用git checkout切换到binutils-2_40-branch分支。然后删除原有的binutils目录,在使用mv命令修改为binutils-gdb目录为binutils。 如gcc目录同gcc库名字相同,直接在gitee上找到库路径后克隆gcc库后切换到对应的分支即可。注意:子模块的目录都是空,使用clone之后都不为空,可以用来检查是否有遗漏。操作一定要小心,不然configure的时候会卡住。如果编译过程卡住2分钟,不要犹豫,直接停止编译,检查子库是否下载正确。纠正后清空build目录里面的内容重新编译。
下面是自己从gitee上找的对应模块,直接复制url的内容按删除操作一个一个clone修改即可。当然你也可以把内容复制到riscv-gnu-toolchain目录里面的.gitmodules文件里面,然后更新子模块配置,让其自动下载,这部分有兴趣可以自己研究,我这边尝试了一把卡住了没成功。 [submodule "binutils"] path = binutils url = https://gitee.com/keaide/binutils-gdb.git branch = binutils-2_40-branch [submodule "gcc"] path = gcc url = https://gitee.com/mirrors/gcc.git branch = releases/gcc-13 [submodule "glibc"] path = glibc url = https://gitee.com/rtlhq/glibc.git [submodule "dejagnu"] path = dejagnu url = https://gitee.com/nwpu-ercesi/dejagnu.git branch = master [submodule "newlib"] path = newlib url = https://gitee.com/mirrors/newlib-cygwin.git branch = master [submodule "gdb"] path = gdb url = https://gitee.com/keaide/binutils-gdb.git branch = gdb-13-branch [submodule "qemu"] path = qemu url = https://gitee.com/liwg06/qemu.git [submodule "musl"] path = musl url = https://gitee.com/nwpu-ercesi/musl.git branch = master [submodule "spike"] path = spike url = https://gitee.com/houxibiao/riscv-isa-sim.git branch = master [submodule "pk"] path = pk url = https://gitee.com/houxibiao/riscv-pk.git branch = master [submodule "llvm"] path = llvm url = https://gitee.com/mirrors/LLVM.git branch = release/17.x 2.3 RISC-V编译1. 正确执行2.1和2.2步骤后,可以编译安装了,按照官方文档,先执行如下命令安装库依赖: $ sudo apt-get install autoconf automake autotools-dev curl python3 python3-pip libmpc-dev libmpfr-dev libgmp-dev gawk build-essential bison flex texinfo gperf libtool patchutils bc zlib1g-dev libexpat-dev ninja-build git cmake libglib2.0-dev2. 在/opt目录下创建riscv目录,并修改权限为777 【很重要】 sudo mkdir /opt/riscv sudo chmod 777 /opt/riscv3. 先安装libncurses5-dev (安装了这个库才能在gdb调试时使用layout命令,先安装再编译riscv才生效) sudo apt install libncurses5-dev4. 在riscv-gnu-toolchain目录创建build目录,然后执行如下命令: cd riscv-gnu-toolchain mkdir build cd build ../configure --prefix=/opt/riscv --enable-multilib make linux -j 4这里使用了兼容32和64位的模式编译,其它模式也是可以的,按照github官方文档说明即可。执行上述命令估计要40分钟左右才能编译完成。看到如下执行完成,没有卡住算是编译完成
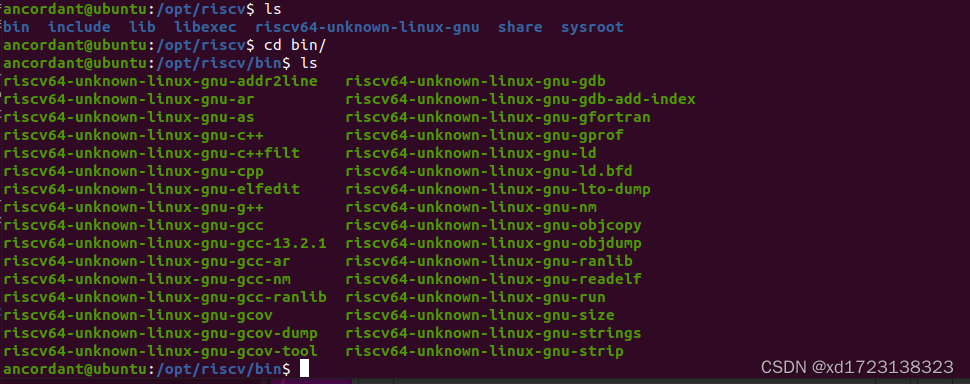
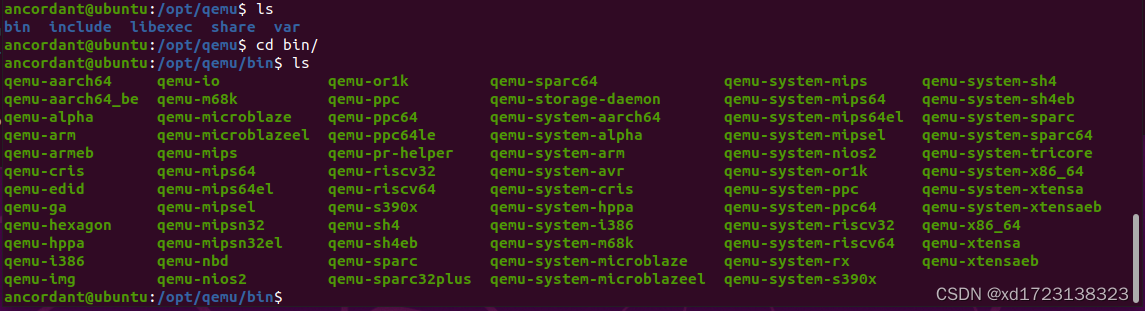
此时/opt/riscv目录如下:
1. 编辑~/.bashrc vim ~/.bashrc2. 在文件~/.bashrc末尾写入如下内容: export RISCV="/opt/riscv" export PATH=$PATH:$RISCV/bin3. 使配置文件生效 source ~/.bashrc 3. 测试RISC-V1. 创建一个hello.c文件,内容如下: #include int main(){ printf("%s","hello RISCV!"); return 1; }2. 使用risc-v的gcc编译
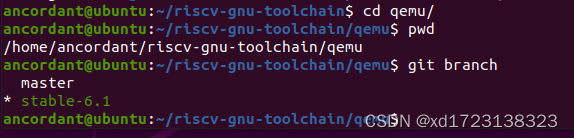
编译无报错,说明成功。编译后是无法执行的,需要安装qemu才能执行 4. 安装QEMU进入riscv-gnu-toolchain/qemu里面,会发现这里面也有.gitmodules, 这里面的下载路径下载速度还行,直接使用如下命令安装即可,如果卡住就按照risc-v的方法手动下载qemu的子目录即可。最新的qemu是8.1.5,我这边使用6.1稳定版
qemu的子模块目录:注意带roms的模块需要cd到roms路径克隆,不带roms切换到qemu目录克隆,带test和ui路径需要切换到test和ui目录克隆。都使用默认的master分支即可。 [submodule "roms/seabios"] path = roms/seabios url = https://gitlab.com/qemu-project/seabios.git/ [submodule "roms/SLOF"] path = roms/SLOF url = https://gitlab.com/qemu-project/SLOF.git [submodule "roms/ipxe"] path = roms/ipxe url = https://gitlab.com/qemu-project/ipxe.git [submodule "roms/openbios"] path = roms/openbios url = https://gitlab.com/qemu-project/openbios.git [submodule "roms/qemu-palcode"] path = roms/qemu-palcode url = https://gitlab.com/qemu-project/qemu-palcode.git [submodule "roms/sgabios"] path = roms/sgabios url = https://gitlab.com/qemu-project/sgabios.git [submodule "dtc"] path = dtc url = https://gitlab.com/qemu-project/dtc.git [submodule "roms/u-boot"] path = roms/u-boot url = https://gitlab.com/qemu-project/u-boot.git [submodule "roms/skiboot"] path = roms/skiboot url = https://gitlab.com/qemu-project/skiboot.git [submodule "roms/QemuMacDrivers"] path = roms/QemuMacDrivers url = https://gitlab.com/qemu-project/QemuMacDrivers.git [submodule "ui/keycodemapdb"] path = ui/keycodemapdb url = https://gitlab.com/qemu-project/keycodemapdb.git [submodule "capstone"] path = capstone url = https://gitlab.com/qemu-project/capstone.git [submodule "roms/seabios-hppa"] path = roms/seabios-hppa url = https://gitlab.com/qemu-project/seabios-hppa.git [submodule "roms/u-boot-sam460ex"] path = roms/u-boot-sam460ex url = https://gitlab.com/qemu-project/u-boot-sam460ex.git [submodule "tests/fp/berkeley-testfloat-3"] path = tests/fp/berkeley-testfloat-3 url = https://gitlab.com/qemu-project/berkeley-testfloat-3.git [submodule "tests/fp/berkeley-softfloat-3"] path = tests/fp/berkeley-softfloat-3 url = https://gitlab.com/qemu-project/berkeley-softfloat-3.git [submodule "roms/edk2"] path = roms/edk2 url = https://gitlab.com/qemu-project/edk2.git [submodule "slirp"] path = slirp url = https://gitlab.com/qemu-project/libslirp.git [submodule "roms/opensbi"] path = roms/opensbi url = https://gitlab.com/qemu-project/opensbi.git [submodule "roms/qboot"] path = roms/qboot url = https://gitlab.com/qemu-project/qboot.git [submodule "meson"] path = meson url = https://gitlab.com/qemu-project/meson.git [submodule "roms/vbootrom"] path = roms/vbootrom url = https://gitlab.com/qemu-project/vbootrom.git具体命令如下: 1. 创建qemu目录存放编译后的二进制文件 sudo mkdir /opt/qemu sudo chmod 777 /opt/qemu3. 执行如下命令,避免过程报错Dependency "pixman-1" not found, tried pkgconfig和一些依赖错误 sudo apt-get install libpixman-1-dev pip3 install -i https://pypi.tuna.tsinghua.edu.cn/simple sphinx==5.3.0 # 还有一个python依赖,没记录下来,如果出现了,执行pip3安装该库的命令即可3. 进入riscv-gnu-toolchain/qemu创建build目录并编译,编译耗时1小时左右,出现下图即算编译成功 mkdir build cd build ../configure --prefix=/opt/qemu make j 4 make install
4.参考2.4配置qemu的环境变量即可,我这边最终的riscv和qemu的环境变量如下:
其中.local/bin是安装python库的时候一个告警,我手动添加的。应该不加也没事。 5. 测试QEMU(用户模式) 1.报错找不到链接库使用qemu执行hello二进制文件报错找不到链接库
原因是:qemu-riscv64会在/lib下搜索riscv64的动态链接,而我们编译的riscv链接在/opt/riscv/sysroot里面。网上有直接copy到/lib下,但是还有其他.so文件问题,全部拷贝之后,容易把系统搞崩溃,我怀疑我的Ubuntu18.04就是这样高崩溃的。
为了避免每次都需要手动执行动态链接库,使用 qemu-riscv64 -h发现设置QEMU的目录动态链接路径即可
|


【本文地址】
今日新闻 |
推荐新闻 |