Python调整图片的文件大小 |
您所在的位置:网站首页 › python调整图片大小 › Python调整图片的文件大小 |
Python调整图片的文件大小
|
文章目录
问题描述减小文件大小1. 减小图片质量2. 减小图片尺寸
增加文件大小封装参考文献
问题描述
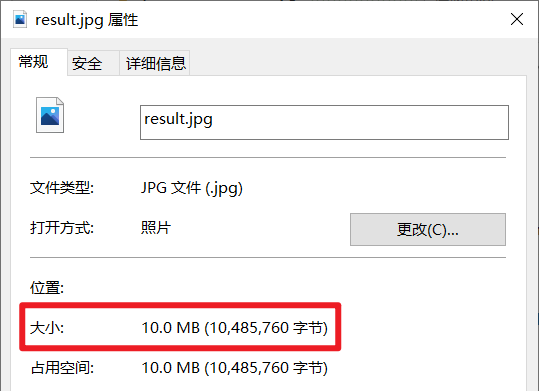
Python调整图片文件的占用空间大小,而不是分辨率 1.jpg 使用 PIL 模块 pip install Pillow 1. 减小图片质量代码 import os from PIL import Image def compress_under_size(imagefile, targetfile, targetsize): """压缩图片尺寸直到某一尺寸 :param imagefile: 原图路径 :param targetfile: 保存图片路径 :param targetsize: 目标大小,单位byte """ currentsize = os.path.getsize(imagefile) for quality in range(99, 0, -1): # 压缩质量递减 if currentsize > targetsize: image = Image.open(imagefile) image.save(targetfile, optimize=True, quality=quality) currentsize = os.path.getsize(targetfile) if __name__ == '__main__': imagefile = '1.jpg' # 图片路径 targetfile = 'result.jpg' # 目标图片路径 targetsize = 2 * 1024 # 目标图片大小 compress_under_size(imagefile, targetfile, targetsize) # 将图片压缩到2KB效果 注意!无法实现图片无限压缩,若文件太小,辨识度也会大大降低 2. 减小图片尺寸 import os from PIL import Image def image_compress(filename, savename, targetsize): """图像压缩 :param filename: 原图路径 :param savename: 保存图片路径 :param targetsize: 目标大小,单位为byte """ image = Image.open(filename) size = os.path.getsize(filename) if size 命令合并数据到图片上 import os import time import subprocess imagefile = '1.jpg' # 图片路径 targetfile = 'result.jpg' # 目标图片路径 targetsize = 10 * 1024 * 1024 # 目标图片大小 tempfile = str(int(time.time())) # 临时文件路径 tempsize = str(targetsize - os.path.getsize(imagefile)) # 临时文件大小 subprocess.run(['fallocate', '-l', tempsize, tempfile]) # 创建临时文件 subprocess.run('cat {} {} > {}'.format(imagefile, tempfile, targetfile), shell=True) # 合并生成新图片 os.remove(tempfile)效果 |
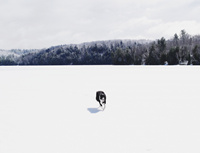 图片大小为 8KB
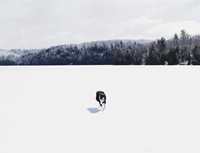
 图片的分辨率没变
【本文地址】
今日新闻 |
推荐新闻 |