Python |
您所在的位置:网站首页 › python监控屏幕像素 › Python |
Python
|
一、安装pyautogui
windows:
pip install pyautogui
或者:pip install pyautogui -i https://pypi.tuna.tsinghua.edu.cn/simple
mac:
pip install pyobjc-core
pip install pyobjc
pip install pyautogui
linux:
sudo apt-get install scrot python3-tk python3-dev
pip install python3-xlib
pip install pyautogui
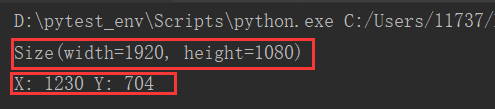
二、鼠标操作: 1:屏幕和鼠标的位置(行X竖Y): 左上角的像素位于坐标0、0。如果屏幕的分辨率为1920 x 1080,则右下角的像素将为1919、1079(因为坐标始于0,而不是1)。 屏幕分辨率大小由该size()函数作为两个整数的元组返回。该position()函数返回鼠标光标的当前X和Y坐标。 2:获取屏幕和鼠标的位置: import pyautogui # 获取屏幕分辨率 print(pyautogui.size()) # 获取鼠标的坐标位置 x, y = pyautogui.position() print("X: %s Y: %s" % (x, y))
注意: 获取到的是电脑设置中的分辨率。如果是虚拟机也是按照虚拟机的设置,不能根据电脑中的分辨率。 3:鼠标移动和点击: 相对移动:pyautogui.move(65, 168)—相对的是当前鼠标的位置。 绝对移动: pyautogui.moveTo(65, 168) 每个动作后停留时间: pyautogui.PAUSE = 2 判断像素点是不是在屏幕中:pyautogui.onScreen(65, 168) 当前位置点击: pyautogui.click() 先移动到位置再点击: pyautogui.click(x=100, y=200) 移动到某个位置左击,右击,中间点击:pyaotogui.click(x=100, y=200, button=‘right’) 移动到某个位置左击,右击,中间多次点击: pyaotogui.click(x=100, y=200, button=‘right’, clicks=3) 移动到某个位置左击,右击,中间多次点击,中间间隔0.25秒点击:pyaotogui.click(x=100, y=200, button=‘right’, clicks=3, interval=0.25) 左击: pyautogui.leftClick(x, y, 过程中秒数) 右击:pyautogui.rightClick(x, y, 过程中秒数) 双击:pyautogui.doubleClick(x, y, 过程中秒数) 4:鼠标移动案例: 描述:定位桌面的回收站,然后右击,再用相对路径,左击属性。 # 定位桌面的回收站,然后右击,再用相对路径,左击属性:(57, 285) import pyautogui # # 每个动作后,停留两秒 # pyautogui.PAUSE = 2 # 1: 移动到回收站的位置,2表示移动过程两秒 pyautogui.moveTo(57, 285, 2) # 2: 右击 pyautogui.rightClick() # 3: pyautogui.move(87, 200, 2) pyautogui.leftClick()5:鼠标拖拽 案例:将回收站向右拖拽500像素。 import pyautogui # 1: 鼠标移动到指定位置---绝对(left表示鼠标左键,middle表示中间键, right表示右键) pyautogui.dragTo(57, 285, button='left') # 2: 进行拖拽,3表示执行时间---相对 pyautogui.drag(500, 0, 3)6:鼠标滚动 案例:定位到代码框,然后滚动 # 案例:定位到代码框,然后滚动 import pyautogui import time # 1:定位到代码框: pyautogui.click(1100, 460,) # 2: 向下滚动: pyautogui.scroll(-1000) time.sleep(1) # 3: 向上滚动 pyautogui.scroll(1000)7:保护措施: 为了能够及时中断,PyAutoGUI提供了一个保护措施。当pyautogui.FAILSAFE = True时,如果把鼠标光标在屏幕左上角,PyAutoGUI函数就会产生pyautogui.FailSafeException异常。如果失控了,需要中断PyAutoGUI函数,就把鼠标光标在屏幕左上角。要禁用这个特性,就把FAILSAFE设置成False。 案例:禁用保护 import pyautogui # 运行过程中,用户动鼠标: 与用户不冲突 pyautogui.FAILSAFE = False while True: pyautogui.moveTo(400, 400) pyautogui.moveTo(1000, 400)8:mouseDown()和mouseUp()函数 import pyautogui import time # 鼠标定位到我的电脑,进行右击 pyautogui.mouseDown(button="right", x=50, y=54) pyautogui.mouseUp() time.sleep(2) # 鼠标定位到属性,进行左击 pyautogui.mouseDown(button="left", x=86, y=356) pyautogui.mouseUp()
三、键盘操作: 1:write函数的使用 中文不支持,需要配合pyperclip一起使用。 interval 关键字进行延时操作。案例:手动打开记事本,定位到记事本,分别写入“hahaha”和“哈哈哈”。 import pyautoguiimport pyperclip
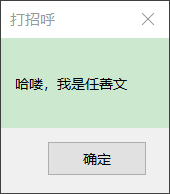
移动到位置进行点击 pyautogui.moveTo(520, 520, 1) pyautogui.click()书写中文 pyautogui.write(“hahaha\n\n”, interval=1)复制中文,然后粘贴 pyperclip.copy(‘哈哈哈’) pyautogui.hotkey(‘ctrl’, ‘v’)2:press函数,keyDown和keyUp函数的使用: 案例: 使用prass函数,和keydown,keyup,write函数分别完成一次,敲击回车 import pyautogui import time pyautogui.moveTo(520, 520, 1) pyautogui.click() # 1: 使用press敲击3次回车 pyautogui.press('enter', presses=3) pyautogui.write("hahaha\n") time.sleep(1) # 2:使用keydown 和keyup敲击三次回车 pyautogui.keyDown("enter") pyautogui.keyUp('enter') pyautogui.keyDown("enter") pyautogui.keyUp('enter') pyautogui.keyDown("enter") pyautogui.keyUp('enter') pyautogui.write("hahaha\n") time.sleep(1) # 3: 使用write敲击三次回车 pyautogui.write(['enter', 'enter', 'enter']) pyautogui.write("hahaha\n")3:hotkey函数的使用: 案例使用热键:打开任务管理器: import pyautogui pyautogui.hotkey('ctrl', 'shift', 'esc')四、信息框操作: 方法 作用 pyautogui.alert() 简单提示消息框 pyautogui.confirm() 多按钮消息框 pyautogui.prompt() 明文输入消息框 pyautogui.password() 密文输入消息框 案例一:显示带有文本和单个“确定”按钮的简单消息框。返回单击的按钮的文本。 import pyautogui el = pyautogui.alert(text='哈喽,我是任善文', title='打招呼', button='OK') print(el)
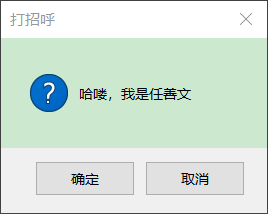
案例二:显示带有“确定”和“取消”按钮的消息框。可以自定义按钮的数量和文本。返回单击的按钮的文本。(点击取消) import pyautogui el = pyautogui.confirm(text='哈喽,我是任善文', title='打招呼', buttons=['OK', 'Cancel']) print(el)
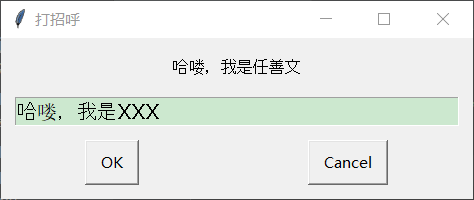
案例三:显示带有文本输入以及“确定”和“取消”按钮的消息框。返回输入的文本,如果单击“取消”,则返回“无”。 import pyautogui el = pyautogui.prompt(text='哈喽,我是任善文', title='打招呼', default='哈喽,我是XXX') print(el)
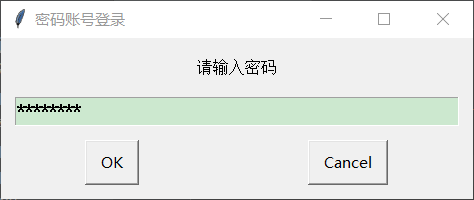
案例四:显示带有文本输入以及“确定”和“取消”按钮的消息框。输入的字符显示为*。返回输入的文本,如果单击“取消”,则返回“无”。 import pyautogui el = pyautogui.password(text='请输入密码', title='密码账号登录', default='12345678', mask='*') print(el)
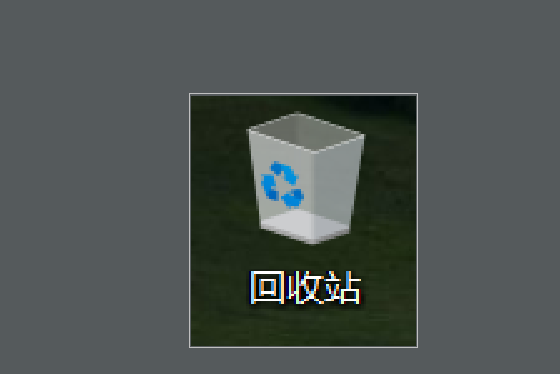
五、截图和定位操作: 1:screenshot函数的使用: 案例: 截取回收站图标,保存到文件中。 import pyautogui img = pyautogui.screenshot('./images/screenshot.png', region=(1, 250, 90, 100)) print(img)截图如图所示:
返回的是Image对象
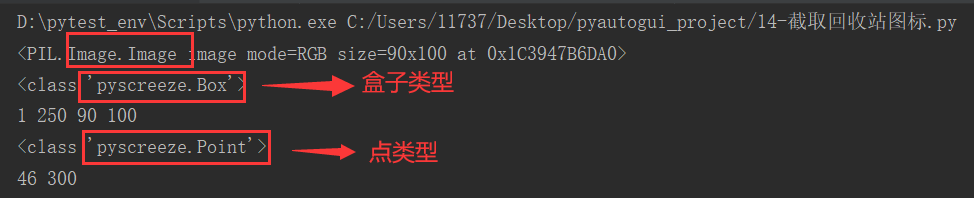
案例一:通过刚才截取的图片,找到回收站的位置,然后双击回收站打开。(全屏搜索) import pyautogui import time # 1:截取回收站的图片 img = pyautogui.screenshot('./images/screenshot.png', region=(1, 250, 90, 100)) print(img) # 图片类型 # 2:全屏搜索图片(回收站)---获取的会是一个区域 rect = pyautogui.locateOnScreen('./images/screenshot.png') print(type(rect)) # 盒子类型 print(rect[0], rect[1], rect[2], rect[3]) # 3:在区域中获取中心位置 point = pyautogui.center(rect) print(type(point)) # 点类型 x, y = point print(x, y) time.sleep(1) # 4: 双击中心位置 pyautogui.doubleClick(x, y
案例二:使用locateCenterOnScreen,在区域内查询。 import pyautogui import time # 1:截取回收站的图片 img = pyautogui.screenshot('./images/screenshot.png', region=(1, 250, 90, 100)) print(img) # 2:全屏搜索图片(回收站)---获取的会是一个区域 point = pyautogui.locateCenterOnScreen('./images/screenshot.png') print(type(point)) x, y = point time.sleep(1) # 4: 双击中心位置 pyautogui.doubleClick(x, y)
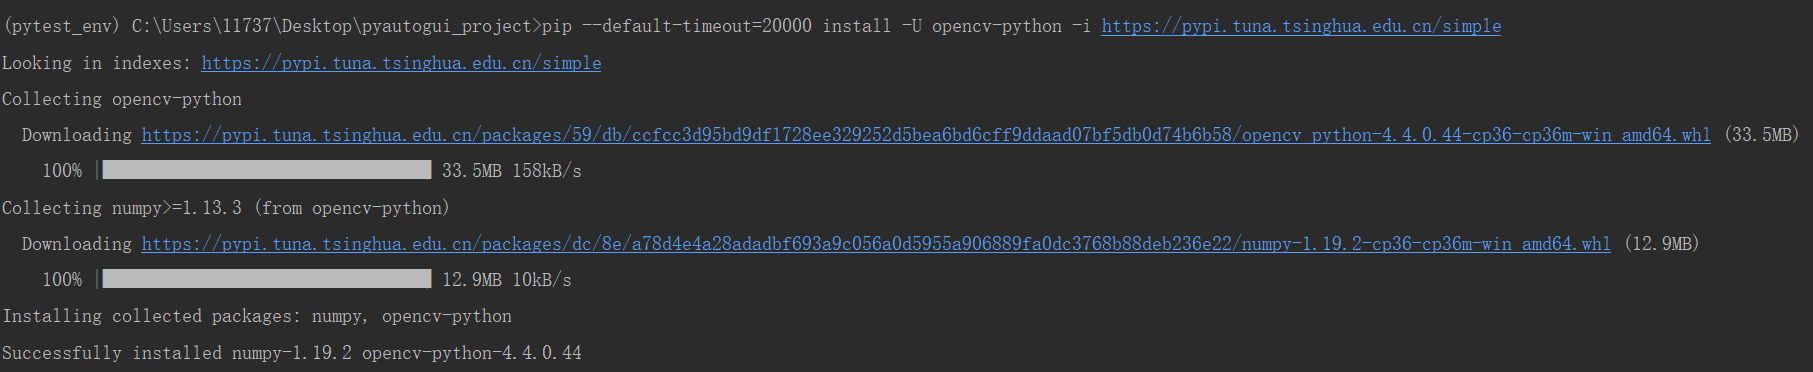
3:提高定位精度 1: 安装OpenCv,由于文件太大需要指定默认等待下载时间(如果网速好可以不用指定)
2:可选的confidence关键字参数指定函数在屏幕上定位图像的精度。 import pyautogui # 可以通过图片,在屏幕上定位图像所在的位置 # 找到返回的是一个4边距元组 (top, left, width, height),没有找到返回None # 全屏幕搜素 rect = pyautogui.locateOnScreen('./images/x3.png', confidence=0.6) print(rect)4:加速定位 1: 指定搜索区域: pyautogui.locateOnScreen('./images/computer.png', region=(0, 0, 400, 400))2: 降低图片颜色的饱和度: pyautogui.locateOnScreen('./images/computer.png', grayscale=True)
==================================================== 原文转自:https://www.dandelioncloud.cn/article/details/1604476127198527489 |


【本文地址】
今日新闻 |
推荐新闻 |