Python基于PyQt的系统登录界面案例集 |
您所在的位置:网站首页 › python登录系统代码 › Python基于PyQt的系统登录界面案例集 |
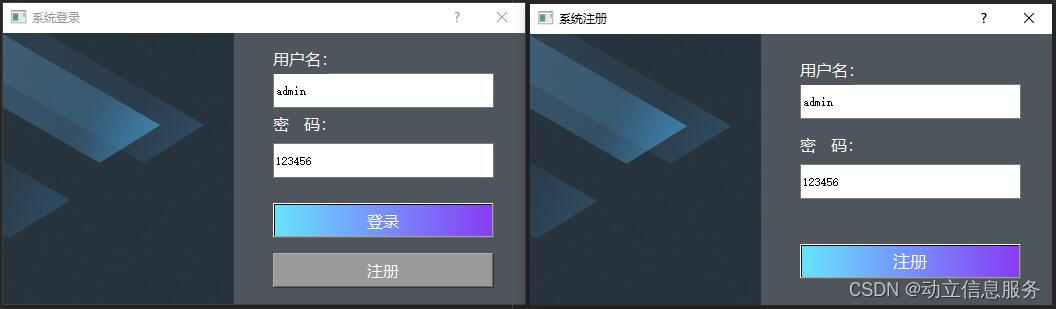
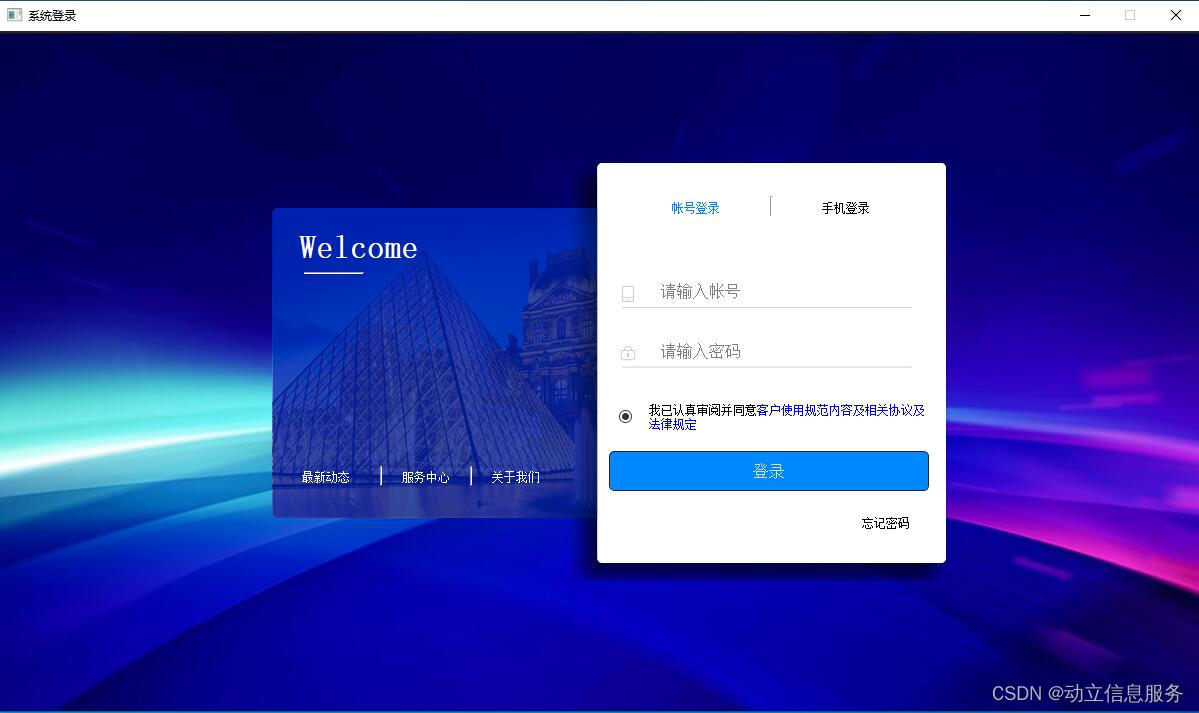
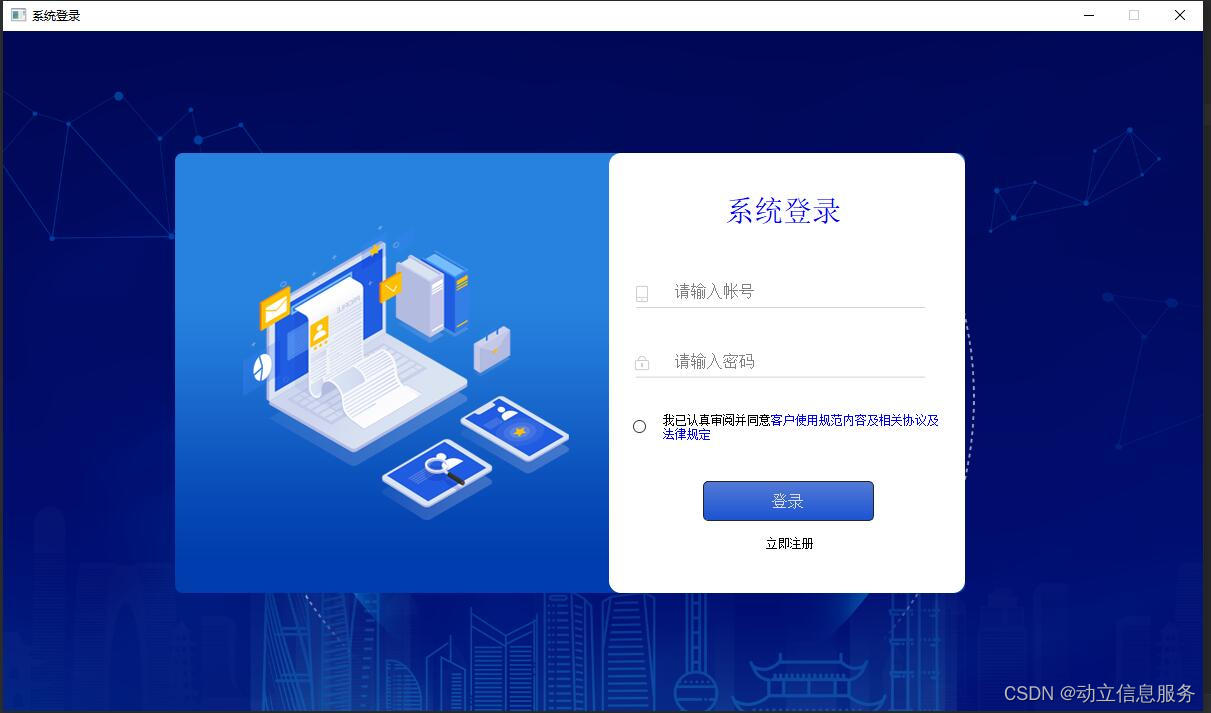
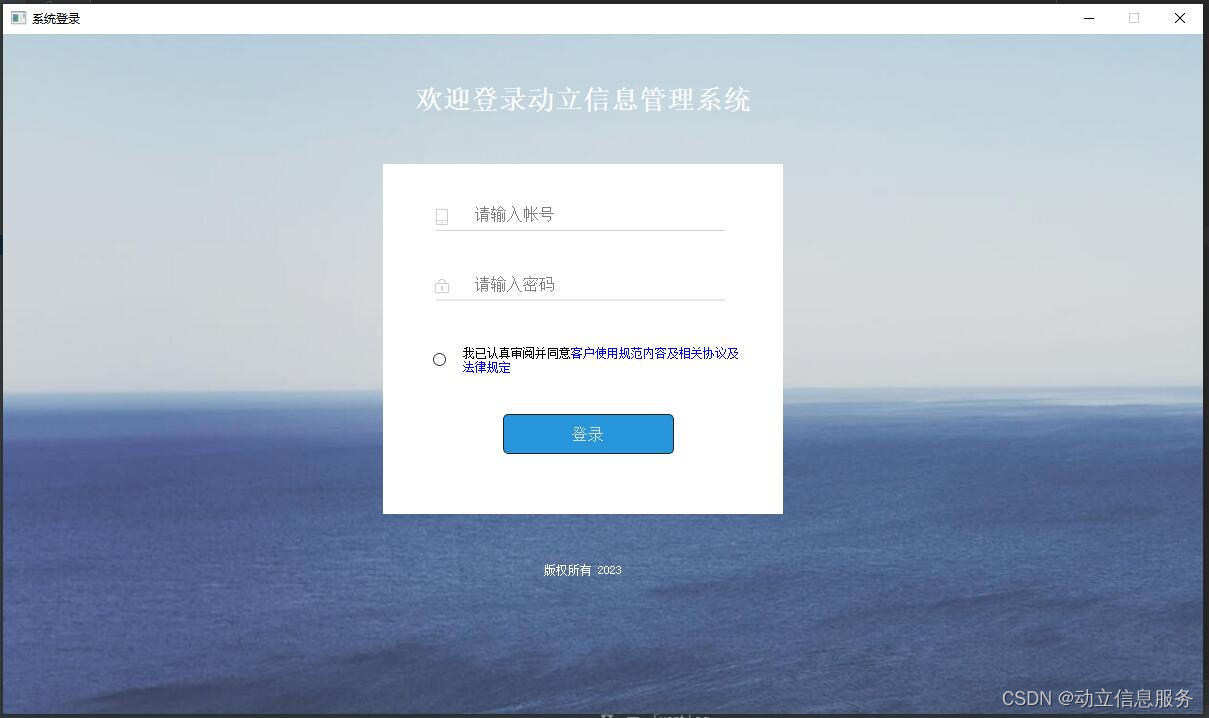
Python基于PyQt的系统登录界面案例集
|
提示:本文章先分享一下基于PyQt快速搭建系统登录界面的案例集
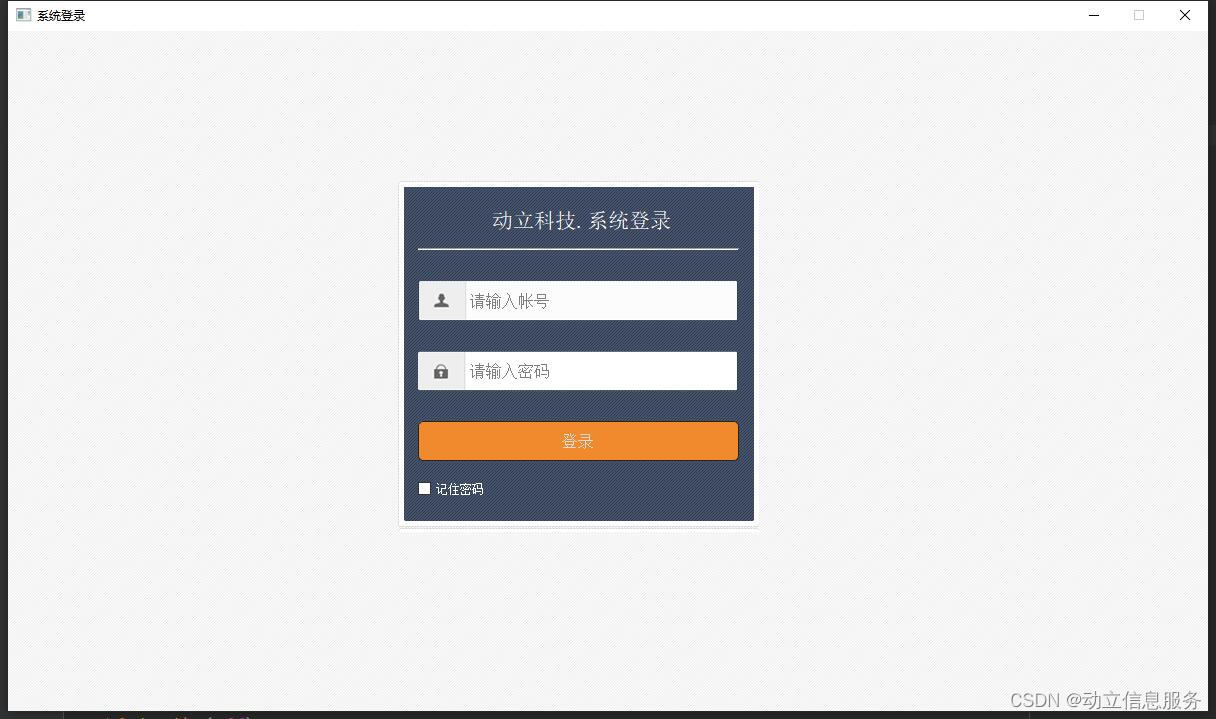
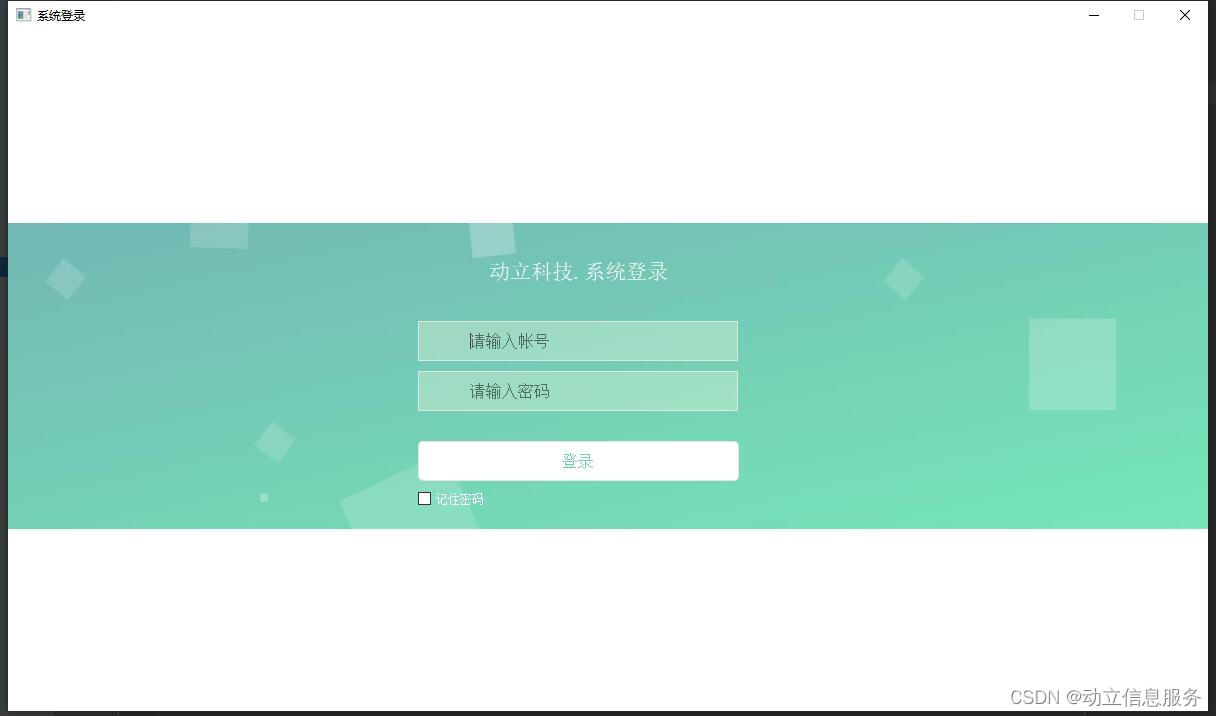
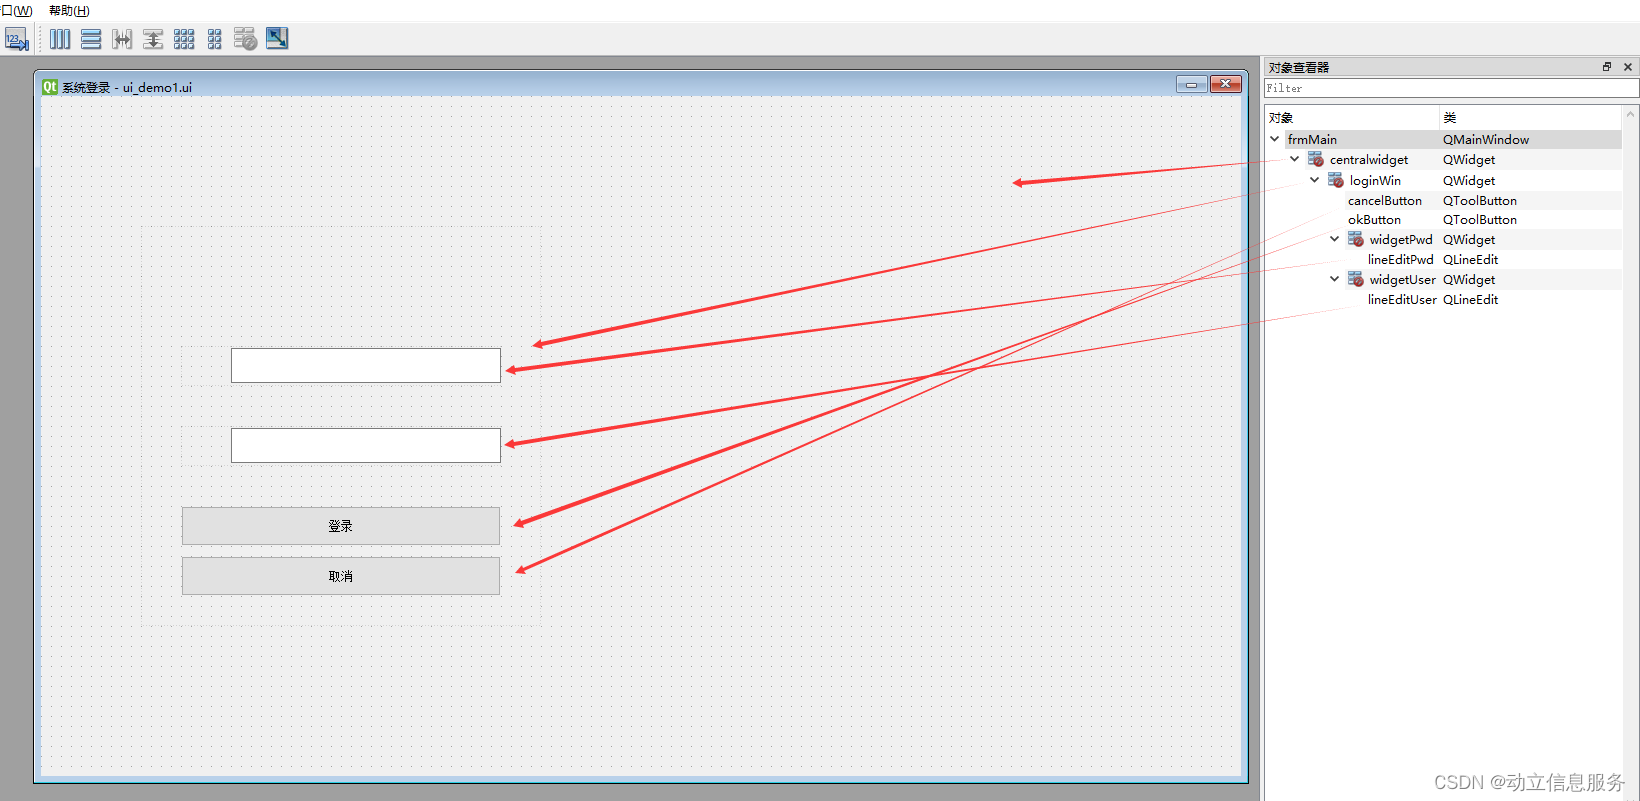
提示:以下详细分享一下如何基于PyQt快速搭建系统登录界面的方法 一、使用designer布局界面使用Qt 设计师(designer.exe)软件初始设置界面的主要控件位置及整体布局,并为每个控件创新唯一的名称,如下图所示。 提示:详情请参考代码中的ui_demo.ui文件.
设计好ui文件后,需要将ui格式文件转换成py格式,才能在py代码中应用,调用python的pyuic5工具可以实现,相关代码如下所示。 import os import os.path # UI文件所在的路径 dir = '.' # 列出目录下的所有ui文件 def listUiFile(): list = [] files = os.listdir(dir) for filename in files: # print( dir + os.sep + f ) # print(filename) if filename == 'ui_demo1.ui': if os.path.splitext(filename)[1] == '.ui': list.append(filename) return list # 把后缀为ui的文件改成后缀为py的文件名 def transPyFile(filename): return os.path.splitext(filename)[0] + '.py' # 调用系统命令把ui转换成py def runMain(): list = listUiFile() for uifile in list: pyfile = transPyFile(uifile) cmd = 'pyuic5 -o {pyfile} {uifile}'.format(pyfile=pyfile, uifile=uifile) # print(cmd) os.system(cmd) 三、使用QSS设置界面样式独立建立qss样式定义文件,用于统一设置界面的样式,样式内容如下所示。 * { font-family:'微软雅黑'; color:white; } /*设置背景图片*/ QMainWindow{ border-image:url("./images/bg.jpg"); } QToolButton{ border:0px; cursor: pointer; font-size:16px; } QLineEdit{ border:0px; font-size:16px; background-color: transparent; } QWidget[objectName="loginWin"]{ border-image:url("./images/logo_bg.png"); } QWidget[objectName="widgetUser"]{ border-image:url("./images/usr_bg.png"); } QWidget[objectName="widgetPwd"]{ border-image:url("./images/pwd_bg.png"); } QToolButton[objectName="okButton"] { border-style:none; border:1px solid #242424; color:#DCDCDC; padding:5px; border-radius:5px; background:qlineargradient(spread:pad,x1:0,y1:0,x2:0,y2:1,stop:0 #00e4ff,stop:1 #01727f); } QToolButton[objectName="okButton"]:hover { background:qlineargradient(spread:pad,x1:0,y1:0,x2:0,y2:1,stop:0 #007785,stop:1 #004e57); } QToolButton[objectName="okButton"]:pressed { background:qlineargradient(spread:pad,x1:0,y1:0,x2:0,y2:1,stop:0 #00e4ff,stop:1 #01727f); } QToolButton[objectName="cancelButton"] { border-style:none; border:1px solid #242424; color:#DCDCDC; padding:5px; border-radius:5px; background:qlineargradient(spread:pad,x1:0,y1:0,x2:0,y2:1,stop:0 #a2a1a1,stop:1 #525252); } QToolButton[objectName="cancelButton"]:hover { background:qlineargradient(spread:pad,x1:0,y1:0,x2:0,y2:1,stop:0 #646464,stop:1 #525252); } QToolButton[objectName="cancelButton"]:pressed { background:qlineargradient(spread:pad,x1:0,y1:0,x2:0,y2:1,stop:0 #a2a1a1,stop:1 #525252); } 四、创建QMainWindow主窗口类最后,创建主窗口类进行封装显示即可,代码如下图所示。 import sys from PyQt5.QtWidgets import * from PyQt5.QtGui import * from PyQt5.QtCore import * import win32ui import win32api,win32con from demo1.ui_demo1 import Ui_frmMain class MyMainWindow(QMainWindow, Ui_frmMain): def __init__(self, parent=None): super(MyMainWindow, self).__init__(parent) self.setupUi(self) self.setFixedSize(1200, 680) #固定大小 self.okButton.clicked.connect(self.ok_action) # 点击登录按钮 self.cancelButton.clicked.connect(self.cancel_action) # 点击取消按钮 #self.setWindowFlags(Qt.FramelessWindowHint) # 无边框 self.startAnimation() self.initQSS() def adj_login(self, user, pwd): ''' 验证登录是否正确 ''' return True def ok_action(self): ''' 点击确定按钮事件 ''' user = self.lineEditUser.text().strip() pwd = self.lineEditPwd.text().strip() if user == '' or pwd == '': win32api.MessageBox(0, "用户名或密码不能为空,请重新输入!", "登录提醒", win32con.MB_ICONWARNING) return False if self.adj_login(user, pwd) == False: win32api.MessageBox(0, "用户名或密码不正确,请重新输入!", "登录提醒", win32con.MB_ICONWARNING) return False self.close() def cancel_action(self): ''' 点击"取消"按钮事件 ''' self.close() def closeWindowAnimation(self): ''' 关闭时的动画效果 ''' self.animation = QPropertyAnimation(self, b"windowOpacity") self.animation.setDuration(1000) self.animation.setStartValue(1) self.animation.setEndValue(0) self.animation.start() self.animation.finished.connect(self.close) def startAnimation(self): ''' 启动时的动画效果 ''' self.animation = QPropertyAnimation(self, b"windowOpacity") self.animation.setDuration(1000) self.animation.setStartValue(0) self.animation.setEndValue(1) self.animation.start() def initQSS(self): ''' 初始化样式 ''' style_file = QFile("style.css") if style_file.open(QFile.ReadOnly | QFile.Text): stream = QTextStream(style_file) style_sheet = stream.readAll() #print(style_sheet) self.setStyleSheet(style_sheet) if __name__=="__main__": app = QApplication(sys.argv) myWin = MyMainWindow() myWin.show() sys.exit(app.exec_()) 总结如需要获取本文中所有模板案例代码,请参考基于Python PyQt的系统登录界面案例集代码 |


【本文地址】