Protobuf安装和使用 |
您所在的位置:网站首页 › python中怎么安装pip指定版本 › Protobuf安装和使用 |
Protobuf安装和使用
Protobuf安装和使用
安装
Protoc :Protoc下载对应电脑系统的版本。配置 protoc 到系统的环境变量中,执行如下命令查看是否安装成功:  python 安装
pip install protobuf
使用
创建 demo 工程 , 创建一个 person.proto 文件
syntax = "proto3";
package example;
message apple{
int64 id = 1;
int32 progress= 2;
int32 mode= 3;
int32 fontsize= 4;
uint32 color= 5;
string midHash= 6;
string content= 7;
int64 ctime= 8;
int32 weight= 9;
string action= 10;
int32 pool= 11;
string idStr= 12;
int32 attr= 13;
string effect= 22;
}
message fruit{
repeated apple Per = 1;
}
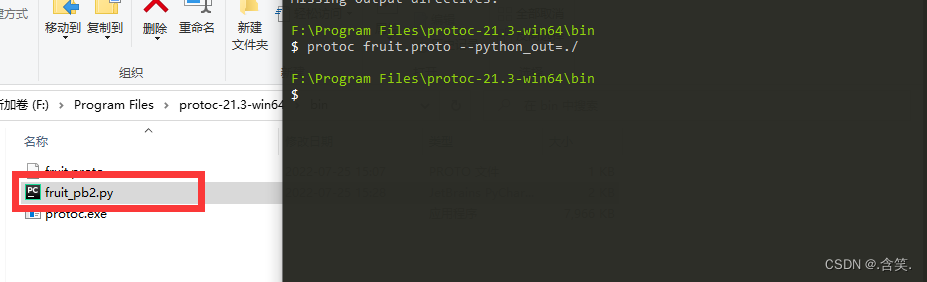
编译 .proto 文件 使用命令:
protoc fruit.proto --python_out=./
protoc -I=$SRC_DIR --python_out=$DST_DIR
$SRC_DIR/addressbook.proto python 安装
pip install protobuf
使用
创建 demo 工程 , 创建一个 person.proto 文件
syntax = "proto3";
package example;
message apple{
int64 id = 1;
int32 progress= 2;
int32 mode= 3;
int32 fontsize= 4;
uint32 color= 5;
string midHash= 6;
string content= 7;
int64 ctime= 8;
int32 weight= 9;
string action= 10;
int32 pool= 11;
string idStr= 12;
int32 attr= 13;
string effect= 22;
}
message fruit{
repeated apple Per = 1;
}
编译 .proto 文件 使用命令:
protoc fruit.proto --python_out=./
protoc -I=$SRC_DIR --python_out=$DST_DIR
$SRC_DIR/addressbook.proto
来编译刚刚的addressbook.proto,其中, $SRC_DIR : addressbook.proto 的目录 –python_our : 因为我们使用的Python , $DST_DIR 产生一个addressbook_pb2.py文件 打印结果 : |
 4. protobuf 进行序列化与反序列化
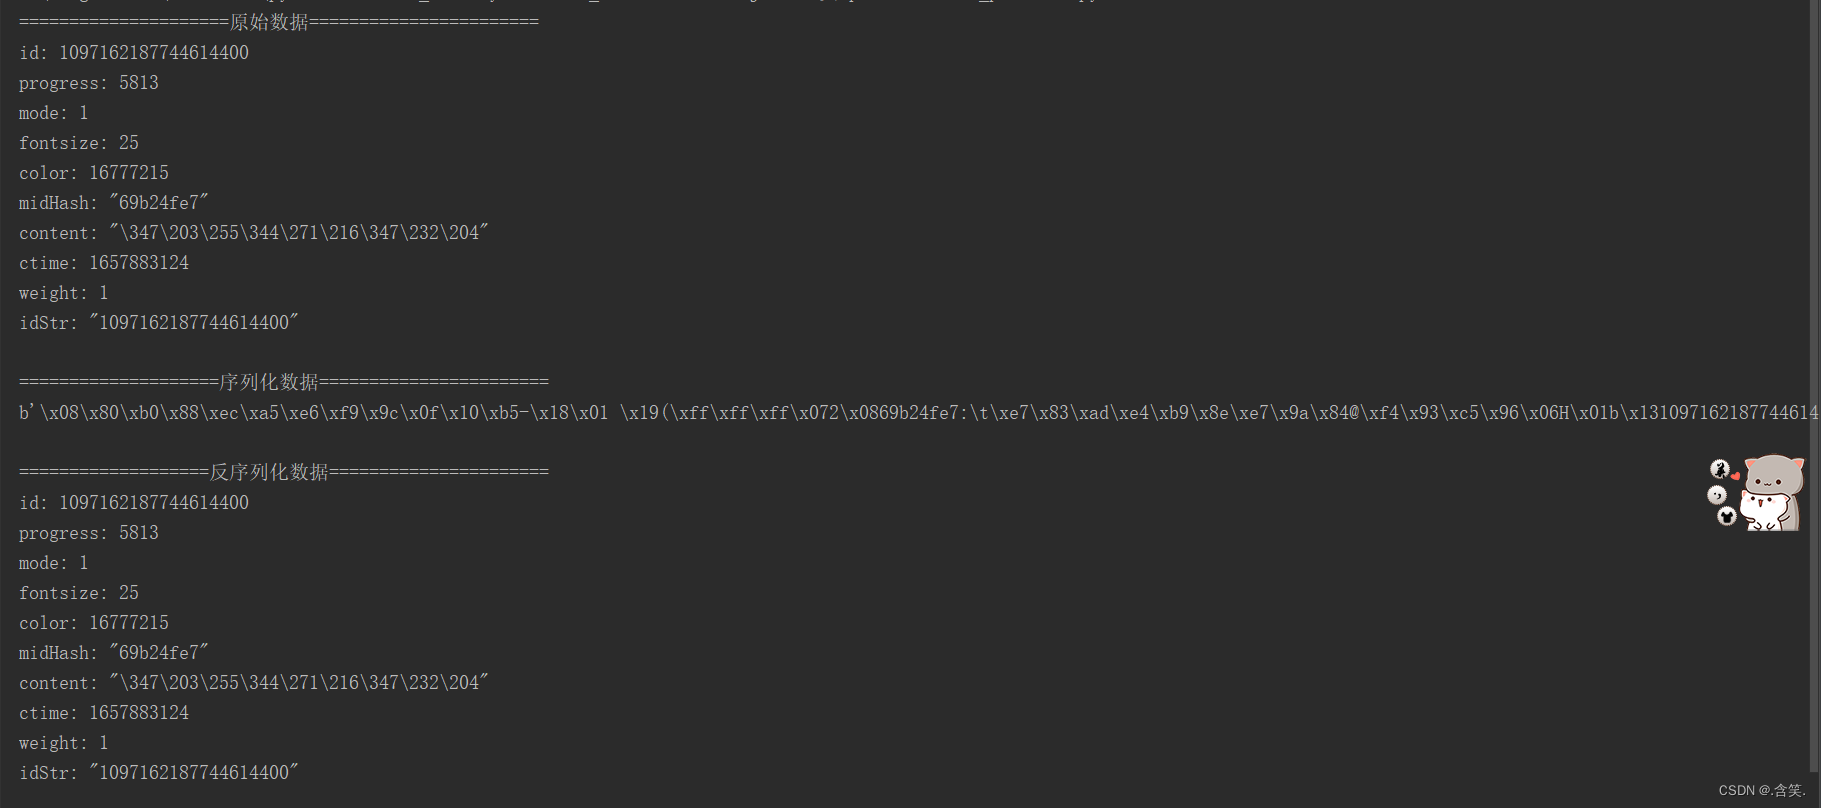 5. 注意 :
【本文地址】
今日新闻 |
推荐新闻 |