自建服务器部署WEB网站可公网访问 |
您所在的位置:网站首页 › pythonweb网站部署ppt › 自建服务器部署WEB网站可公网访问 |
自建服务器部署WEB网站可公网访问
|
文章目录
自建服务器部署WEB网站可公网访问一、公网IP端口映射到服务器主机或者内网穿透二、Nginx 反向代理和负载均衡2.1 windows 10 安装Nginx2.2 ubuntu18.04 安装Nginx
三、web部署四、遇到问题
自建服务器部署WEB网站可公网访问
一、公网IP端口映射到服务器主机或者内网穿透
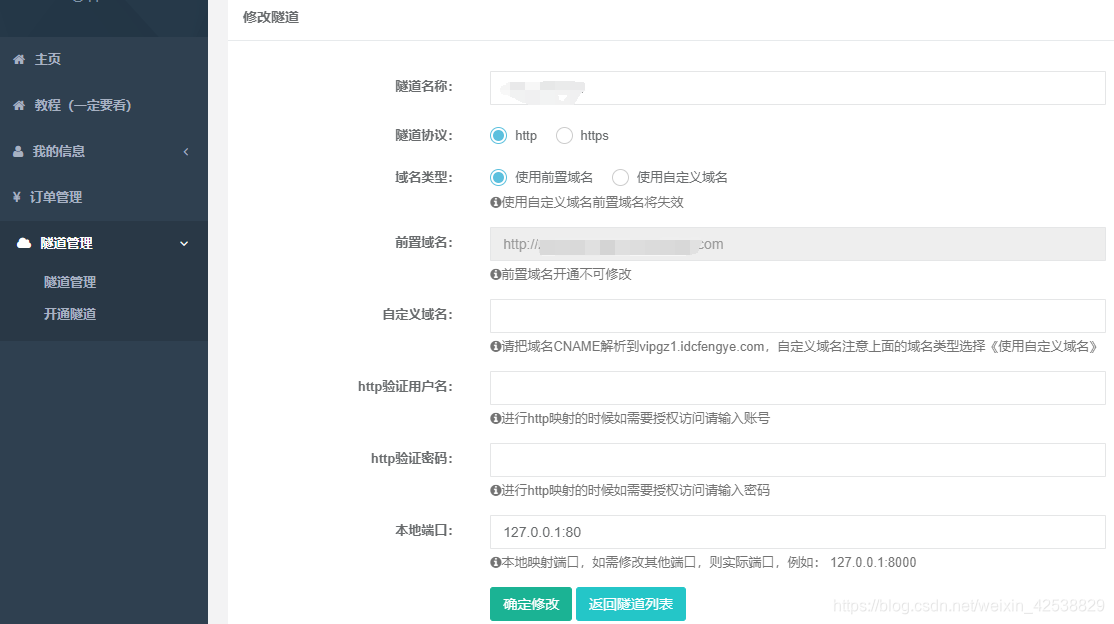
1、公网IP转发服务器端口 入户电信和联通宽带可以申请桥接模式,请宽带操作员把家中光猫设置成拨号模式,然后通过路由器进行拨号上网,这样在该路由器上转发服务器IP和端口,实现公网访问。 最直接的方案:端口映射。比如路由器的公网IP:10.10.10.1,私网路由器IP:192.168.1.1,个人电脑IP:192.168.1.12,你web服务部署的端口8080.在路由器做端口映射192.168.1.1:8080192.168.1.12:8080.这样设置好后,通过外网访问10.10.10.1:8080时,就是访问你的web服务了。注意防火墙设置等。 2、通过代理进行内网穿透 这个可选方法有很多,有付费的花生壳,免费的小米球和国外Ngrok等,这里介绍下免费的小米球。一般付费的带宽会好一点。 小米球官网链接:https://www.ngrok.cc/ 1、使用Nginx作为服务器反向代理中间件。 Nginx下载地址:http://nginx.org/en/download.html Nginx常用命令: cd /usr/local/nginx/sbin/ ./nginx # 启动 ./nginx -s stop # 停止 ./nginx -s quit # 安全退出 ./nginx -s reload # 重新加载配置文件 ps aux|grep nginx # 查看nginx进度 2.2 ubuntu18.04 安装Nginx1、安装Nginx-1.20.1 参考:ubuntu安装nginx 在执行如下步骤时: ./configure遇到问题: ./configure: error: the HTTP rewrite module requires the PCRE library. You can either disable the module by using --without-http_rewrite_module option, or install the PCRE library into the system, or build the PCRE library statically from the source with nginx by using --with-pcre= option.解决方案: 先忽略了,执行: ./configure --without-http_rewrite_module出现问题: ./configure: error: the HTTP gzip module requires the zlib library. You can either disable the module by using --without-http_gzip_module option, or install the zlib library into the system, or build the zlib library statically from the source with nginx by using --with-zlib= option.安装zlib: 参考:Ubuntu Nginx ./configure: error: the HTTP gzip module requires the zlib library. 以及tengine的编译安装 在执行: make遇到问题: 之后,重新执行: sudo su ./configure显示成功: Configuration summary + using system PCRE library + OpenSSL library is not used + using system zlib library之后,执行: make make install 三、web部署基于web服务端的模型部署,主要是通过REST API的形式来提供接口方便调用。 1、web服务与技术框架 2、服务配置 3、预测接口定义 4、接口测试 四、遇到问题1、问题:重启几次flask之后,报错: requests.exceptions.ConnectionError: HTTPSConnectionPool(host=‘api.github.com’, port=443): Max retries exceeded with url: /repos/ultralytics/yolov5/releases/latest (Caused by NewConnectionError(’: Failed to establish a new connection: [Errno 11001] getaddrinfo failed’)) 解决: 在win10的环境中添加miniconda,如下:
|
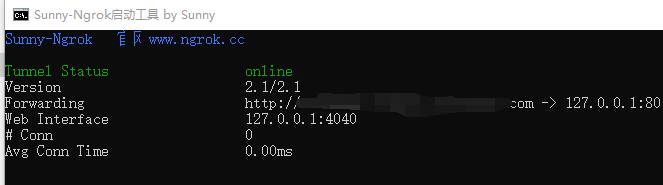 具体操作见官网教程,开通隧道后,可以用Forwarding栏http://xxxx.xxxx.com网址直接访问服务器部署的网站。
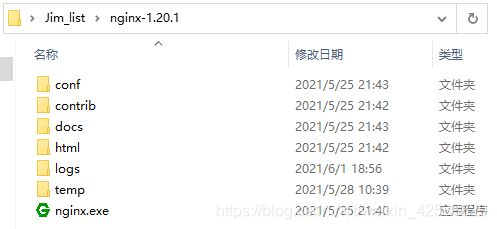
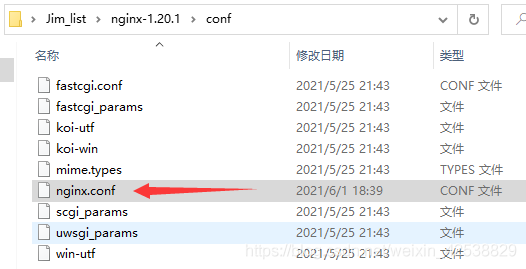 进入nginx.conf文件,主要在http函数中设置upstream和location功能:
 解决参考:Ubuntu下一步一步安装nginx,make: *** No rule to make target build', needed bydefault’. Stop. 期间,遇到清华源出错,所以都改成了阿里源,改源步骤参考: 更换Ubuntu源(sources.list) 然后,开始安装依赖:
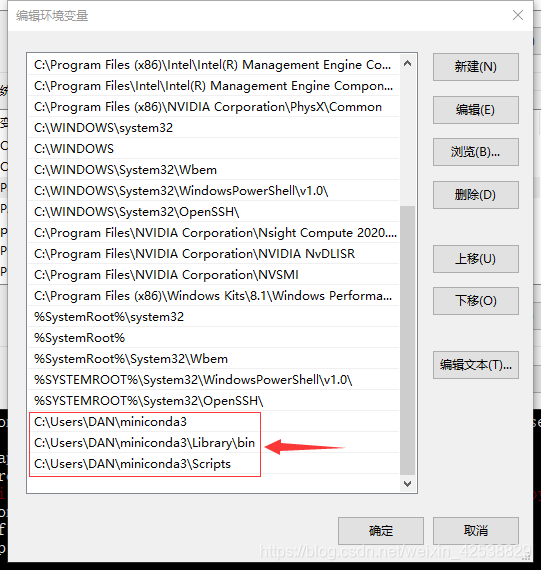
 引用链接:
引用链接:【本文地址】
今日新闻 |
推荐新闻 |