The Ultimate ROM File Compression Guide – Retro Game Corps |
您所在的位置:网站首页 › ps1游戏bin转chd › The Ultimate ROM File Compression Guide – Retro Game Corps |
The Ultimate ROM File Compression Guide – Retro Game Corps
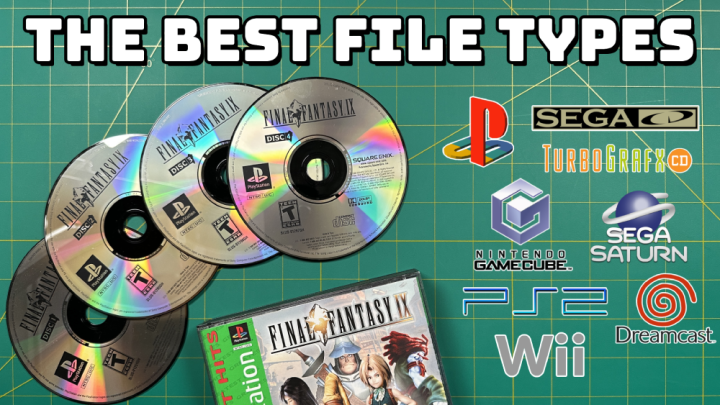
Last updated: 08FEB2023 (see Changelog for details) Organizing your ROM library can be confusing and tedious, and so in this guide I will show you how I use CHD, PBP, and RVZ files to optimize my collection. For this guide I will focus on CD-based games, as they often pose the most issues when it comes to compatibility. (Secret tip: for cartridge-based systems like NES, you can generally just use zip files or leave them uncompressed). Note that the video guide is made with Windows PCs in mind, but I have included Mac instructions where applicable below. Table of Contents CHD files PBP files (PS1) m3u playlist files (multi-disc games) RVZ files (GameCube and Wii) CSO files (PSP) WUA files (Wii U) ChangelogCHD files CHD (“Compressed Hunks of Data”) files are compressed data files that can be used on most CD-based systems. They are in a lossless compression format, meaning that they perfectly preserve all game data while reducing file sizes. CHDs were originally developed for MAME to compress CD-based arcade games, but now the are compatible with a variety emulators and CD-based consoles. CHD files are compatible with most emulators for the following systems: Sony PlayStation Sony PlayStation 2 Sega CD Sega Saturn Sega Dreamcast NEC TurboGrafx-CD (PC Engine CD) Neo Geo CD Panasonic 3DO Amiga CD32 Philips CD-IThe most common file type to convert to CHD are BIN/CUE files. If you happen to have only BIN files without their corresponding CUE file, use this tool to easily generate CUE files. Windows instructions: The MAME-developed tool for CHD conversion is called CHDman, which works well but requires some knowledge of command line to get working. If you would like to try your hand at it, here is a pretty good guide. Luckily, there is now a program that uses a graphical user interface (GUI) to navigate CHDman, and it is called namDHC. That’s what we are going to use in this guide. Download the chdman.exe and namDHC.exe files from the latest namDHC GitHub release. You can place these files wherever you would like. Open the namDHC.exe file and select “Add files” from the Input Files section. Choose the files you want to convert to CHD. These file types can be cue, toc, gdi, iso, or zip files. You can select many files at once. Select your desired Output Folder and then click the “Create CHD” button. When complete, you can read a report to verify that all CHD files were created successfully.Linux instructions: Check out this handy tool called the tochd converter. Mac instructions: Converting game files to CHD format on a Mac is tricky, but very possible. This code is written for bin/cue files but you could do the same with ISO files (see the bottom of the instructions). Install Homebrew on your Mac. To do so, open a Terminal window and type: /bin/bash -c "$(curl -fsSL https://raw.githubusercontent.com/Homebrew/install/HEAD/install.sh)" Install rom-tools on your Mac via Homebrew. To do so, open a Terminal window and type: brew install rom-tools On your Mac, create a folder and put all of your BIN/CUE files inside. Open a Terminal window and change your directory to the folder that hosts all those BIN/CUE files. The easiest way to do that is to type “cd” (without the quotes) and the path of your folder To find your folder path, navigate to the folder with your games, and make sure you can see the Path Bar at the bottom of your Finder window (if you don’t, go to Finder > View > Show Path Bar). Drag the folder name from the Path Bar in your Finder window into the Terminal window. The full command should be “cd (name of path)” but without the quotes Once Terminal is pointed to the folder and you have all your BIN/CUE files inside, copy and paste the following code: #!/bin/bash for file in *.cue; do chdman createcd -i "${file%.*}.cue" -o "${file%.*}.chd"; doneSome notes for Mac users: Thanks to the Redditors from this post for figuring all this out. This code above could be altered for ISO files by using “*.iso” instead of “*.cue”. If using an older version of MacOS, you may have to use MacPorts which contains an older version of CHDman (thanks Lourens for the tip)PBP files (PS1) Many PS1 games came in multiple discs, and there is a special tool that will let you convert multi-disc PS1 games into one single PBP file. It will also compress the game files to reduce file size, but bear in mind that this is a lossy compression, meaning that you cannot go back to a different file type after converting to PBP (for example, you can switch back and forth with CHD files). There is also some concern that game data is lost in this conversion process, and so if you want to maintain pristine files this may not be the format for you. But for my own use case I haven’t ever ran into issues with PBP files and I prefer the single-file solution they bring. One downside for PBP files is that they are not compatible with RetroAchievements (more info here). So if you want to earn achievements for your PS1 games, you will need to stick with CHD files and use m3u playlists for multi-disc games. Note that this conversion tool is only available on Windows, but it is possible for Mac users to run this application via Wine. PBP conversion instructions (Windows only): Go to this page and download PSX2PSP, then extract the zip file onto your computer. Open the PSX2PSP.exe file, and choose “Clasic Mode” In the ISO/PBP File section, choose “File 1” and then press the button to the right to choose your first disc’s game file. This works best with bin/cue or ISO files. In the same section, choose “File 2” from the drop-down and press the button to the right again to choose your second disc’s game file. Repeat this step if you have more discs. Under “Output PBP folder” choose wherever you would like to save the file, and then press the “Convert” button near the bottom of the window. When complete, you will have a folder in your output folder that is named after that game’s serial number, and inside will be a file named EBOOT.PBP — rename this file to your game (like “Final Fantasy VII.PBP”) and you are ready to go. See the video above to learn how to switch between discs while playing a game.If you have a multi-disc game that uses multiple BIN files, creating a PBP file can be a challenge since it only will load the first BIN file. To get around this limitation, you can combine the BIN files using an app called CDMage. This tool is only available on Windows, but can be run via Wine on Mac too. Download the latest (beta) version of CDMage, it is a self-extracting zip file; open it to extract the .exe file Open CDMage and select File > Open, then navigate to and select the CUE file of the game that has multiple BIN files. Once the game is loaded in CDMage, select File > Save As… and choose somewhere other than where the original files are located (so you don’t mix them up once they are created). Click on the “Save” button, you will get another dialog window, just click the “Ok” button and let the conversion happen. Once complete, you should have a new BIN/CUE file in the output location you selected. Repeat this process for the other discs in you collection, and then you can being the PBP conversion process above.m3u playlist files (multi-disc games) The PBP method above only works for PS1 games, so if you have other systems with multi-disc games, I recommend trying m3u playlists. This method is also great for Mac users who don’t want to deal with using workarounds like Wine to create PBP files for PSX games. To start, I recommend converting each of your game disc files to single CHD files following the guide above. On your computer, make a new blank text file using Notepad (Windows) or TextEdit (Mac). If using Mac, go to the Menu Bar and select Format > Make Plain Text to remove any rtf formatting from the file Within this file, list the name of each CHD file in the multi-game disc, such as: Shenmue (Disc 1) (USA).chd Shenmue (Disc 2) (USA).chd Shenmue (Disc 3) (USA).chd Save the file with whatever name you’d like, but save it as a .m3u file extension, such as “Shenmue (USA).m3u”. In your emulator, launch the m3u file and it should load the first disc; you can then use the emulator’s disc-swapping option to change different discs. If you want to hide your CHD files from multi-disc games, you can rename the CHD files to a different extension; for most emulators, they will still run the files as long as the m3u playlist file matches the new file extension. For example, with Shenmue as our example, you can change the file extension for each disc from “chd” to “cd”, and then alter the m3u playlist as follows: Shenmue (Disc 1) (USA).cd Shenmue (Disc 2) (USA).cd Shenmue (Disc 3) (USA).cdThis will effectively hide your .chd files from the emulator menu, but still allow you to launch your games via the m3u playlist. RVZ files (GameCube and Wii) When using the Dolphin emulator for GameCube and Wii emulation, you can take advantage of a special compressed format known as RVZ. Converting to this file is super easy, as it can be done in the Dolphin GUI. Note that in order for this to work you need to use Dolphin 5.0-12188 or later. This can be done on Windows or Mac versions of Dolphin. Load your games into the Dolphin emulator Right-click on the game and select “Convert File” Under “Format”, choose RVZ, then click the “Convert” button That’s it! Depending on the game, this tool will compress the file by up to 90%.Note: While in the video above I mention that you have to convert the files one at a time, I have since learned that you can multi-click on the games within the Dolphin window, and then right-click and select “Convert Selected Files” to batch convert them. CSO files (PSP) Typical PSP files will come in ISO format, but they are easy to compress into .cso files. I would expect a ~20% reduction in file size with this method. This process is done using a Windows-based tool called UMDGen, but it may be possible to run this app via Wine on Mac, too. Note that CSO files are currently not compatible with RetroAchievements, and so if you want to earn achievements (for now) you must use the original .iso format. There are multiple user requests with the RetroAchievements team to add CSO binaries to their code, and so this may be resolved in the future. Download UMDGen from this link and extract the UMDGen.exe file. Open UMDGen and navigate to the “Batch Image Converter” tab Drag and drop your ISO files into the main window within this Batch Image Converter tab; they should all load up with a “Queued” status. Below the window, select the option Convert To: > CSO and click on the “Start Batch Conversion” button. When complete, the .cso files will appear in the same folder as your .iso files.WUA files (Wii U) Another file type that is super handy are .wua files, which are compressed files that will work within the Cemu (Wii U) emulator. These will compress everything together into a single file: the base game, DLC, updates, etc. To get started, you need to be running Cemu 1.27 or later. You also need to load your games, updates, and DLC into the emulator beforehand. When running Cemu, go to Tools > Title Manager. Here you will see a list of all the games, updates, and DLC loaded for each game. Click the “Type” column header to sort by type, then find the list of games under the “base” type. Right-click on a game and select “Convert to compressed Wii U archive (.wua)” and it will confirm all of the data that will be compressed into a single file. Click on OK to confirm. Choose your output folder for the .wua file, and you are good to go! Re-load this file into Cemu, and discard the other files if you would like (you can delete them from the Title Manager tool).Changelog 12APR2023– added tochd converter as a Linux option 08FEB2023– added PSP (cso) section by request 07FEB2023– added Wii U (wua) section by request 06FEB2023– published guide– added CDMage instructions for consolidating multiple BIN files into a single BIN file, to aid in PBP conversion process.– added m3u section– added note about RetroAchievements not working with PBP files Spread the word:TwitterRedditFacebookPinterestTelegramTumblrPrintEmail Related |
【本文地址】