三维重建工具 |
您所在的位置:网站首页 › pcl和pclp的区别 › 三维重建工具 |
三维重建工具
|
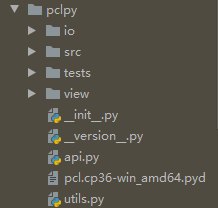
最近试了试用pclpy这个库进行点云处理,在此对pclpy的使用进行一个总结 更全的pclpy教程,代码完全开源:github,欢迎fork、star! 相关文章:pclpy安装 文章目录 pclpy相关开发环境文件结构 I/O读取构造PCL模板类点云保存点云 滤波曲面处理可视化总结: pclpy相关pclpy的github仓库 pclpy教程 pclpy v1.12.0移除了可视化模块,但本人在项目中需要用到可视化模块,所以选择了v1.11.0版本。所以本教程的例子都是在v1.11.0环境下进行测试。 开发环境windows10 + python3.6 + pclpyv1.11.0 文件结构安装成功后会在your_env_path/Lib/site-packages/下面找到pclpy的文件夹: (安装请参考:pclpy安装) 支持读取las、pcd、ply格式,以及ascii到binary之间的转换等。下面主要介绍PCL中点云格式的读取(las格式点云请自行阅读源码)。 构造PCL模板类点云 从numpy.array()生成 from pclpy import pcl import pclpy # 此种方式只支持于PointXYZ PointXYZI PointXYZINormal PointNormal PointXYZRGBNormal PointXYZRGBA类型的点云生成 # PointXYZ类型点云 a = np.random.ranf(3).reshape(-1, 3) pc = pcl.PointCloud.PointXYZ.from_array(a) // or pc = pcl.PointCloud.PointXYZ(a) # 其他格式点云类似 # PointXYZRGB xyz = np.random.ranf(30).reshape(-1, 3) rgb = (np.random.ranf(30) * 100).astype("u1").reshape(-1, 3) pc = pcl.PointCloud.PointXYZRGB(xyz, rgb) // or pcl.PointCloud.PointXYZRGB.from_array(xyz, rgb) ......参考:/Lib/site-packages/pclpy/tests/test_point_types.py 读取.las格式生成PCL模板类点云 pc = pclpy.read(test_data("street_thinned.las"), "PointXYZ") # 其他模板类类似 pc = pclpy.read(test_data("street_thinned.las"), "PointXYZRGBA") .....参考:/Lib/site-packages/pclpy/tests/test_io.py 读取.pcd式生成PCL模板类点云 # 读取PointXYZ类型点云 支持于PointXYZ PointXYZI PointXYZINormal PointNormal PointXYZRGBNormal pc = pcl.PointCloud.PointXYZ() reader = pcl.io.PCDReader() reader.read("bunny.pcd", pc) # 其余格式点云类似 pc = pcl.PointCloud.PointXYZ() reader = pcl.io.PCDReader() reader.read("bunny.pcd", pc) 读取.ply、.vtk格式 mesh = pcl.PolygonMesh() pcl.io.loadPLYFile("messy_mesh_binary.ply", mesh) pcl.io.loadPLYFile("messy_mesh_binary.vtk", mesh) 保存点云 保存las文件 a = np.random.ranf(70).reshape(-1, 7) pc = pcl.PointCloud.PointNormal.from_array(a) pclpy.write_las(pc, temp_las_path) # 带偏移 pclpy.write_las(pc, temp_las_path, xyz_offset=[10, 10, 10]) # las转pcd pc = pclpy.read("street_thinned.las", "PointXYZ") writer = pcl.io.PCDWriter() writer.writeBinary('pc.pcd', pc) #保存pcd reader = pcl.io.PCDReader() pcd = pcl.PointCloud.PointXYZ() reader.read('pc.pcd', pcd) # 保存ply mesh = pcl.PolygonMesh() pcl.io.savePLYFile('mesh.ply', mesh) # 保存vtk pcl.io.savePLYFile('mesh.vtk', mesh)参考:/Lib/site-packages/pclpy/tests/test_io.py 更多用法,请参考pclpy/tests/test_io.py 函数清单: def test_data(*args)将data路径加入系统路径def temp_las_path(request):路径检查def temp_file(request):路径检查def test_simple_io_pcd()读取pcd格式点云def test_las_xyz()从本地读取las格式点云,返回PointXYZ格式点云def test_las_rgb()从本地读取las格式点云,返回PointXYZRGBA格式点云def test_las_intensity()从本地读取las格式点云,返回PointXYZI格式点云def test_las_save_extra_dims(temp_las_path)保存PointNormal格式点云到本地def test_las_read_normals()从本地读取las格式点云,返回PointNormal格式点云def test_las_write_with_offset(temp_las_path)带offset保存las格式点云到本地 def test_las_read_with_offset(temp_las_path)读取带offset的las格式点云def test_las_to_pcd(temp_file)las格式转pcd格式def test_ply_to_ply_binary(temp_file)保存PolygonMesh为binary PLY 格式def test_ply_to_ply_ascii(temp_file)保存PolygonMesh为ascii PLY 格式 滤波 提取索引 pc = pclpy.read(test_data("street_thinned.las"), "PointXYZ") extract = pcl.filters.ExtractIndices.PointXYZ() extract.setInputCloud(pc) pi = pcl.PointIndices() pi.indices.append(3) extract.setIndices(pi) out = pcl.PointCloud.PointXYZ() extract.filter(out) ROR降噪 pc = pclpy.read(test_data("street_thinned.las"), "PointXYZ") output = pclpy.radius_outlier_removal(pc, search_radius=0.5, min_neighbors=10) # 或者使用作者封装好的函数 output2 = pclpy.ror(pc, search_radius=0.5, min_neighbors=10)参考:/Lib/site-packages/pclpy/tests/test_filters.py 曲面处理 MLS pc = pclpy.read(test_data("street_thinned.las"), "PointXYZ") output = pclpy.moving_least_squares(pc, search_radius=0.5, compute_normals=True) # 或使用绑定 output2 = pclpy.mls(pc, search_radius=0.5, compute_normals=True) MLS_OMP使用OMP技术进行加速 pc = pclpy.read(test_data("street_thinned.las"), "PointXYZ") output = pclpy.moving_least_squares(pc, search_radius=0.5, compute_normals=False, num_threads=8) 贪婪投影三角化算法 pc = pclpy.read(test_data("street_thinned.las"), "PointXYZRGBA") cloud_with_normals = pcl.PointCloud.PointNormal() pc.compute_normals(radius=0.15, output_cloud=cloud_with_normals, num_threads=8) ms = pcl.surface.GreedyProjectionTriangulation.PointNormal() pi = 3.141592 triangles = pcl.PolygonMesh() ms.setSearchRadius(0.2) # 设置连接点之间的最大距离,(即是三角形最大边长) ms.setMu(2.5) # 设置被样本点搜索其近邻点的最远距离为2.5,为了使用点云密度的变化 ms.setMaximumNearestNeighbors(100) # 设置样本点可搜索的邻域个数 ms.setMaximumSurfaceAngle(pi / 4) # 设置某点法线方向偏离样本点法线的最大角度45 ms.setMinimumAngle(pi / 18) # 设置三角化后得到的三角形内角的最小的角度为10 ms.setMaximumAngle(2 * pi / 3) # 设置三角化后得到的三角形内角的最大角度为120 ms.setNormalConsistency(True) # 设置该参数保证法线朝向一致 ms.setInputCloud(cloud_with_normals) tree2 = pcl.search.KdTree.PointNormal() ms.setSearchMethod(tree2) ms.reconstruct(triangles) 可视化 CloudViewer使用Cloudviewer进行可视化 import pclpy from pclpy import pcl pc = pcl.PointCloud.PointXYZ() reader = pcl.io.PCDReader() reader.read('tests/test_data/bunny.pcd', pc) viewer = pcl.visualization.CloudViewer("viewer") viewer.showCloud(pc, "hi") while not viewer.wasStopped(10): pass效果:
使用PCLVisualizer进行可视化 单一视图: from pclpy import pcl import numpy as np xyz = pcl.PointCloud.PointXYZ() reader = pcl.io.PCDReader() reader.read("tests/test_data/bunny.pcd", xyz) rgb = (np.random.ranf((xyz.size(), 3)) * 100).astype("u1").reshape(-1, 3) pc = pcl.PointCloud.PointXYZRGB(xyz.xyz, rgb) viewer = pcl.visualization.PCLVisualizer("viewer", True) viewer.setBackgroundColor(0, 0, 0) # rgb = pcl.visualization.PointCloudColorHandlerRGBAField.PointXYZRGBA(pc) viewer.addPointCloud(pc, "sample cloud") viewer.setPointCloudRenderingProperties(0, 3, "sample cloud") viewer.addCoordinateSystem(1.0) viewer.initCameraParameters() viewer.resetCamera() while not viewer.wasStopped(): viewer.spinOnce(10)
多视图: def multi_View_PCLVisualizer(filename1, filename2): """ :param filename: :return: """ # 读取第一个点云 temp = pcl.PointCloud.PointXYZ() reader = pcl.io.PCDReader() reader.read(filename1, temp) cloud1 = pcl.PointCloud.PointXYZ(temp.xyz*100) # 读取第二个点云 cloud2 = pcl.PointCloud.PointXYZRGB() reader = pcl.io.PCDReader() reader.read(filename2, cloud2) viewer = pcl.visualization.PCLVisualizer("viewer") v0 = 1 viewer.createViewPort(0.0, 0.0, 0.5, 1.0, v0) viewer.setBackgroundColor(0, 0, 0, v0) g = pcl.visualization.PointCloudColorHandlerCustom.PointXYZ(cloud1, 0.0, 255.0, 0.0) viewer.addPointCloud(cloud1, g, "cloud", v0) viewer.setPointCloudRenderingProperties(0, 3, "cloud", v0) v1 = 2 viewer.createViewPort(0.5, 0.0, 1.0, 1.0, v1) viewer.setBackgroundColor(0.0, 0.0, 0.0, v1) # r = pcl.visualization.PointCloudColorHandlerCustom.PointXYZ(filename2, 255.0, 0.0, 0.0) viewer.addPointCloud(cloud2, "cloud2", v1) # viewer.addPolygonMesh(triangles.cloud, triangles.polygons, "cloud4", v1) viewer.setPointCloudRenderingProperties(0, 3, "cloud2", v1) viewer.addCoordinateSystem(1.0) viewer.resetCamera() while not viewer.wasStopped(): viewer.spinOnce(10) if __name__ == "__main__": # singleViewPCLVisualizer('tests/test_data/bunny.pcd') multi_View_PCLVisualizer('tests/test_data/bunny.pcd', 'tests/test_data/bunny_color.pcd')效果:
总的来说,pclpy v1.11.0绑定了pcl里面的部分功能。如果是基础的点云处理比如点云读取、计算法线、简单的曲面重建的话,pclpy v1.11.0可以胜任。但是它毕竟是PCL的python绑定版,还有很多功能不是很完善,比如使用viewer.addPolygonMesh()显示重建好的曲面就一直出问题(也许是我的问题o(╥﹏╥)o),最后想了个办法,用python调PCL c++版bin下面提供的小工具: import os main = "pcl_viewer.exe bunny.pcd" r_v = os.system(main)效果和直接在cmd里边输入pcl_viewer.exe bunny.pcd一样 哈哈,机智如我 2021.08.22 后记 最近需要从点云生成深度图,c++里面用PCL很简单,具体可参考PCL点云转换为深度图并保存 ,其依赖于RangeImage类。 去翻了翻pclpy的GitHub,发现pclpy 还没有完成RangeImage,见issue#57: https://github.com/davidcaron/pclpy/issues/57 没办法,只能自己写一个点云转深度图了 |
 pclpy的作者没有给出详细的使用文档,只给了简单的几个demo,主要在pclpy/tests下面,有c++ 下PCL开发经验的话,很很容易看懂。


【本文地址】