SpringBoot实战 |
您所在的位置:网站首页 › patagonia高仿 › SpringBoot实战 |
SpringBoot实战
|
Springboot实战
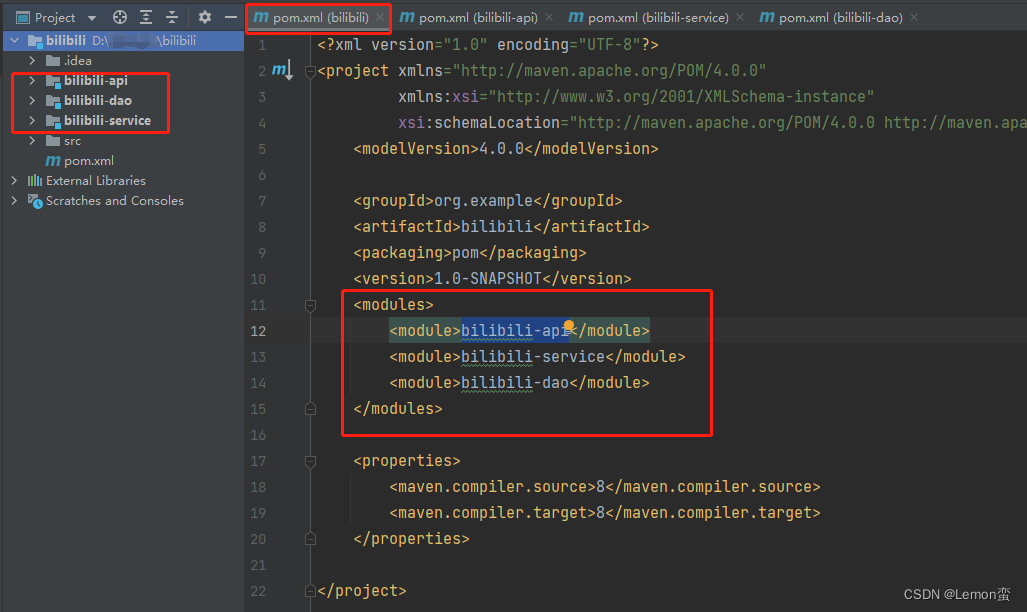
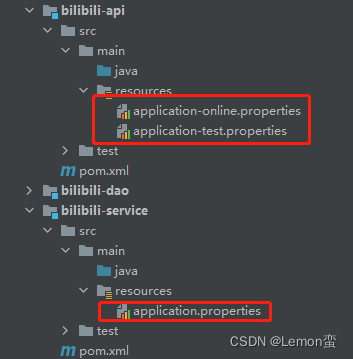
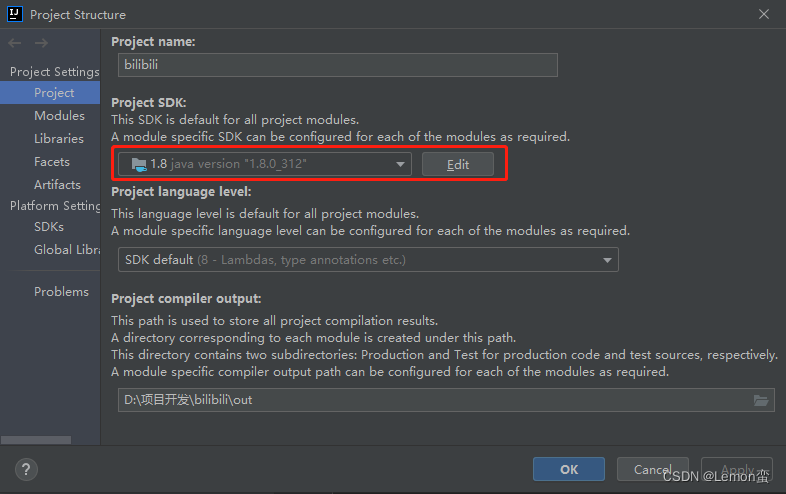
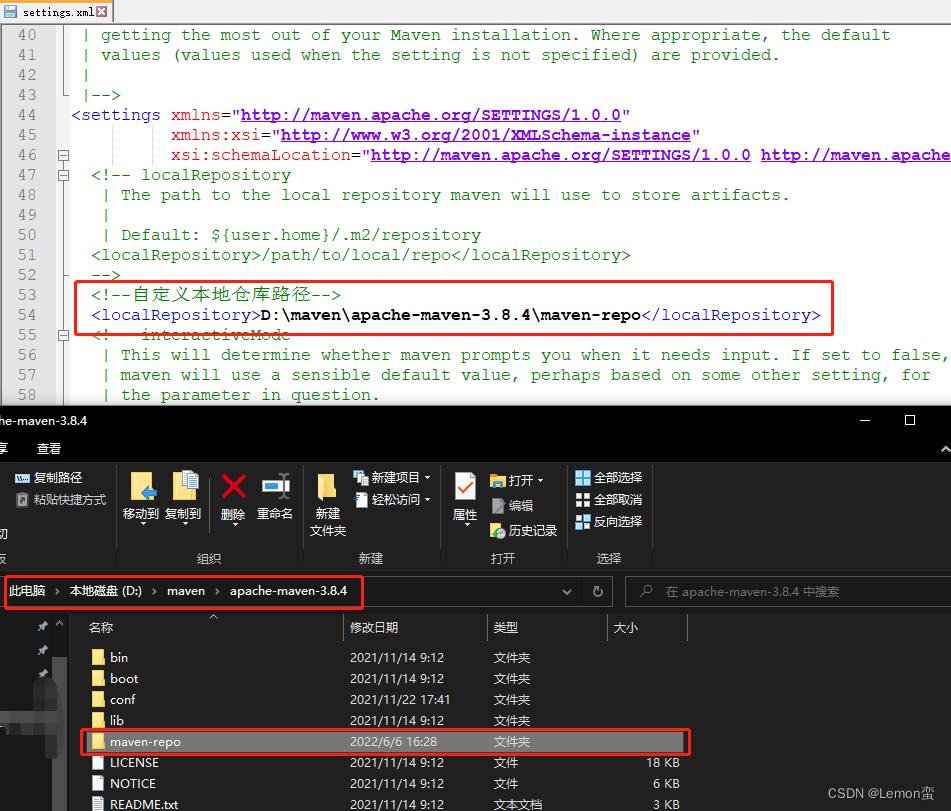
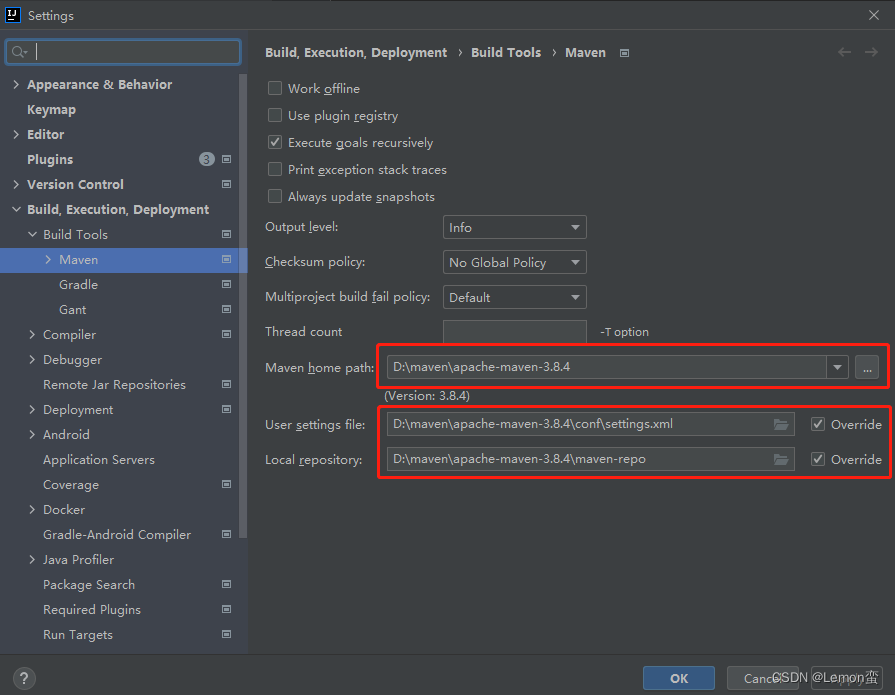
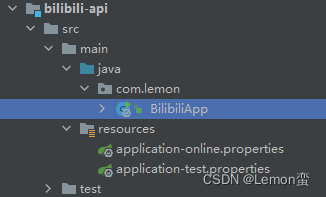
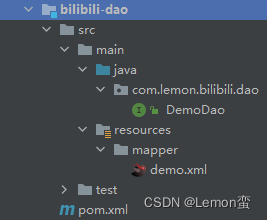
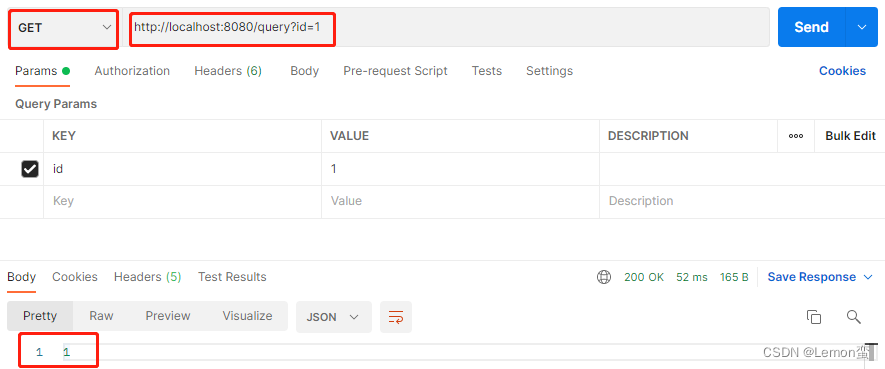
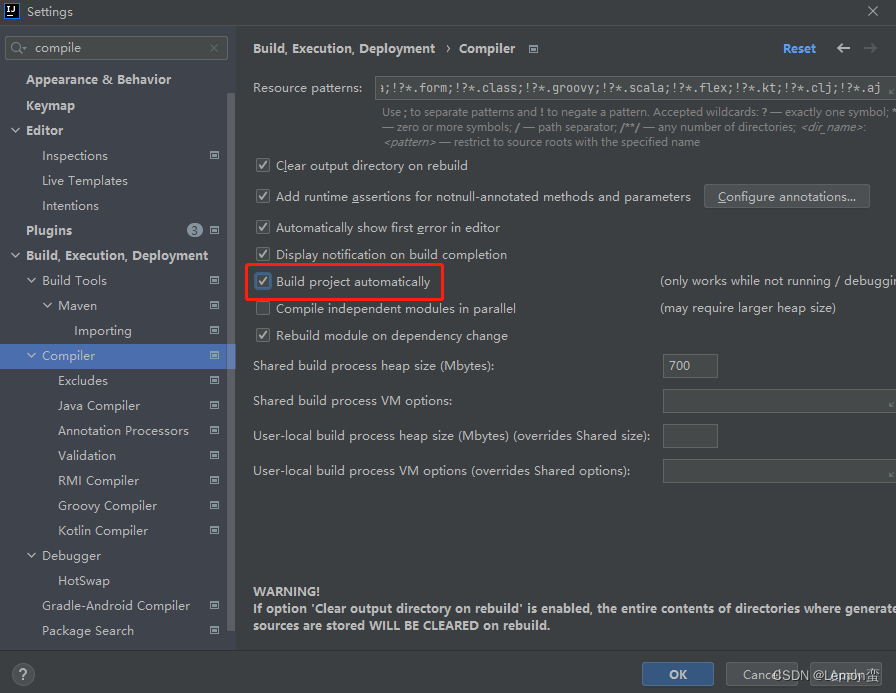
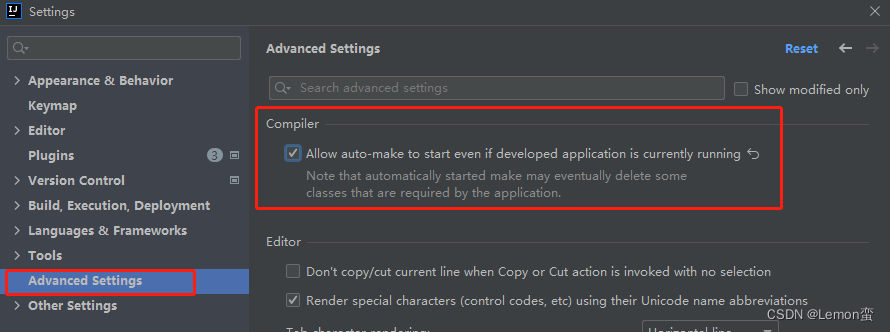
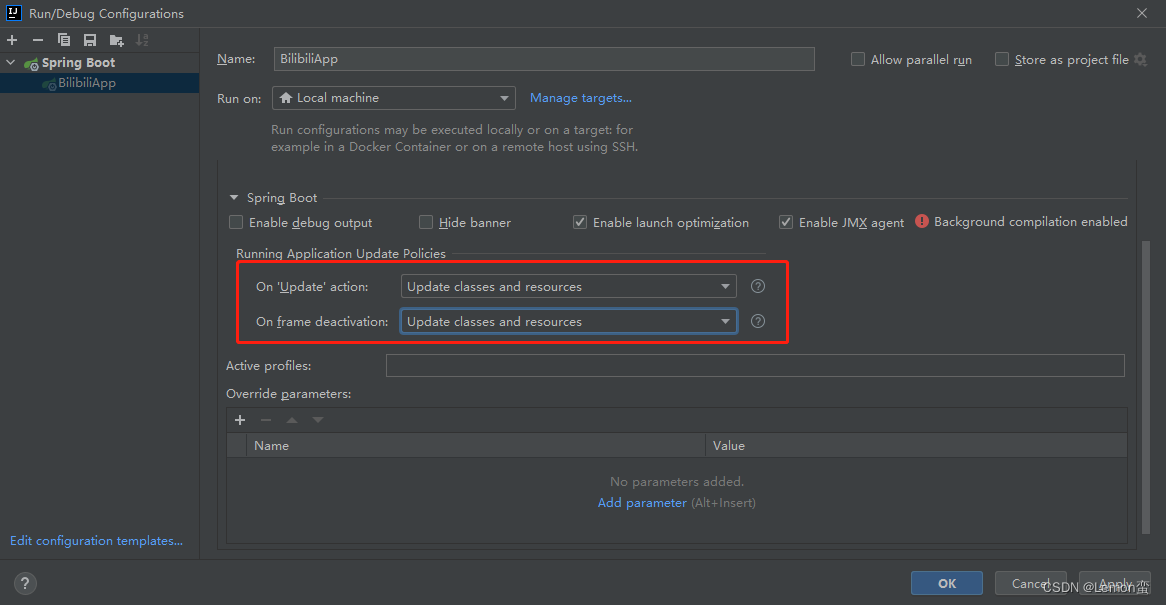
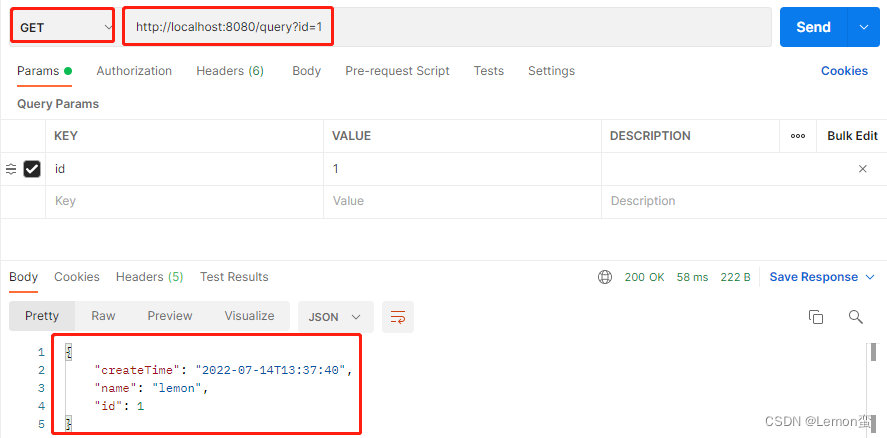
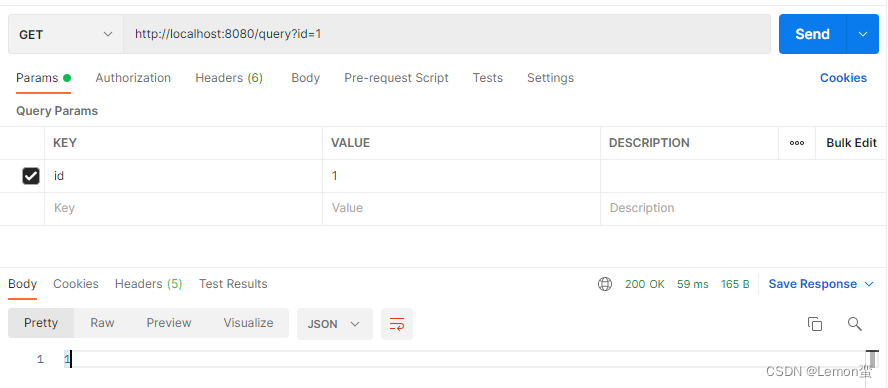
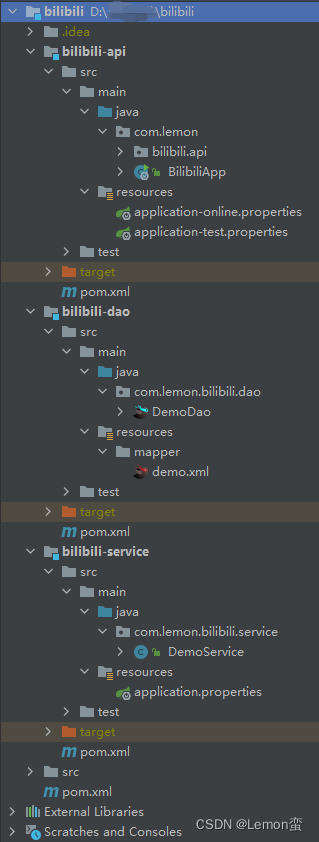
本次内容为课程导学和项目环境搭建及基本测试demo 文章目录 Springboot实战1.课程导学1.1.为什么选b站1.2.学习方法 2.项目环境搭建2.1.项目架构2.1.1.业务(功能)架构2.1.2.技术架构2.1.3.部署架构 2.2.开发环境搭建2.2.1.开发环境2.2.2.创建多模块、多环境项目2.2.3.配置JDK与Maven2.2.4.运行仿bilibili后端项目2.2.5.搭建数据库与持久层框架 2.3.热部署2.3.1.概述2.3.2.实现热部署2.3.3.测试热部署 2.4.项目结构 1.课程导学 1.1.为什么选b站项目角度:规模大且不同种类,流量大,个性化功能 技术角度:经典高并发异步问题、视频流+弹幕定制功能 1.2.学习方法 准备要充分实践出真知不懂就要问举一而反三温故而知新坚持即胜利 2.项目环境搭建 2.1.项目架构 2.1.1.业务(功能)架构 顶层:用户服务(登录注册、大会员权限、查找感兴趣视频等)中间层:在线视频流播放+实时弹幕底层:管理后台(视频上传、数据统计、系统消息推送) 2.1.2.技术架构 技术选型:Springboot2.x + MySQL + MyBatis + Maven开发模式:经典MVC,模式控制层(Controller层)、服务层(Service层)、数据层(Dao层) 2.1.3.部署架构 前端:服务转发 + 负载均衡(请求数量大时,按一定规律转发请求到服务器)后端:业务处理+ 功能实现工具:缓存、队列 2.2.开发环境搭建 2.2.1.开发环境 操作系统:Linux/Mac/Windows均可开发工具:IDEA必备:JDK1.8、Maven 2.2.2.创建多模块、多环境项目 多模块:创建MVC模式多模块项目,模式控制层(Controller层)、服务层(Service层)、数据层(Dao层)创建一个普通的maven项目,想maven项目中创建多个模块bilibili-api、bilibili-service、bilibili-dao application.properties文件:多环境下,相同环境的复用,使项目开发灵活 1.JDK配置:目录:file -> project Structure 2.Maven配置: 本地maven仓库的设置可以加快下载包的速度,提高开发效率! 打开所下载的maven,找到conf下的setting.xml文件,修改文件到自定义的仓库文件夹中,修改后保存即可(根据自己文件名字、路径修改!) 在IDEA中重写Maven默认配置环境,在file -> Settings中搜索maven修改,apply后OK即可 1.在pom文件中引入Springboot框架相关依赖(父pom.xml文件中) spring-boot-starter-parent org.springframework.boot 2.6.4在添加dependencies模块,添加spring-boot-starter-web,版本与parent中相同 org.springframework.boot spring-boot-starter-web 2.6.42.在子模块pom文件中添加模块间依赖关系 api在最上层,service在中间层,dao在最底层,dao不会与其他层产生依赖,只需与service层有关联,api层关联dao层 所以在service模块的pom.xml中添加: org.example bilibili-dao 1.0-SNAPSHOT同理api模块的pom.xml中添加: org.example bilibili-service 1.0-SNAPSHOT3.添加启动入口,启动项目 (1)在api模块的src-main-java创建包com.lemon(最顶级的包),直接存放我们的启动类,在com.lemon中创建启动类BilibiliAPP.java,在类中添加入口,编写代码如下: /** * @program: bilibili * @description: 项目启动类 * @author: lemon **/ // 标明我们的项目是Springboot项目 @SpringBootApplication public class BilibiliApp { public static void main(String[] args) { // ApplicationContext项目上下文环境 ApplicationContext app = SpringApplication.run(BilibiliApp.class, args); } }(2)选择启动加载配置文件 因为是多环境,要选择启动加载配置文件,在service模块的application.properties文件中修改: # profile spring.profiles.active=test(3)启动项目 以debug方式启动,没有错误即是运行成功! (4)启动类文件结构 1.数据库 选用MySQL数据库,特点是:体积小、速度快、开源 2.在项目中配置MySQL数据库 (1)在MySQL中创建好数据库及数据库表 CREATE TABLE `t_demo` ( `id` bigint NOT NULL AUTO_INCREMENT, `name` varchar(255) DEFAULT NULL, `createTime` datetime DEFAULT NULL ON UPDATE CURRENT_TIMESTAMP, PRIMARY KEY (`id`) ) ENGINE=InnoDB DEFAULT CHARSET=utf8mb3;插入数据: (2)在父项目pom.xml文件中添加MySQL数据库驱动依赖 mysql mysql-connector-java 8.0.28(3)在项目配置文件中配置链接 测试模块中添加: # datasource spring.datasource.url=jdbc:mysql://localhost:3306/demo spring.datasource.username=root spring.datasource.password=Lemon spring.datasource.driver-class-name=com.mysql.cj.jdbc.Driver3.持久层框架——MyBatis MyBatis特点是XML形式管理、支持动态SQL (1)在项目中添加MyBatis框架依赖 org.mybatis.spring.boot mybatis-spring-boot-starter 2.2.0(2)在配置文件中配置MyBatis 在service模块的配置文件中添加: # 所有mapper存放路径扫描配置 mybatis.mapper-locations=classpath:mapper/*.xml # 以包形式扫描,扫描到的class/interface由mybatis统一实例化,再与xml进行关联 mybatis.type-aliases-package=com.lemon.bilibili.dao在dao模块中添加包、接口如下: DemoDao.java中: @Mapper public interface DemoDao { }demo.xml中: DOCTYPE mapper PUBLIC "-//mybatis.org//DTD Mapper 3.0//EN" "http://mybatis.org/dtd/mybatis-3-mapper.dtd">(3)阶段性Demo ①dao层 DemoDao.java中添加方法接口 public Long query(Long id);demo.xml中添加映射查询语句,要求:id与查询方法名字相同,参数、结果类型保持一致; 在#{id}中传递参数对应parameterType即输入参数,dao中id字段; 数据库中属性名与实体类中名字相同,在写xml文件时可以直接用一样的名称,可以自动对应上,节省代码编写量 select id from t_demo where id = #{id}②service层 创建包,创建类DemoService.java,代码: /** * @program: bilibili * @description: Demo的Service * @author: lemon **/ // 让Springboot在启动时把DemoService作为一个需要发布的bean,添加到上下文中,包含@Component注解 @Service public class DemoService { // 引入,依赖注入 @Autowired private DemoDao demoDao; public Long query(Long id) { return demoDao.query(id); } }③api层 创建包,创建类DemoApi.java,代码: /** * @program: bilibili * @description: Demo的Api * @author: lemon **/ // 包含@Component注解 @RestController public class DemoApi { @Autowired private DemoService demoService; @GetMapping("/query") public Long query(Long id) { return demoService.query(id); } }④运行项目,打开Postman测试 成功! 2.3.热部署 2.3.1.概述 热部署就是当应用程序这种运行的时候升级冉家或者修改某一部分代码、配置文件时,无需手动启动应用,即可修改的部分生效热部署方式:spring-boot-devtools工具 + IDEA配置 2.3.2.实现热部署开启IDEA自动构建(Build project automatically)选项,在Settings - Advanced Settings中勾选Compile autoMake allow when app running(IDEA 2021以上版本在此修改) 启动类中开启热部署(Running Application Update Policies) pom文件中添加spring-boot-devtools,service的配置文件中添加配置 org.springframework.boot spring-boot-devtools # springdevtools spring.devtools.restart.enabled=true 2.3.3.测试热部署(1)将query方法参数返回值类型修改为Map,api层、service层、dao层(包括demo.xml映射文件)均要修改;以dao层为例: @Mapper public interface DemoDao { public Map query(Long id); } select * from t_demo where id = #{id}在Postman中测试,可以看到返回值为Map集合 (2)再将query方法参数返回值类型修改为Long类型 (3)不重启项目,直接在Postman中测试,可以看到返回值为Long类型了! 热部署成功! 2.4.项目结构
未完待续~ |

【本文地址】
今日新闻 |
推荐新闻 |