Ubuntu玩机记录,让我破电脑又飞起来了 |
您所在的位置:网站首页 › oppo官网手机官网a72 › Ubuntu玩机记录,让我破电脑又飞起来了 |
Ubuntu玩机记录,让我破电脑又飞起来了
|
写在前面
很早之前的电脑ThinkPad E440,一直没怎么用。最近整理了一下电脑的资料,全部备份到云盘。整理的过程感觉电脑很慢很慢,难受极了。整理完后,终于我要对它下手了! 我制作了启动U盘,把Ubuntu 22.04的镜像烧录进去,通过U盘启动,把系统装在ThinkPad上。居然电脑出奇的好用,根本不卡。那就记录一下吧。
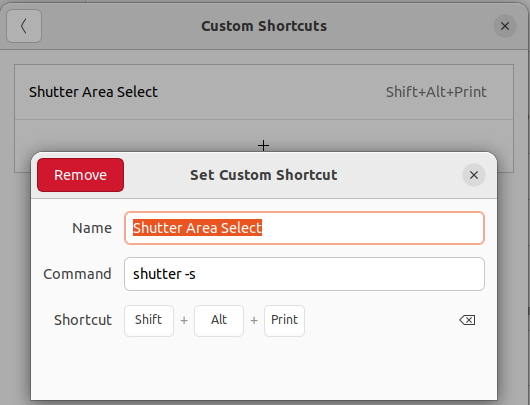
先从官网下载镜像,然后通过BalenaEtcher来把系统镜像放在U盘上。接着就是启动与安装了,没什么特别的,只要改一下BIOS的启动顺序即可。 参考: https://ubuntu.com/tutorials/install-ubuntu-desktop#2-download-an-ubuntu-image 截图可以用系统自带的,但我使用的是Shutter,直接在Ubuntu Software搜索安装即可。但安装完不能使用自选区域截图,会提示: cannot work without X11 server解决方案: 找到/etc/gdm3/custom.conf文件,去掉注释:WaylandEnable=false 重启一下:sudo systemctl restart gdm3即可。 设置快捷键: Settings -> Keyboard -> Keyboard Shortcuts -> View and Customize Shortcuts 接着拉到最后的Custom Shortcuts。添加如下:
参考: https://askubuntu.com/questions/1353360/ubuntu-21-04-shutter-did-not-work-without-x11-server https://hakanu.net/linux/2021/04/25/keyboard-shortcuts-for-shutter-in-ubuntu-for-easy-screenshots/ 安装Typora新版本的Typora收费了,并且官网也下载不了原有的免费版本,可以在这个链接下载: 下载地址:https://github.com/iuxt/src/releases/download/2.0/Typora_Linux_0.11.18_amd64.deb 然后使用apt安装即可: sudo apt install ./Typora_Linux_0.11.18_amd64.deb参考:https://zahui.fan/posts/64b52e0d/ 显示电池百分比Settings -> Power -> Show Battery Percentage 中文输入法设置里找到Regin & Language,Manage installed Languages,安装中文。输入法系统选iBus即可。接着在Keyboard那添加中文输入法,有拼音和五笔,如果操作不了,可能需要先重启:
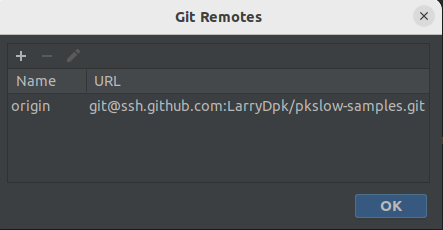
可以通过Win + 空格来切换。中英文通过Shift。 git安装大致如下: sudo apt install git git config --global user.name "LarryDpk" git config --global user.email "[email protected]" # 生成ssh key,把pub key放GitHub上 ssh-keygen -t rsa -b 4096 -C "[email protected]"Git拉取代码报错: $ git pull ssh: connect to host github.com port 22: Connection timed out fatal: Could not read from remote repository. Please make sure you have the correct access rights and the repository exists.换成另一个域名:ssh.github.com:
参考: https://docs.github.com/en/authentication/troubleshooting-ssh/using-ssh-over-the-https-port git status显示数字,不显示中文: git config --global core.quotepath false Chrome因为Chrome在Ubuntu不在Software Center,所以要通过先下载安装包的方式来下载: wget https://dl.google.com/linux/direct/google-chrome-stable_current_amd64.deb sudo dpkg -i google-chrome-stable_current_amd64.deb python相关系统已经自带了Python3,版本也比较高,也没办法再安装了。但要安装pip3: $ python3 --version Python 3.10.6 sudo apt install python3-pip 挂载硬盘我的电脑是一个SSD盘,一个普通硬盘,系统装在SSD上,所以需要把硬盘挂载一下: sudo mount /dev/sda3 /home/larry/data但每次都这样手动mount很麻烦,又要输入密码,所以我们让系统在启动的时候就mount,在/etc/fstab文件中添加一行: # disk UUID=277de78c-6639-4373-a5cd-38feff129de7 /home/larry/data ext4 defaults 0 0重启即可。 参考: https://developerinsider.co/auto-mount-drive-in-ubuntu-server-22-04-at-startup/ OSS阿里云下载Linux 64位版本:https://github.com/aliyun/oss-browser 直接打开会报错,少了libgconfi-2-4,安装后打开即可: $ ./oss-browser ./oss-browser: error while loading shared libraries: libgconf-2.so.4: cannot open shared object file: No such file or directory $ sudo apt install libgconf-2-4参考:https://stackoverflow.com/questions/37624225/shared-libraries-libgconf-2-so-4-is-missing JDK下载JDK: https://github.com/graalvm/graalvm-ce-builds/releases 我下载的版本是:graalvm-ce-java11-linux-amd64-22.3.0.tar.gz 解压后指定JAVA_HOME即可。 JAVA_HOME=/home/larry/software/graalvm-ce-java11-22.3.0 export PATH=$JAVA_HOME/bin:$PATH Maven直接下载后解压即可:https://maven.apache.org/download.cgi export M2_HOME=/home/larry/software/apache-maven-3.8.6 export PATH=$M2_HOME/bin:$PATH bash_profile设置在.bashrc添加: if [ -f ~/bash_profile.sh ]; then . ~/bash_profile.sh fi然后便可在bash_profile.sh文件中添加自己的配置了: export JAVA_HOME=/home/larry/software/graalvm-ce-java11-22.3.0 export PATH=$JAVA_HOME/bin:$PATH export M2_HOME=/home/larry/software/apache-maven-3.8.6 export PATH=$M2_HOME/bin:$PATH alias l='ls -al' SSH SFTP客户端WindTerm下载软件: https://github.com/kingToolbox/WindTerm/releases/tag/2.5.0 选择自动复制已经支持了。 右键直接粘贴:
参考: https://github.com/kingToolbox/WindTerm/issues/19#issuecomment-719334753 修改锁屏密码: 点击一下右下角的Lock Screen即可修改。 添加程序到Farorites Bar以IDEA为例,直接通过IDEA自己提供的工具,如下图所示:
或者自己创建对应的Entry,放在特定的位置: $ cat /usr/share/applications/jetbrains-idea.desktop [Desktop Entry] Version=1.0 Type=Application Name=IntelliJ IDEA Ultimate Edition Icon=/home/larry/software/ideaIU-2022.3/bin/idea.svg Exec="/home/larry/software/ideaIU-2022.3/bin/idea.sh" %f Comment=Capable and Ergonomic IDE for JVM Categories=Development;IDE; Terminal=false StartupWMClass=jetbrains-idea StartupNotify=true如果只是自己生效则放在~/.local/share/applications。 其它例子: [Desktop Entry] Version=1.0 Type=Application Name=WindTerm Icon=/home/larry/software/WindTerm_2.5.0/windterm.png Exec="/home/larry/software/WindTerm_2.5.0/WindTerm" %f Comment=WindTerm Categories=Development;SSH; Terminal=false StartupNotify=true VSCodeIDEA占用的内存还是太多了,还是使用VSCode吧,直接Ubuntu Software搜索安装即可。 安装Anaconda到官网下载: https://repo.anaconda.com/archive/Anaconda3-2022.10-Linux-x86_64.sh 然后执行命令安装: $ bash ./Anaconda3-2022.10-Linux-x86_64.sh会有一些提示,要输入yes等。最后init,执行命令: $ source ~/.bashrc其它就是帮我们加了这段内容到.bashrc文件中: # >>> conda initialize >>> # !! Contents within this block are managed by 'conda init' !! __conda_setup="$('/home/larry/anaconda3/bin/conda' 'shell.bash' 'hook' 2> /dev/null)" if [ $? -eq 0 ]; then eval "$__conda_setup" else if [ -f "/home/larry/anaconda3/etc/profile.d/conda.sh" ]; then . "/home/larry/anaconda3/etc/profile.d/conda.sh" else export PATH="/home/larry/anaconda3/bin:$PATH" fi fi unset __conda_setup # |


【本文地址】
今日新闻 |
推荐新闻 |