django+swagger+Apifox 设置接口文档 |
您所在的位置:网站首页 › openapi文件夹 › django+swagger+Apifox 设置接口文档 |
django+swagger+Apifox 设置接口文档
|
一、安装库
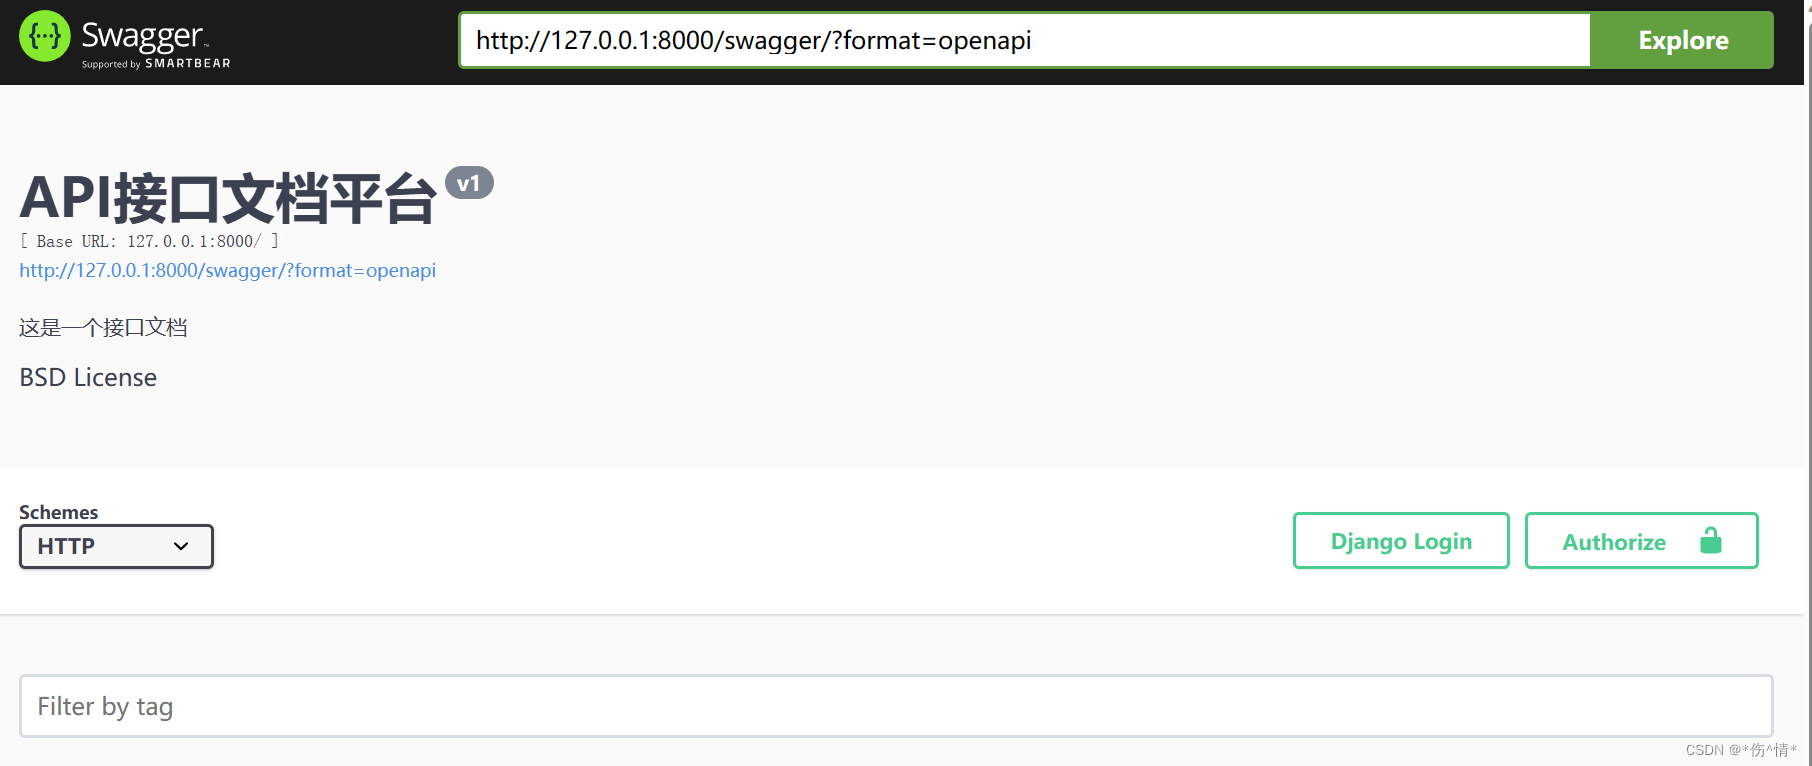
pip3 install drf_yasg 二、配置settings文件rest_framework drf接口框架 drf_yasg 第三方库 INSTALLED_APPS = [ 'django.contrib.admin', 'django.contrib.auth', 'django.contrib.contenttypes', 'django.contrib.sessions', 'django.contrib.messages', 'django.contrib.staticfiles', 'myapp', 'rest_framework', 'drf_yasg', ] 三、配置总url路由 from django.contrib import admin from django.urls import path,include from myapp import views from drf_yasg.views import get_schema_view from drf_yasg import openapi schema_view = get_schema_view( openapi.Info( title="API接口文档平台", # 必传 default_version='v1', # 必传 description="这是一个接口文档", license=openapi.License(name="BSD License"), ), public=True, # permission_classes=(permissions.AllowAny,), # 权限类 ) urlpatterns = [ path('swagger/', schema_view.with_ui('swagger', cache_timeout=0), name='schema-swagger-ui'), path('redoc/', schema_view.with_ui('redoc', cache_timeout=0), name='schema-redoc'), ] 四、运行运行项目 网址输入http://127.0.0.1:8000/swagger/
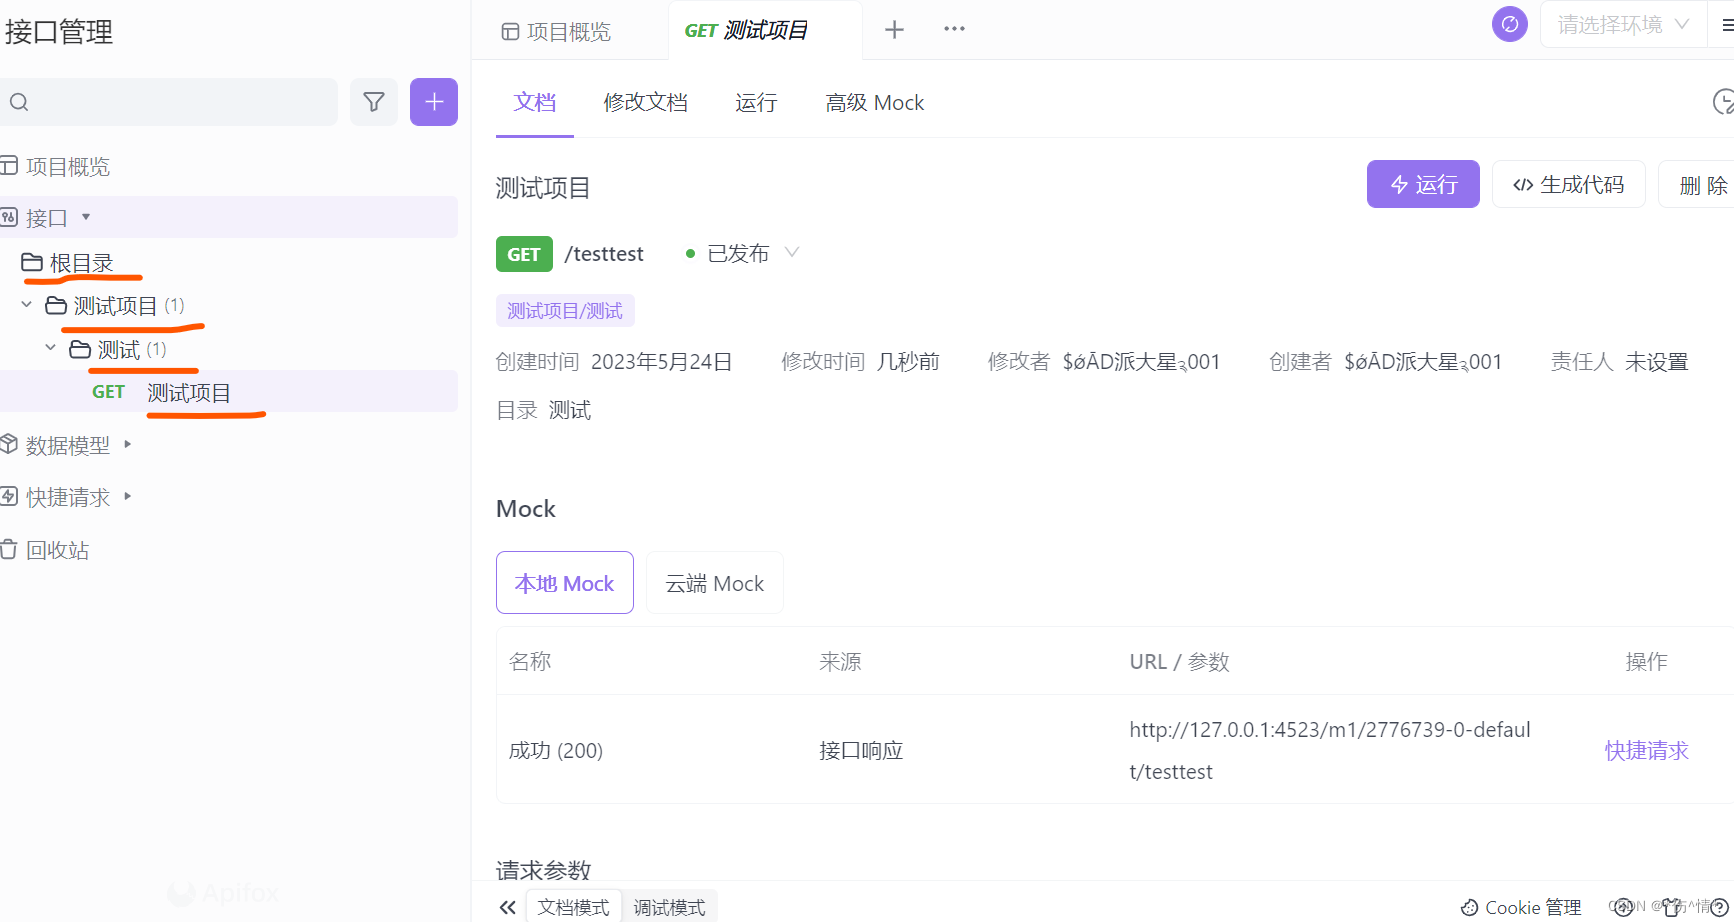
在views中配置swagger_auto_schema from django.shortcuts import render from rest_framework.views import APIView from drf_yasg.utils import swagger_auto_schema # Create your views here. class Test(APIView): @swagger_auto_schema(operation_summary="测试项目",tags=['测试项目/测试']) def get(self,request): return 六、配置Apifox
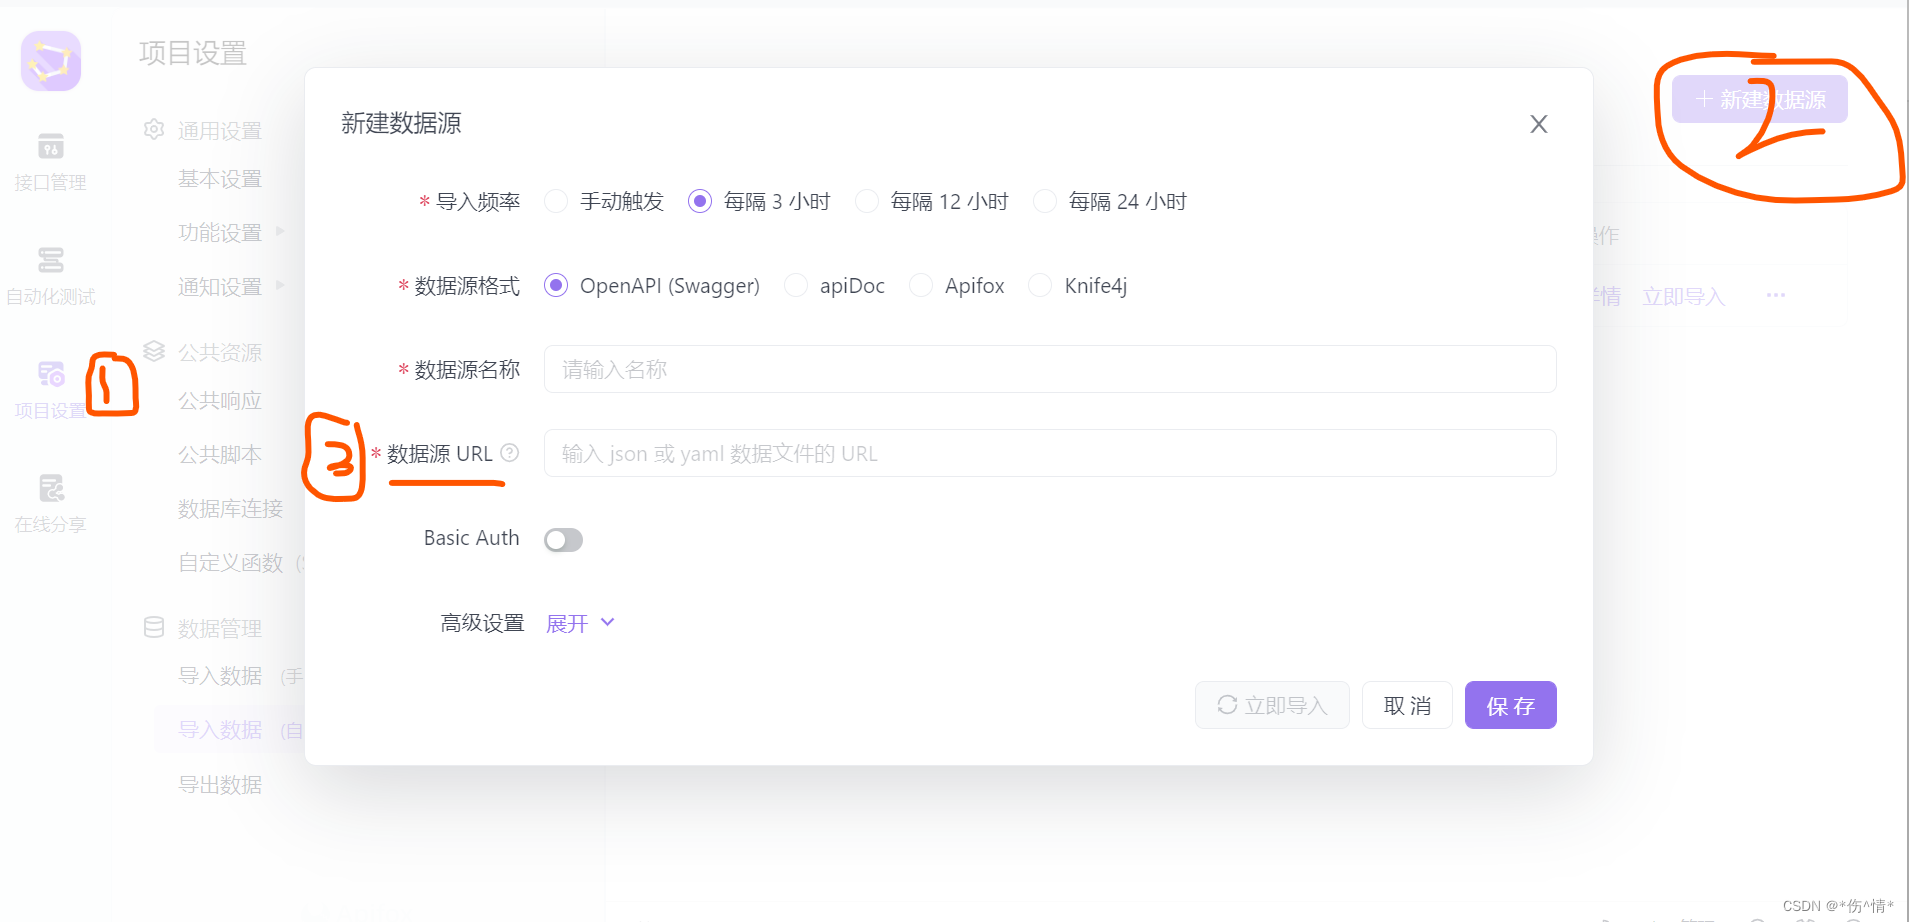
数据源URL是 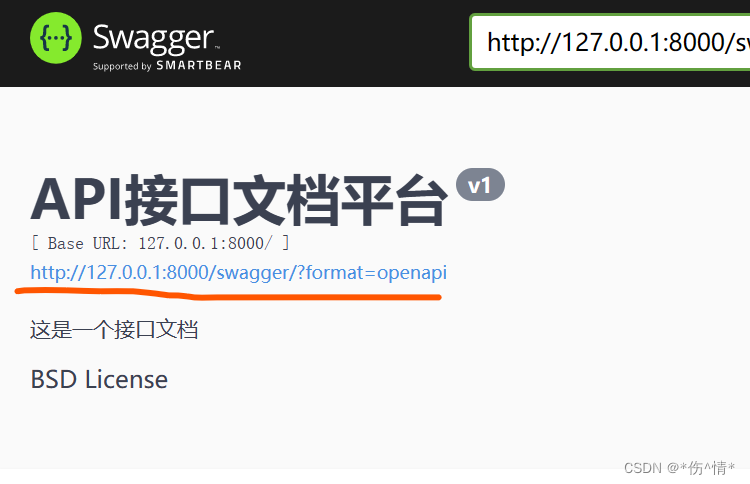 七、apifox最终效果 七、apifox最终效果
|
【本文地址】
今日新闻 |
推荐新闻 |