Idea中搭建Spring源码阅读环境 |
您所在的位置:网站首页 › nexus软件打开乱码 › Idea中搭建Spring源码阅读环境 |
Idea中搭建Spring源码阅读环境
|
目录
一、前期准备1. gradle配置2. Spring 源码下载
二、spring-framwork 源代码编译三、问题解决1. 搭建时编译的过程中,可能会出现如下报错:A build scan was not published as you have not authenticated with server 'ge.spring.io'.Build scan background action failed.解决方式
2. 在测试文件夹里添加了一个单元测试类myTest并运行,出现:No tests found for given includes: [**/*Tests.class, **/*Test.class]解决方式
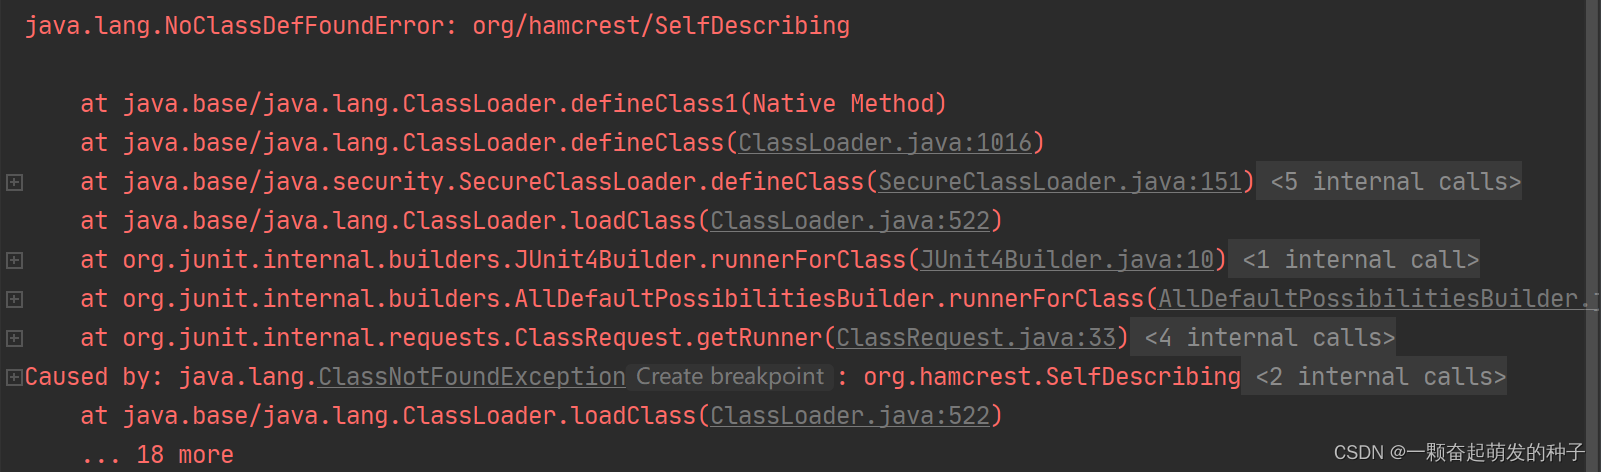
3. 运行单元测试类时,报错:java.lang.NoClassDefFoundError: org/hamcrest/SelfDescribing解决方式
4. 控制台输出显示中文乱码解决方式
一、前期准备
IntelliJ IDEA 2020.2JDK 15.0.2gradle 6.8.3spring-framwork 5.3.x
1. gradle配置
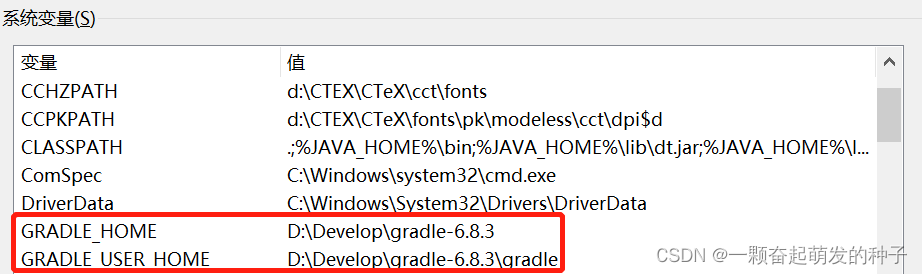
下载地址:https://services.gradle.org/distributions/ gradle版本与JDK版本兼容性说明:https://docs.gradle.org/current/userguide/compatibility.html#compatibility 2.1 环境变量配置 以我下载存放文件夹位置为例:
打开“系统属性 - 高级 - 环境变量 - 系统变量”,增添以下变量:
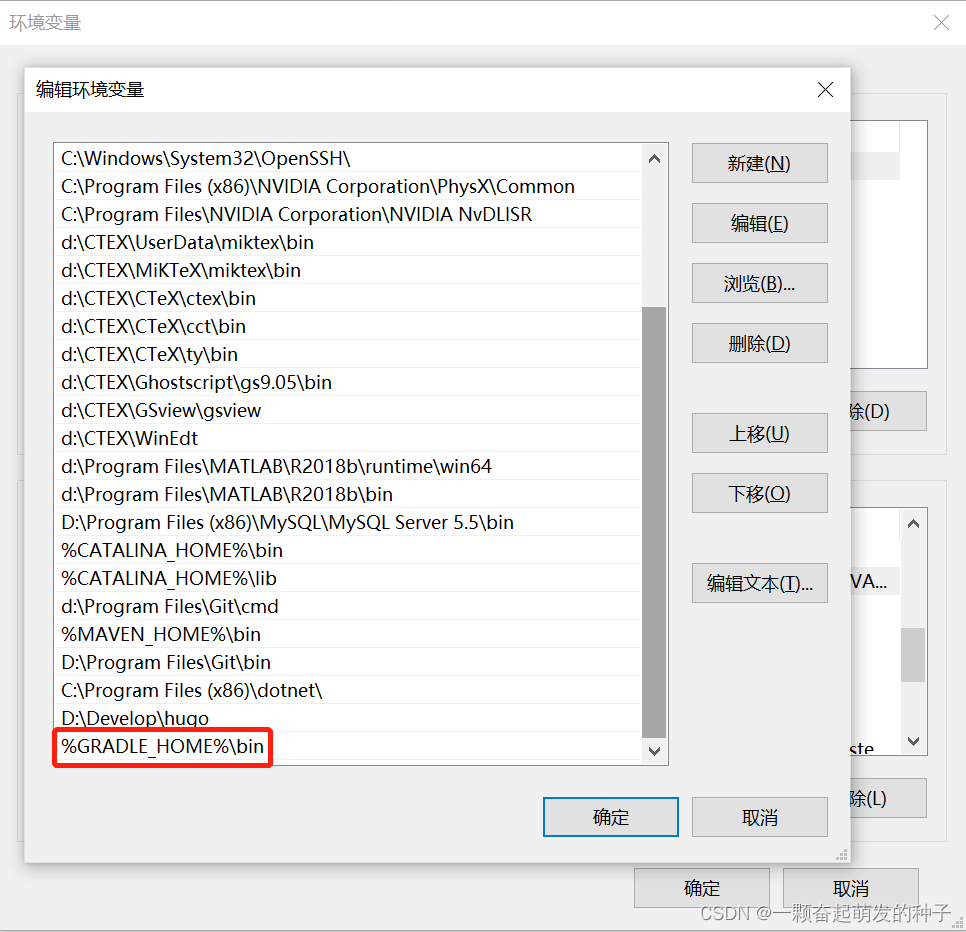
在系统变量 - 选择 Path,点编辑 - 添加“%GRADLE_HOME%\bin”
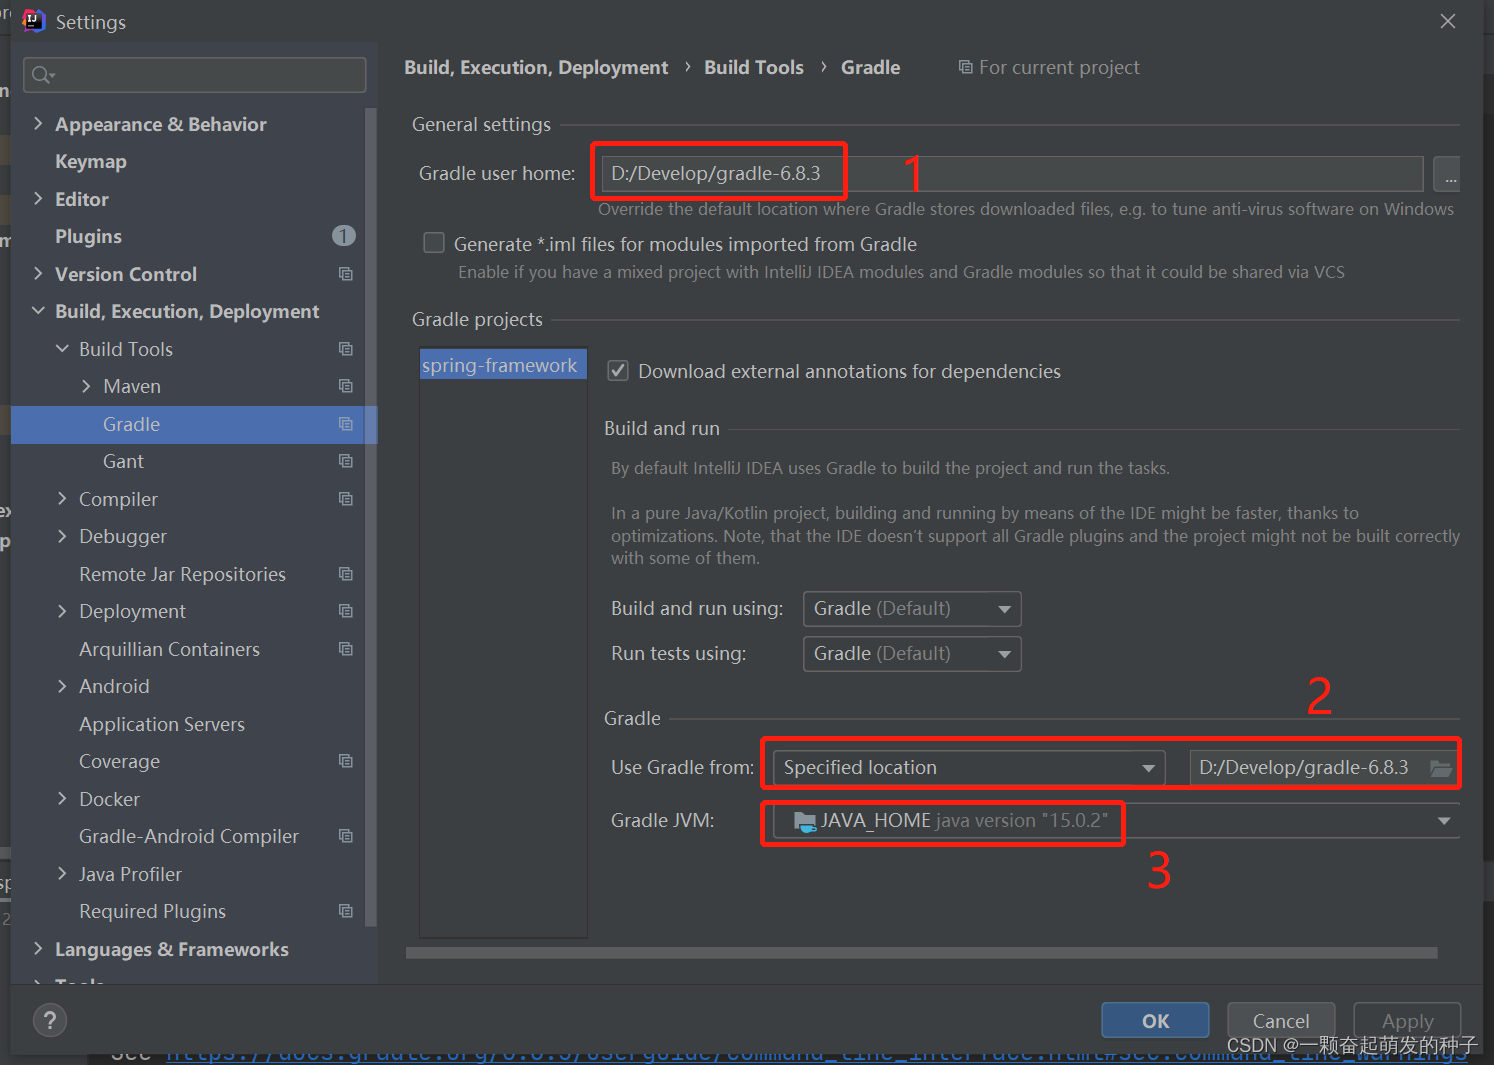
Spring 源码地址:https://github.com/spring-projects/spring-framework/tree/5.3.x Spring 源码国内镜像地址:https://gitcode.net/mirrors/spring-projects/spring-framework Spring 源码构建官方文档:https://github.com/spring-projects/spring-framework/wiki/Build-from-Source 下载spring-framwork源码后,用 IntelliJ IDEA 打开,然后打开Settings,修改Gradle配置为本地配置
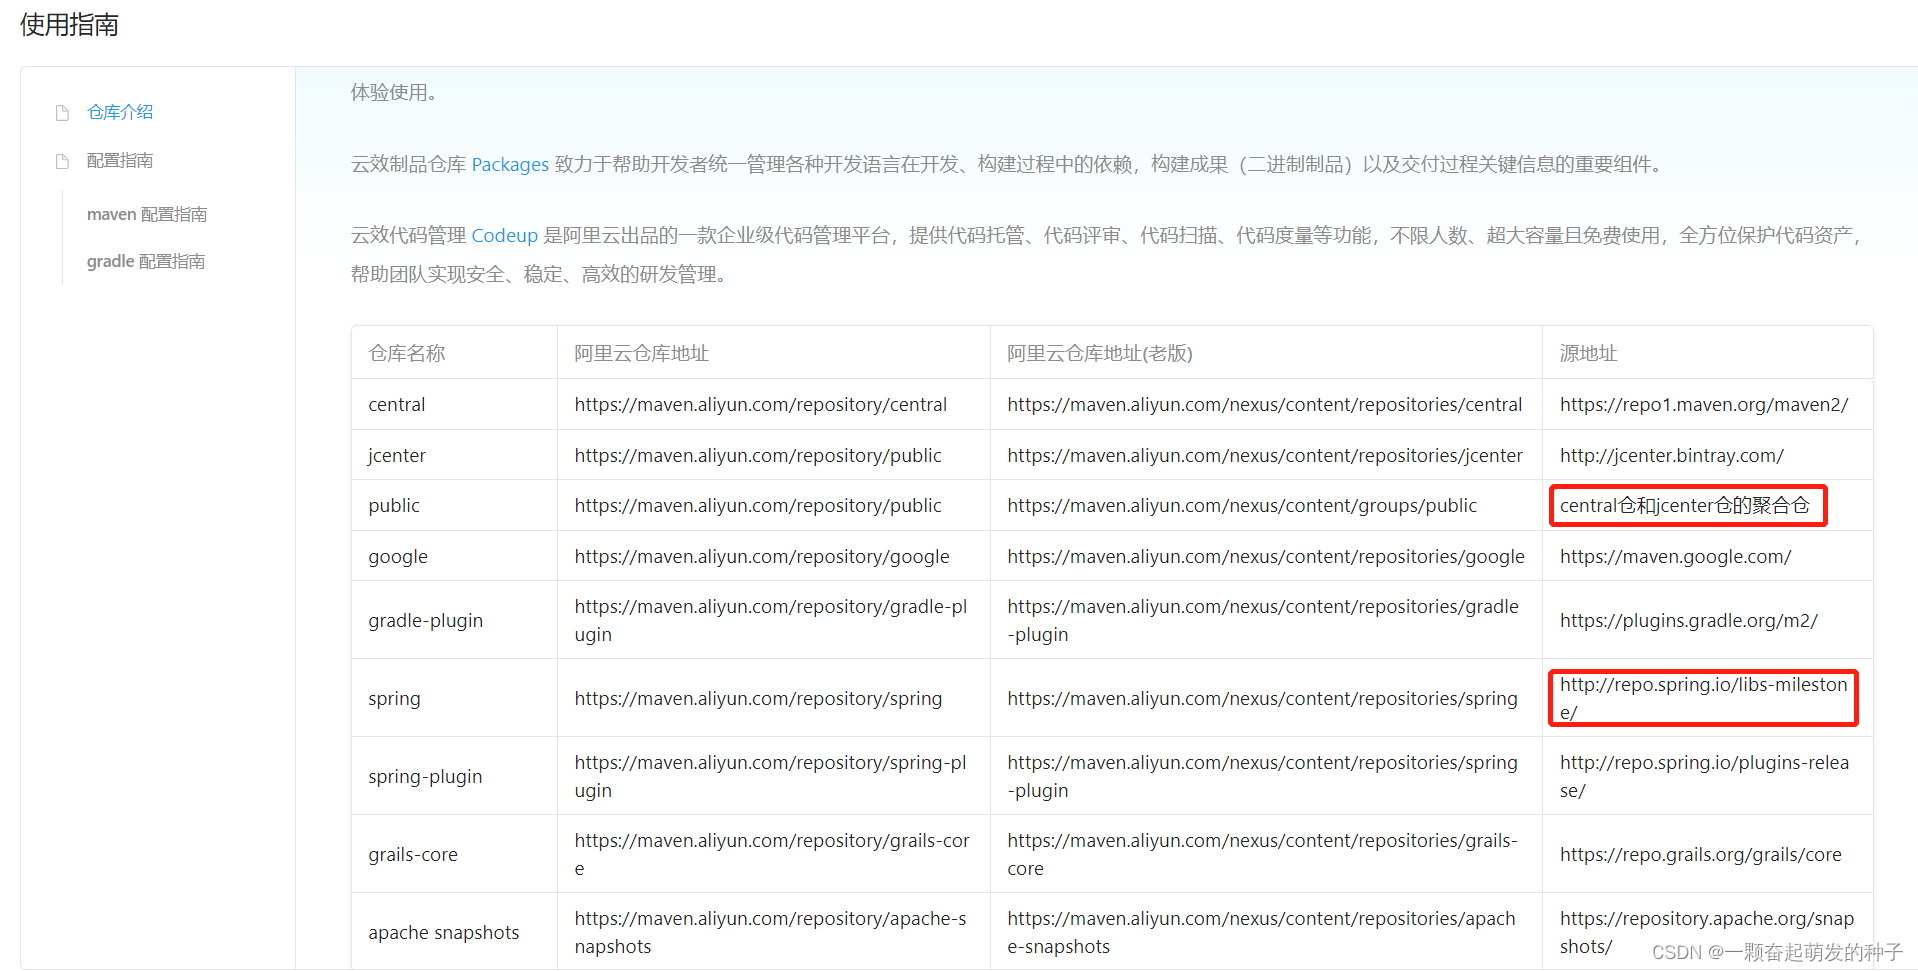
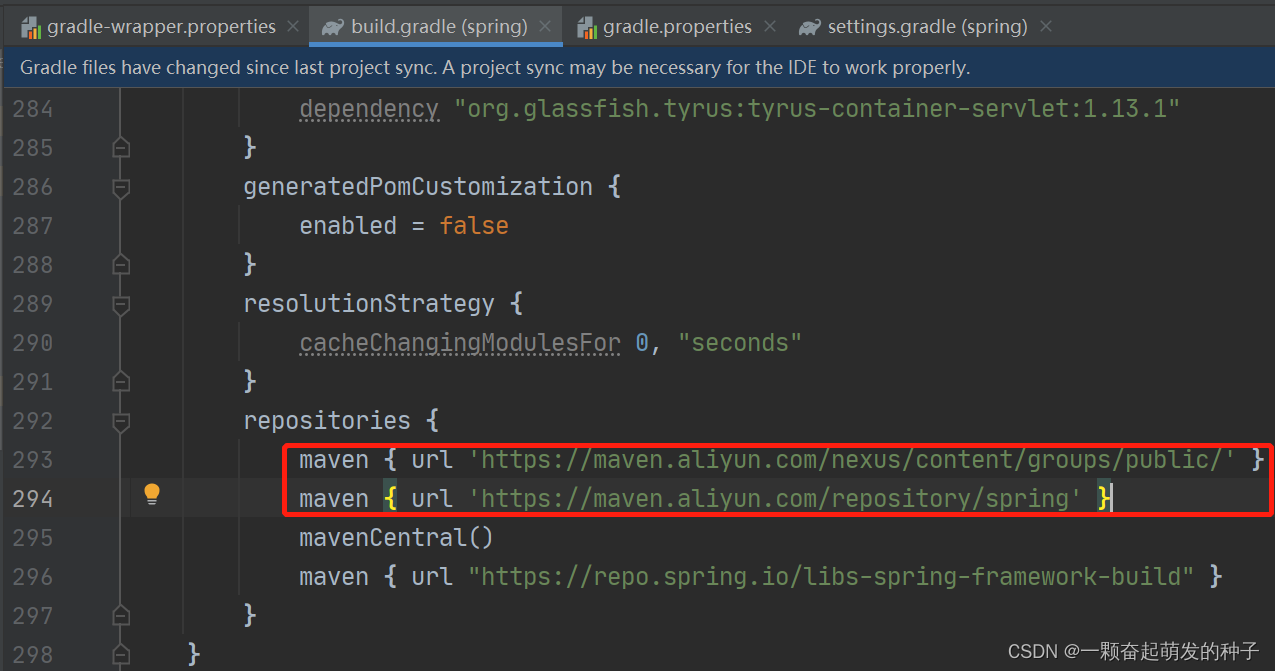
打开 build.gradle 文件,配置阿里云镜像: 参考阿里云代理仓库指南:https://developer.aliyun.com/mvn/guide 会发现 public 仓库没有spring相关依赖,所以需要额外配置 https://maven.aliyun.com/repository/spring。否则会报异常:Could not resolve: com.ibm.websphere:uow:6.0.2.17
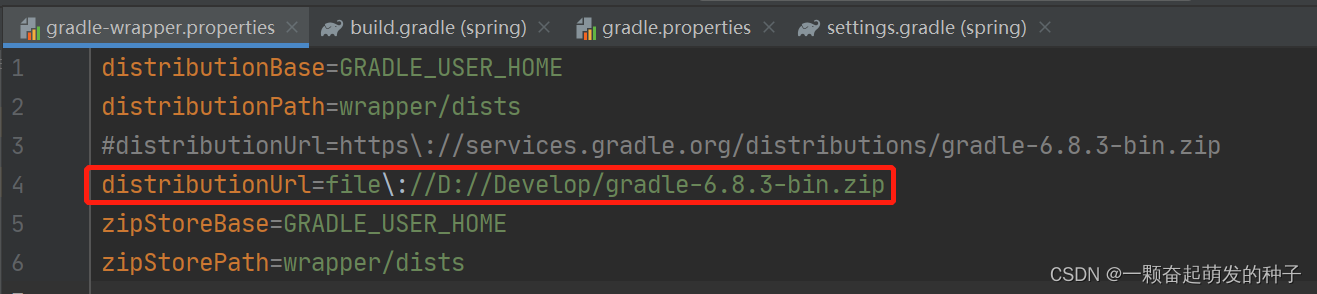
修改 gradle-wrapper.properties 文件
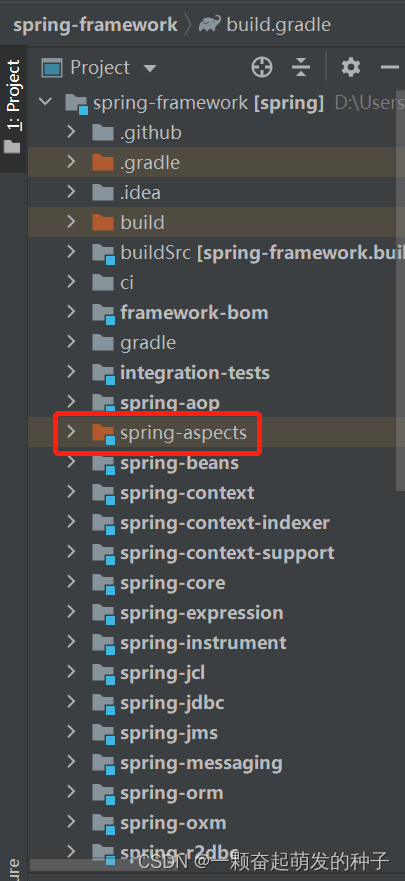
需要注意的是:由于IDEA不能识别 AspectJ 语法,会报错。AspectJ 使用的 ajc 编译器,可以看成是 javac 的增强版,而IDEA默认使用的是 javac 编译器,无法识别 Aspectj 语法,所以会报错。AspectJ入门及在IDEA中的配置可以参考这篇文章:https://juejin.cn/post/6844904065659305991 因此,这里我们可以选择直接排除 spring-aspects 模块,或者安装AspectJ并设置IDEA选用ajc编译器。具体操作可以参考《Spring源码深度解析》第2版中1.4章节。 在Project Structure中需要将 spring-aspects 这个module除去,因为build报错。 右键 spring-aspects 模块,点击 Load/Unload modules 选中 spring-aspects 点击 unload 之后如图所示 module 编译顺序:core-oxm-context-bean-aop 工程-Tasks-other-compileTestJava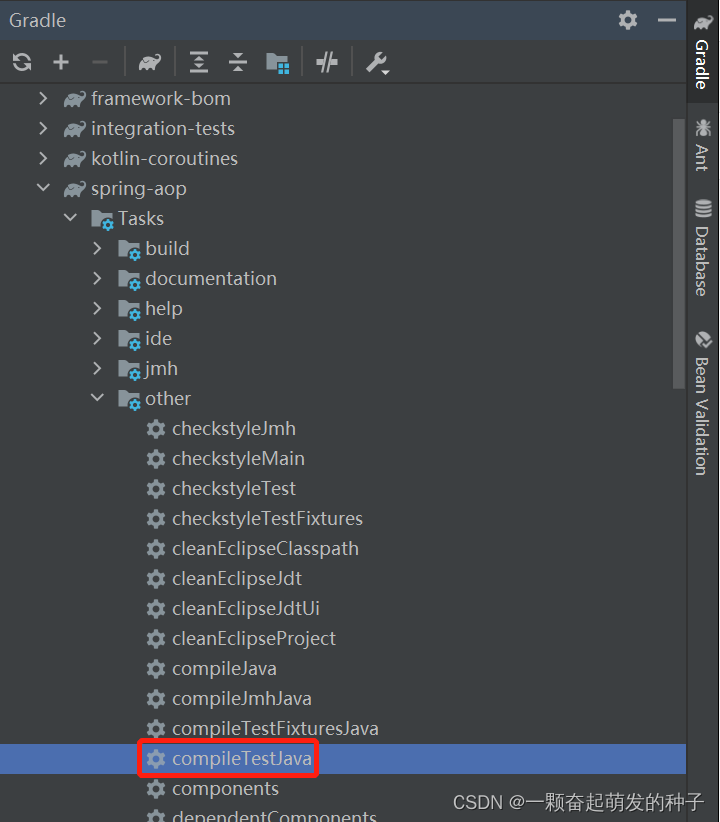 编译成功,显示如下 编译成功,显示如下 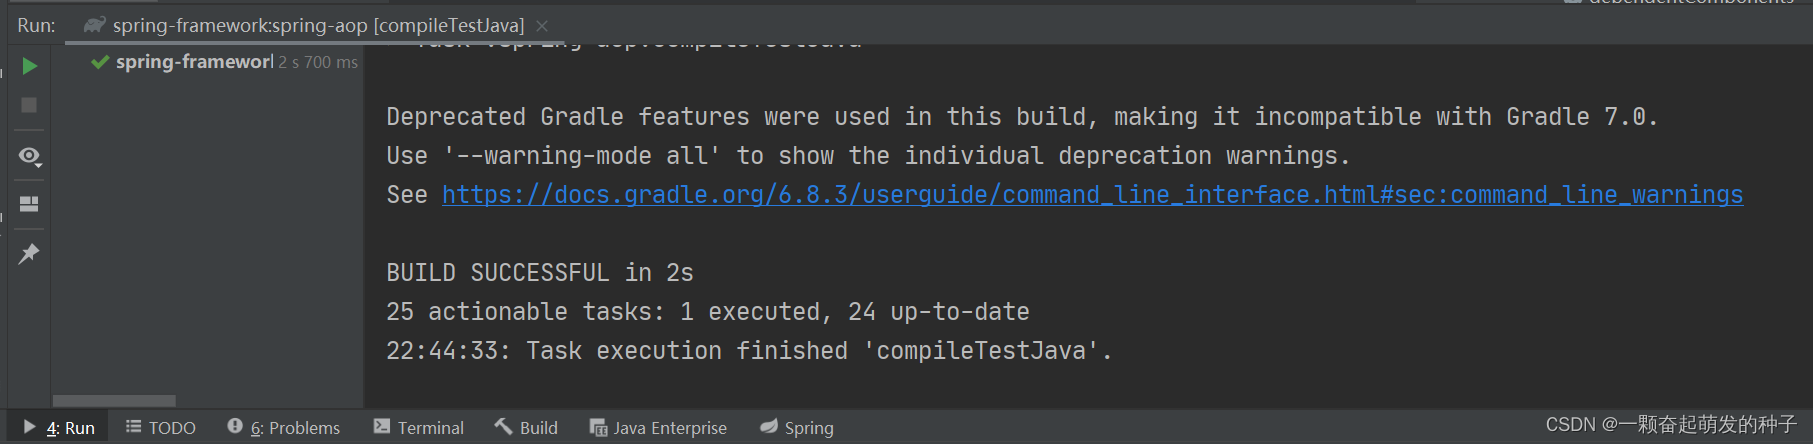 当以上 module 都编译好了后,则可以创建一个自己的 Spring module 来调试阅读 Spring 框架源码了。
三、问题解决
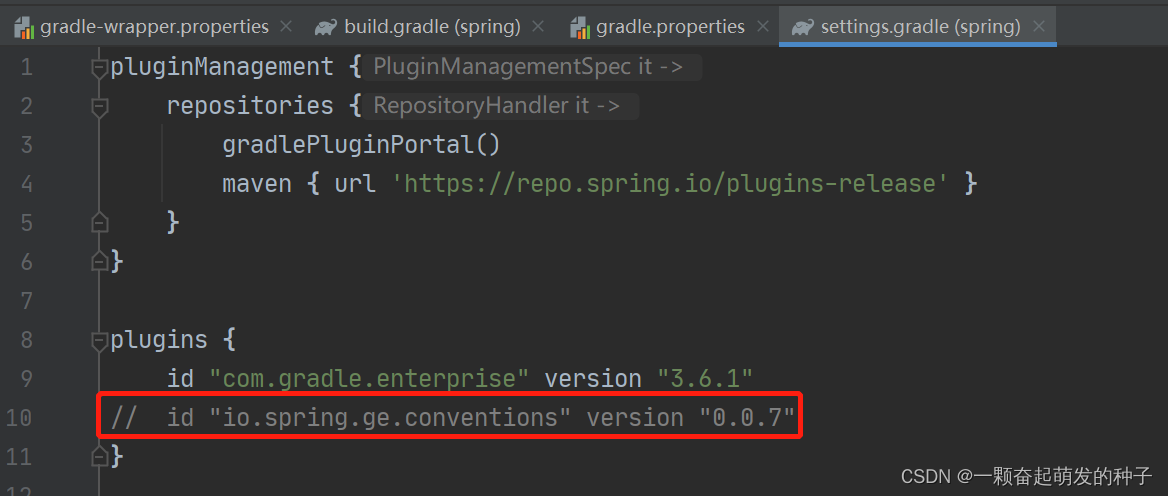
1. 搭建时编译的过程中,可能会出现如下报错:A build scan was not published as you have not authenticated with server ‘ge.spring.io’.Build scan background action failed.
解决方式 当以上 module 都编译好了后,则可以创建一个自己的 Spring module 来调试阅读 Spring 框架源码了。
三、问题解决
1. 搭建时编译的过程中,可能会出现如下报错:A build scan was not published as you have not authenticated with server ‘ge.spring.io’.Build scan background action failed.
解决方式
将 setting.gradle 文件中的这行代码注释
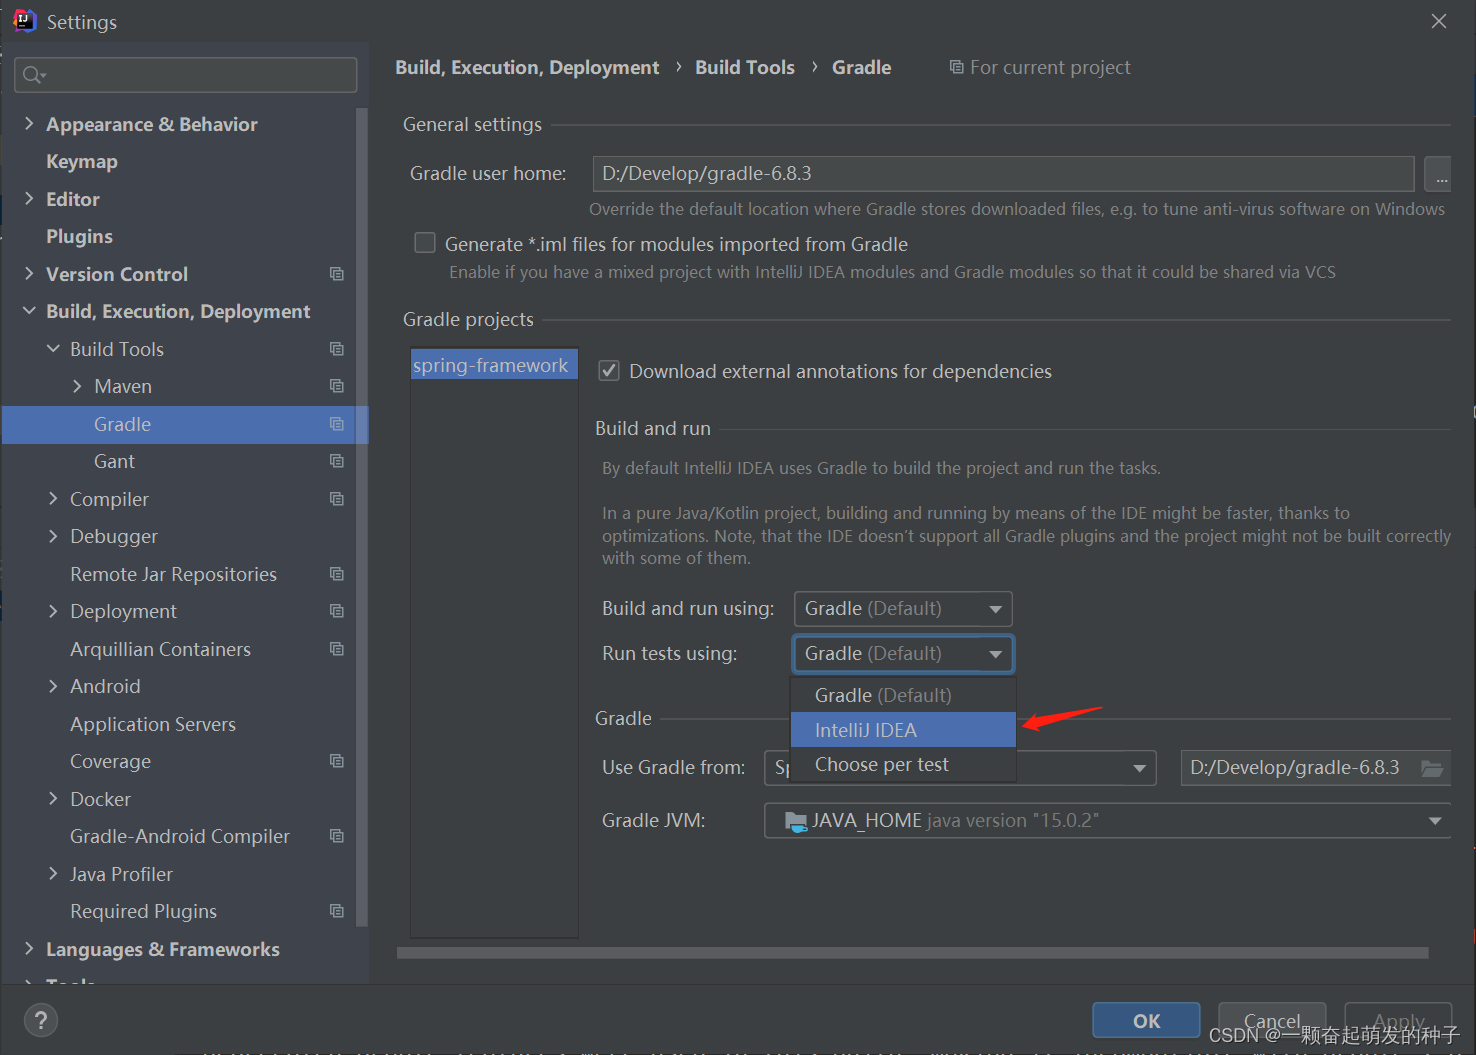
配置测试运行器 在Settings的Gradle工具窗口中,打开 Gradle设置页面。 在“ 运行测试使用”列表中,为选定的Gradle项目选择以下测试运行器选项之一: Gradle:IntelliJ IDEA使用Gradle作为默认测试运行器。结果,在持续集成(CI)服务器上获得相同的测试结果。此外,在命令行中运行的测试将始终在IDE中运行。 IntelliJ IDEA:选择此选项可将测试过程委派给IntelliJ IDEA。在这种情况下,IntelliJ IDEA使用 JUnit 测试运行器,并且由于增量编译,测试运行得更快。 选择每个测试:选择此选项可配置每个测试专门使用哪个测试运行器(Gradle或IntelliJ IDEA)。 这里要选择IntelliJ IDEA
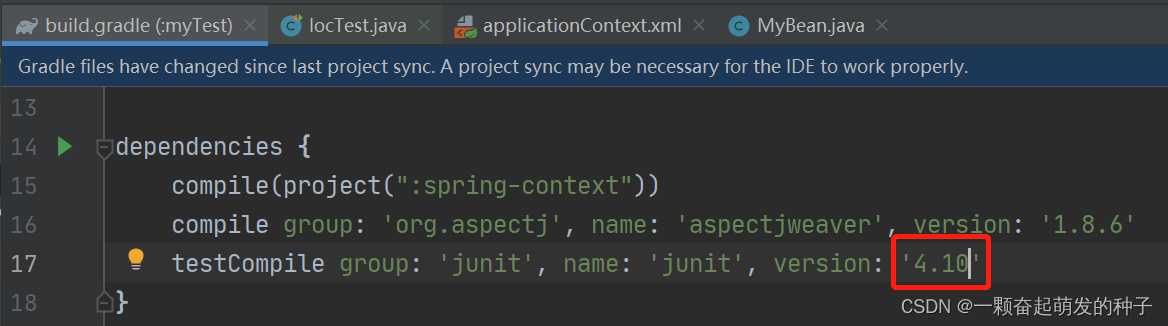
查官网:JUnit now uses the latest version of Hamcrest. Thus, you can use all the available matchers and benefit from an improved assertThat which will now print the mismatch description from the matcher when an assertion fails. junit.jar: Includes the Hamcrest classes. The simple all-in-one solution to get started quickly.Starting with version 4.11, Hamcrest is no longer included in this jar.(4.11以上版本不在包含hamcrest)junit-dep.jar: Only includes the JUnit classes but not Hamcrest. Lets you use a different Hamcrest version. 解决方式所以现在有两个办法解决: junit版本降到4.10 导入hamcrest-core-1.3.jar 这里我在 build.gradle 里将 junit 版本修改为 4.10
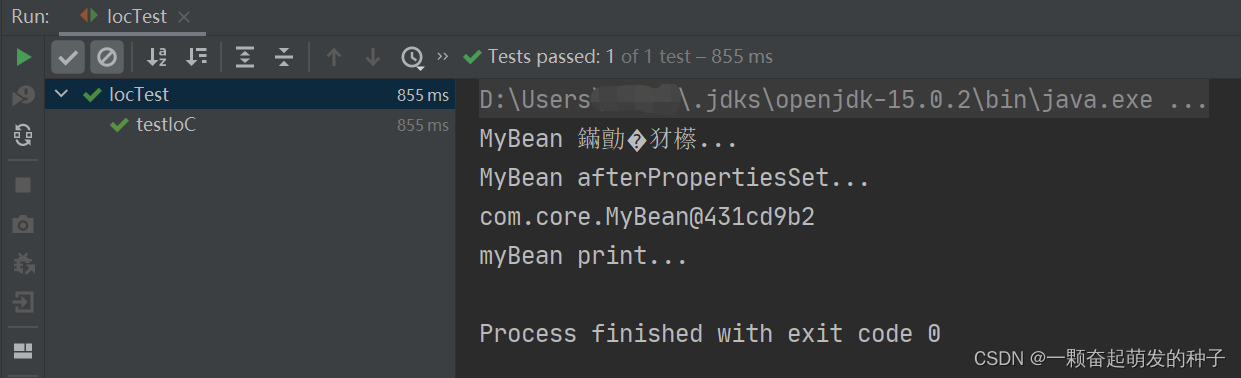
然后重新build gradle,运行单元测试类 myTest
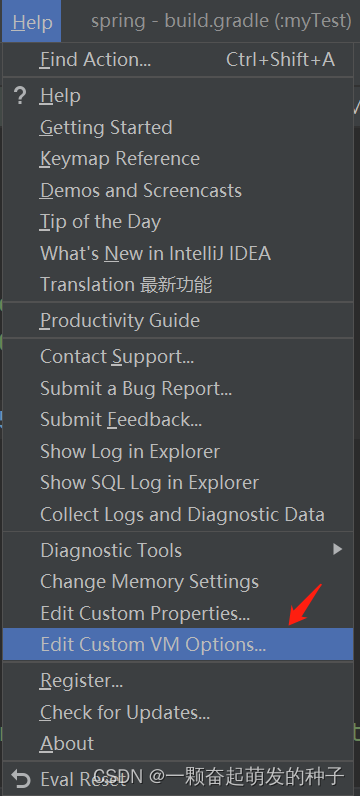
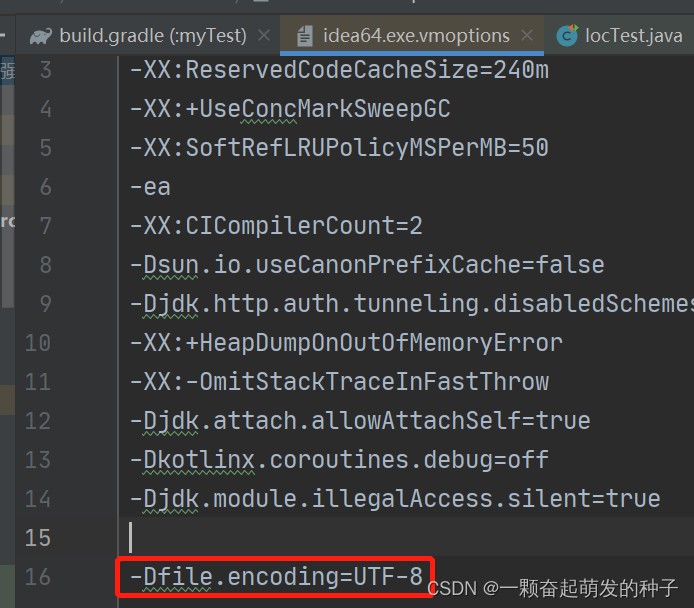
但是又出现了问题,测试类中我打印的是中文,控制台输出时乱码了。 4. 控制台输出显示中文乱码 解决方式在工具栏 - help中,选择 Edit Custom VM Options… 增加配置 -Dfile.encoding=UTF-8
重启 IDEA 即可。如果重启后控制台输出仍然显示中文乱码,则有可能是没有清楚缓存,需要在 File 中选择 Invalidate Caches / Restart…
|

 设置好了之后,打开cmd窗口验证下是否配置成功:


【本文地址】
今日新闻 |
推荐新闻 |