人脸检测 Retinaface |
您所在的位置:网站首页 › mafa数据集全称 › 人脸检测 Retinaface |
人脸检测 Retinaface
|
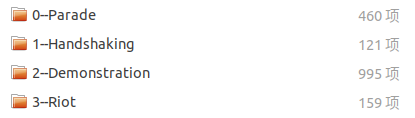
人脸检测 Retinaface - 数据集的处理(WIDER FACE) flyfish WIDER FACE数据集是由香港中文大学发布的大型人脸数据集,含32,203幅图像和393,703个高精度人脸包围框,该库中人脸包含尺度、姿态、表情、遮挡和光照等变化。 WiderFace数据集的划分方法 WiderFace以60个事件类别(如交通、节日、游行等)为基础进行划分,每个事件类别中随机选择40% / 10% / 50%的数据分别作为训练集/验证集/测试集. WIDER FACE: A Face Detection Benchmark 原版的标注方式File name 图片中有多少张脸 x1, y1, w, h, blur, expression, illumination, invalid, occlusion, pose 图片的位置和名称; 边框的数量(图片中有多少张脸) 每个人脸的边框和属性: 其中1~4位是x1, y1, w, h(x1和y1用来表示边框的左上角坐标,w和h分别表示边框的宽度和高度) blur:模糊,0清晰、1一般、2严重; expression:表情,0正常、1夸张; illumination:曝光,0正常、1极度; occlusion:遮挡,0无、1部分、2大量; pose:姿势,0正常,1非典型; Scale. 以图像的高将人脸分成三个尺度:small(10-50个像素),medium(50-300个像素),large(300以上个像素)。这样的划分主要是考虑到通用目标的检测率和人眼的辨别能力。 Occlusion. 对于评估一个人脸检测器来说,遮挡是一个很重要的因素。这里将遮挡看成是一个属性,并将人脸划分为三类,无遮挡、部分遮挡和严重遮挡,其中遮挡1-30%的为部分遮挡,30%以上的为严重遮挡。 Pose. 与遮挡相似,定义两个等级,分成典型的和非典型的。roll或pitch角度大于30度,或yaw大于90度的认为是非典型的。 Event. 不同事件通常对应着不同的场景。WiderFace包含60个事件类别,涵盖现实场景中的大量场景。为了评估事件对人脸检测的影响,用三个因素对每个事件进行描述:尺度、遮挡和姿态。对于每个因素,我们计算特定事件类型的检测率,然后进行排序,将事件分成三部分:easy(41-60类),medium(21-40类),hard(1-20类) 关键点的标注方式 # 0--Parade/0_Parade_marchingband_1_849.jpg 449 330 122 149 488.906 373.643 0.0 542.089 376.442 0.0 515.031 412.83 0.0 485.174 425.893 0.0 538.357 431.491 0.0 0.82 # 0--Parade/0_Parade_Parade_0_904.jpg 361 98 263 339 424.143 251.656 0.0 547.134 232.571 0.0 494.121 325.875 0.0 453.83 368.286 0.0 561.978 342.839 0.0 0.89以第一个例子为例 449 330 122 149 表示box(x1, y1, w, h) 接着是5个关键点信息,分别用0.0隔开 或者1.0分开 488.906 373.643 0.0 542.089 376.442 0.0 515.031 412.83 0.0 485.174 425.893 0.0 538.357 431.491 0.0 1个置信度值 "#"号开头的,便是图片的地址,将其放入img_path中 PyTorch支持两种不同类型的数据集 map-style datasets, 映射类型的数据集 映射那就是key-value键值对,通过具体的索引,就能得到对应数据。dataset[idx],通过索引idx就能把图片和对应的标注信息读出来 retinaface用的就是map-style dataset这种 iterable-style datasets. dataset = WiderFaceDetection( training_dataset,preproc(img_dim, rgb_mean) torch.utils.data.Dataset 表示数据集的抽象类 这个PyTorch源码中的抽象类等着你实现,函数都空着呢 class Dataset(object): def __getitem__(self, index): raise NotImplementedError def __add__(self, other): return ConcatDataset([self, other])按照PyTorch使用数据集的方法 例如官方提供api使用数据集 torchvision.datasets.MNIST(root, train=True, transform=None, target_transform=None, download=False) torchvision.datasets.CocoDetection(root, annFile, transform=None, target_transform=None, transforms=None)我们自己的数据集也想像官方那样调用 这就是wider_face.py的由来,操作数据就要数据增强这就是data_augment.py的由来 操作COCO数据集的名字是CocoDetection,那操作WIDER FACE数据集就是WiderFaceDetection dataset = WiderFaceDetection(…) dataloader=data.DataLoader(dataset,…) import torch.utils.data as data class WiderFaceDetection(data.Dataset): 继承自标准 torch.utils.data.Dataset类,并实现__len__和__getitem__。 基类是torch.utils.data.Dataset 改写 __init__ __len__ __getitem__getitem 是python内置的操作方法,对应的操作符是索引操作符[],就像数组的下标,通过索引返回具体的某一条数据记录,索引从0开始。 len 返回数据的总数。Dataset类重写该方法,可以使用len内置函数获取数据的数目
结果是path=“0–Parade/0_Parade_marchingband_1_849.jpg” 再经过 path = txt_path.replace(‘label.txt’,‘images/’) + path path=“图片的绝对路径” imgs_path存储的都是图片的绝对路径 label: [405.0, 294.0, 28.0, 33.0, 417.0, 299.0, 0.0, 425.0, 295.0, 0.0, 428.0, 305.0, 0.0, 424.0, 315.0, 0.0, 429.0, 312.0, 0.0, 0.32] 代码中是通过操作索引跳过0或者1 annotation : [[430. 263. 450. 290. 436.562 272.496 444.049 272.321 440.567 277.371 436.737 280.33 443.527 280.33 1. ]] annotation: [[265. 489. 281. 513. -1. -1. -1. -1. -1. -1. -1. -1. -1. -1. -1.]] 最后的 annotation[0, 14]相当于上面的annotation最后的那个数 如果值为1 表示landmark是正常的,-1表示landmark是不正确的 与官方的COCO操作是相同的 rstrip() 删除 string 字符串末尾的指定字符(默认为空格) 完整代码 import os import os.path import sys import torch import torch.utils.data as data import cv2 import numpy as np class WiderFaceDetection(data.Dataset): def __init__(self, txt_path, preproc=None): self.preproc = preproc self.imgs_path = [] self.words = [] f = open(txt_path,'r') lines = f.readlines() isFirst = True labels = [] for line in lines: line = line.rstrip() if line.startswith('#'): if isFirst is True: isFirst = False else: labels_copy = labels.copy() self.words.append(labels_copy) labels.clear() path = line[2:] path = txt_path.replace('label.txt','images/') + path self.imgs_path.append(path) else: line = line.split(' ') label = [float(x) for x in line] labels.append(label) self.words.append(labels) def __len__(self): return len(self.imgs_path) def __getitem__(self, index): img = cv2.imread(self.imgs_path[index]) height, width, _ = img.shape labels = self.words[index] annotations = np.zeros((0, 15)) if len(labels) == 0: return annotations for idx, label in enumerate(labels): annotation = np.zeros((1, 15)) # bbox annotation[0, 0] = label[0] # x1 annotation[0, 1] = label[1] # y1 annotation[0, 2] = label[0] + label[2] # x2 annotation[0, 3] = label[1] + label[3] # y2 # landmarks annotation[0, 4] = label[4] # l0_x annotation[0, 5] = label[5] # l0_y annotation[0, 6] = label[7] # l1_x annotation[0, 7] = label[8] # l1_y annotation[0, 8] = label[10] # l2_x annotation[0, 9] = label[11] # l2_y annotation[0, 10] = label[13] # l3_x annotation[0, 11] = label[14] # l3_y annotation[0, 12] = label[16] # l4_x annotation[0, 13] = label[17] # l4_y #print("annotation:",annotation) if (annotation[0, 4] |
 path = line[2:] 因为路径是从#空格开始# 0–Parade/0_Parade_marchingband_1_849.jpg
【本文地址】
今日新闻 |
推荐新闻 |