使用fabric.js实现对图片涂鸦、文字编辑、平移缩放与保存功能 |
您所在的位置:网站首页 › js如何实现大量图片的播放 › 使用fabric.js实现对图片涂鸦、文字编辑、平移缩放与保存功能 |
使用fabric.js实现对图片涂鸦、文字编辑、平移缩放与保存功能
|
文章目录
背景1.初始化画布1.创建画布2.设置画布大小
2.渲染图片3.功能:开启涂鸦4.功能:添加文字5.旋转图片6.画布平移7.画布缩放8.保存图片9.上传图片10.销毁实例11.总结
背景
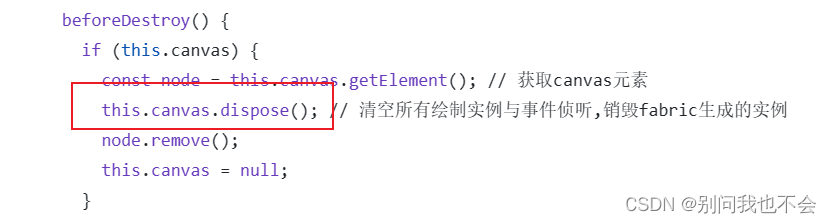
项目中有个需求,需要对图片附件进行简单的编辑操作,如涂鸦、添加文字、拖动与缩放图片、旋转图片、保存图片、上传图片等。经过技术选型对比,决定使用fabric.js开源库。 以下的代码都为简化版。 1.初始化画布图片需要绘制在canvas画布上进行相关的编辑操作。 1.创建画布 import { fabric } from "fabric"; export default { mounted() { this.canvas = new fabric.Canvas("editorcanvas", { selection: false, // 不允许从画板框选,但允许选中元素 centeredRotation: true, // true时Canvas上的所有对象使用中间点(而不是默认的左上角)作为旋转的原点 // backgroundVpt: false, // 锁定背景图,不受画板缩放移动的影响 // isDrawingMode: true, // 开启自由绘制 // selectionFullyContained: true, // 只选择完全包含在拖动选择矩形中的元素 }); this.canvas.freeDrawingBrush.width = 4; // 画笔的宽度 this.canvas.freeDrawingBrush.limitedToCanvasSize = true; // 自由绘制被限制为画布大小 }, } 2.设置画布大小由于每个图片的宽高都是不定的,可能是横图也可能是纵图。要根据图片的宽高来动态设置画布的宽高,保证图片在画布中是完全铺满的,并且画布的大小需适应屏幕。 这里还需要注意图片的跨域问题。 const img = document.createElement("img"); img.crossOrigin = "anonymous"; img.src = this.file.playUrl; // 图片的url img.onload = () => { let width; let height; const radio = img.width / img.height; if (radio > 1) { width = Math.min(img.width, 1200); height = width / radio; } else { height = Math.min(img.height, 700); width = height * radio; } this.domData.imgWidth = img.width; this.domData.imgHeight = img.height; this.domData.width = width; this.domData.originWidth = width; this.domData.height = height; this.domData.originHeight = height; this.initCanvas(width, height, img.width, img.height, { scaleWidth: width, scaleHeight: height, }); }; initCanvas(width, height, imgWidth, imgHeight, info) { this.canvas.setDimensions({ width, height }); // 设置画布的宽高 }, 2.渲染图片图片以背景图的形式渲染在画布上。 initCanvas(width, height, imgWidth, imgHeight, info) { this.canvas.setDimensions({ width, height }); // 设置画布的宽高 this.$nextTick(() => { this.canvas.setBackgroundImage( this.file.playUrl, this.canvas.renderAll.bind(this.canvas), { imgWidth, imgHeight, scaleX: info.scaleWidth / imgWidth, scaleY: info.scaleHeight / imgHeight, left: width / 2, top: height / 2, angle: this.rotateValue, // 旋转角度,默认为0 originX: "center", originY: "center", crossOrigin: "anonymous", } ); }); }, 3.功能:开启涂鸦在开启涂鸦、添加文字等功能时,请自行注意功能的互斥。 涂鸦就是开启自由绘制功能。 this.canvas.freeDrawingBrush.width = Number(this.lineWidthValue || 4) this.canvas.freeDrawingBrush.color = this.colorDrawValue; this.canvas.isDrawingMode = true; // 自由绘制 4.功能:添加文字实现思路:在画布中间添加一行文本,并且让文本处于活跃状态,并选中所有文本,方便用户直接修改文字。 const text = new fabric.IText("请输入文本", { fill: this.colorTextValue, }); text.setControlsVisibility({ // 控制文本的手柄 mt: false, mr: false, mb: false, ml: false, }); this.canvas.add(text); this.canvas.viewportCenterObject(text); // 画布中间 this.canvas.setActiveObject(text); // 活跃状态 text.enterEditing(); // 进入编辑状态 text.selectAll(); // 选中所有文本 5.旋转图片思路就是改变画布大小,让画布的宽高进行互换,并且重新渲染图片背景,此时渲染的图片是有旋转角度 rotateValue 的。 这里有个注意点,我这种实现方式在旋转后会清空之前的所有绘制,不清空的话之前的绘制会有坐标偏移,展示不对。 revolveCanvas() { const { imgWidth, imgHeight, originWidth, originHeight } = this.domData; if (!this.rotateValue || !((this.rotateValue / 90) % 2)) { this.domData.width = originHeight; this.domData.height = originWidth; } else { this.domData.width = originWidth; this.domData.height = originHeight; } this.rotateValue += 90; // 累加,顺时针旋转 this.canvas.clear(); // 清空之前画布上的所有绘制 this.activeThingchange(null); this.isActive = null; this.initCanvas( this.domData.width, this.domData.height, imgWidth, imgHeight, { scaleWidth: this.domData.originWidth, scaleHeight: this.domData.originHeight, } ); }, 6.画布平移 this.canvas.on("mouse:down", (opt) => { const evt = opt.e; this.dragging.open = true; this.dragging.lastPosX = evt.clientX; this.dragging.lastPosY = evt.clientY; }); this.canvas.on("mouse:move", (opt) => { if (this.dragging.open) { const evt = opt.e; const vpt = this.canvas.viewportTransform; vpt[4] += evt.clientX - this.dragging.lastPosX; vpt[5] += evt.clientY - this.dragging.lastPosY; this.canvas.requestRenderAll(); // 异步更新画板,提升性能 this.dragging.lastPosX = evt.clientX; this.dragging.lastPosY = evt.clientY; } }); this.canvas.on("mouse:up", (e) => { if (this.dragging.open) { this.canvas.setViewportTransform(this.canvas.viewportTransform); this.dragging.open = false; } }); 7.画布缩放有两种画布缩放方式,第一种是以鼠标指针为中心点来缩放画布,第二种是以画布的原点为中心点来缩放画布。 this.canvas.on("mouse:wheel", (opt) => { const delta = opt.e.deltaY; // 正值为放大 let zoom = this.canvas.getZoom(); zoom *= 0.999 ** delta; if (zoom > 20) zoom = 20; if (zoom const { imgWidth, imgHeight, width, height, initWidth, initHeight } = this.commonSaveUtil(); setTimeout(() => { const dataURL = this.canvas.toDataURL({ format: "jpeg", quality: 1, width: initWidth, height: initHeight, }); this.canvas.backgroundVpt = true; this.canvas.viewportTransform = [1, 0, 0, 1, 0, 0]; this.initCanvas(width, height, imgWidth, imgHeight, { scaleWidth: this.domData.originWidth, scaleHeight: this.domData.originHeight, }); const link = document.createElement("a"); link.download = new Date().getTime(); link.href = dataURL; document.body.appendChild(link); link.click(); document.body.removeChild(link); this.loading = false; }, 1500); }, commonSaveUtil() { this.loading = true; this.canvas.backgroundVpt = false; const { imgWidth, imgHeight, width, height } = this.domData; let initWidth; let initHeight; if (!this.rotateValue || !((this.rotateValue / 90) % 2)) { initWidth = imgWidth; initHeight = imgHeight; } else { initWidth = imgHeight; initHeight = imgWidth; } this.initCanvas(initWidth, initHeight, imgWidth, imgHeight, { scaleWidth: imgWidth, scaleHeight: imgHeight, }); this.canvas.viewportTransform = [ initWidth / width, 0, 0, initHeight / height, 0, 0, ]; return { imgWidth, imgHeight, width, height, initWidth, initHeight }; }, 9.上传图片逻辑与保存图片类似,只是需要将获取到的base64格式的url转为file类型,再上传给服务器。 function dataURLtoFile(dataurl, filename) { // base64 -> file const arr = dataurl.split(","); const mime = arr[0].match(/:(.*?);/)[1]; const bstr = atob(arr[1]); let n = bstr.length; const u8arr = new Uint8Array(n); while (n--) { u8arr[n] = bstr.charCodeAt(n); } return new File([u8arr], filename, { type: mime }); } const file = dataURLtoFile(dataURL, new Date().getTime()); 10.销毁实例我是把图片编辑功能封装成了一个组件,可以在项目的多个地方使用。在进行组件销毁时,建议手动把实例销毁掉。 使用fabric.js库实现这些功能比较简单,网上有很多博客可供参考,这里贴一个开发时经常查阅的中文文档:http://funcion_woqu.gitee.io/fabric-doc/api/#basebrush |
【本文地址】
今日新闻 |
推荐新闻 |