校园网锐捷认证破解(mentohust):《从编译到多拨》 |
您所在的位置:网站首页 › gswifi助手 › 校园网锐捷认证破解(mentohust):《从编译到多拨》 |
校园网锐捷认证破解(mentohust):《从编译到多拨》
|
Post Views: 4,986 原创文章,转载请注明出处https://qiedd.com/ 路由器选择目前可刷入Openwrt的路由器有很大一部分都是MTK的,市面上常见一般是 MT7620 与 MT761 我手上关于MTK的路由有三台小米mini(MT7620) 、三台Newifi3 D2(MT7621)、R6800(MT7621) 虽然说 Newifi3 d2(新三) 无线方面比较弱鸡,但是它有 32M 的 ROM 和 512M 的 RAM,配置来说比较香,宿舍用的话足够了,现在大概90左右能拿下?(闲鱼) 固件编译请参考我的上一篇文章,编译示例中已写到 原版Openwrt编译这是我自己用于测试mentohust而编译的 小米mini(R1C) 点我下载Newifi3 d2(新三)点我下载 若你想使用闭源驱动的Pandorabox,可在此处下载 Newifi3 d2(新三)R19.02:点我下载 备份R20.3.8:点我下载 备份 小米mini(R1C)R18.10:点我下载 备份 网件 R6800:点我下载 备份 固件刷入仅供参考,其他路由器刷机教程可在恩山中找 Breed官方下载:点我跳转 小米mini(R1C):点我跳转Newifi3 D2(新三):点我跳转网件 R6800:点我跳转!!R6800无需使用breed,官方自带的bootloader已经非常好用了 mentohust编译这里使用的源码来自:https://github.com/shanzhaozhen/mentohust_for_zqu 编译环境 Ubuntu 18.04不建议在root下编译,请在user环境下操作! 若你在VPS上编译,请先创建用户 #创建用户 useradd -m -g users -s /bin/bash username #更改用户密码 passwd username #登陆进用户 su username #进入用户的root文件夹 cd开始编译 #安装编译环境 sudo apt install make cmake autoconf automake gcc flex bison autopoint #下载源码 git clone https://github.com/shanzhaozhen/mentohust_for_zqu #进入文件夹 cd mentohust_for_zqu #防止报错 cp README.md README #检查环境 ./autogen.sh #生成Makefile ./configure #编译 makementohust在 src\ 中,但是上面的仅能在x86_64的Linux系统中使用若想在路由器上使用则需要交叉编译 交叉编译首先我们需要SDK,你可以去Openwrt官网下载这里我提供几个 OpenwrtMT7620:点我下载MT7621:点我下载X86_64:点我下载 PandoraboxMT7620:官方下载 备份MT7621:官方下载 备份 以MT7621为例,为Pandorabox编译mentohust请填写自己的路径,不要照抄! #下载SDK wget http://downloads.pangubox.com:6380/pandorabox/19.02/targets/ralink/mt7621/PandoraBox-SDK-ralink-mt7621_gcc-5.5.0_uClibc-1.0.x.Linux-x86_64-2019-02-01-git-0231ad4b5.tar.xz #解压 tar Jxvf PandoraBox-SDK-ralink-mt7621_gcc-5.5.0_uClibc-1.0.x.Linux-x86_64-2019-02-01-git-0231ad4b5.tar.xz #设置变量 export STAGING_DIR=/home/username/PandoraBox-SDK-ralink-mt7621_gcc-5.5.0_uClibc-1.0.x.Linux-x86_64-2019-02-01-git-0231ad4b5/staging_dir/toolchain-mipsel_1004kc+dsp_gcc-5.5.0_uClibc-1.0.x/bin export PATH=$PATH:/home/username/PandoraBox-SDK-ralink-mt7621_gcc-5.5.0_uClibc-1.0.x.Linux-x86_64-2019-02-01-git-0231ad4b5/staging_dir/toolchain-mipsel_1004kc+dsp_gcc-5.5.0_uClibc-1.0.x/bin首先需要编译 Libpcap请先去官网下载 Libpcap 这里以 Libpcap 1.9.1为例 #安装编译环境 sudo apt install make cmake autoconf automake gcc flex bison autopoint #下载libpcap wget https://www.tcpdump.org/release/libpcap-1.9.1.tar.gz #解压 tar zxvf libpcap-1.9.1.tar.gz #进入文件夹 cd libpcap-1.9.1 #生成Makefile ./configure --host=mipsel-openwrt-linux --with-pcap=linux #编译 make此时会在本目录下生成一个libpcap.a,接下来编译 Mentohust 会用到 #下载源码 git clone https://github.com/shanzhaozhen/mentohust_for_zqu #进入文件夹 cd mentohust_for_zqu #防止报错 cp README.md README #执行 ./autogen.sh #生成Makefile ./configure --host=mipsel-openwrt-linux --with-pcap=/home/username/libpcap-1.9.1/libpcap.a #编译 make在 src 文件夹中会生成一个二进制的 Mentohust 文件接下来就是将其上传到路由器了 将Mentohust上传至路由器建议使用Winscp这个应用上传 路由器开机 进入路由器默认地址 http://192.168.1.1 Openwrt默认帐号:root默认密码:password Pandorabox默认帐号:root默认密码:admin 使用SCP协议登录进路由器 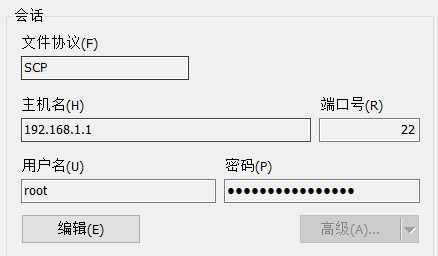 将 Mentohust 上传至 /usr/sbin 通过SSH登录进路由器可在Windows的CMD中登录 ssh [email protected]给Mentohust增加执行权限 chmod +x /usr/sbin/mentohust #进行测试 mentohust -h使用Mentohust对于锐捷认证,首先需要修改路由器MAC地址有两种方法一种是在breed中修改,另一种是在Openwrt中修改 breed中修改物理地址以 Newifi3 d2 为例 断电,网线接到wan口,按住路由器reset键通电,等待路由器等闪烁就可以松开reset键了 这时候电脑浏览器进入 http://192.168.1.1 然后按下图位置修改成你的MAC地址 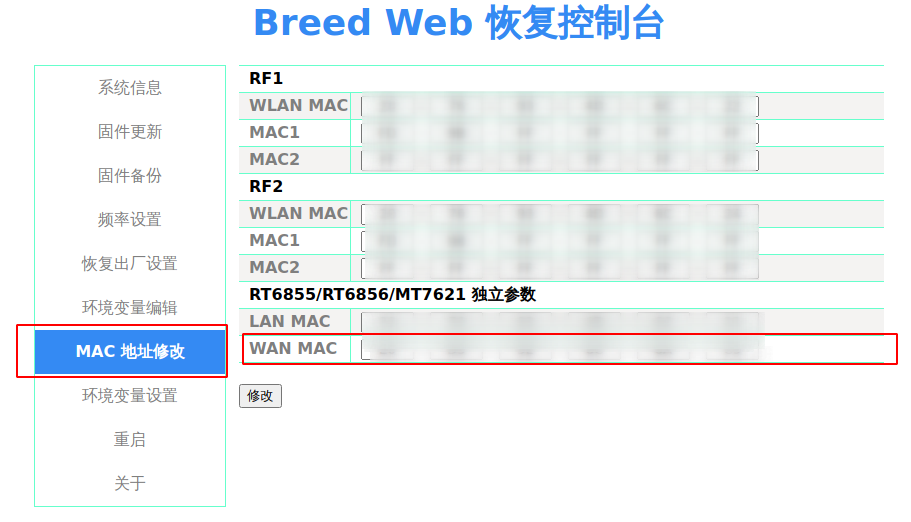 在 Openwrt/Pandorabox 中修改物理地址 在 Openwrt/Pandorabox 中修改物理地址进入Luci 在网络->接口->编辑WAN口 然后在高级设置中->重设MAC地址 保存并应用,最后重启试一下 Pandorabox 修改软件源由于mentohust需要用到Libpcap,而Pandorabox的固件没有提供,需要手动下载在使用之前需要修改软件源 Openwrt固件无需理会如何修改? Pandorabox 修改软件源使用Mentohust进行认证在 Luci的 网络->接口 处,将wan口协议修改为DHCP 注意事项选项与参数中间不要加空格!!某些学校需要用到的文件配置为GBK,因此需要使用iconv进行转换可使用 mentohust -h 自行查看参数以下为示例,请勿照抄 首先使用-w保存文件 #认证参数 mentohust -u帐号 -p密码 -n网卡 -a1 -d1 -v版本号 --service学生用户 -w #或者直接手动设置 mentohust认证参数详解:网卡为你的认证网卡,是wan口,可使用命令 ifconfig 查看-a1 为组播地址,选择锐捷-d1 为获取 IP 的方式,如何获取的就如何选择-v 你的客户端版本号,填数字,如 -v4.44 –service 你的用户类型,请自行查看在win上认证成功后的用户类型(如:学生用户)-w 将参数保存至 /etc/mentohust.conf 如果以上参数正确,但无法认证成功,可能是因为认证的服务端使用了GBK编码,而mentohust默认使用 UTF-8 ,因此需要转换文件编码 Openwrt上的iconv我不会用,我是直接在Arch上转换再上传到路由器 /etc 的 #转换文件编码 iconv -f UTF-8 -t GBK mentohust.conf -o mentohust.conf.GBK #删除原来的配置文件 rm /etc/mentohust.conf #重命名 mv mentohust.conf.GBK mentohust.conf #查看文件编码 file mentohust*然后进行认证 #直接使用mentohust指令进行认证,不要加 -w mentohust #若认证成功,可放在后台运行 mentohust -b3Mentohust开机启动编辑 /etc/rc.local 将mentohust指令丢进去 示例 # Put your custom commands here that should be executed once # the system init finished. By default this file does nothing. mentohust -b3 exit 0macvlan创建Openwrt创建虚拟网口(macvlan)负载均衡Openwrt的负载均衡Mentohust多帐号认证按照上面两步创建好 macvlan 与 负载均衡 首先我们创建一个文件,把所有的命令丢进去 touch boot.sh然后把创建macvlan,以及锐捷认证的命令都丢进去 我们只要删除 /var/run/mentohust.pid即可进行下一个帐号的认证但是需要注意时间间隔!! #!/bin/bash mentohust -u123456 -p123456 -neth0 -a1 -d1 -v4.44 -b3 sleep 10 rm -rf /var/run/mentohust.pid sleep 5然后我们把所有需要启动的都丢进去,以下是例子 #!/bin/bash #编译时你得选择安装bash #如果有luci-app-syncdial,请使用那个创建vwan,不需要以下两步 ip link add link wan name macvlan1 type macvlan ifconfig macvlan1 up ip link add link wan name macvlan2 type macvlan ifconfig macvlan2 up #等待macvlan启动,并等待其获取IP,请根据实际情况修改 sleep 30 mentohust -u123456 -p123456 -neth0 -a1 -d1 -v4.44 -b3 sleep 10 rm -rf /var/run/mentohust.pid sleep 5 mentohust -u123456 -p123456 -nmacvlan1 -a1 -d1 -v4.44 -b3 sleep 10 rm -rf /var/run/mentohust.pid sleep 5 mentohust -u123456 -p123456 -nmacvlan -a1 -d1 -v4.44 -b3 sleep 10 rm -rf /var/run/mentohust.pid sleep 5保存后,给文件加执行权限 chmod +x boot.sh然后再把 boot.sh 设置为开机启动 vim /etc/rc.local #请按照自己设定的文件文件路径来 # Put your custom commands here that should be executed once # the system init finished. By default this file does nothing. /root/boot.sh exit 0 |
【本文地址】
今日新闻 |
推荐新闻 |